1/32 Hasegawa Fw190D-9 Red One
- BlackSheep214
- Elite Member
- Posts: 13418
- Joined: Sun Apr 06, 2014 8:47 pm
Re: 1/32 Hasegawa Fw190D-9 Red One
Now that is ingenious work!

“Who controls the skies, controls the fate of this Earth”
Author unknown- 352nd Fighter Group, Blue-Nosed Bastards of Bodney
“Send one plane it’s a sortie; send two planes it’s a flight; send four planes it’s a test of airpower. - Richard Kohn
Author unknown- 352nd Fighter Group, Blue-Nosed Bastards of Bodney
“Send one plane it’s a sortie; send two planes it’s a flight; send four planes it’s a test of airpower. - Richard Kohn
- speedgraflex
- Moderator
- Posts: 11358
- Joined: Fri Feb 10, 2017 11:08 pm
- Contact:
Re: 1/32 Hasegawa Fw190D-9 Red One
John, it may be raining, cold and dark outside, but your work is like the sun. Your ideas just are fantastic, and the way you brought the masking together, then followed through with an incredibly elegant solution to placing one magnet just makes this world a bit brighter. Truly. Inspiring. Work.
Make more models!
- Medicman71
- Elite Member
- Posts: 11301
- Joined: Mon Apr 07, 2014 9:32 am
- Location: Houston, Tx
Re: 1/32 Hasegawa Fw190D-9 Red One
That's awesome!!

Mike
Sponsored by Boeing, Lockheed Martin, Northrop Grumman, Saab, BAE, and Dassault
-
kahunaminor
- Advanced Member
- Posts: 375
- Joined: Thu Jul 07, 2016 4:53 am
Re: 1/32 Hasegawa Fw190D-9 Red One
Danke! I felt really energized when that prop spinner POPPED into place. I ran in the house and showed my wife my handiwork.
It took a while but I drafted a set of custom masks on AutoCAD and exported them to a DXF file for the Silhouette Portrait to cut from vinyl masking material. The first cut job made the numerals WAY TOO BIG and I had to throw that batch in the can. I properly scaled the second cut job and I had my masks ready!
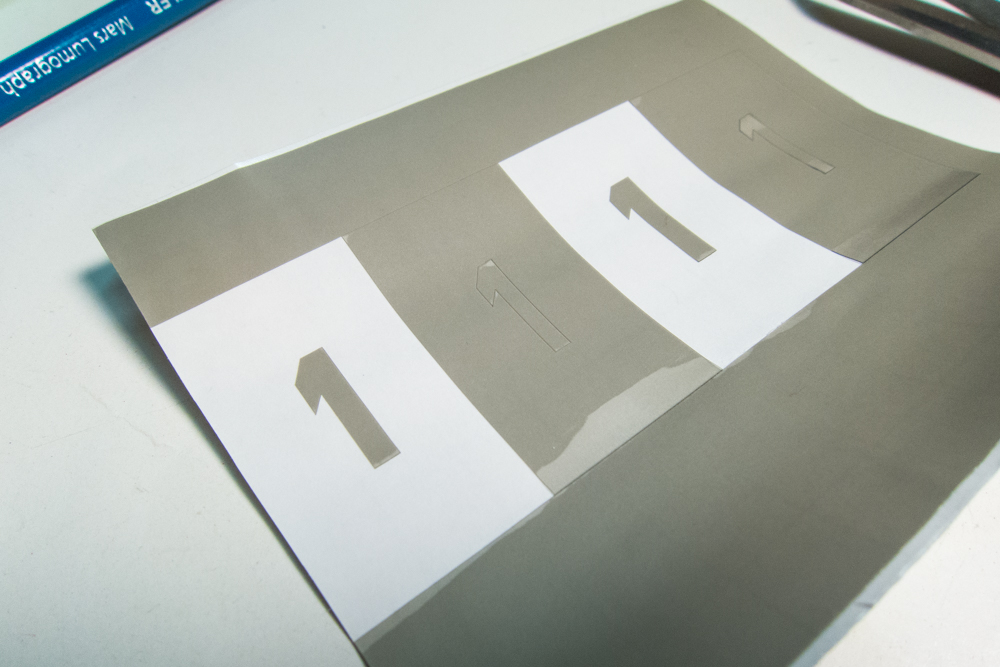
I print my masks on Oramask 810, which seems to be identical to the material that Montex uses. I really shouldn't be buying any more simple masks from Montex or re-using old ones when I can make my own.

The red number with the white border can be done in different ways. I chose to do the red first and then the white border. BUT... white actually comes first, as a base for the red.
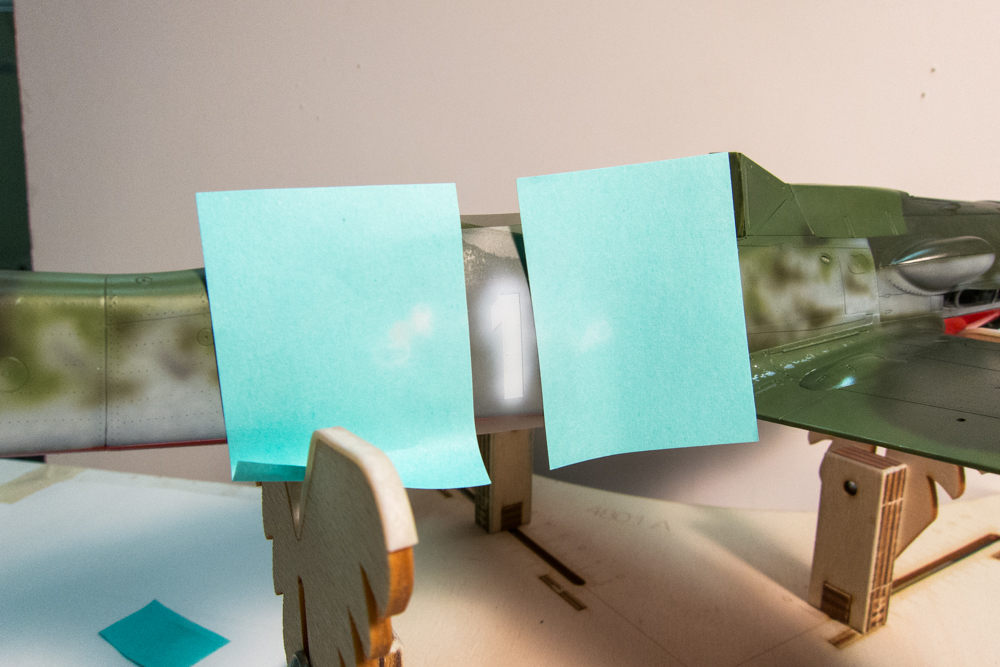
The red goes on and is left to dry.
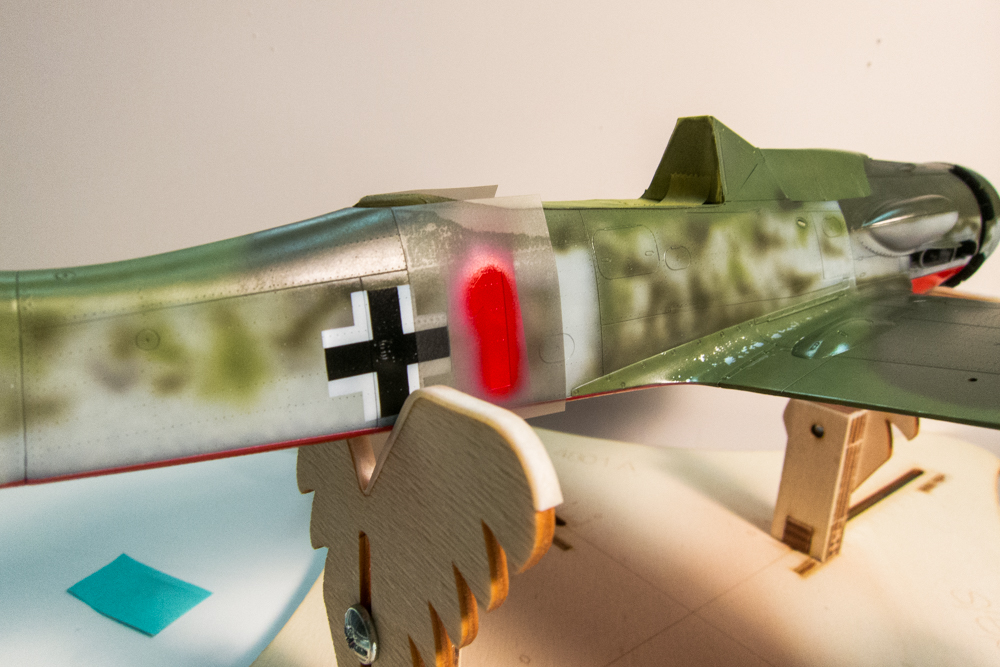
The smaller numeral is placed within the masked area, trying to maintain an equal border all the way around. After the smaller mask is positioned, the white border can be sprayed on.
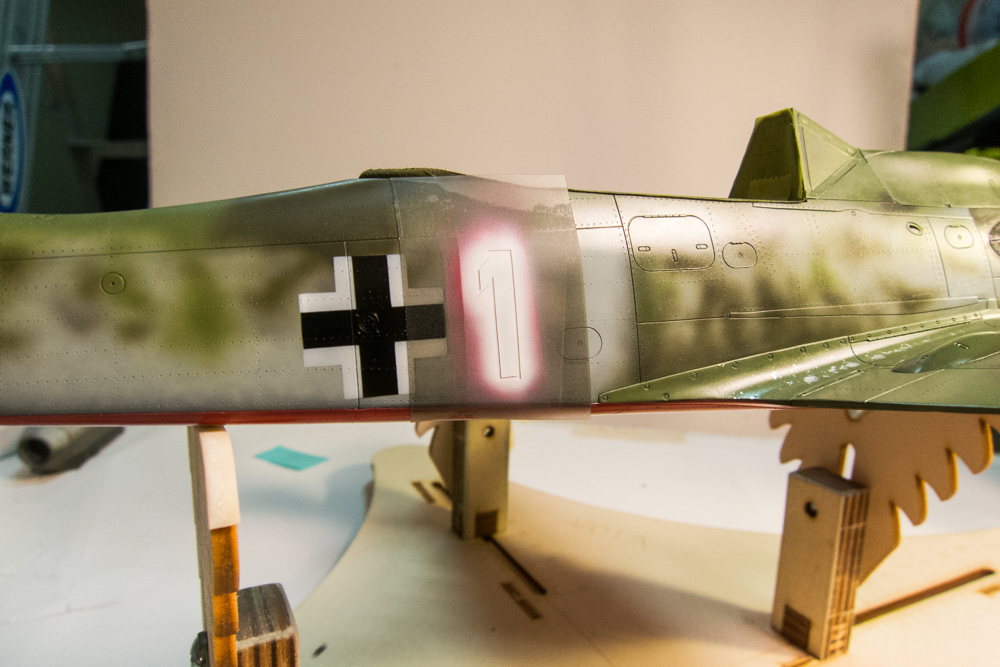
Remove all of the masks and you should have a nice two-color number "1".
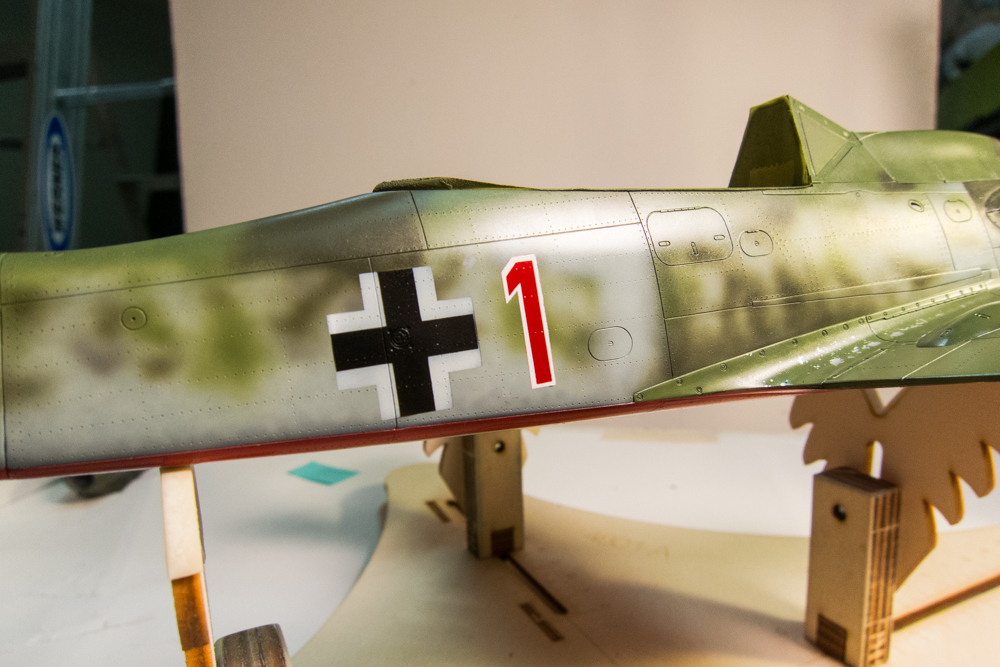
The port side number "1", which is a slightly different style, is painted at the same time. I don't think I would've ever noticed the diff unless I compared back to back photos of the two sides.
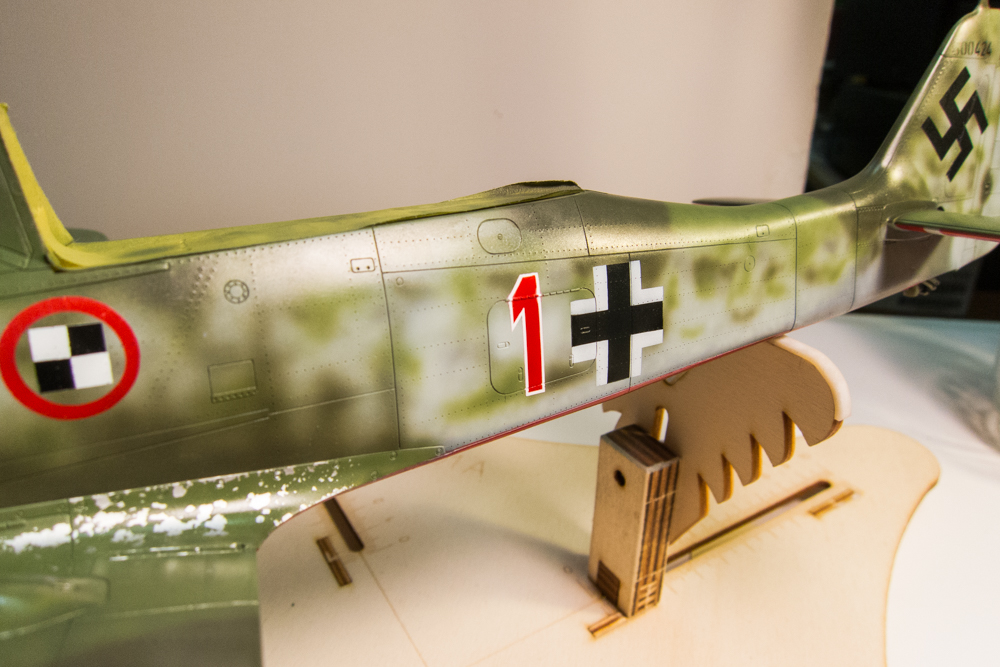
Take a break and look at where we stand... most of the major markings are on except the characteristic slogan that each of the JV44 pilots inscribed on their personal mounts.
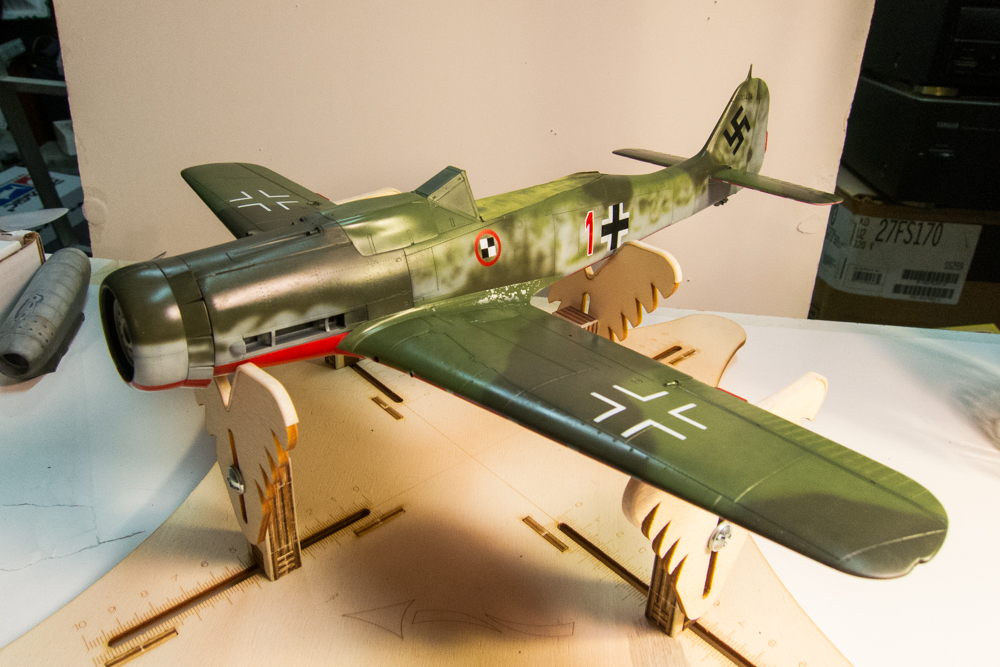
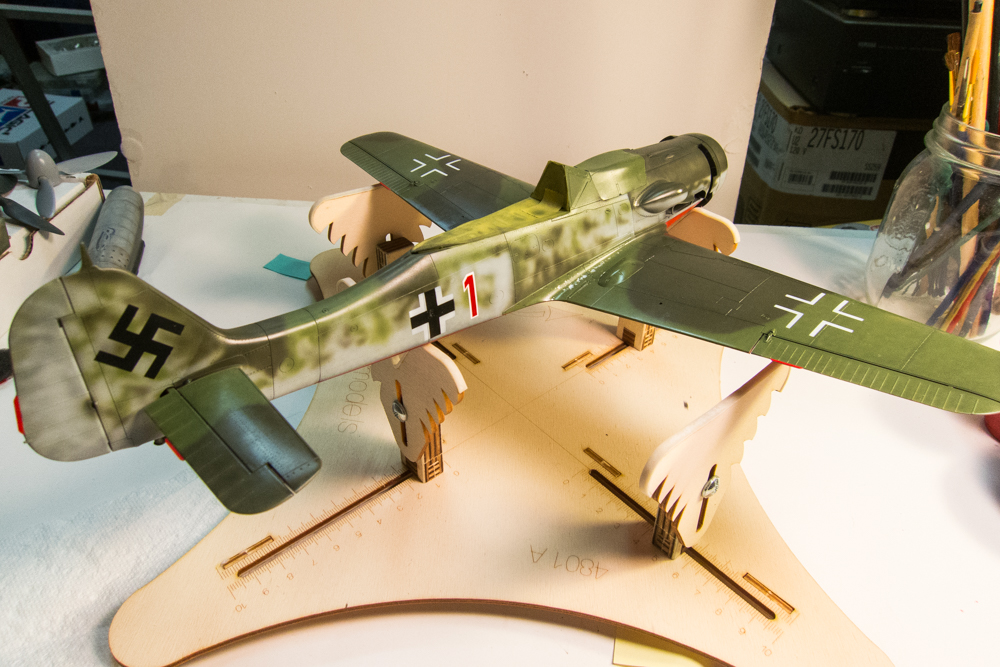
The Montex mask set provides a mask for the slogan but it is too complex and tiny for me to work with. I'm going to use the Eagle Cal decal, which are usually of excellent quality. This slogan says, "Sell my clothes, I'm going to heaven!" At this point, I was using the Micro Set/Micro Sol system to settle the decals down. White is a tough color and the white parts were not completely conforming to the rivets and panel lines like I wanted.
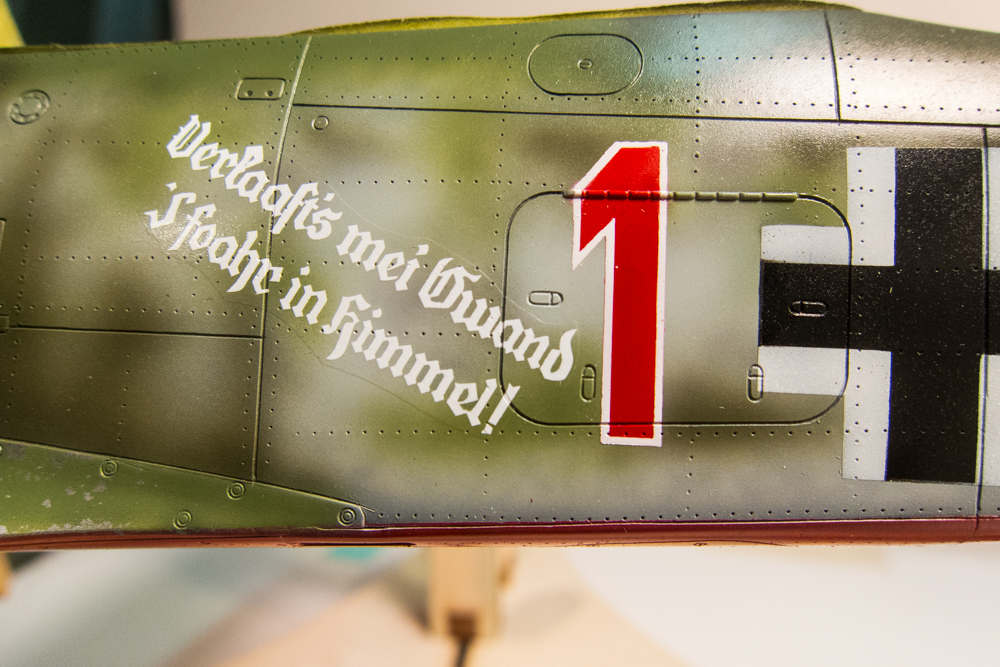
So I used a couple applications of Walther's Solvaset, which is a bit stronger than Micro Sol in softening the decal. I followed that up by cutting the decal along the panel lines with a fresh x-acto blade AND poking every rivet through the decal. I don't always go to this extreme but this is one decal that has to match the painted markings or it will be a distraction. A final application of Solvaset completed the work on the slogan decal. The visible edge around the decal will be taken care of by the subsequent clear coats. Do you see how the rivets and panel lines show, unimpeded, through the decal?

Using aggressive modeling tactics often bite us back. There was a drop of Solvaset at the bottom of the decal that had not completely dried and I accidentally touched it. Solvaset is strong stuff and CAN sometimes dissolve a decal or affect the paint underneath... so use at your own risk. I'll let that paint fudge and the decal dry completely before I do the repair work. Kinda nervous about having to place a mask on the decal that you've worked so hard to place.
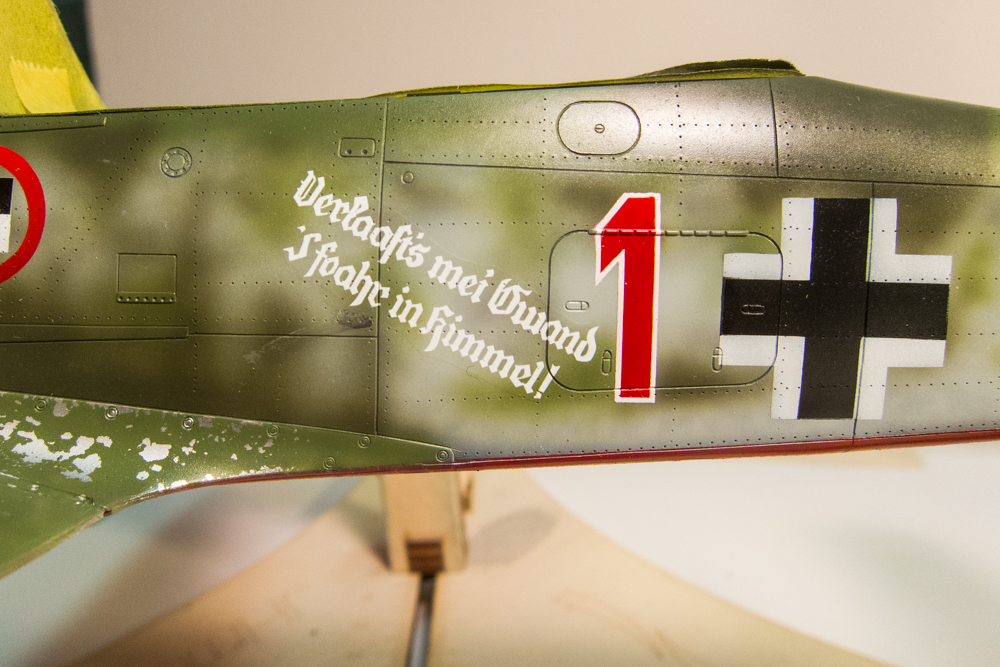
From this vantage point we can see the major markings in place. The paint mistake can hardly be seen but we all know it is there right? Red 1 looks like a factory fresh bird but that will change soon.

A final shot of some clean-up paint work that I did. The edges of the wheel bays have been painted RLM02 to remove the remnants and overspray from the red and white striping. Just another detail that I've often thought about but have never bothered to do.

It took a while but I drafted a set of custom masks on AutoCAD and exported them to a DXF file for the Silhouette Portrait to cut from vinyl masking material. The first cut job made the numerals WAY TOO BIG and I had to throw that batch in the can. I properly scaled the second cut job and I had my masks ready!

I print my masks on Oramask 810, which seems to be identical to the material that Montex uses. I really shouldn't be buying any more simple masks from Montex or re-using old ones when I can make my own.

The red number with the white border can be done in different ways. I chose to do the red first and then the white border. BUT... white actually comes first, as a base for the red.

The red goes on and is left to dry.

The smaller numeral is placed within the masked area, trying to maintain an equal border all the way around. After the smaller mask is positioned, the white border can be sprayed on.

Remove all of the masks and you should have a nice two-color number "1".

The port side number "1", which is a slightly different style, is painted at the same time. I don't think I would've ever noticed the diff unless I compared back to back photos of the two sides.

Take a break and look at where we stand... most of the major markings are on except the characteristic slogan that each of the JV44 pilots inscribed on their personal mounts.


The Montex mask set provides a mask for the slogan but it is too complex and tiny for me to work with. I'm going to use the Eagle Cal decal, which are usually of excellent quality. This slogan says, "Sell my clothes, I'm going to heaven!" At this point, I was using the Micro Set/Micro Sol system to settle the decals down. White is a tough color and the white parts were not completely conforming to the rivets and panel lines like I wanted.

So I used a couple applications of Walther's Solvaset, which is a bit stronger than Micro Sol in softening the decal. I followed that up by cutting the decal along the panel lines with a fresh x-acto blade AND poking every rivet through the decal. I don't always go to this extreme but this is one decal that has to match the painted markings or it will be a distraction. A final application of Solvaset completed the work on the slogan decal. The visible edge around the decal will be taken care of by the subsequent clear coats. Do you see how the rivets and panel lines show, unimpeded, through the decal?

Using aggressive modeling tactics often bite us back. There was a drop of Solvaset at the bottom of the decal that had not completely dried and I accidentally touched it. Solvaset is strong stuff and CAN sometimes dissolve a decal or affect the paint underneath... so use at your own risk. I'll let that paint fudge and the decal dry completely before I do the repair work. Kinda nervous about having to place a mask on the decal that you've worked so hard to place.

From this vantage point we can see the major markings in place. The paint mistake can hardly be seen but we all know it is there right? Red 1 looks like a factory fresh bird but that will change soon.

A final shot of some clean-up paint work that I did. The edges of the wheel bays have been painted RLM02 to remove the remnants and overspray from the red and white striping. Just another detail that I've often thought about but have never bothered to do.

John aka JKim
-----------<><

-----------<><

Re: 1/32 Hasegawa Fw190D-9 Red One
Painted on markings are second to none. In 32nd scale you can really go to town with them. Awesome work, John!
I really had to chuckle when reading the slogan. It's phonetic spelling of a really brutish Lower Bavarian or Austrian accent.
Cheers,
Torben
Torben
- Stikpusher
- Moderator
- Posts: 21189
- Joined: Sat Apr 05, 2014 8:37 pm
- Location: Ceti Alpha 5
Re: 1/32 Hasegawa Fw190D-9 Red One
North vs. South?mostrich wrote:Painted on markings are second to none. In 32nd scale you can really go to town with them. Awesome work, John!
I really had to chuckle when reading the slogan. It's phonetic spelling of a really brutish Lower Bavarian or Austrian accent.
"Surely I have made my meaning plain? I intend to avenge myself upon you, Admiral. I have deprived your ship of power, and when I swing 'round, I intend to deprive you of your life."
FLSM
FLSM
Re: 1/32 Hasegawa Fw190D-9 Red One
This little comment clearly shows that you spent some time over here, Carlos. It's the old Prussian vs. Bavarian game we love to play.Stikpusher wrote:North vs. South?![]()
Cheers,
Torben
Torben
- Stikpusher
- Moderator
- Posts: 21189
- Joined: Sat Apr 05, 2014 8:37 pm
- Location: Ceti Alpha 5
Re: 1/32 Hasegawa Fw190D-9 Red One
Yes I have... and I do remember long before my first trip there learning the different pronunciations for “ich” when learning German in school...
We have our regional rivalries dialects and accents in the USA as well....
"Surely I have made my meaning plain? I intend to avenge myself upon you, Admiral. I have deprived your ship of power, and when I swing 'round, I intend to deprive you of your life."
FLSM
FLSM
Re: 1/32 Hasegawa Fw190D-9 Red One
John,
I don't really find enough of adjectives anymore.. I just say simply Impeccable!
- Kari
I don't really find enough of adjectives anymore.. I just say simply Impeccable!
- Kari
---
On the bench:
MiniArt 1:48 - Junkers F13 Float Plane
https://www.facebook.com/GrundAsk-Scale ... 721218708/
On the bench:
MiniArt 1:48 - Junkers F13 Float Plane
https://www.facebook.com/GrundAsk-Scale ... 721218708/



