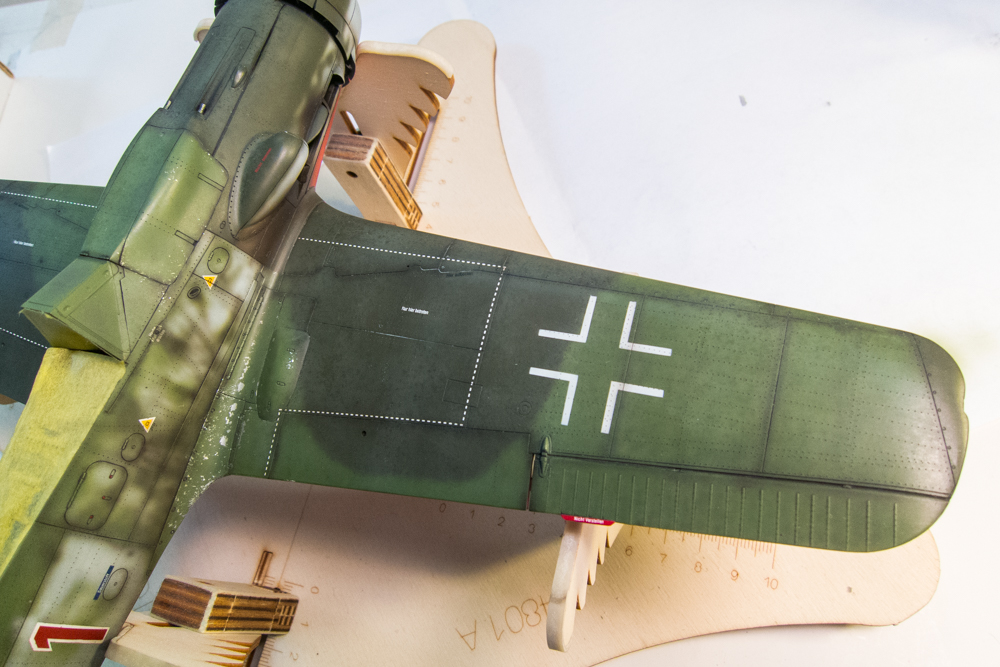
1/32 Hasegawa Fw190D-9 Red One

Post your work in progress of your aircraft builds in here.
User avatar
jkim
Elite Member
Posts: 4073
Joined: Mon Apr 10, 2017 4:03 pm

Re: 1/32 Hasegawa Fw190D-9 Red One

Post by jkim »

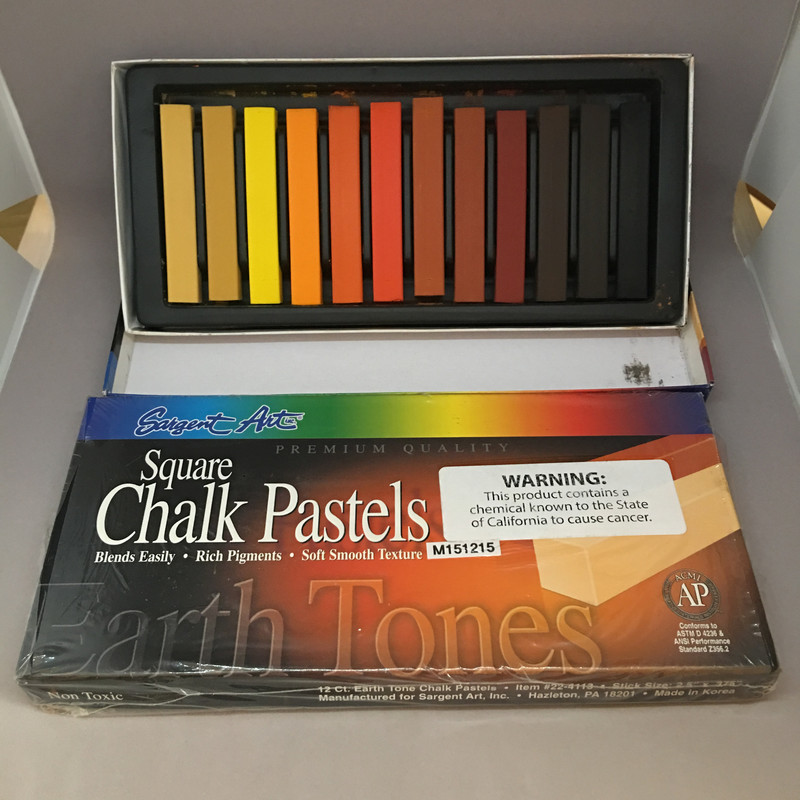
Thanks guys! Yeah, the wash is that simple. Scrape and mix!

You can custom make any color you want and I like the results that you get with this method... very smooth and no granularity or grittiness at all. Plus it's water-based so it is very safe with all paint finishes and clear coats. I've been using this set...
Image

I also have a set of Greys to make lighter color washes.

I make only enough for the task at hand. It'll dry out by the next day but you can simply add some water and use it again. I like to use a fresh batch when I'm putting the wash over the entire model. I haven't done this but you could probably make a larger batch and put it in a small bottle so that it wouldn't dry out.
John aka JKim
-----------<><
Image
User avatar
Stuart
Elite Member
Posts: 11911
Joined: Sun Apr 06, 2014 1:06 pm
Location: North Wales

Re: 1/32 Hasegawa Fw190D-9 Red One

Post by Stuart »

I'm just thinking of all the pastel pencils and pastels I have sat in my cupboard :hmm: Thanks for that explanation of a very interesting and simple technique John - I'll be trying that out.

There's an interesting video from Humbrol on youtube about using their weathering powders with water. The guy on the video mixed in a little bit of decalfix instead of washing liquid. It acted as a kind of fixer once everything was dry, but would still re-active with water.
Stuart Templeton 'I may not be good but I'm slow...'
User avatar
jkim
Elite Member
Posts: 4073
Joined: Mon Apr 10, 2017 4:03 pm

Re: 1/32 Hasegawa Fw190D-9 Red One

Post by jkim »

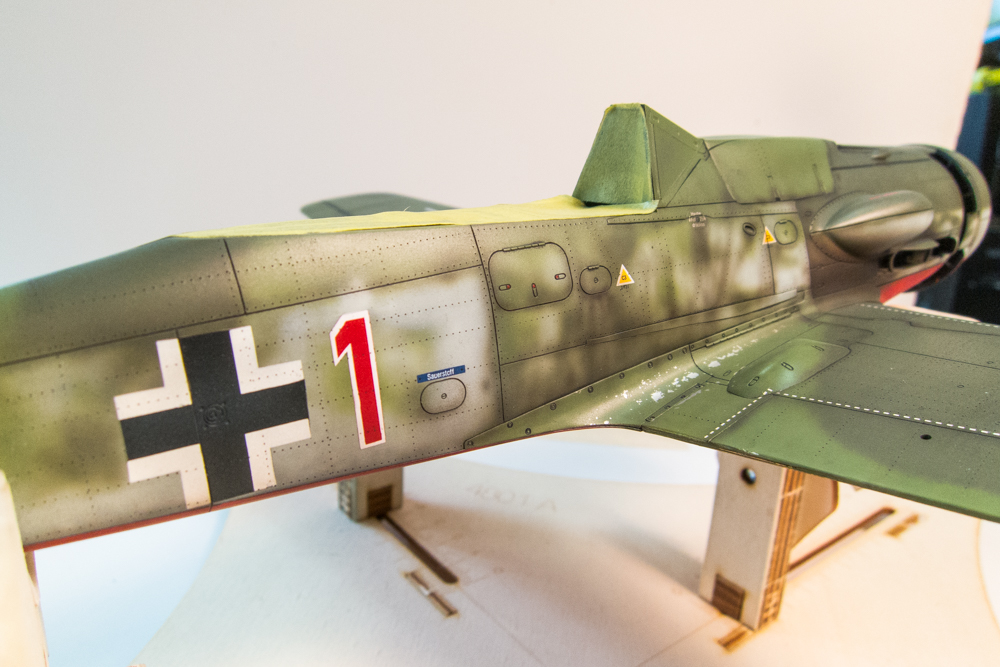
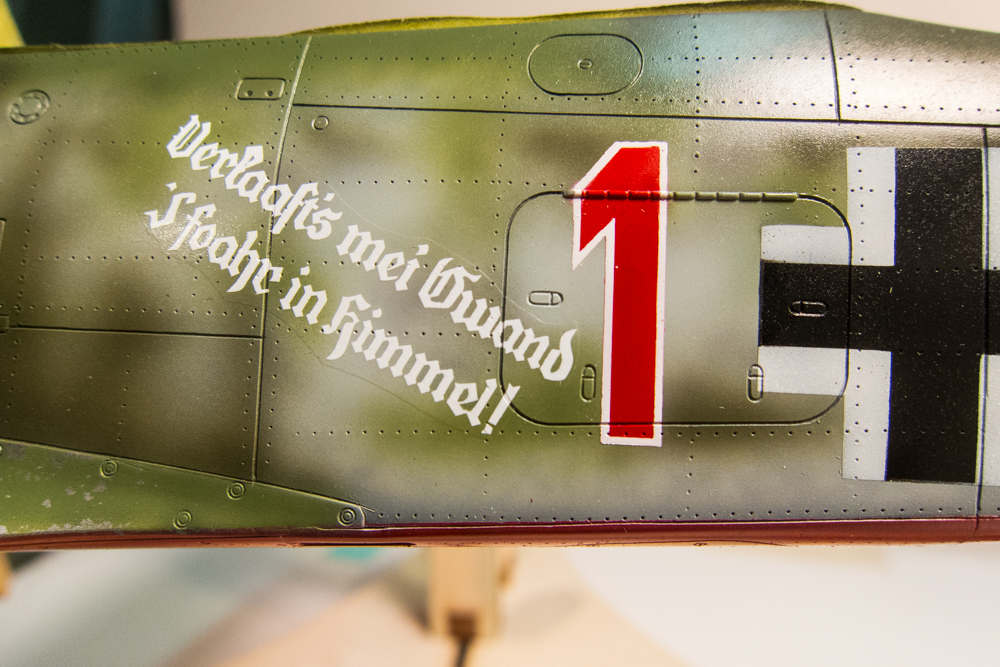
Time for another correction! Again it was something that I did not notice at first. Based on the photographic record of Red 1, the position of the fuselage cross puts it very close to the red bottom with only a sliver of RLM76 light blue peaking through.
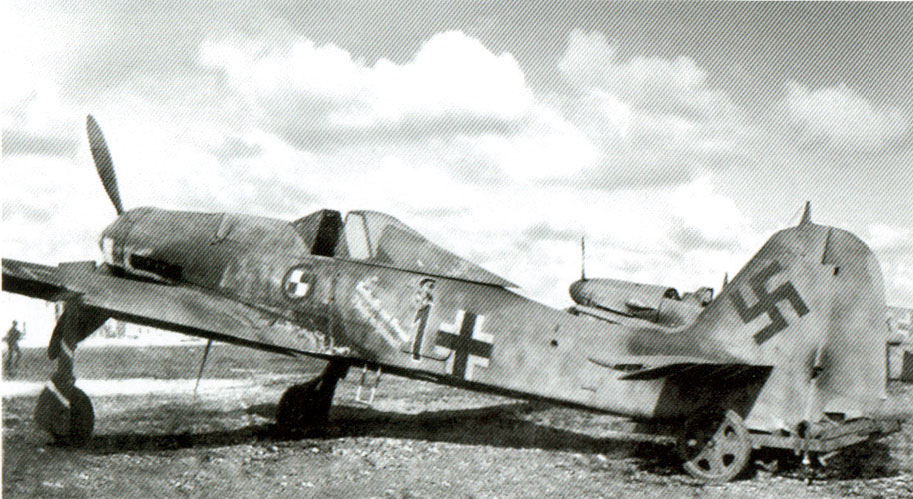
Image

There is a noticeably bigger gap on my Red 1.
Image

A suggestion was made to lower it but that would lower the top of the cross below the red "1" and I thought that it would look odd. Instead, I decided to create a slightly larger mask. If I could encompass the old cross entirely within the new mask, it would make the replacement MUCH easier to boot.

A new mask was produced using the Portrait 2 cutter. Test fitting the mask seemed to validate the solution.
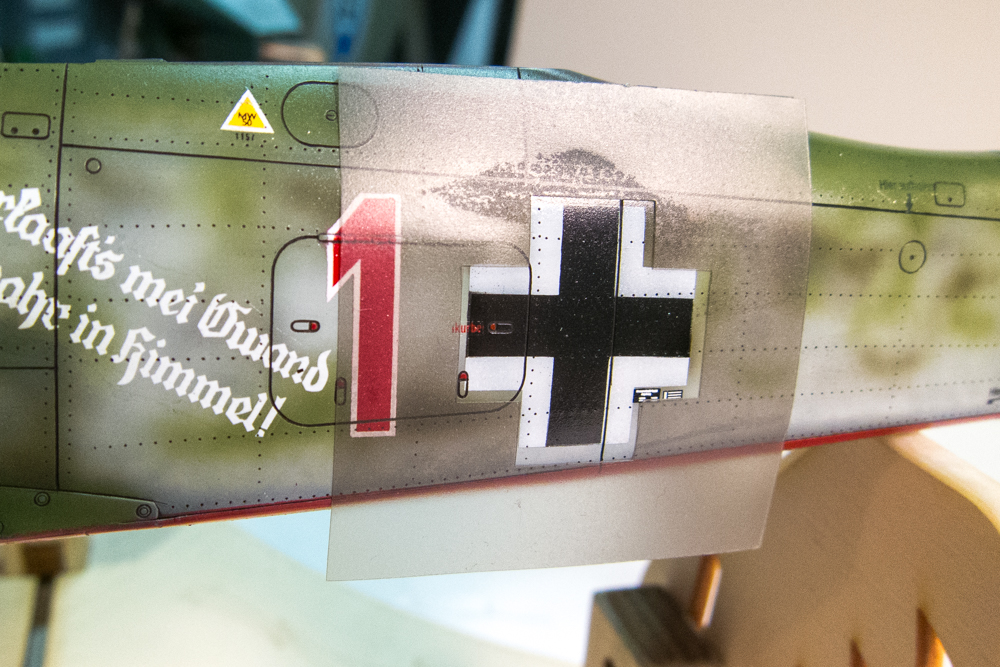
Image

A couple of small stencil details needed to be removed. The two data plates under the cross were really welded onto the model and I couldn't get them off. I rubbed them down with Micromesh to remove any visible edges.
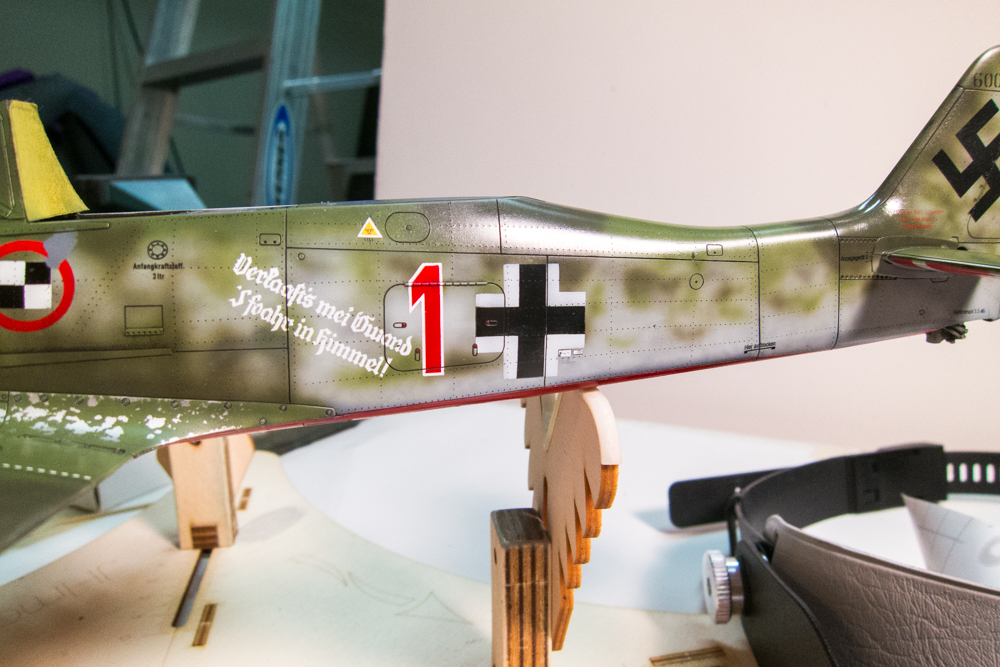
Image

I used a different paint order on these crosses. I did the white first, instead of the black.
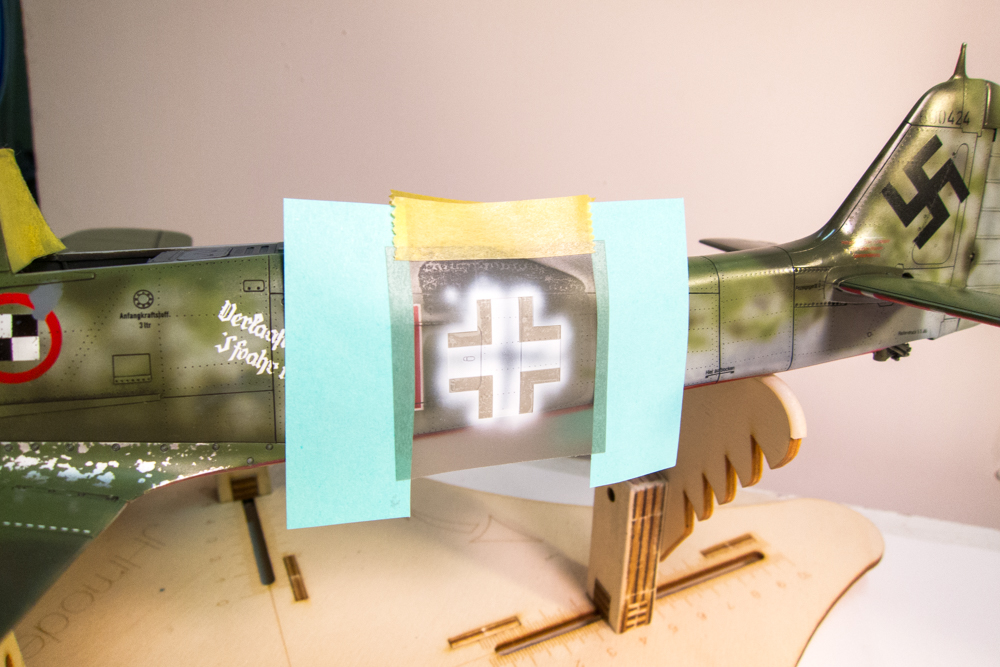
Image

Here is the new cross... the offending gap has been greatly reduced and the top of the cross is roughly in line with the top of the "1".
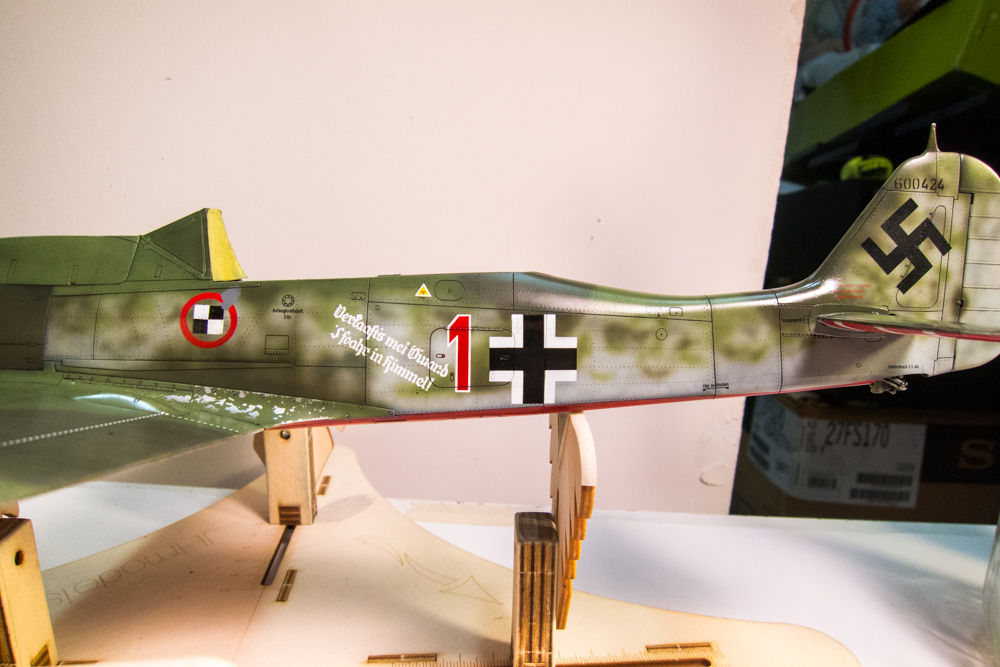
Image

Fixed cross on the starboard side. This is the first instance where I experienced major paint lift upon removal of the mask but it should be a very easy fix.
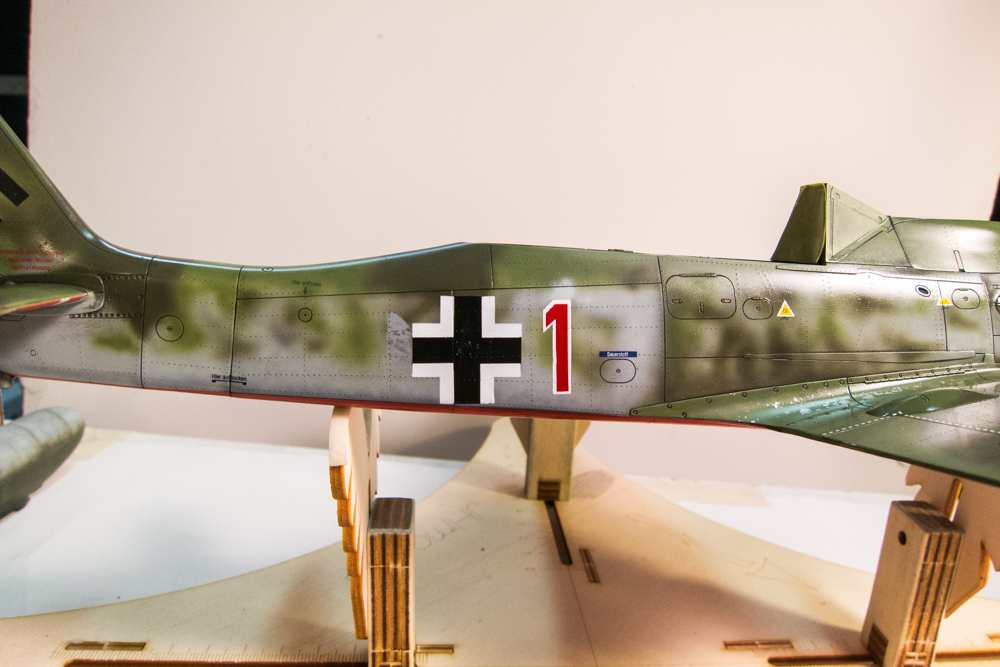
Image

I like the crosses better. Honestly, the gap between the cross and the red bottom didn't bother me much for some reason. However, the white in the old crosses was a bit soft and underdone, especially compared to the crispness of the "1". I think the new crosses are an improvement in that regard.
John aka JKim
-----------<><
Image
User avatar
Stikpusher
Moderator
Posts: 21188
Joined: Sat Apr 05, 2014 8:37 pm
Location: Ceti Alpha 5

Re: 1/32 Hasegawa Fw190D-9 Red One

Post by Stikpusher »

:shoutout: :shoutout: :shoutout:

I’m running out of complimentary words.
"Surely I have made my meaning plain? I intend to avenge myself upon you, Admiral. I have deprived your ship of power, and when I swing 'round, I intend to deprive you of your life."

FLSM
User avatar
KSaarni
Elite Member
Posts: 5621
Joined: Sun Apr 06, 2014 7:13 am
Location: Gent, Belgium
Contact:

Re: 1/32 Hasegawa Fw190D-9 Red One

Post by KSaarni »

Me Too ( euhm...)

- Kari
---
On the bench:

MiniArt 1:48 - Junkers F13 Float Plane


https://www.facebook.com/GrundAsk-Scale ... 721218708/
User avatar
jkim
Elite Member
Posts: 4073
Joined: Mon Apr 10, 2017 4:03 pm

Re: 1/32 Hasegawa Fw190D-9 Red One

Post by jkim »

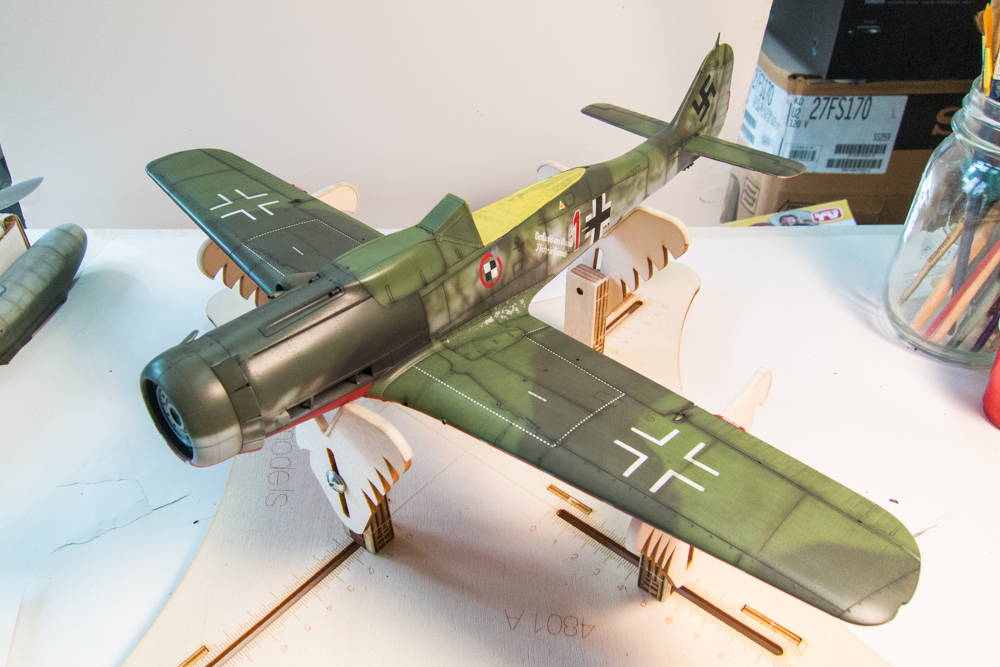
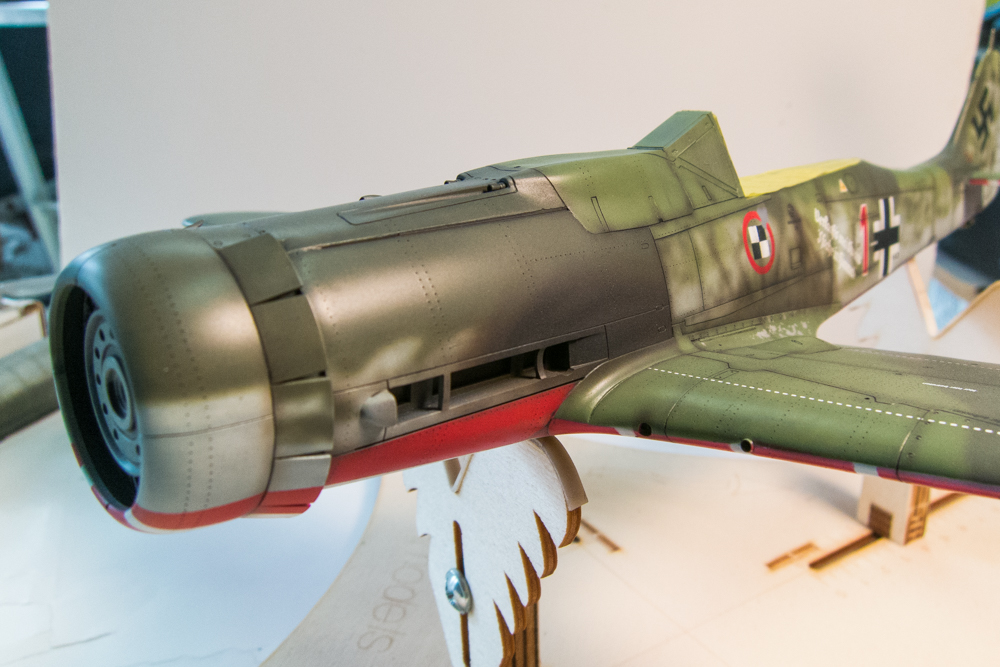
The first round of post-shading is done. This work was sealed with a satin finish (1/2 gloss, 1/2 flat). I'm working my way toward a salt fade and I find it easier to do if the finish has a little flat to it.
Image
Image

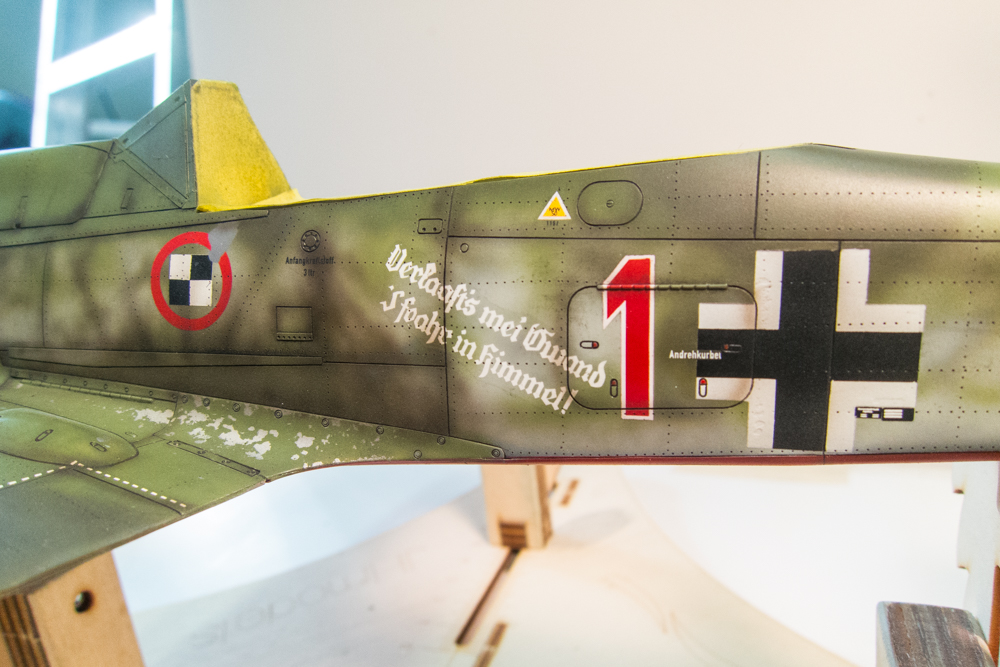
The post-shading, using very watery mixtures of dark browns, is also an opportunity to replicate some of the stains evident in the archive photos of Red 1.
Image
Image

The exhaust stains were also painted at this stage since there are shades of browns and blacks in the airbrush already. Note that the stains stop abruptly at a panel line. This is to reflect the references which indicate that the engine assembly may have been a replacement on Red 1.
Image
Image

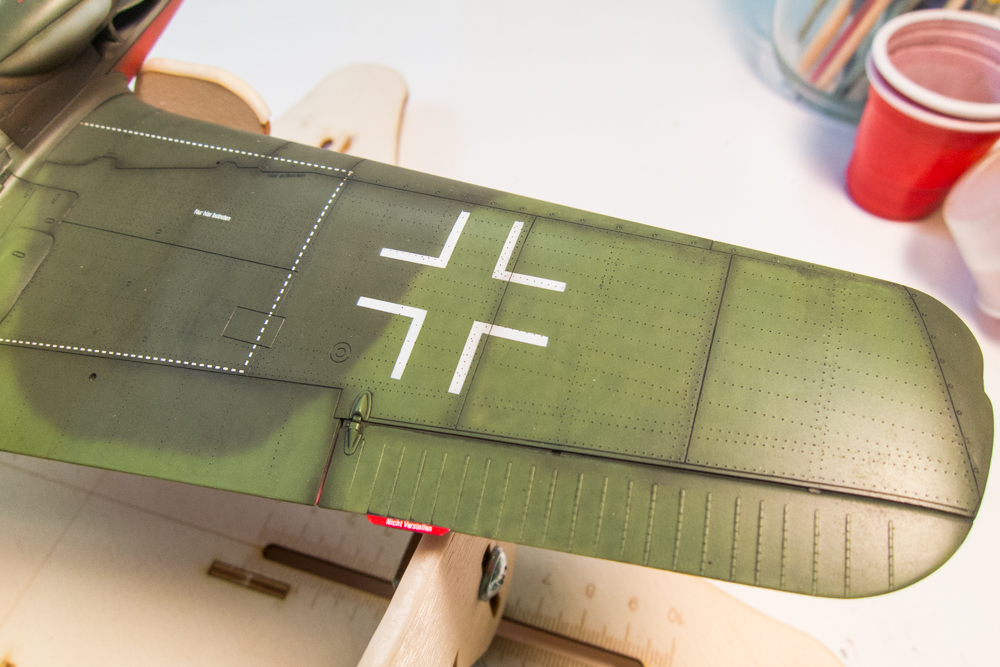
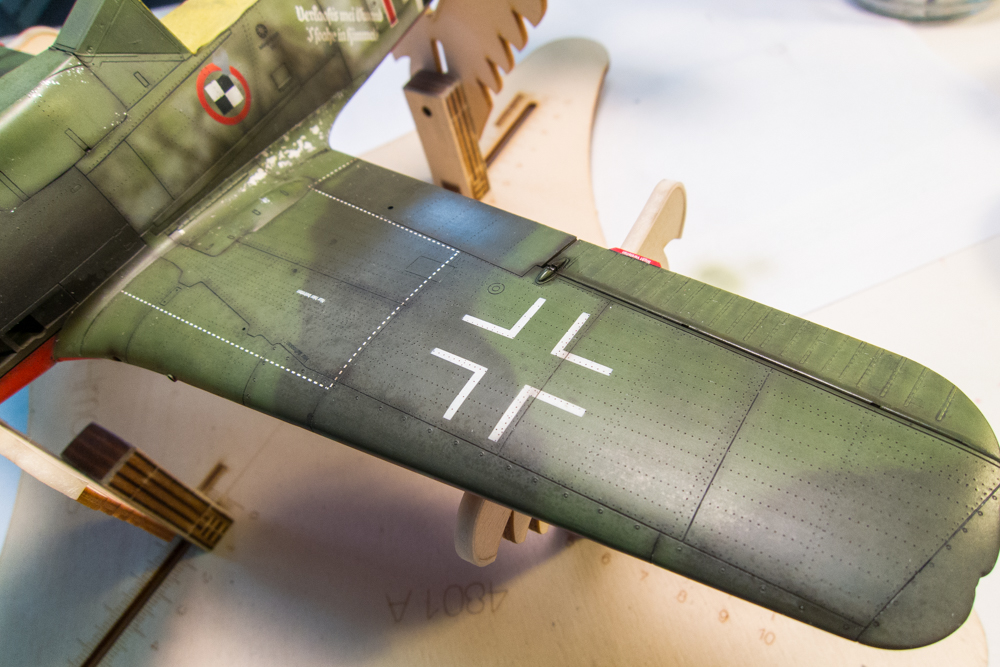
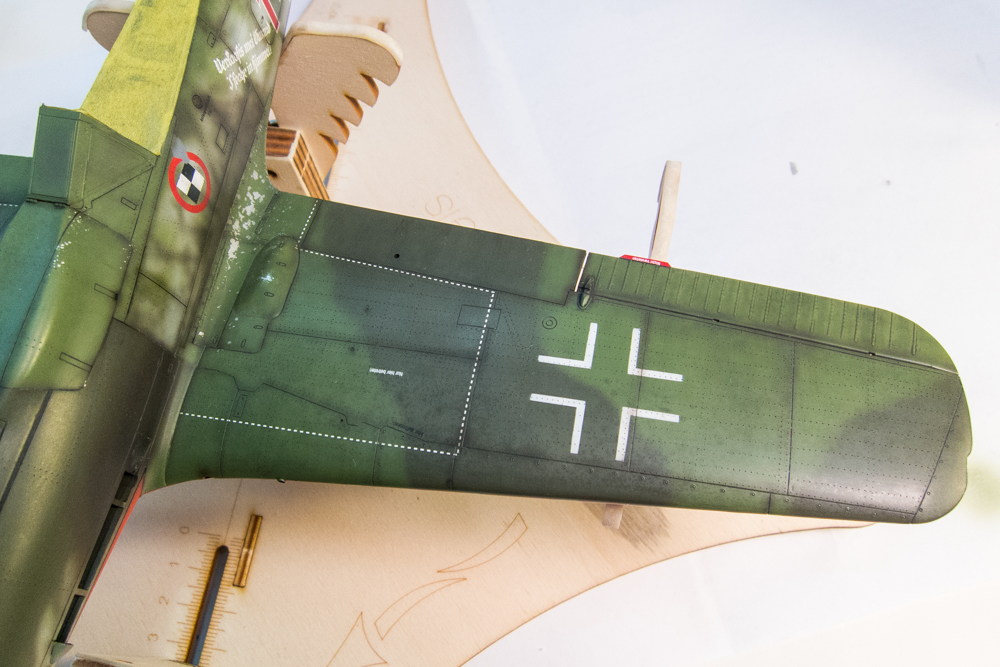
A close-up on the starboard upper wing showing a bit of the mottle pre-shading that was done many steps ago. The post-shade on the top came out a little bit too heavy, especially along the wing root on the port side. If I have the ability and opportunity, this will be targeted to be toned down but salt fading step should do that as well.
Image

I'm kind of at a loss of what to do on the bottom. That contrast between the red and white is so strong that it tends to kill the effects that I'm used to doing, although it shows up better in person than it does in photos.
Image
Image
John aka JKim
-----------<><
Image
User avatar
jkim
Elite Member
Posts: 4073
Joined: Mon Apr 10, 2017 4:03 pm

Re: 1/32 Hasegawa Fw190D-9 Red One

Post by jkim »

Round 1 of the salt fading stage. I used a light green for this.
Image
Image
Image
Image

I've also added some very minor chipping using a sponge along the wing roots and also on the front fuselage.
John aka JKim
-----------<><
Image
User avatar
speedgraflex
Moderator
Posts: 11358
Joined: Fri Feb 10, 2017 11:08 pm
Contact:

Re: 1/32 Hasegawa Fw190D-9 Red One

Post by speedgraflex »

Beautiful—I believe the areas of repaint should be treated separately—as a unique final series of fuselage appearance changes over the service life of the aircraft. Your painting is so good, seriously... to tone it down is unnecessary. The delightful shockful contrast reminds me of “violent delights have violent ends,” which has been beaten to death on Westworld, literally, but truly does remind me of the duality of humanity. On one side we see the blending and disappearing act, on the other we see the brightly colored circus so overloaded with vitality it is almost an... assault.
Make more models!
User avatar
KennyX
Elite Member
Posts: 2631
Joined: Sun Dec 24, 2017 11:19 am

Re: 1/32 Hasegawa Fw190D-9 Red One

Post by KennyX »

Image

That’s lovey.
Kenny X
Head Mother Trucker In-Charge @ Kenny X’s Reichs Winzigkleines Flugzeugewerks *and now* Airboat Records, too!
User avatar
LyleW
Admin
Posts: 15035
Joined: Fri Dec 13, 2013 7:25 am
Location: Mt. Washington KY

Re: 1/32 Hasegawa Fw190D-9 Red One

Post by LyleW »

This just keeps getting better.
To make each build less crappy than the last one. Or, put another way, "Better than the last one, not as good as the next one!"..
Post Reply

Return to “Aircraft Work in Progress”