Cool! Thanks, amigo.mostrich wrote:Those are isolators to separate the antenna from the parts of the wire that work as tension cable. So only the "T" over the fuselage is the actual antenna.jkim wrote:Yeah... those light colored objects hanging on the aerial in your photo. What are they? I replicated them using short sections of brass tubing...
1/32 Hasegawa Fw190D-9 Red One
-
speedgraflex

- Moderator
- Posts: 11534
- Joined: Fri Feb 10, 2017 11:08 pm
- Contact:
Re: 1/32 Hasegawa Fw190D-9 Red One
Make more models!

Re: 1/32 Hasegawa Fw190D-9 Red One
One step forward... two steps back. I had an issue with the flat coat over the salt fade. The finish started developing a "dusty" or slightly cloudy look with every pass of the airbrush. Not sure what was happening but probably something to do with the salt residue and the flat mixture. So I gave the model an emergency gloss coat (Alclad Aqua Gloss thinned with Tamiya Acrylic thinner instead of the usual iso alcohol to "bite" through the latest flat coat into the salt fade layer) in hopes of getting rid of the cloudy look.
This morning I inspected the model and thankfully that dusty look was gone with the exception of some areas around the engine cowling. I re-established the RLM 83 Dark Green in that area and also the engine exhaust staining and gave the model a careful coat of 1/2 gloss and 1/2 flat. Again, no cloudy finish developed but I noticed that the salt fade effects had been completely obliterated by the multiple clear coats.
So if feels like I've moved back three steps in this build. I'm going to establish one more (very gradual) salt fade layer and evaluate whether I can increase the flat factor a notch without incurring that cloudy look.
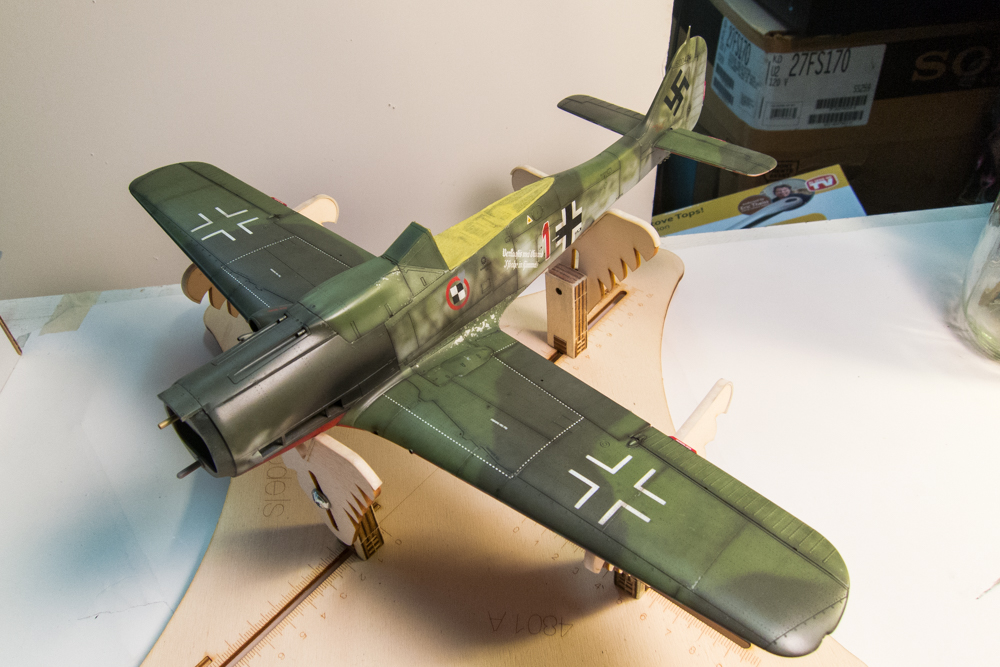
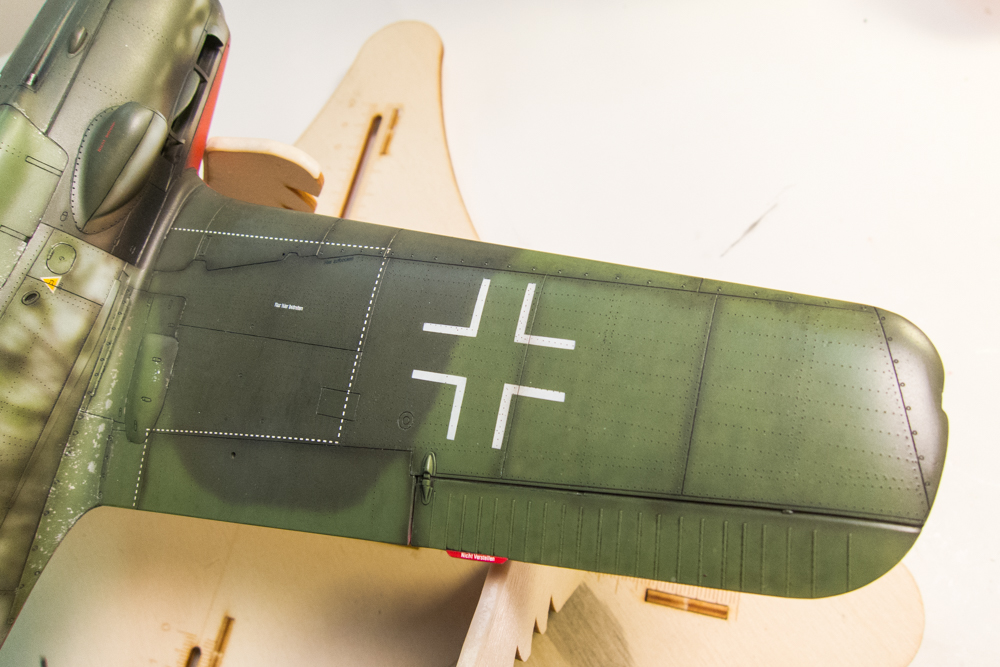

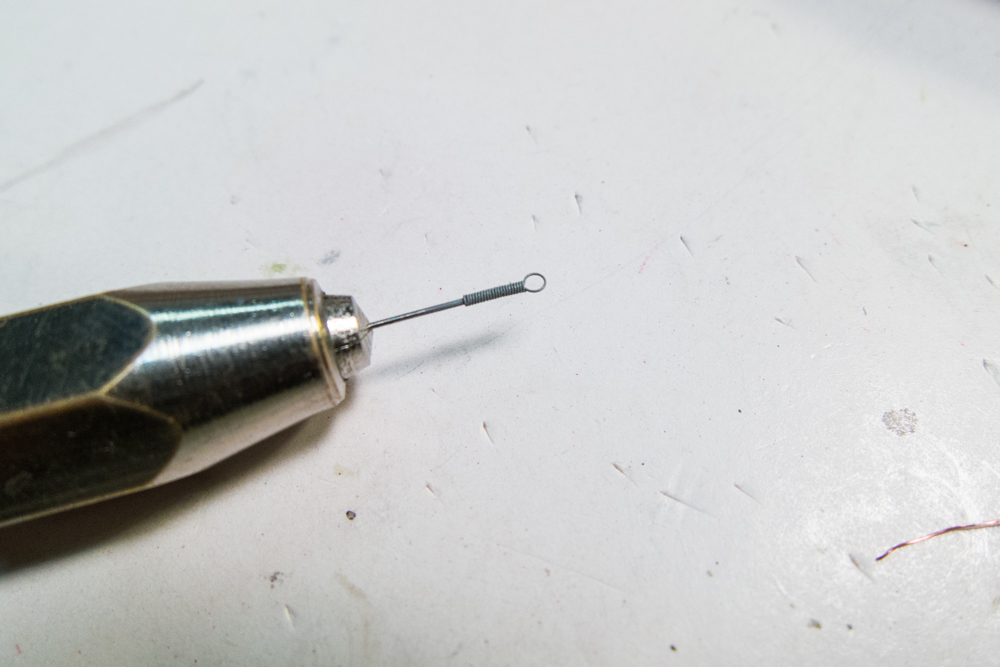
In the meantime, I'm getting all of the fiddly bits ready for final assembly. The spring tensioner on the aerial has been fabricated using fine electrical wire wrapped around the smallest micro drill bit I have.

This morning I inspected the model and thankfully that dusty look was gone with the exception of some areas around the engine cowling. I re-established the RLM 83 Dark Green in that area and also the engine exhaust staining and gave the model a careful coat of 1/2 gloss and 1/2 flat. Again, no cloudy finish developed but I noticed that the salt fade effects had been completely obliterated by the multiple clear coats.
So if feels like I've moved back three steps in this build. I'm going to establish one more (very gradual) salt fade layer and evaluate whether I can increase the flat factor a notch without incurring that cloudy look.
In the meantime, I'm getting all of the fiddly bits ready for final assembly. The spring tensioner on the aerial has been fabricated using fine electrical wire wrapped around the smallest micro drill bit I have.
John aka JKim
-----------<><

-----------<><
-
Medicman71

- Elite Member
- Posts: 11396
- Joined: Mon Apr 07, 2014 9:32 am
- Location: Houston, Tx
Re: 1/32 Hasegawa Fw190D-9 Red One
 Wow. That's incredibly small!! Nice work!
Mike
Sponsored by Boeing, Lockheed Martin, Northrop Grumman, Saab, BAE, and Dassault
Sponsored by Boeing, Lockheed Martin, Northrop Grumman, Saab, BAE, and Dassault
Re: 1/32 Hasegawa Fw190D-9 Red One
Round 2 of salt fading is complete. Which puts me back to where I was, essentially. I don't want a repeat of flat coat fiasco so I'm going to got with this finish.
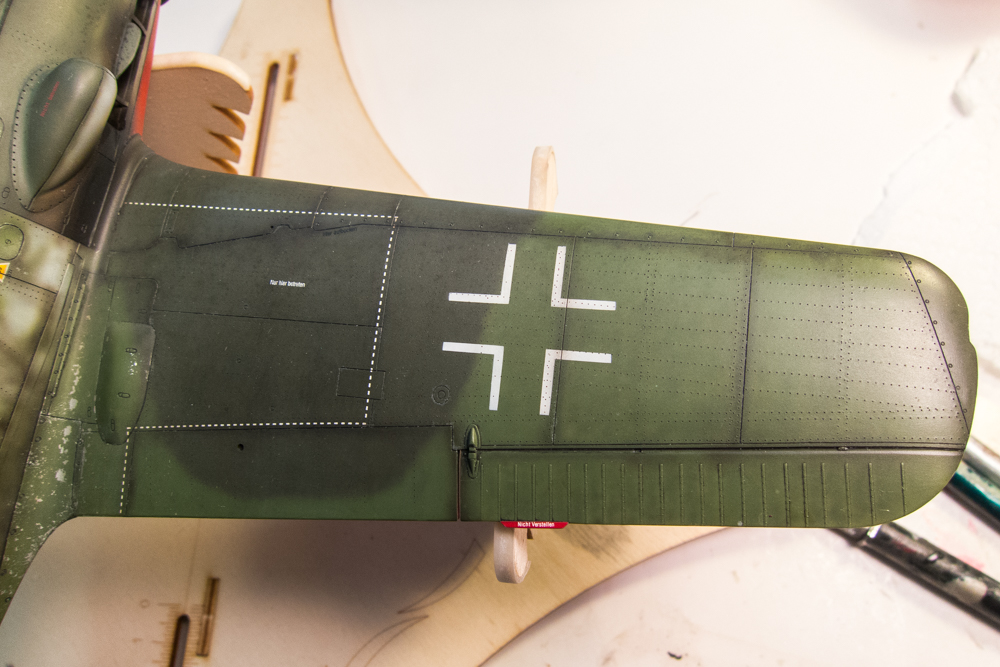
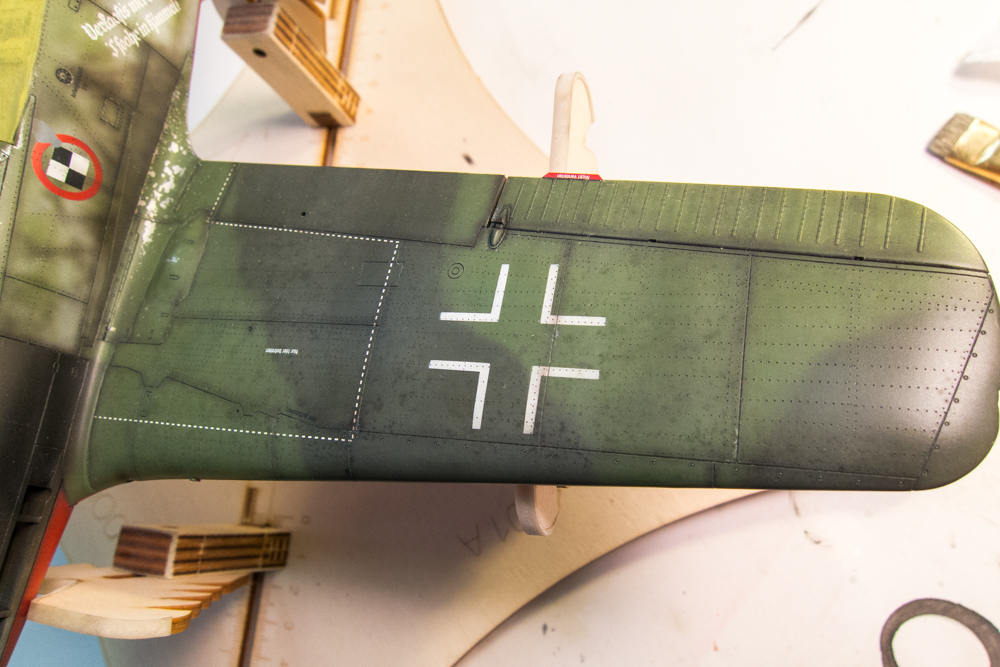
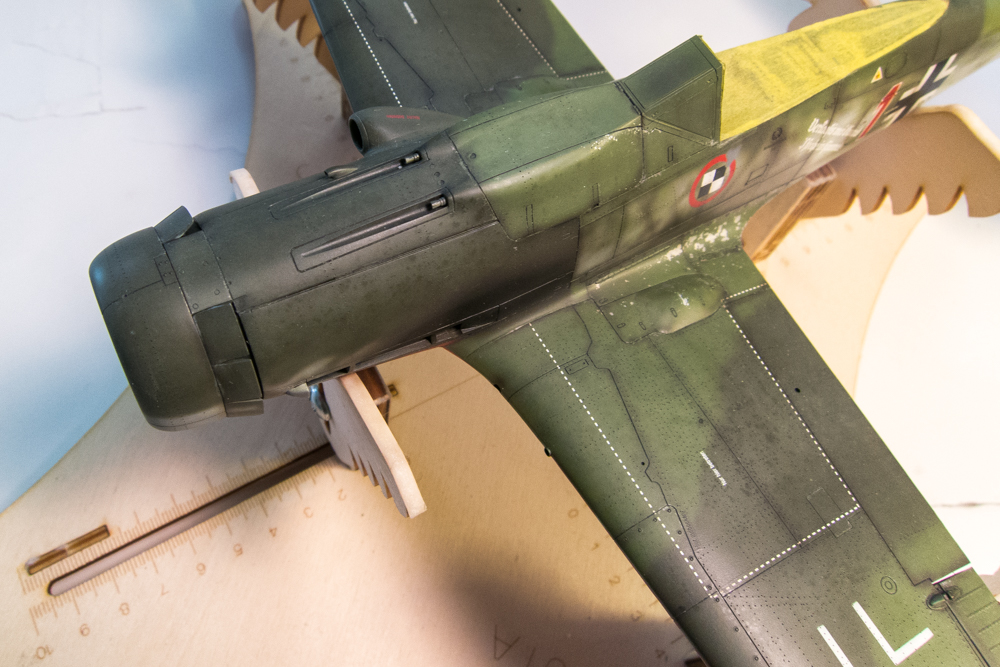
That pretty much ends the airbrush work on this model so off comes the masking on the clear parts.
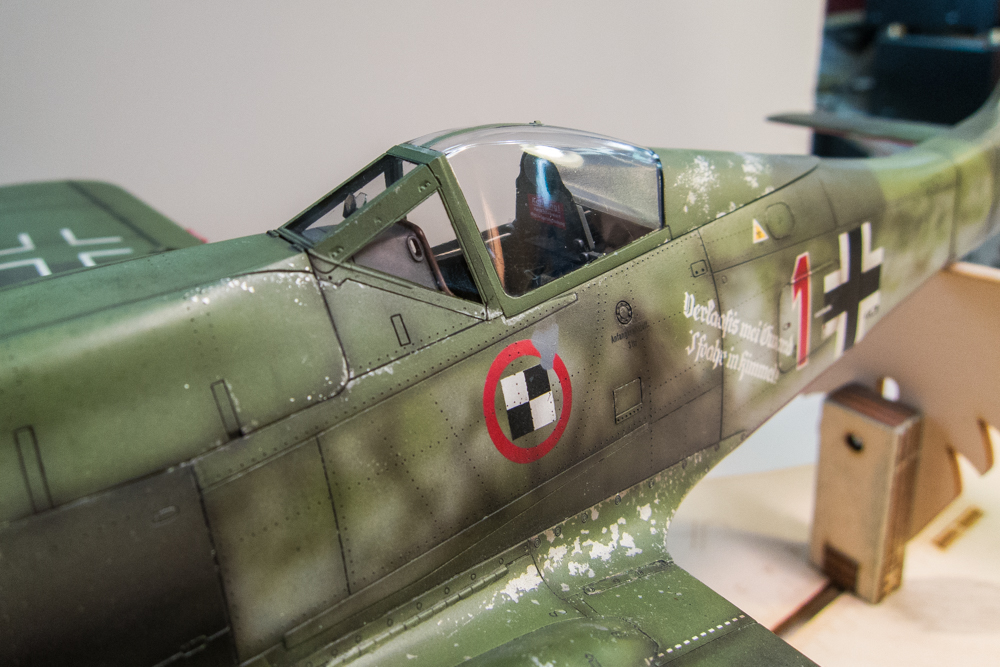
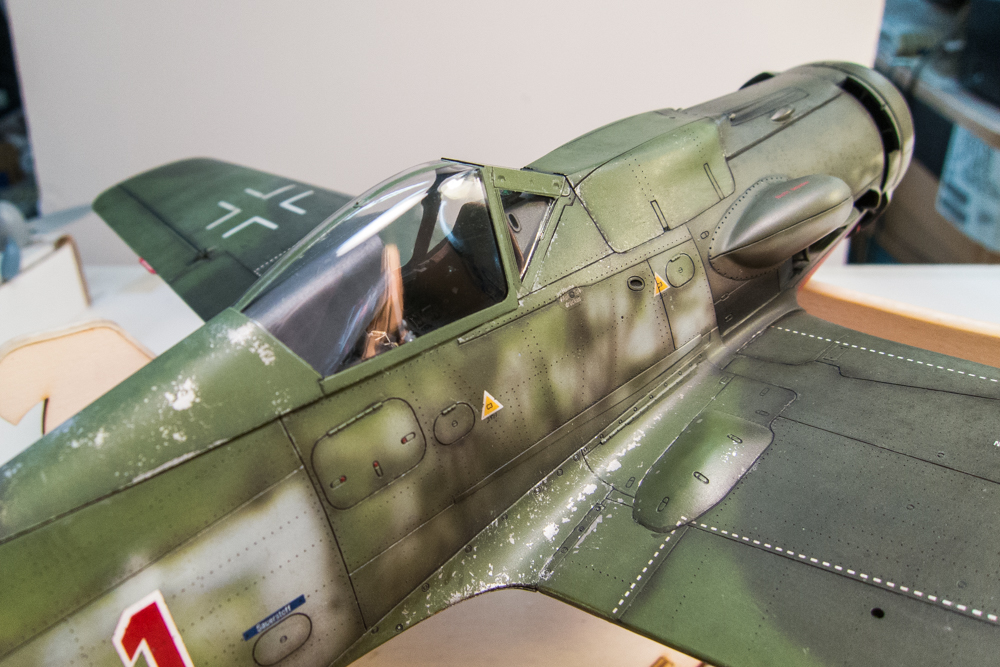
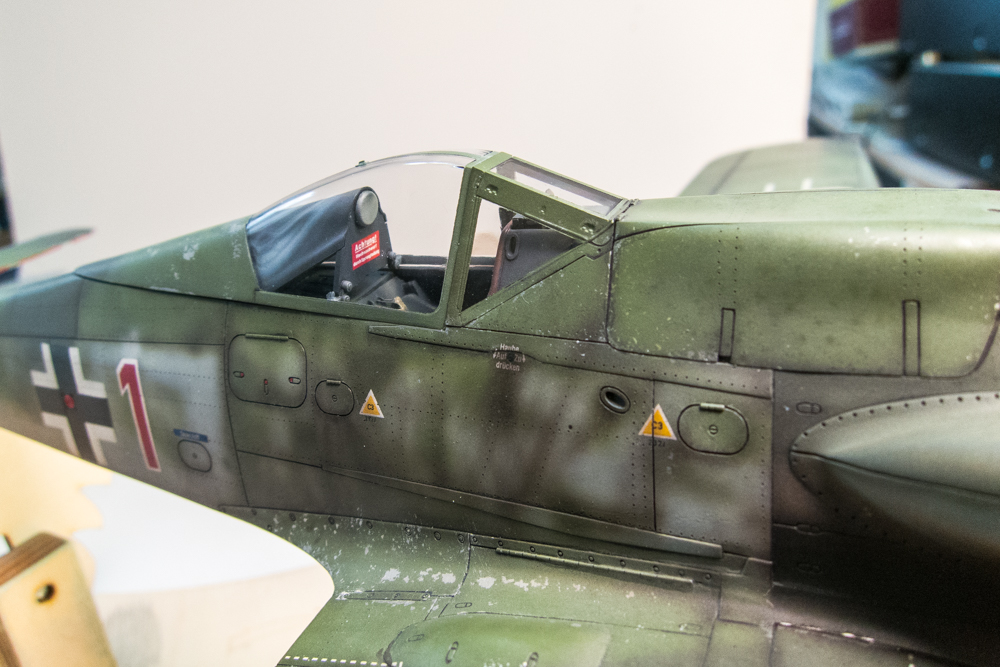
The exhaust pipes get cemented into position.

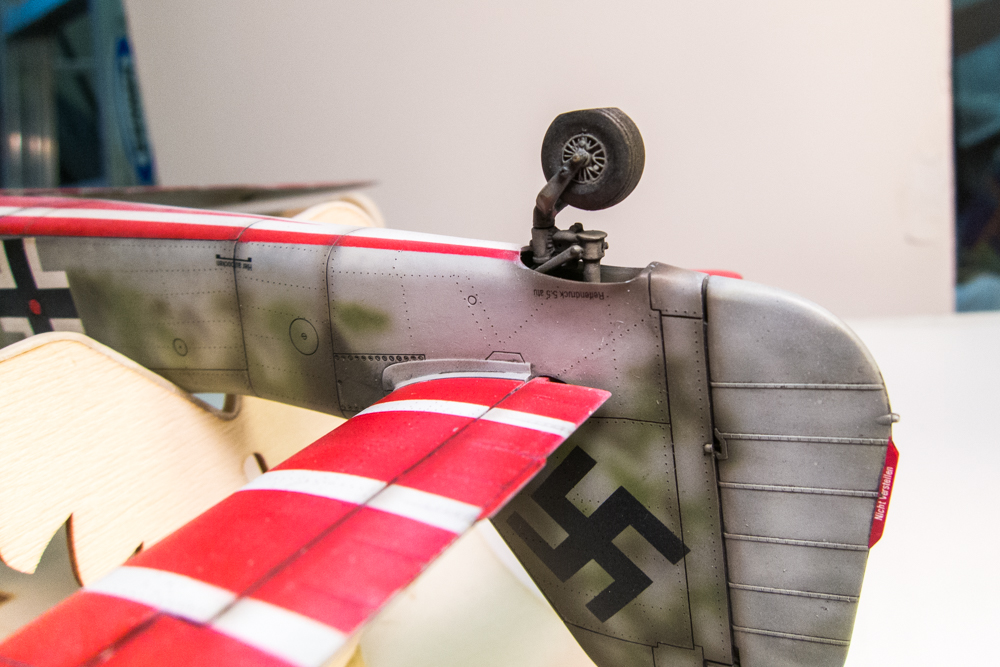
Next comes the landing gear... starting with the tail wheel. There is a brass tubing axle that allows the tail wheel to spin freely. I'll leave it that way so that flat spot can find the right position once the main gear and wheels are in place.
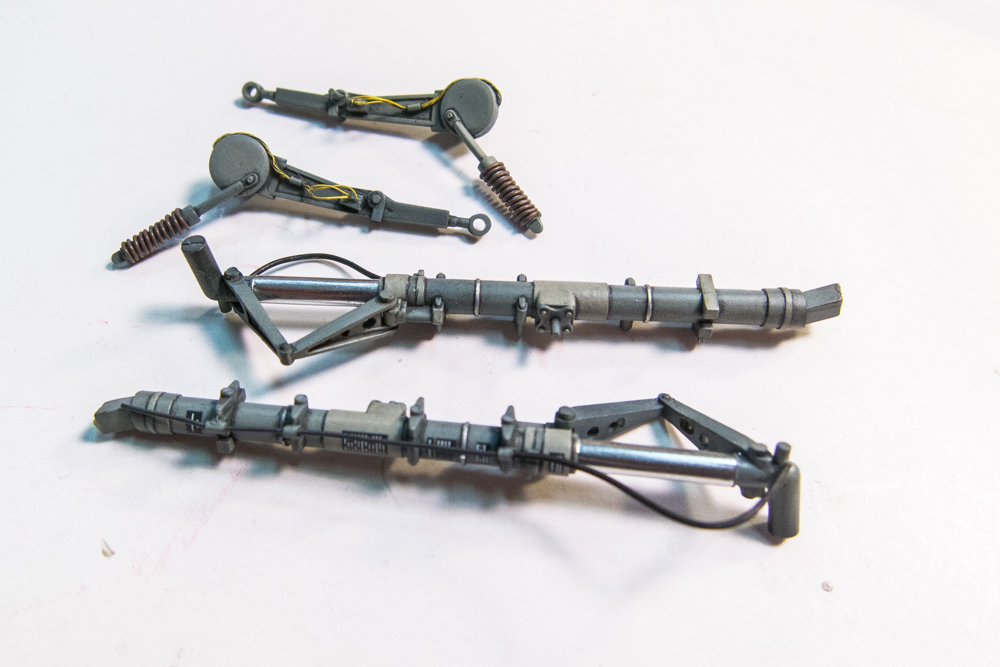
The main landing gear components are ready to be installed.
The peg/hole arrangement is a very tight affair. I press the legs in partially, seep Tamiya Extra Thin cement into the join and then push them in all of the way.
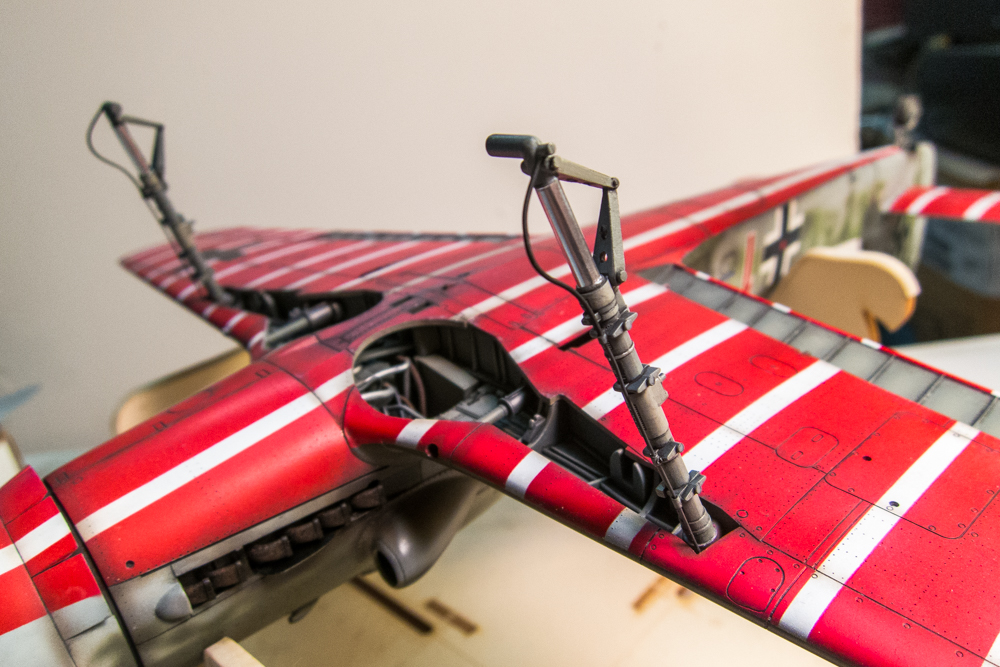
The actuating arms are cemented in a similar way.
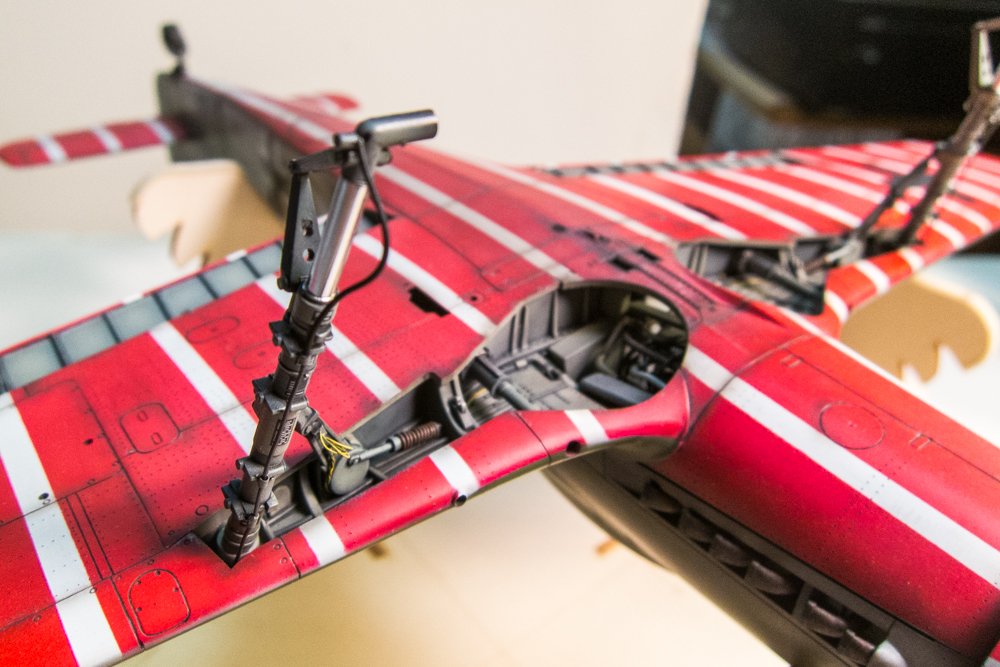
The wheels are glued on with Tamiya Extra Thin cement. As the glue stiffens, I set the model on its legs for the first time and make sure the flat spots on the three tires are in contact with the table surface. The perspective makes the legs look funky but I've verified that they are at the correct angle.
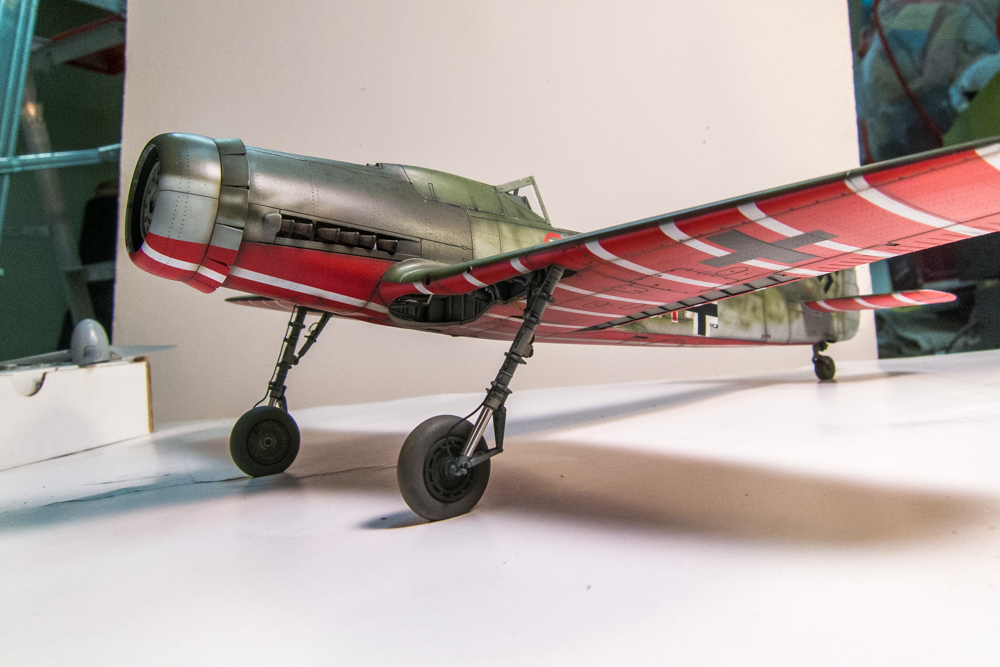
The landing gear covers are glued into place. It was a while ago but the gap between the cover and the bottom of the wing has been eliminated with a shim... can't even tell right?

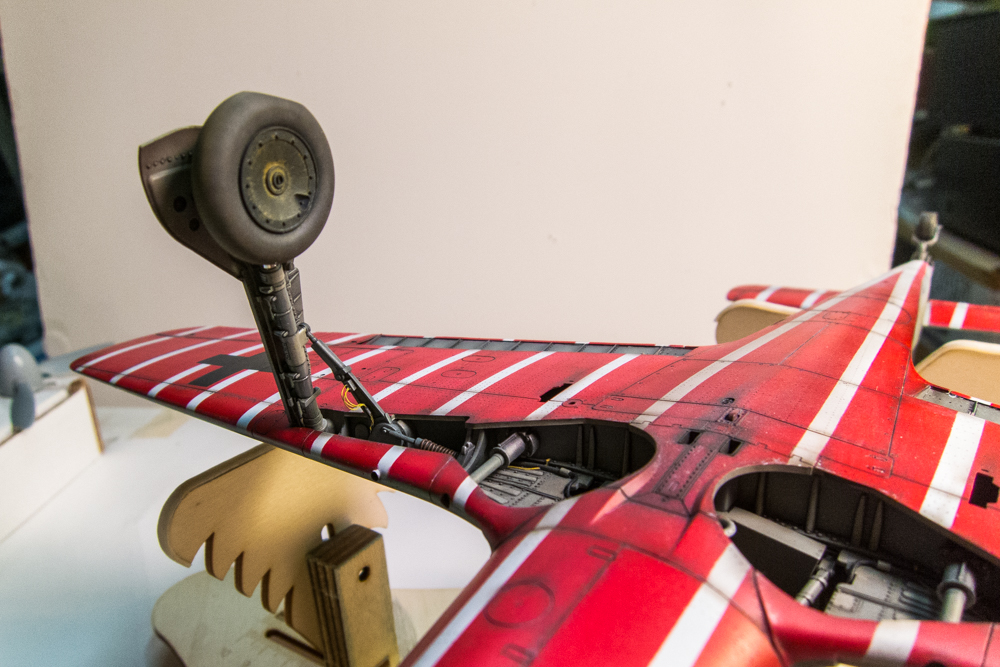
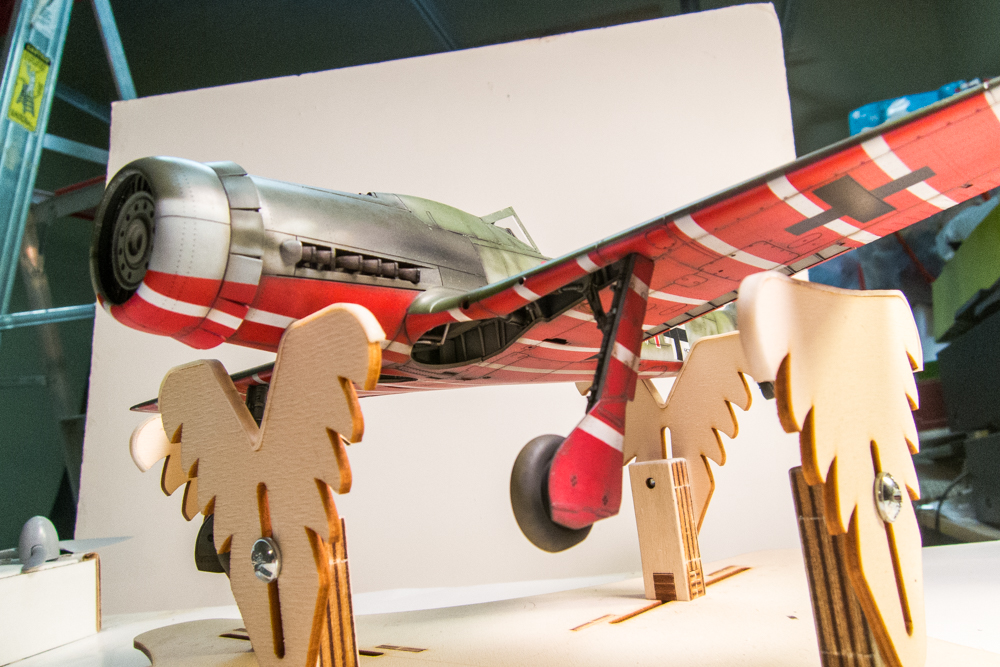
The Eduard brass flaps are secured using JB Kwik Weld epoxy. This is a tenuous connection and I wanted to make it as strong as possible.
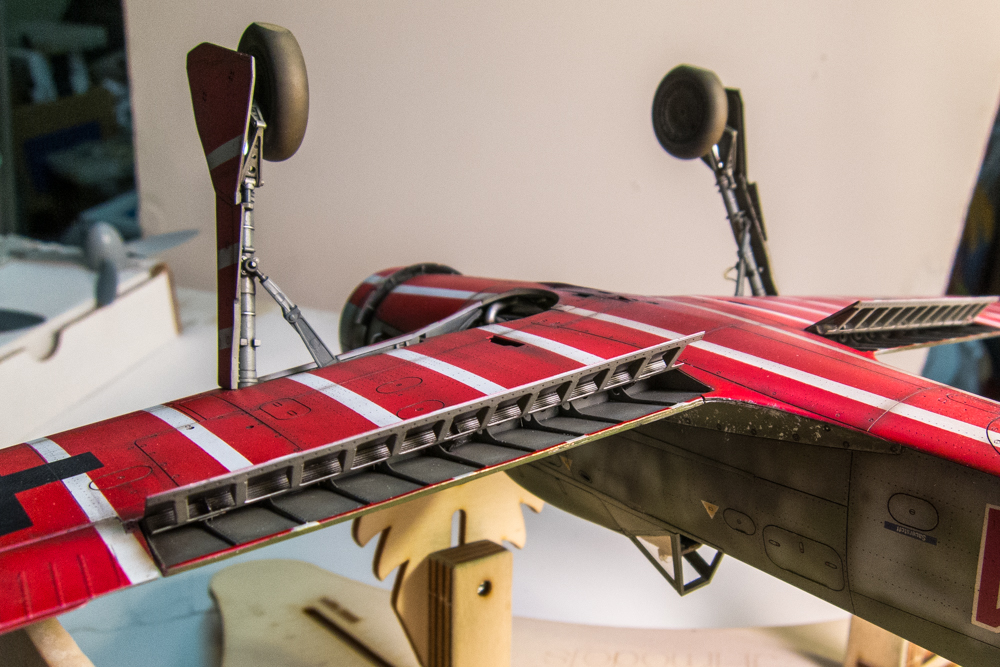
The finish line for Red 1 is clearly within sight now!

That pretty much ends the airbrush work on this model so off comes the masking on the clear parts.
The exhaust pipes get cemented into position.
Next comes the landing gear... starting with the tail wheel. There is a brass tubing axle that allows the tail wheel to spin freely. I'll leave it that way so that flat spot can find the right position once the main gear and wheels are in place.
The main landing gear components are ready to be installed.
The peg/hole arrangement is a very tight affair. I press the legs in partially, seep Tamiya Extra Thin cement into the join and then push them in all of the way.
The actuating arms are cemented in a similar way.
The wheels are glued on with Tamiya Extra Thin cement. As the glue stiffens, I set the model on its legs for the first time and make sure the flat spots on the three tires are in contact with the table surface. The perspective makes the legs look funky but I've verified that they are at the correct angle.
The landing gear covers are glued into place. It was a while ago but the gap between the cover and the bottom of the wing has been eliminated with a shim... can't even tell right?
The Eduard brass flaps are secured using JB Kwik Weld epoxy. This is a tenuous connection and I wanted to make it as strong as possible.
The finish line for Red 1 is clearly within sight now!
John aka JKim
-----------<><
-----------<><
-
Medicman71
- Elite Member
- Posts: 11396
- Joined: Mon Apr 07, 2014 9:32 am
- Location: Houston, Tx
Re: 1/32 Hasegawa Fw190D-9 Red One
Incredible!!!
Mike
Sponsored by Boeing, Lockheed Martin, Northrop Grumman, Saab, BAE, and Dassault
Sponsored by Boeing, Lockheed Martin, Northrop Grumman, Saab, BAE, and Dassault
-
speedgraflex
- Moderator
- Posts: 11534
- Joined: Fri Feb 10, 2017 11:08 pm
- Contact:
Re: 1/32 Hasegawa Fw190D-9 Red One
What a burst of energies you have had, John! So much has happened. You absolutely handled brilliantly whatever was affecting the clear coat/salt water interference. The colors look outstanding. The details look outstanding. Even the micro-winding of electrical wire looks outstanding. Simply put, this entire project looks outstanding in every way. You have taken the leveling up from the last 1/32 Hase to a new level of fit n' finish. There was so much to learn, so much to see and I believe for you there were construction items on your "To Do" List that you handled here (the tail, gluing the tail to each side of the fuse) in a superb fashion. To look at those landing gear details again is pure joy—the purest joy imaginable. Ah well, now I have to go back to my reality... Cheers, my friend! I hope you sleep soundly tonight and let the epoxy cure! All the best!
Make more models!

Re: 1/32 Hasegawa Fw190D-9 Red One
New to the forum - wow, extraordinary detail and a beautiful finish. Really impressive work!
BTW - where does that stand come from?
BTW - where does that stand come from?
Thanks,
John
John
-
mustang1989

- Moderator
- Posts: 5044
- Joined: Tue Mar 18, 2014 8:35 pm
Re: 1/32 Hasegawa Fw190D-9 Red One
You were wise I taking your time with the landing gear struts John. The angle not only as viewed from the front but the side as well can make or break the looks of these beautiful aircraft. To little fore/aft take on the struts and these things look “peg legged “...and too much rake makes em look like they’re gonna fall flat on their underbelly any second. This one looks juuuust right.
Re: 1/32 Hasegawa Fw190D-9 Red One
Thanks guys! The build did rush toward completion this week after the salt fading incident. All of the bits and pieces were already painted prior so after weathering, things go quick. The landing gear connection on this kit is very positive and provides the correct position of the gear legs, which is confirmed by the fit of the actuator arms.
I really like Hasegawa kits as they are the most in-line with how I like to build. Accurate shapes, decent detail but no rivets (I like to add my own), no engines or removable panels. For my next build, I will jumping into unfamiliar waters and tangling with the big scale 1/32 Tamiya Corsair. Planning on doing one of Boyington's Corsairs, Bu 17740... would you guys be interested in seeing this build?

Luftwaffe birds are my main interest so this US fighter will be a challenge for me since my knowledge base is next to nothing. So I'll probably need lots of help on the way.
But first things first... gotta finish Red 1 to make room for another build to start while I continue on with my 262 build.
Oh... the stand is a wooden jig that I picked up at UMM-USA. Very handy!
http://umm-usa.com/onlinestore/product_ ... dea8c5d5dd
I really like Hasegawa kits as they are the most in-line with how I like to build. Accurate shapes, decent detail but no rivets (I like to add my own), no engines or removable panels. For my next build, I will jumping into unfamiliar waters and tangling with the big scale 1/32 Tamiya Corsair. Planning on doing one of Boyington's Corsairs, Bu 17740... would you guys be interested in seeing this build?
Luftwaffe birds are my main interest so this US fighter will be a challenge for me since my knowledge base is next to nothing. So I'll probably need lots of help on the way.
But first things first... gotta finish Red 1 to make room for another build to start while I continue on with my 262 build.
Oh... the stand is a wooden jig that I picked up at UMM-USA. Very handy!
http://umm-usa.com/onlinestore/product_ ... dea8c5d5dd
John aka JKim
-----------<><
-----------<><

Re: 1/32 Hasegawa Fw190D-9 Red One
Oh yes we would!!jkim wrote:Planning on doing one of Boyington's Corsairs, Bu 17740... would you guys be interested in seeing this build?
- Kari
---
On the bench:
Eduard 1:48 - Fokker D.VII OAW
https://www.facebook.com/GrundAsk-Scale ... 721218708/
On the bench:
Eduard 1:48 - Fokker D.VII OAW
https://www.facebook.com/GrundAsk-Scale ... 721218708/