Pacific Coast Models 1/32 Fw 190A-1. Black 13. Belgium, 1941

Re: Pacific Coast Models 1/32 Fw 190A-0. Black 13. Belgium,
Agree... great photos of your subject! Those repair marks are very distinctive... I wonder what color they were. Fresh RLM 65? Or some type of grey?
John aka JKim
-----------<><

-----------<><
-
speedgraflex

- Moderator
- Posts: 11534
- Joined: Fri Feb 10, 2017 11:08 pm
- Contact:
Re: Pacific Coast Models 1/32 Fw 190A-0. Black 13. Belgium,
I am trying to figure this out, too. I think RLM 65, like you. Have a look:jkim wrote:Agree... great photos of your subject! Those repair marks are very distinctive... I wonder what color they were. Fresh RLM 65? Or some type of grey?
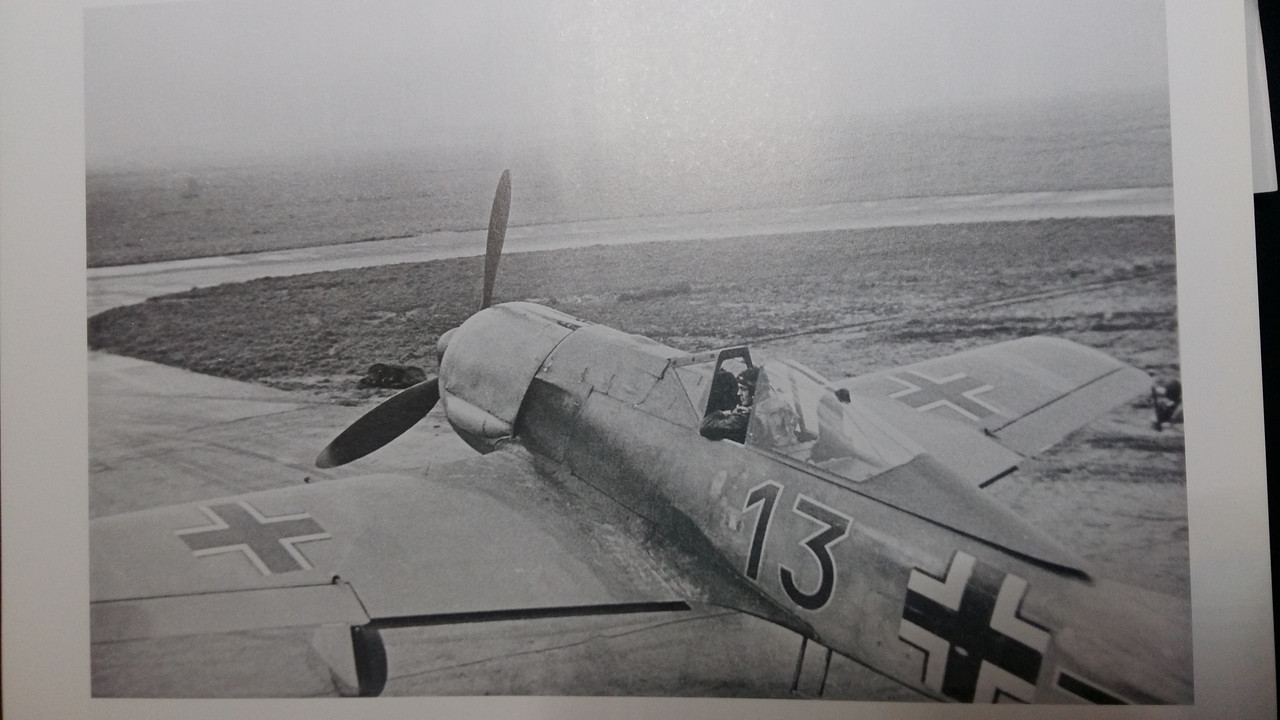
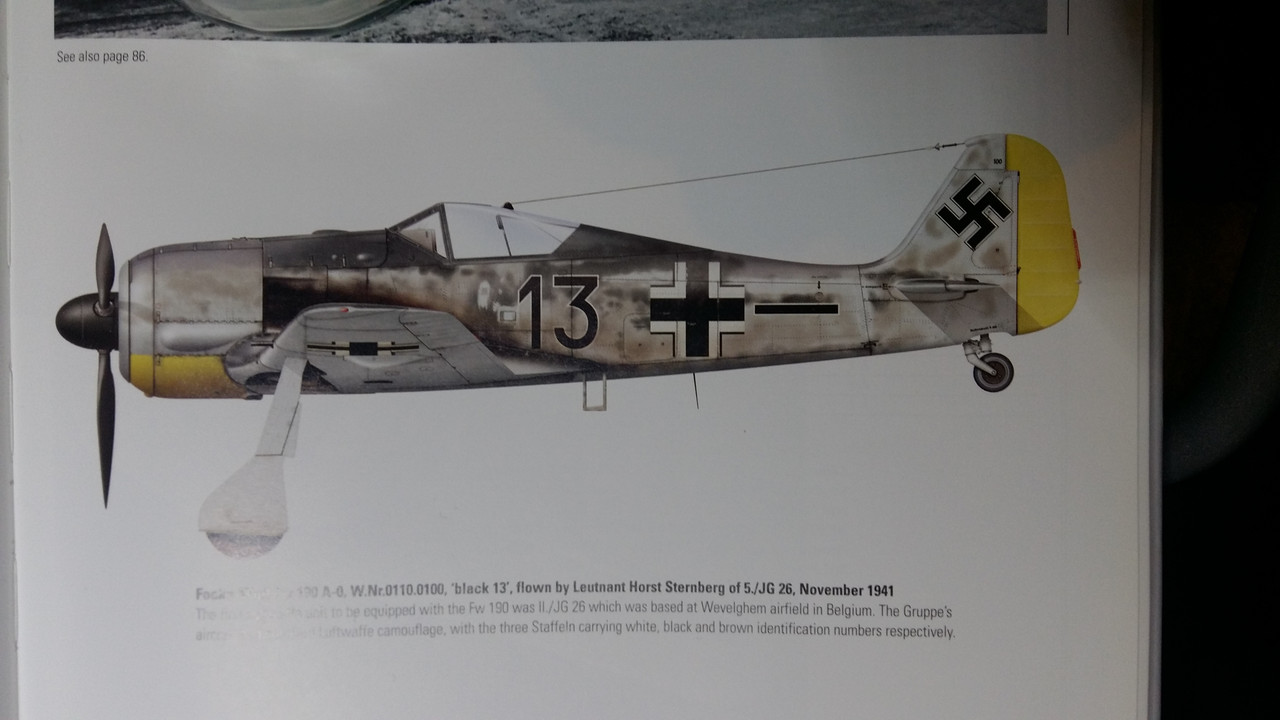
Apologies for uploading these piecemeal but I wanted to try to clean these up first... and I ran outta time.
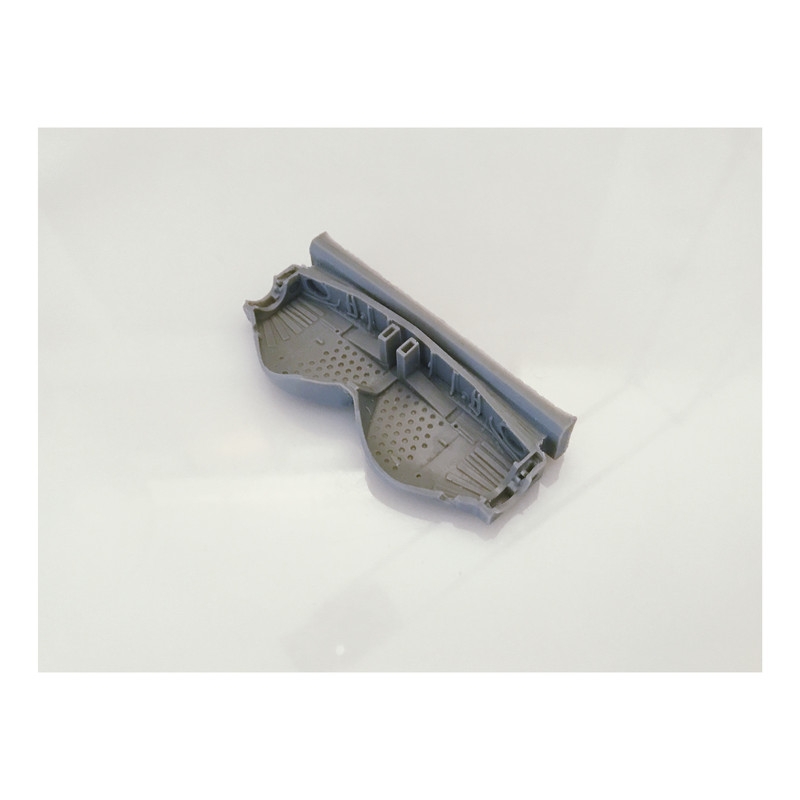
Make more models!
-
speedgraflex
- Moderator
- Posts: 11534
- Joined: Fri Feb 10, 2017 11:08 pm
- Contact:
Re: Pacific Coast Models 1/32 Fw 190A-0. Black 13. Belgium,
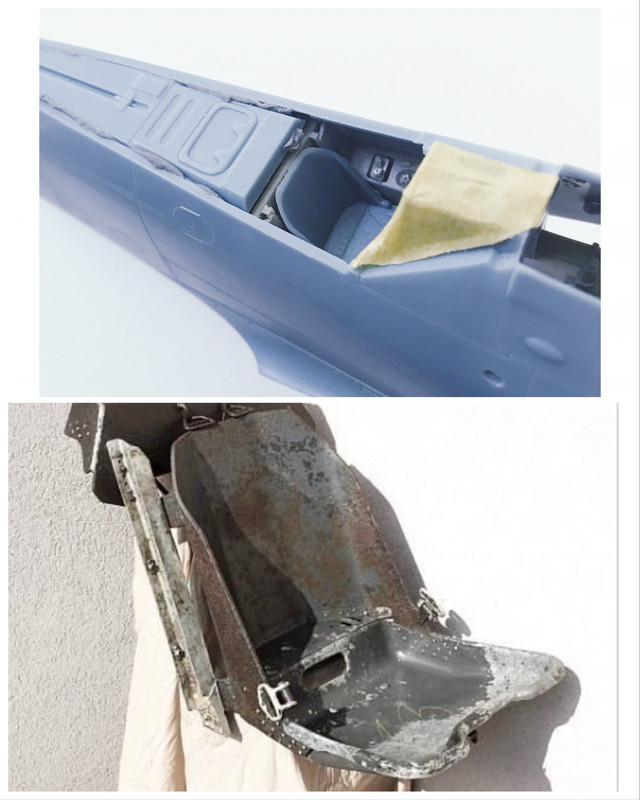
Time to thin the edges a little methinks. Also is this an RLM02 or RLM66 cockpit interior? The seat reference looks to be RLM66. I read that barring the first prototype all Fw190 Antons have RLM66 painted cockpits, but I dunno if “read somewhere” applies to this particular aircraft.

Make more models!

Re: Pacific Coast Models 1/32 Fw 190A-0. Black 13. Belgium,
You have a knack for finding great photos! My bet would also be fresh RLM65 for the repaired area. And the tail definitely looks different too. Maybe replaced? The seat could use thinning a bit at the edges. As for cockpit colors RLM66 would a safe choice unless you find hard evidence showing another color.
March as one, Don't look back
Odin's sons... Attack!
Unleash hell! Do not repent! Warfare grants us no lament
Let your weapons slash and tear This is no place for fear
Hold the lines! Move as one! In unity our victory's won
Our shields will form a mighty wall
United we shall never fall
Odin's sons... Attack!
Unleash hell! Do not repent! Warfare grants us no lament
Let your weapons slash and tear This is no place for fear
Hold the lines! Move as one! In unity our victory's won
Our shields will form a mighty wall
United we shall never fall
-
speedgraflex
- Moderator
- Posts: 11534
- Joined: Fri Feb 10, 2017 11:08 pm
- Contact:
Re: Pacific Coast Models 1/32 Fw 190A-0. Black 13. Belgium,
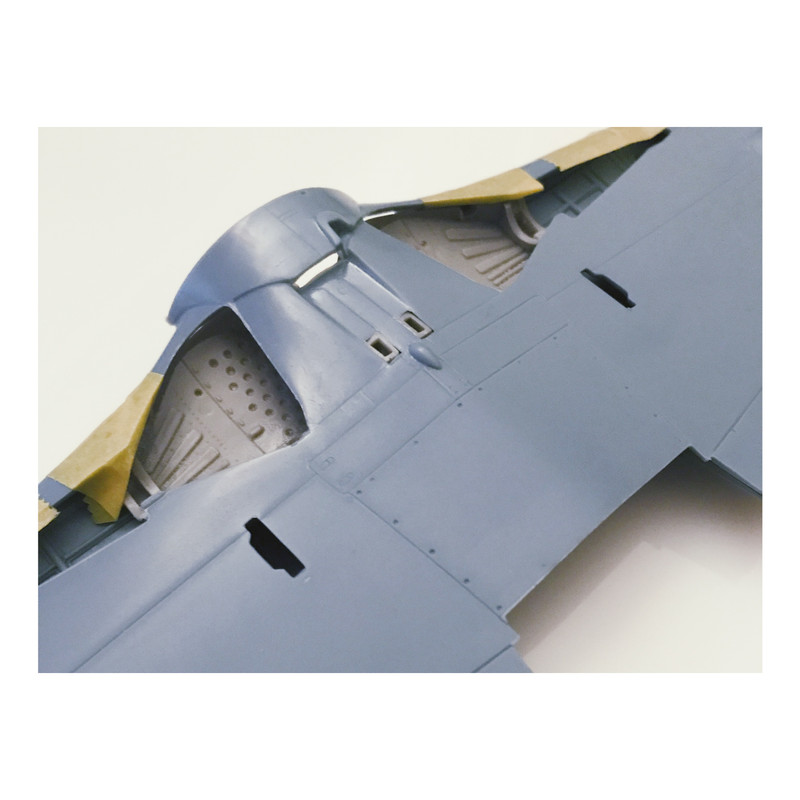
Thanks, Clint. It was Torben who discovered those Black 13 images and profile. I had two photos from the same series (including a duplicate of one of his) which I posted at the start of the project. I know it takes me a long time to begin building anything. I respect when a builder knows where and when to begin! I think you are more like that. I need to be a little more speedy... but ya know, I just need a long ramp to get started. I need to explore and think... maybe that’s how a lot of us are only not everyone records their navel gazing? Anyway I am still debating if I do partial selective rivets, on the fuselage sides since these will be seen, for example, do those first, but I am not sure. I would like to begin building and painting but still have the wheel well to square away. If this is anything like the rest of the kit, it will require very little fitting adjustments.Floki wrote:You have a knack for finding great photos! My bet would also be fresh RLM65 for the repaired area. And the tail definitely looks different too. Maybe replaced? The seat could use thinning a bit at the edges. As for cockpit colors RLM66 would a safe choice unless you find hard evidence showing another color.
Make more models!
Re: Pacific Coast Models 1/32 Fw 190A-0. Black 13. Belgium,
Almost every kit I have in the stash I have a idea in my head on what I'm going to do with it. But I change my mind alot too when it comes time to building like the Storch I had originally planned a refueling diorama now it's changed to that photo you posted. Before I start putting glue to plastic I like to dry fit as much of the basic airframe as I can just like what your doing some times that takes a few weeks some times a few hours. Either way the main goal is are you having fun and when you're done can you say your proud of what you built that's all that matters to me.
March as one, Don't look back
Odin's sons... Attack!
Unleash hell! Do not repent! Warfare grants us no lament
Let your weapons slash and tear This is no place for fear
Hold the lines! Move as one! In unity our victory's won
Our shields will form a mighty wall
United we shall never fall
Odin's sons... Attack!
Unleash hell! Do not repent! Warfare grants us no lament
Let your weapons slash and tear This is no place for fear
Hold the lines! Move as one! In unity our victory's won
Our shields will form a mighty wall
United we shall never fall
Re: Pacific Coast Models 1/32 Fw 190A-0. Black 13. Belgium,
The wheel well looks good! Does it interfere with the cockpit tub at all? I'd think about thinning out the walls for the ammo ejection chutes. Or replacing with brass sheeting.
John aka JKim
-----------<><
-----------<><
-
Stikpusher

- Moderator
- Posts: 21383
- Joined: Sat Apr 05, 2014 8:37 pm
- Location: Ceti Alpha 5
Re: Pacific Coast Models 1/32 Fw 190A-0. Black 13. Belgium,
jkim wrote:I'd think about thinning out the walls for the ammo ejection chutes. Or replacing with brass sheeting.

"Surely I have made my meaning plain? I intend to avenge myself upon you, Admiral. I have deprived your ship of power, and when I swing 'round, I intend to deprive you of your life."
FLSM
FLSM
-
speedgraflex
- Moderator
- Posts: 11534
- Joined: Fri Feb 10, 2017 11:08 pm
- Contact:
Re: Pacific Coast Models 1/32 Fw 190A-0. Black 13. Belgium,
Clint, Thank you so much! You articulated what it’s like to build a model so well. It’s so important to be able to take the time to let ideas develop and make changes as new data appears, or as our feelings change through the process of well—creation! I’m really over the moon with the quality of the kit—or qualities of individual components—the fit and finish are fantastic.
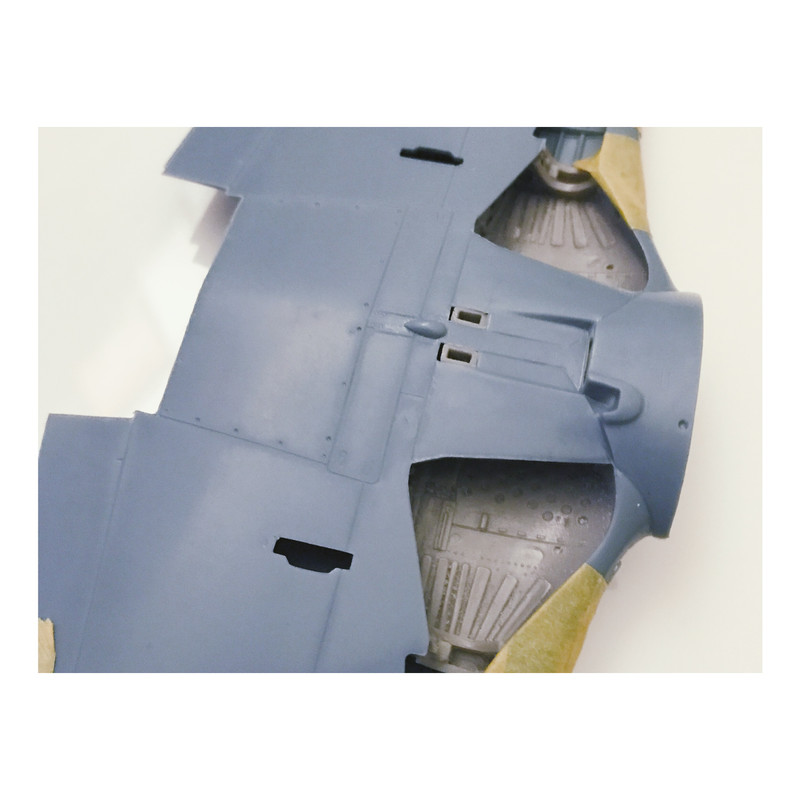
John, Thank you so much for following along and your thoughts! I am still recovering from my 35 minute resin block removal session. The hardest part was doing these three cuts without the benefit of the Zona blade. I used the CMK tool initial to create guides, then switched over to the Tamiya razor saw. Both blades were mismatched for the task at hand, due to blade length and cutting depth, but together I was able to saw from each short end until I reached the middle. I was lucky that I was pretty close to target. I used the Zirconium X-Acto Blade to whittle the side angles down. By the time I had the resin prepped and cleaned I was only thinking about the fit around the openings, frankly. I have to add that I would probably never think about thinning the edges—also I would imagine the chutes butt against the edges of the opening a bit tighter than what the resin set does, too. So, thank you so much! I know your work building these chutes in 1/32 is outstanding! The design of the resin plug being a locking point to the wings (one of the few areas where the kit has locators) leads me to consider chamfering the edges, instead of removal. I’m going to do the next set of test fits tonight.
About last night:
Carlos, Thank you so much! I dunno if I explained why older kits appeal very well, but I do know I feel that this kit, a six year old is a spring chicken really, benefited from a sub 100 parts count and a simplified engine plug, which is a feature of the oldest plastic kits made. To be continued, or “At the next!” as Sylvio signs off his posts.
John, Thank you so much for following along and your thoughts! I am still recovering from my 35 minute resin block removal session. The hardest part was doing these three cuts without the benefit of the Zona blade. I used the CMK tool initial to create guides, then switched over to the Tamiya razor saw. Both blades were mismatched for the task at hand, due to blade length and cutting depth, but together I was able to saw from each short end until I reached the middle. I was lucky that I was pretty close to target. I used the Zirconium X-Acto Blade to whittle the side angles down. By the time I had the resin prepped and cleaned I was only thinking about the fit around the openings, frankly. I have to add that I would probably never think about thinning the edges—also I would imagine the chutes butt against the edges of the opening a bit tighter than what the resin set does, too. So, thank you so much! I know your work building these chutes in 1/32 is outstanding! The design of the resin plug being a locking point to the wings (one of the few areas where the kit has locators) leads me to consider chamfering the edges, instead of removal. I’m going to do the next set of test fits tonight.
About last night:
Carlos, Thank you so much! I dunno if I explained why older kits appeal very well, but I do know I feel that this kit, a six year old is a spring chicken really, benefited from a sub 100 parts count and a simplified engine plug, which is a feature of the oldest plastic kits made. To be continued, or “At the next!” as Sylvio signs off his posts.
Make more models!
Re: Pacific Coast Models 1/32 Fw 190A-0. Black 13. Belgium,
Sawing casting blocks off of big resin pieces can be surprisingly PHYSICAL, I've found. Cutting from different angles and meeting somewhere in the middle because the saw blade bottoms out... yeah, I've been there!
Thinning the edges of chutes from the inside would be my first route too. Might be tedious work but luckily resin is much softer medium than styrene. I would use a sharp x-acto blade to scrape the edge at an angle, keeping the blade perpendicular to the surface.
Thinning the edges of chutes from the inside would be my first route too. Might be tedious work but luckily resin is much softer medium than styrene. I would use a sharp x-acto blade to scrape the edge at an angle, keeping the blade perpendicular to the surface.
John aka JKim
-----------<><
-----------<><