Stikpusher wrote:Looks like you have succeeded in wrestling the landing gear into shape Lyle.
Well, sort of. In the process, nose gear door and the hardest one to put back on the right main popped off. I'll reattach the nose gear door later and managed to get the piece on the main. I also got the two tiny actuator (?) struts attached.
The attach points that I can identify are tiny and hard to get any glue applied in a sufficient amount to hold them firmly in place. What do you guys do? I plan on going back with CA after the plastic cement sets overnight. Here is all the help you get....the bottom left panel is a joke.
To make each build less crappy than the last one. Or, put another way, "Better than the last one, not as good as the next one!"..
"Surely I have made my meaning plain? I intend to avenge myself upon you, Admiral. I have deprived your ship of power, and when I swing 'round, I intend to deprive you of your life."
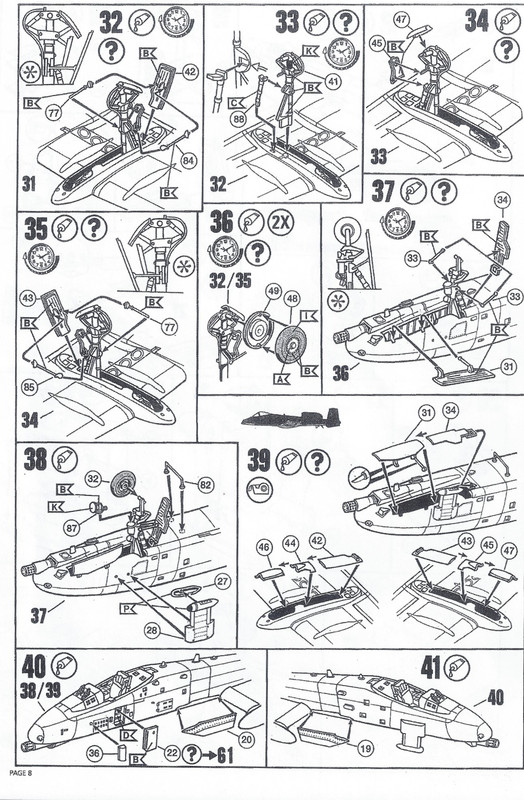
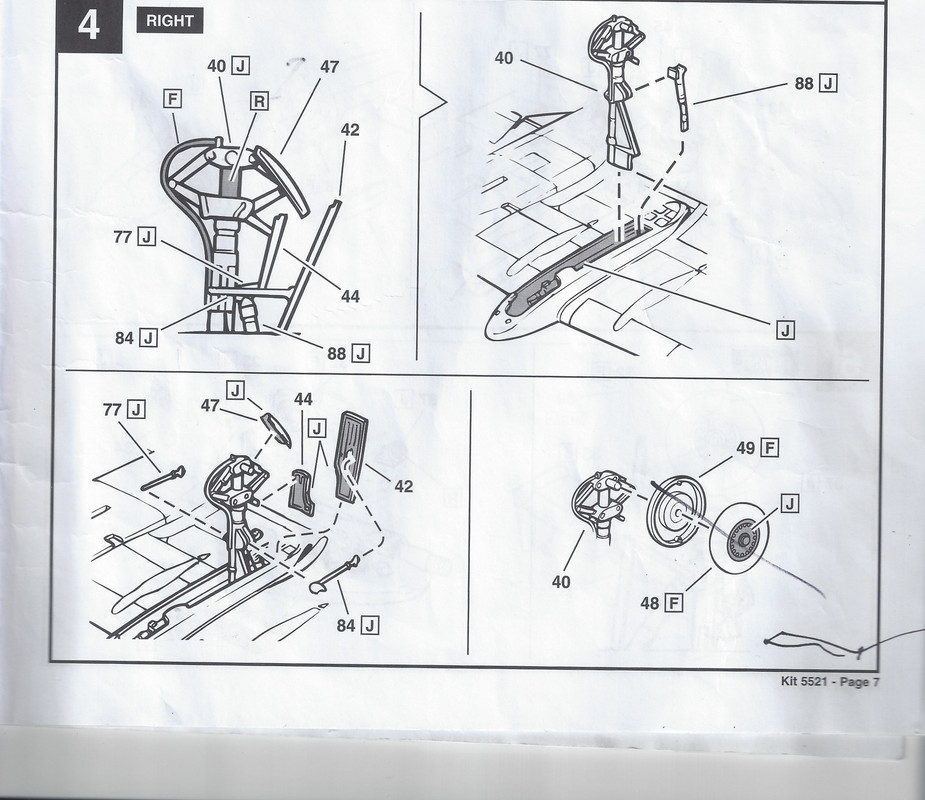
Quite interesting on some of the differences. Way more cluttered because of the arrows and more breakout diagrams. On the main gear, there does seem to be an attempt to show both attach points on some things. Too late now! I will print these out and keep a set. Many thanks.
To make each build less crappy than the last one. Or, put another way, "Better than the last one, not as good as the next one!"..
You’re quite welcome. I’m sort of curious now to,dig out my older boxing and see if the instructions are different yet again. I think that I have an early 90s or late 80s issue of the kit. I know the decal set I bought was for Desert Storm Flying Tigers...
"Surely I have made my meaning plain? I intend to avenge myself upon you, Admiral. I have deprived your ship of power, and when I swing 'round, I intend to deprive you of your life."
Since you asked, I am gonna write how I fix landing gear that pops off spaceships. Your plan to use CA is a good one. I would use fresh CA, though. In my opinion, once opened CA diminishes in effectiveness. I would make a “soft mask” around the wheel bay, just lightly cover the painted areas to protect your paint. Once that is done, I would move to another part of the bench and grind enough sprue to make a small pile of dust. I grind this onto a post it folded in half or any small piece of paper folded in half. Use the fold to slide the dust onto the CA after application. Styrene dust bonds really well. So I think from the diagram, add a bead of CA to a toothpick and let gravity slide it down over the main tab. Apply two drops then slide the sprue dust over the glue. You may not have to touch up anything at all. Let that cure for 10 minutes, gently remove the soft mask and you have gear that is welded in place with a bead of hardened CA. P.S. I almost forgot - do not use gel CA. Ever. The only “crazing” I have ever had came from gel CA. The good stuff too.
Alternately if you think the above is way too complex and fussy, my Dad would repair broken cow catchers with JB Weld. You might try 5 minute clear epoxy. I just used some Gorilla brand from my Home Depot on the flight stick. But you only have 5 minutes of “monkey business” before you have to leave the epoxy alone.
Stikpusher wrote:You’re quite welcome. I’m sort of curious now to,dig out my older boxing and see if the instructions are different yet again. I think that I have an early 90s or late 80s issue of the kit. I know the decal set I bought was for Desert Storm Flying Tigers...
I just printed these. There are 12 pages versus 16 in the Revell USA kit. Looks like the biggest difference is the size of the "blocks" of instruction.
The Revell of Germany:
Revell US:
To make each build less crappy than the last one. Or, put another way, "Better than the last one, not as good as the next one!"..
Bruce, this goes in my Tips book. Good info. In this instance, I need to now, get into a very small area - I guess with a toothpick or needle and drop some CA in.
I think I'll try this on the gear of the next project, though. Thank you!
To make each build less crappy than the last one. Or, put another way, "Better than the last one, not as good as the next one!"..
LyleW wrote:Bruce, this goes in my Tips book. Good info. In this instance, I need to now, get into a very small area - I guess with a toothpick or needle and drop some CA in.
I think I'll try this on the gear of the next project, though. Thank you!
I still am not understanding how the actuator piece connects to the strut, though!

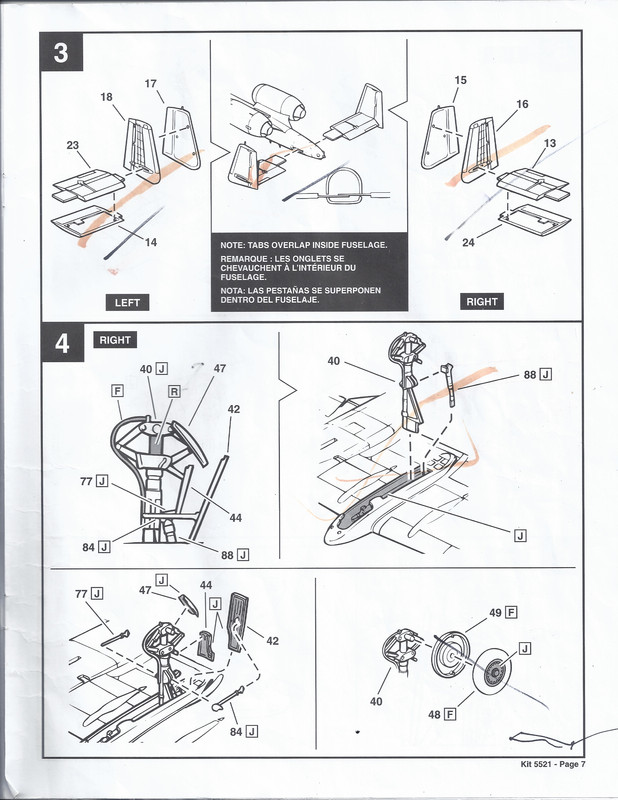

 I will print these out and keep a set. Many thanks.