
Very cool Medic.
So..? Do you spray the hairspray over the whole model or just selected areas?
1:48 Tamiya Corsair
Re: 1:48 Tamiya Corsair
Stuart Templeton 'I may not be good but I'm slow...'
-
Medicman71

- Elite Member
- Posts: 11396
- Joined: Mon Apr 07, 2014 9:32 am
- Location: Houston, Tx
Re: 1:48 Tamiya Corsair
 If I remember right, I did it over the whole model.
Mike
Sponsored by Boeing, Lockheed Martin, Northrop Grumman, Saab, BAE, and Dassault
Sponsored by Boeing, Lockheed Martin, Northrop Grumman, Saab, BAE, and Dassault

Re: 1:48 Tamiya Corsair
I really like the distressing you did on that, my man! That looks good! And thank you for weighing in with the Model Master acrylics! Add that one to the list!
Kenny X
Head Mother Trucker In-Charge @ Kenny X’s Reichs Winzigkleines Flugzeugewerks *and now* Airboat Records, too!
Head Mother Trucker In-Charge @ Kenny X’s Reichs Winzigkleines Flugzeugewerks *and now* Airboat Records, too!
Re: 1:48 Tamiya Corsair
Stuart,
That’s a matter of personal preference. I don’t like to cover the whole model. Just the general areas I want to chip in. I almost do it panel-by-panel. But I paint in sections anyway and it wasn’t a huge change for me to go from painting in sections all in one go to painting in sections day by day until the whole airplane is covered. I’d say do what works for you best but be cautioned- I have no idea if this would still work if the paint had cured for more than 24 hours. That’s another reason why I like doing in section-by section so much- I can prep, paint, chip right then and there and not worry.
That’s a matter of personal preference. I don’t like to cover the whole model. Just the general areas I want to chip in. I almost do it panel-by-panel. But I paint in sections anyway and it wasn’t a huge change for me to go from painting in sections all in one go to painting in sections day by day until the whole airplane is covered. I’d say do what works for you best but be cautioned- I have no idea if this would still work if the paint had cured for more than 24 hours. That’s another reason why I like doing in section-by section so much- I can prep, paint, chip right then and there and not worry.
Kenny X
Head Mother Trucker In-Charge @ Kenny X’s Reichs Winzigkleines Flugzeugewerks *and now* Airboat Records, too!
Head Mother Trucker In-Charge @ Kenny X’s Reichs Winzigkleines Flugzeugewerks *and now* Airboat Records, too!
Re: 1:48 Tamiya Corsair
Thanks Kenny!KennyX wrote:Stuart,
That’s a matter of personal preference. I don’t like to cover the whole model. Just the general areas I want to chip in. I almost do it panel-by-panel. But I paint in sections anyway and it wasn’t a huge change for me to go from painting in sections all in one go to painting in sections day by day until the whole airplane is covered. I’d say do what works for you best but be cautioned- I have no idea if this would still work if the paint had cured for more than 24 hours. That’s another reason why I like doing in section-by section so much- I can prep, paint, chip right then and there and not worry.
Stuart Templeton 'I may not be good but I'm slow...'

Re: 1:48 Tamiya Corsair
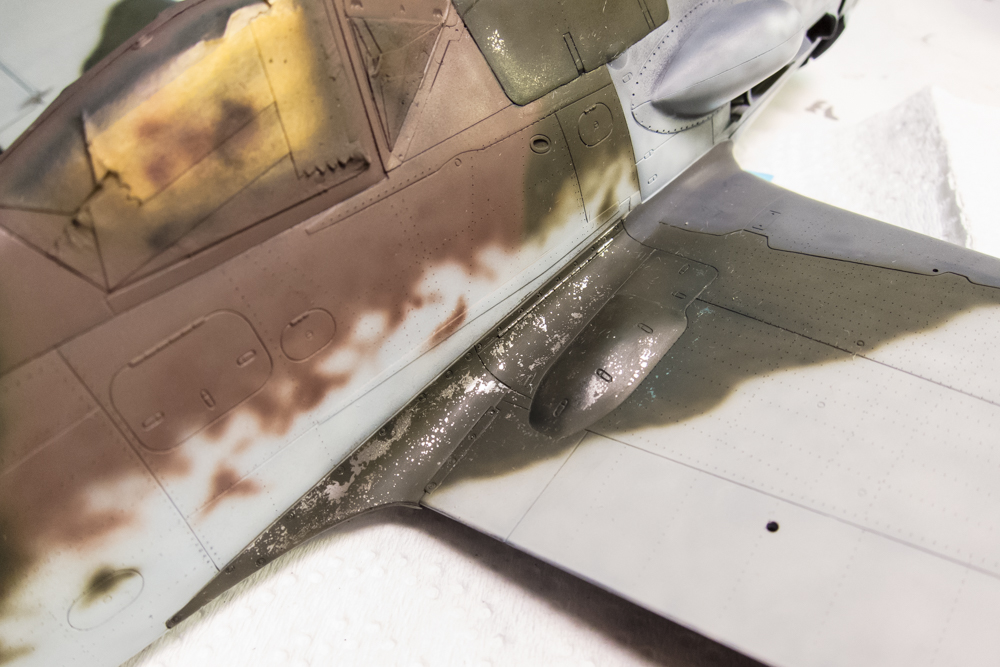
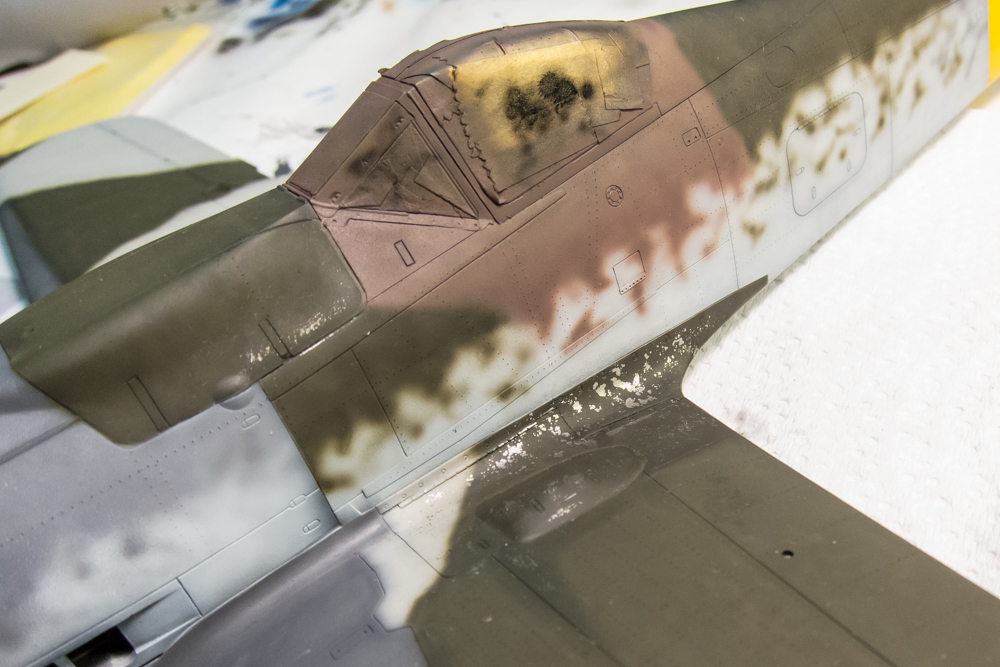
Instead of using a toothpick, try repeated brushing of the surface with a stiff wet brush. It takes longer but the chipping comes out much finer.KennyX wrote: 5. When I do my chipping, I first gently wet the surface to be chipped with a small-diameter brush charged with water, and next I very, VERY GENTLY nick the wet surface with the tip of a toothspick which I have whittled-down to have an even finer point. It doesn’t take much pressure to get this done. I go as small as I can, with the chips, and slowly enlarge/shape them to suit me.
John aka JKim
-----------<><

-----------<><
Re: 1:48 Tamiya Corsair
jkim wrote:Instead of using a toothpick, try repeated brushing of the surface with a stiff wet brush. It takes longer but the chipping comes out much finer.KennyX wrote: 5. When I do my chipping, I first gently wet the surface to be chipped with a small-diameter brush charged with water, and next I very, VERY GENTLY nick the wet surface with the tip of a toothspick which I have whittled-down to have an even finer point. It doesn’t take much pressure to get this done. I go as small as I can, with the chips, and slowly enlarge/shape them to suit me.
Ah! Thank you for the tip, John! I remember seeing that and thinking it was beautiful, and marveling at how you got it down so fine. Stylistically-speaking, I prefer smaller chips and abrasions to larger. Personal preference an all. I just like that finer look better.
And you know, it’s funny. I’ve been toothpicking it because I didn’t have much luck with the brushes I own. I don’t think they’re quite stiff enough. Conversely, I may not have been being patient enough. I’ll get some stiffer brushes, give that a try, and be more patient

Kenny X
Head Mother Trucker In-Charge @ Kenny X’s Reichs Winzigkleines Flugzeugewerks *and now* Airboat Records, too!
Head Mother Trucker In-Charge @ Kenny X’s Reichs Winzigkleines Flugzeugewerks *and now* Airboat Records, too!
Re: 1:48 Tamiya Corsair
Yes, give stiffer brushes and more patience a try... I think you'll like the results. I cut the bristles on my hairspray paint brush down to increase stiffness.
Sometimes the paint over the hairspray comes off TOO easily ya know? And other times, it seems like it was freaking welded on. When the paint is really stubborn and doesn't want to react to my stiff paint brush, I use a fiberglass pen.
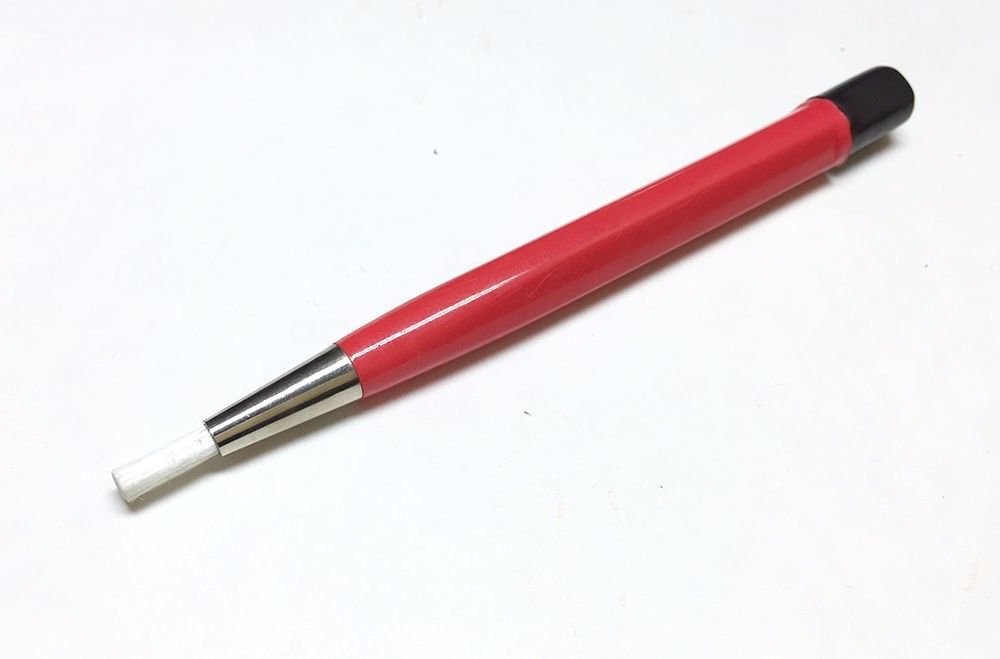
If that fails, I'll resort to poking it with the toothpick.
Sometimes the paint over the hairspray comes off TOO easily ya know? And other times, it seems like it was freaking welded on. When the paint is really stubborn and doesn't want to react to my stiff paint brush, I use a fiberglass pen.
If that fails, I'll resort to poking it with the toothpick.
John aka JKim
-----------<><
-----------<><
Re: 1:48 Tamiya Corsair
jkim wrote:Yes, give stiffer brushes and more patience a try... I think you'll like the results. I cut the bristles on my hairspray paint brush down to increase stiffness.
Sometimes the paint over the hairspray comes off TOO easily ya know? And other times, it seems like it was freaking welded on. When the paint is really stubborn and doesn't want to react to my stiff paint brush, I use a fiberglass pen.
If that fails, I'll resort to poking it with the toothpick.
Nice! Thank you!!
Kenny X
Head Mother Trucker In-Charge @ Kenny X’s Reichs Winzigkleines Flugzeugewerks *and now* Airboat Records, too!
Head Mother Trucker In-Charge @ Kenny X’s Reichs Winzigkleines Flugzeugewerks *and now* Airboat Records, too!
Re: 1:48 Tamiya Corsair
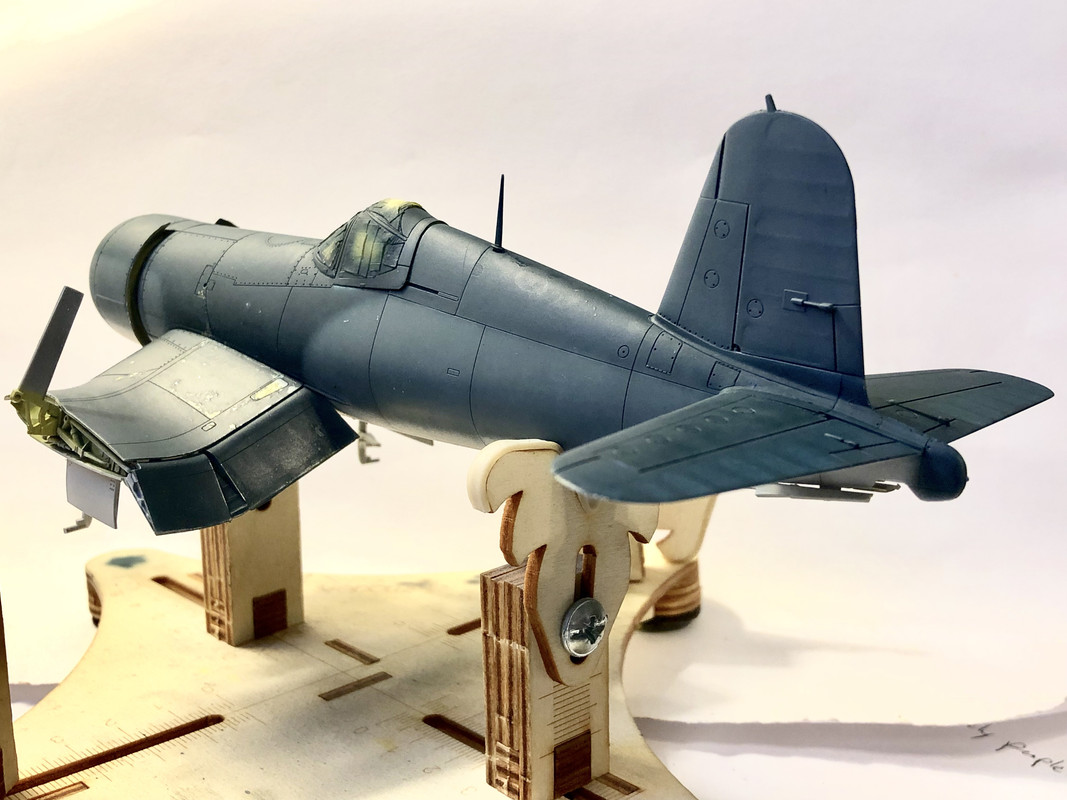

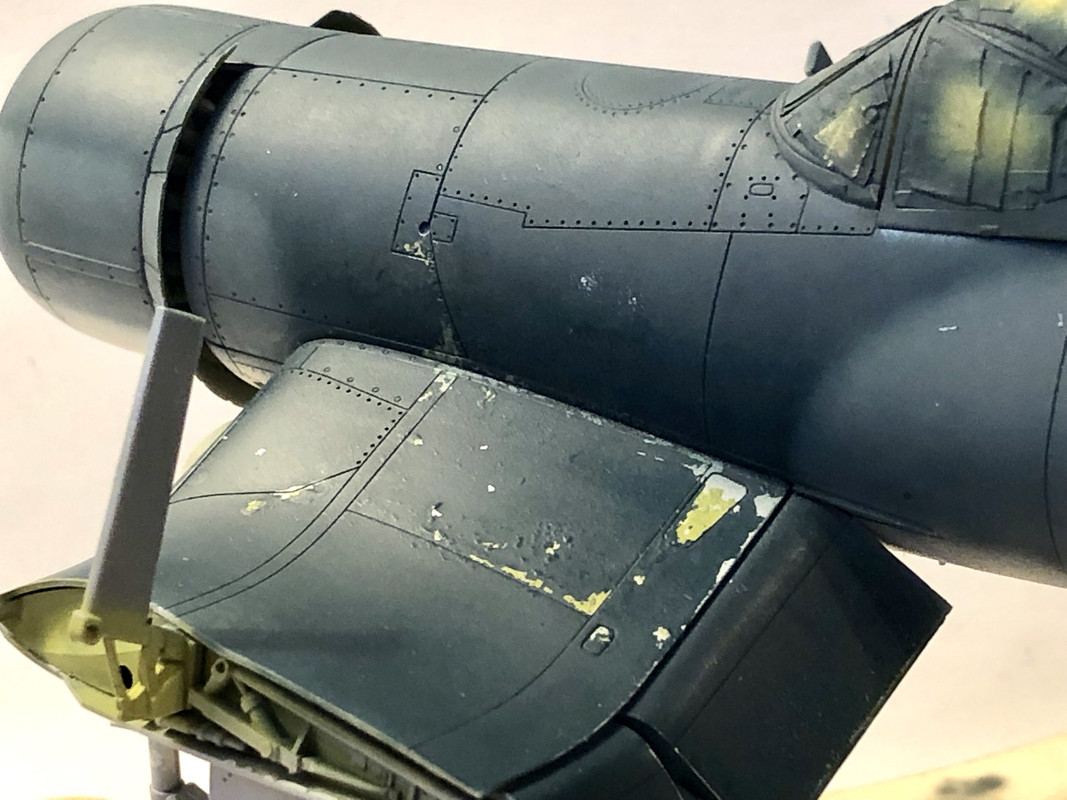
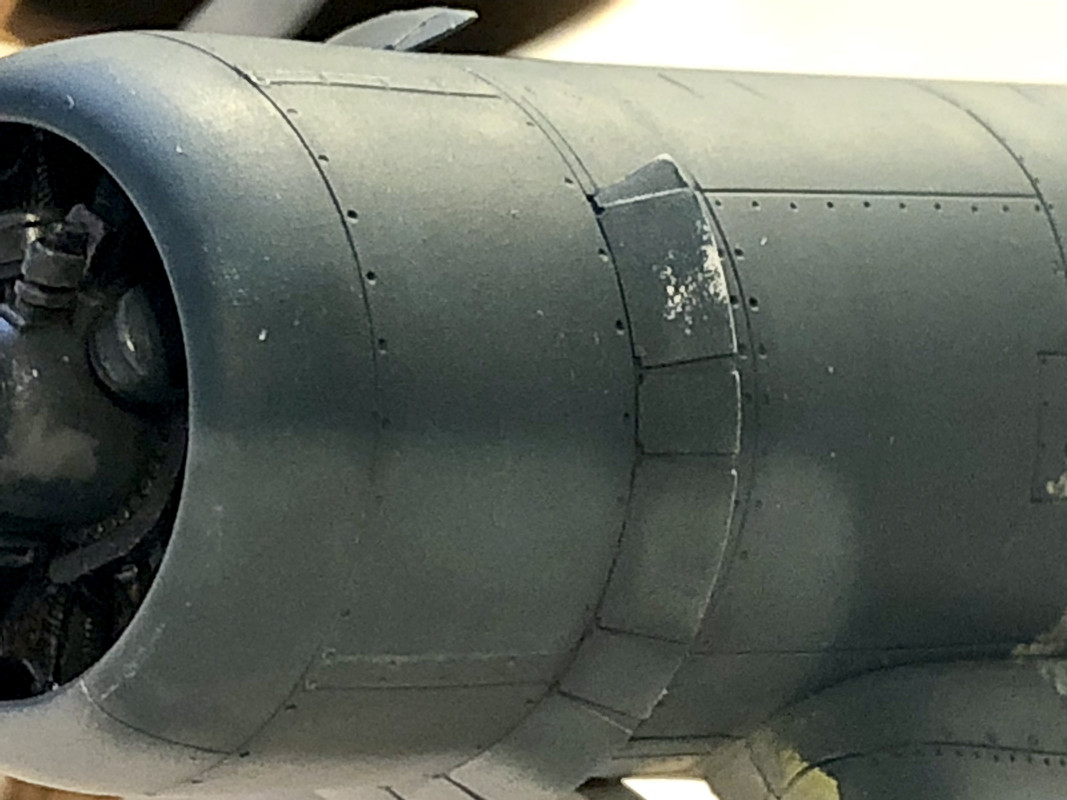
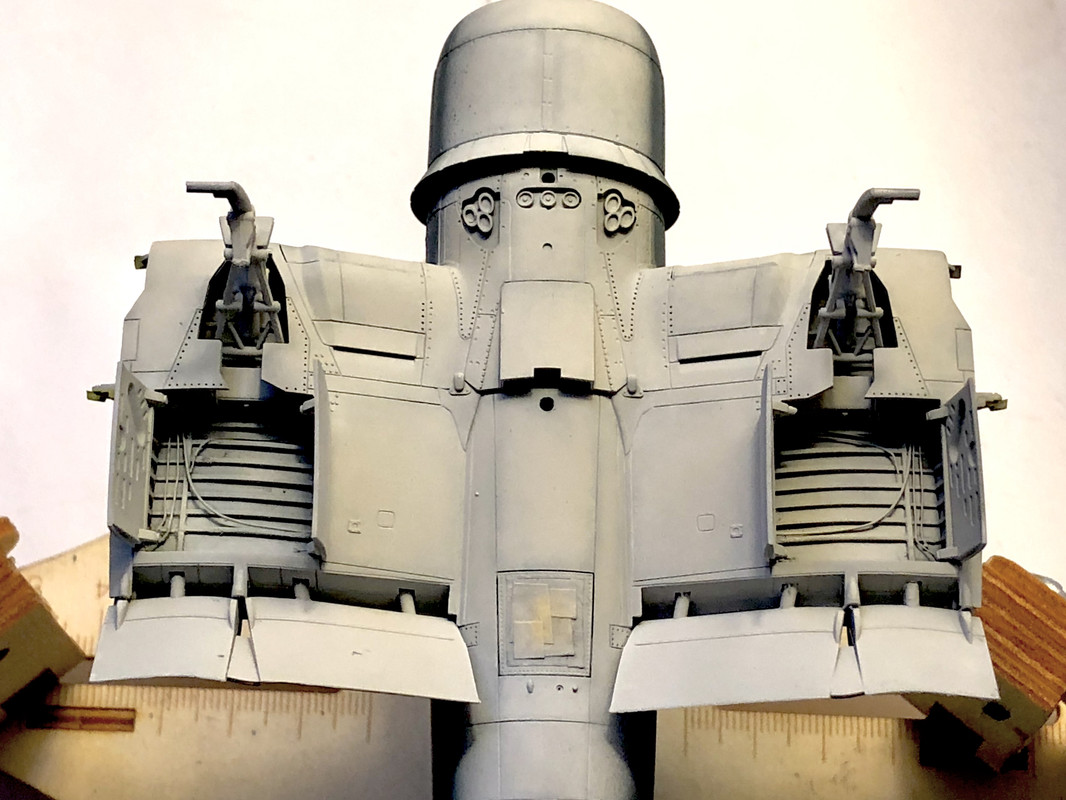
Okay, got the camo down on BIG HOG! Also, the bottom is done as well.
I’m laid-up with a jacked-up right foot. I took a spill on Mother’s Day in my carport and my foot is hurting. It’s all swollen and angry (but mobility is returning and it doesn’t hurt anywhere near as bad as it hurt yesterday). Subsequently, I can’t bike, run, lift weights, or go to Jiu Jitsu class. That’s a bummer. But all my paints and airbrush are within arm’s reach so I got that going for me, which is nice.
I didn’t feel like cutting masks. So I freehanded the camo after pre-shading with German Grey and Olive Drab. When I painted, I mottled in sections same as always, making sure only but the bare minimum of the preshade would pull through.
I chipped a little bit of the forward fuse and cowling using a brush as John advised. Yeah buddy, I like that! Way finer, more “scale” and more controllable. Nice!
Kenny X
Head Mother Trucker In-Charge @ Kenny X’s Reichs Winzigkleines Flugzeugewerks *and now* Airboat Records, too!
Head Mother Trucker In-Charge @ Kenny X’s Reichs Winzigkleines Flugzeugewerks *and now* Airboat Records, too!