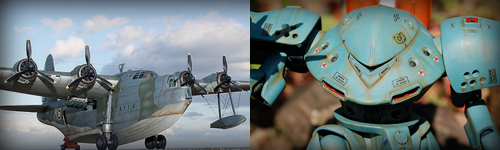
Short Sunderland MK.I Italeri 1/72

Post your work in progress of your aircraft builds in here.
User avatar
BsYamato
Addicted Member
Posts: 1130
Joined: Mon Apr 07, 2014 3:20 pm

Re: Short Sunderland MK.I Italeri 1/72

Post by BsYamato »

Thanx for comments guys :winkgrin:
Time to more resume finally:

wheels

Image

Side guns , OOB

Image

The finished tail "sitter"

Image

Various parts in drybrus session

Image

Main landing gear drybrushing

Image

and finished

Image

test fitting :)

Image

Glued wings some filling needed

Image

fixing bomb rail gaps in the wings

Image

ready

Image

light tips with clear sprue, first i cut the light zone

Image

Image
The upper central cockpit consolle finished

Image

the IP painted

Image

instruments paint detailing in the cockpit and back room

Image

Image

Image

Image

Image

Image

Image

Main bottom deck started to paint

Image

front bottom deck

Image

and cetral upper floor

Image

And after washing and drybrush

Image

Image

Image

In the cockpit i notice some more structural details was needed

Image

Image

Image

signed a manhole in this floor for the second ladder .. that is to scratchbuild too

Image

Image

gluing to the other upper floor

Image

Image

another missing deck to build .. :x

Image

Image

Image

Painted

Image

Image

Image

Image

Seats improving and missing ones sratchin

Image

Image

Image

Image

going for a coffee :roll: lots to resume again ..
At the next!
Image
User avatar
BorgR3mc0
Elite Member
Posts: 3311
Joined: Tue Mar 18, 2014 7:16 am
Location: Utereg

Re: Short Sunderland MK.I Italeri 1/72

Post by BorgR3mc0 »

That is a lot of details you have added BSYamato. Ver impressive, :bow:
ImageImageImageImageImage
User avatar
Duke Maddog
Elite Member
Posts: 7668
Joined: Tue Jun 03, 2014 11:22 am
Location: Rowland Heights, CA

Re: Short Sunderland MK.I Italeri 1/72

Post by Duke Maddog »

Wow! Seeing all this fine work makes me glad that I never got that plane. Man, mine would look like a toy next to this. Well done! Keep up the great work!
The Duke
Virtuoso of Miniatures

"Do you know what the chain of command is? It's the chain I get and beat you with 'till you understand who's in ruttin' command!"
-Jayne Cobb, Firefly Episode 2 "The Train Job"

We are modelers - the same in spirit, in hunger to insanely buy newly released kits, hustlers in hiding our stash from our better halves and experts in using garbage as replacements for after-market parts.
lawdog114
Master Member
Posts: 534
Joined: Tue May 20, 2014 11:46 pm
Location: Olmsted Township, Ohio

Re: Short Sunderland MK.I Italeri 1/72

Post by lawdog114 »

Very nice!... that detail looks great!

Joe
Can you fly this plane and land it? Surely you can't be serious? I am serious, and don't call me Shirley
User avatar
Thomas_M
Admin
Posts: 4244
Joined: Fri Dec 13, 2013 9:43 am
Location: Bad Wurzach - Germany
Contact:

Re: Short Sunderland MK.I Italeri 1/72

Post by Thomas_M »

Hope those reworked seats and all those improvements will be seen later! What a job! Congrats!
User avatar
BsYamato
Addicted Member
Posts: 1130
Joined: Mon Apr 07, 2014 3:20 pm

Re: Short Sunderland MK.I Italeri 1/72

Post by BsYamato »

Thanx for positive comments guys :bow:
It's time to syncronize the thread to actual situation because last night i put the sunderland on the table with intention to close it :)

Parachute holders.. unfortunately i have ony a parachute :(

Image

Image

Tail bulkhead

Image

Image

Fuselage last structures added and painting

Image

Image

Image

for the final zone of tail structures i used a trick, draw the structures with tape and drybrush the free zones :stirpot:

Image

Image

drybrush on a side

Image

glossy and washing

Image

Image

Image

and painting some yellow contour

Image

Image

windows

Image

Engine , floats , control surface and other things finishing

Image

Image

Image

i numbered the engines to follow the camouflage schemes :Bur2: also one of engines have a different angle and exhaust

Image

Image

Image

Image

pieces ready

Image

Image

Image

Image

exhausts

Image

Fixing central decks to hare references for remaining decks and bulkhead to stratch

Image

Takin measures and build last bulkheads

Image

Image

Image

Image

Image

Image

Image

with the little greenhouse, humbrol 78 on

Image

washing and drybrush

Image

Image

Image

parachute holders too

Image

posing the parachute holders after gluing the new bulkheads in place

Image

Image

Image

Image

Image

Image

Image

Image

the second ladder to scratch

Image

Image

Image

Image

Image

scratchin the fire extinguishers

Image

Image

Image

and placing them

Image

Image

Image

Image

a missing table for the radio operator, also glued other seats

Image

Image

Image

prepared some quadruple cable to fix in some part

Image

Image

Image

other cables on the rear IP

Image

Image

engine operator consolle

Image

Image

Image

Image

the first wrong way.. cables must head to above :Bur2:

correct way

Image

Image

and painted

Image

Image

bombs almost ready

Image

detailing left cockpit consolle

Image

Image

finished with the resume :) these works was done between august 2013 and few months ago. Next time the works i did last night.
At the next!
Image
User avatar
scorpiomikey
Addicted Member
Posts: 1134
Joined: Sat Apr 05, 2014 11:44 pm
Location: Nanaimo Canada

Re: Short Sunderland MK.I Italeri 1/72

Post by scorpiomikey »

Excellent job. I am enjoying this build. 2 questions however.

1. How do you do your glass? Your demarcations always seem flawless but ive never seen you use masking.
2. I seem to remember a discussion some time ago on a different forum about fire extinguishers not being red on aircraft during ww2. I know the germans used green, but i dont know about the allies. Are you sure on the colour?
You can learn all the math in the 'Verse, but you take a boat in the air that you don't love, she'll shake you off just as sure as the turning of the worlds. Love keeps her in the air when she oughta fall down, tells you she's hurtin' 'fore she keens. Makes her a home.
User avatar
BsYamato
Addicted Member
Posts: 1130
Joined: Mon Apr 07, 2014 3:20 pm

Re: Short Sunderland MK.I Italeri 1/72

Post by BsYamato »

Tank you Mike :)
You never see me masking canopy because I rarely do it. I prefer to use a fine brush to paint frames, all the needed layers. Before the first glossy layer before decals I remove excess paint with a toothpick. Smooth surface of glass surface help the removing operation.
Just on the hound helicopter I used the masking liquid from microscale to protect the clear parts from final satin coat.

About extinguers we discussed with, probably, Bish and other modelers on fsm forum about the color. My first idea was about a emerald green but after some research with others the classic red seems the more correct colour.
Image
User avatar
BorgR3mc0
Elite Member
Posts: 3311
Joined: Tue Mar 18, 2014 7:16 am
Location: Utereg

Re: Short Sunderland MK.I Italeri 1/72

Post by BorgR3mc0 »

So many pics that it is hard to pick what is my favorite part! Great work all around.
ImageImageImageImageImage
User avatar
CallSignOWL
Addicted Member
Posts: 1754
Joined: Mon Apr 07, 2014 12:45 pm

Re: Short Sunderland MK.I Italeri 1/72

Post by CallSignOWL »

ugh I hate you, I really do. :bow: :whiteflag:
Every take-off has a landing...some are just better than others
Post Reply

Return to “Aircraft Work in Progress”