Page 18 of 20
Re: 1/32 Hasegawa Bf109G-14 Hartmann
Posted: Fri Jul 17, 2020 3:27 pm
by speedgraflex
Good luck, John. I was thinking maybe you could try an increased curing time to reduce the instability, perhaps, but you know best. I have faith. Have a nice weekend.
Re: 1/32 Hasegawa Bf109G-14 Hartmann
Posted: Fri Jul 17, 2020 7:52 pm
by jkim
Luck is good to have and I'll probably need some before this one is through.
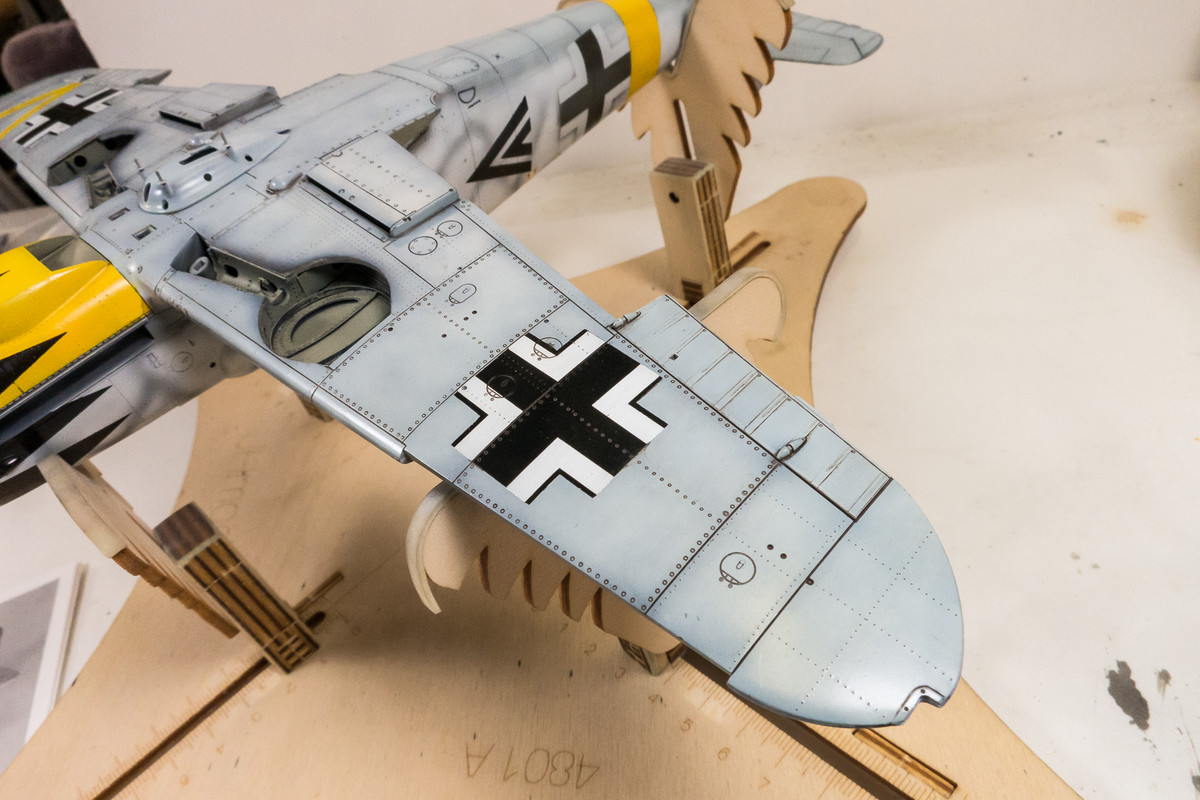
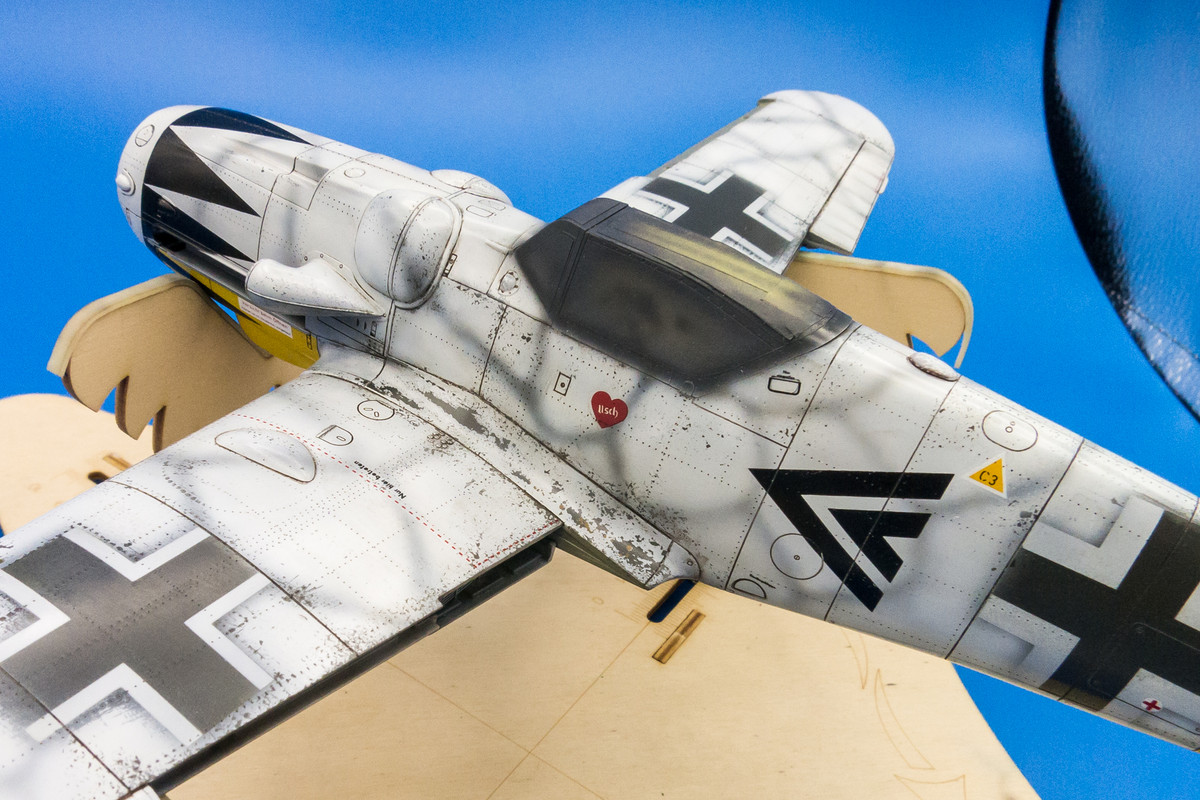
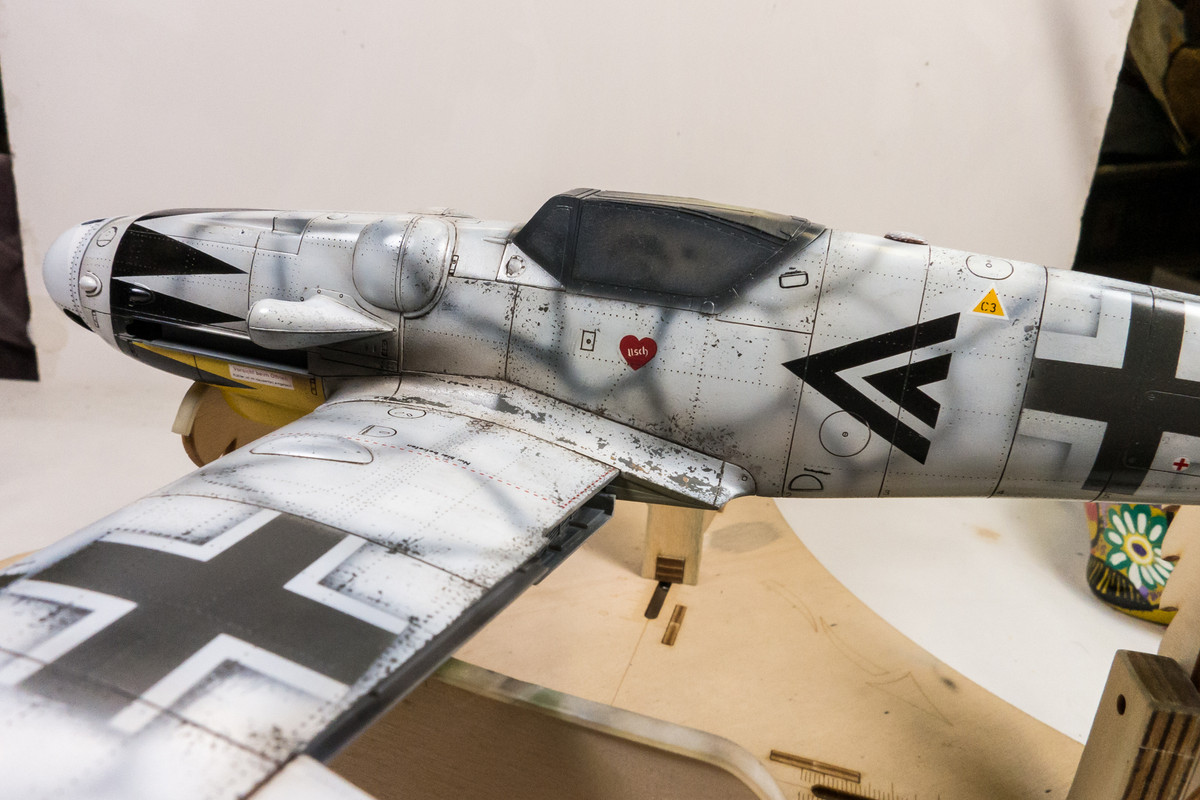
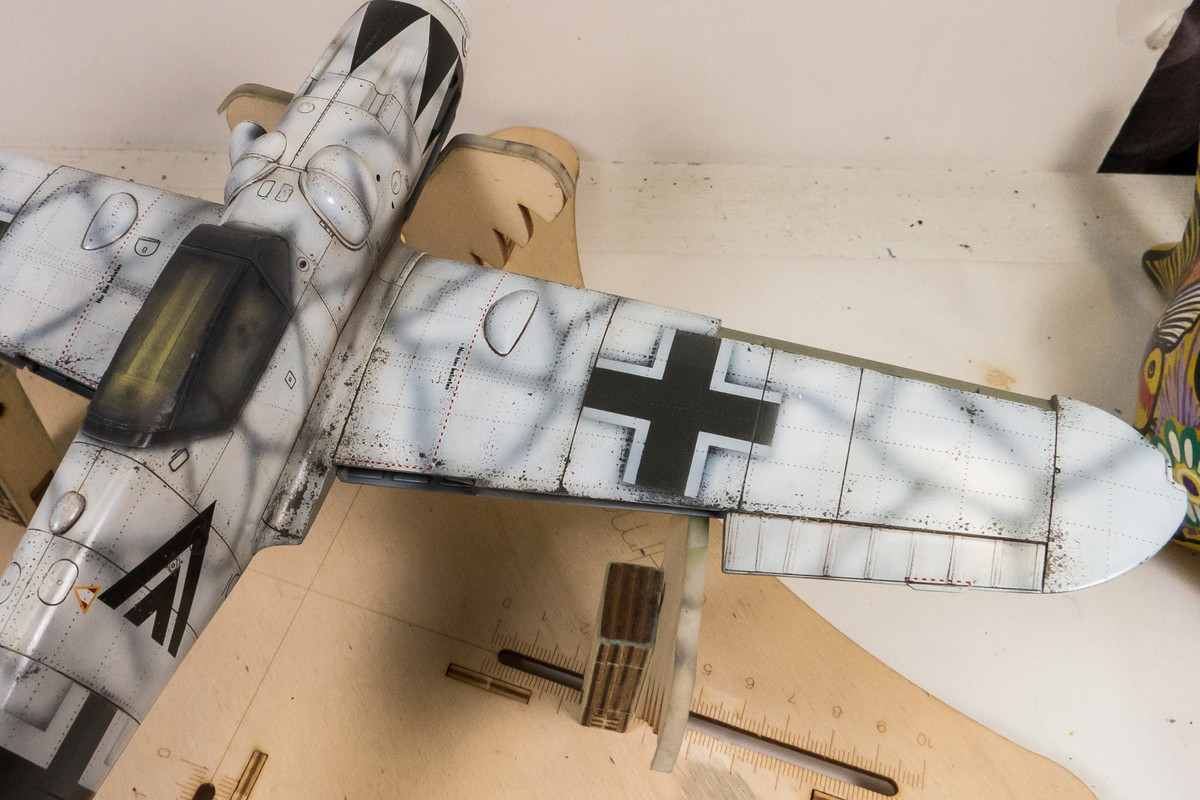
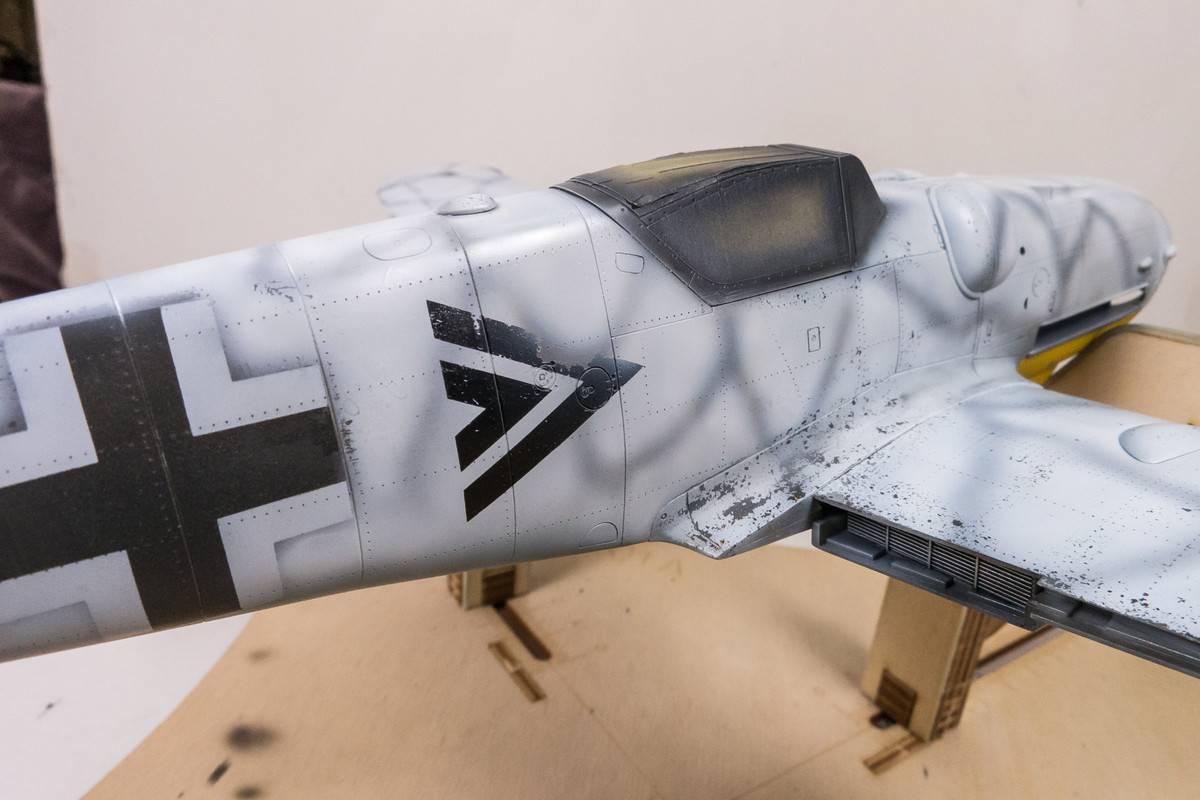
Here's a sample of the paint repairs that I'm performing at various locations. Since this one runs into a hard-edged marking, there are more steps involved.
First I remove the compromised white paint layer with tacky tape. Honestly, if I were to really try, I could probably remove most of the upper fuselage paint this way but I don't want to start completely over. Understanding that there are no more adhesive masks to be applied in this area, I TRY to constrain the removals to a small area. The area is scrubbed with Micromesh to reduce the hard edges of the chips.
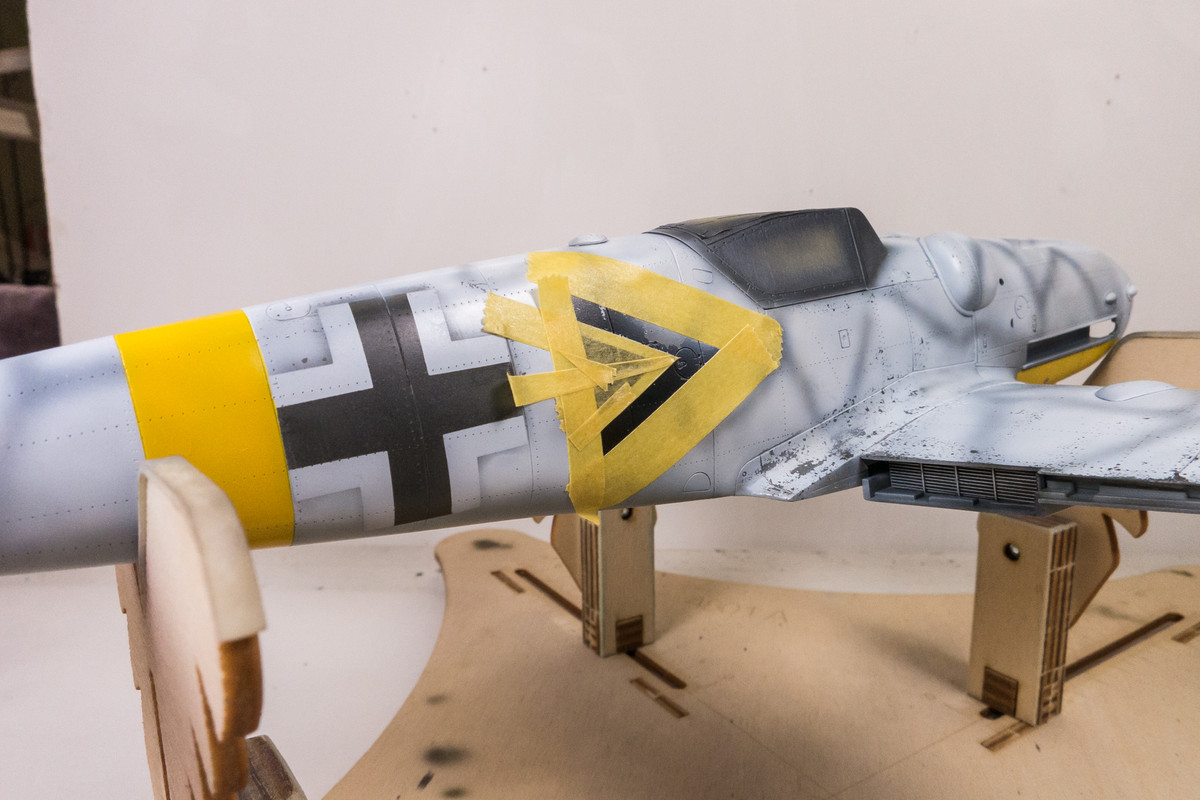
The darker base color is sprayed onto the repair area. I am using the lighter RLM 75 color because this shade sprays smoother than the RLM 74.
The white is then sprayed over the RLM 74.
Once this is dry, I mask off the black chevron. I can also cut another mask using the Silhouette Portrait but the Oramask is very tacky and I'm afraid of lifting more paint so I choose to use Tamiya yellow tape for this.
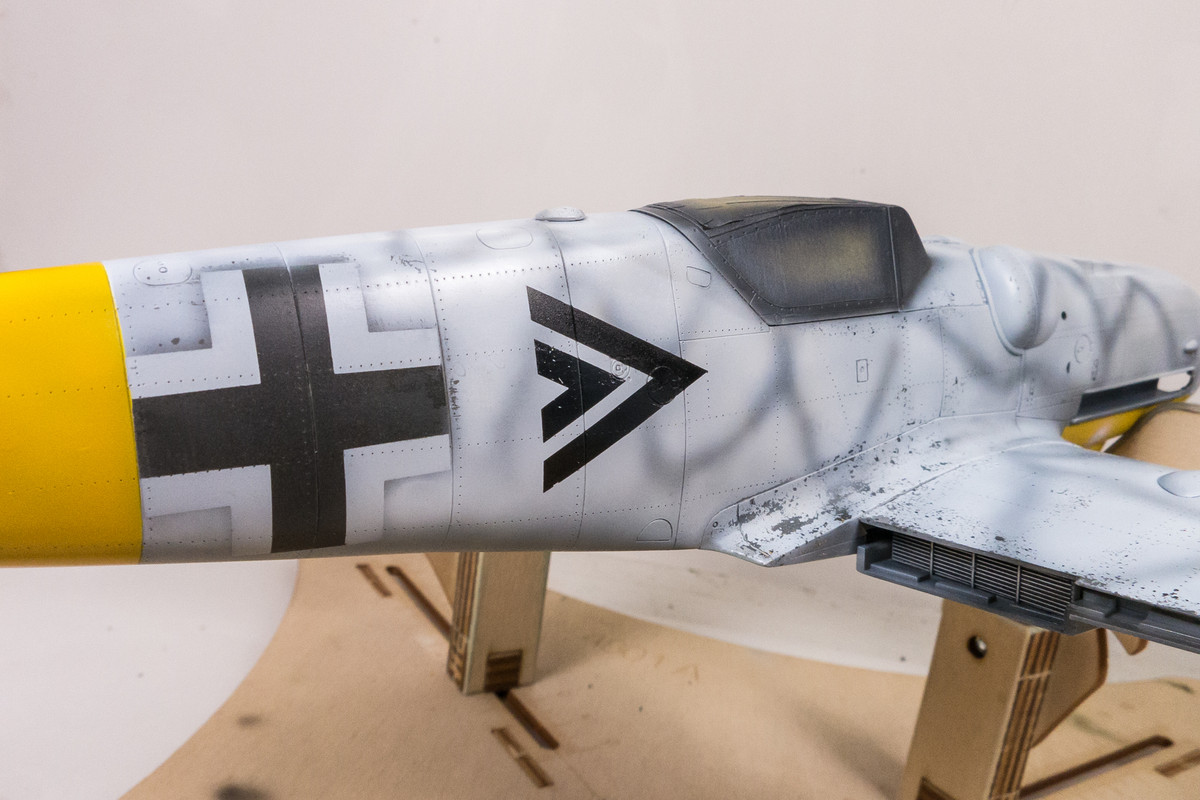
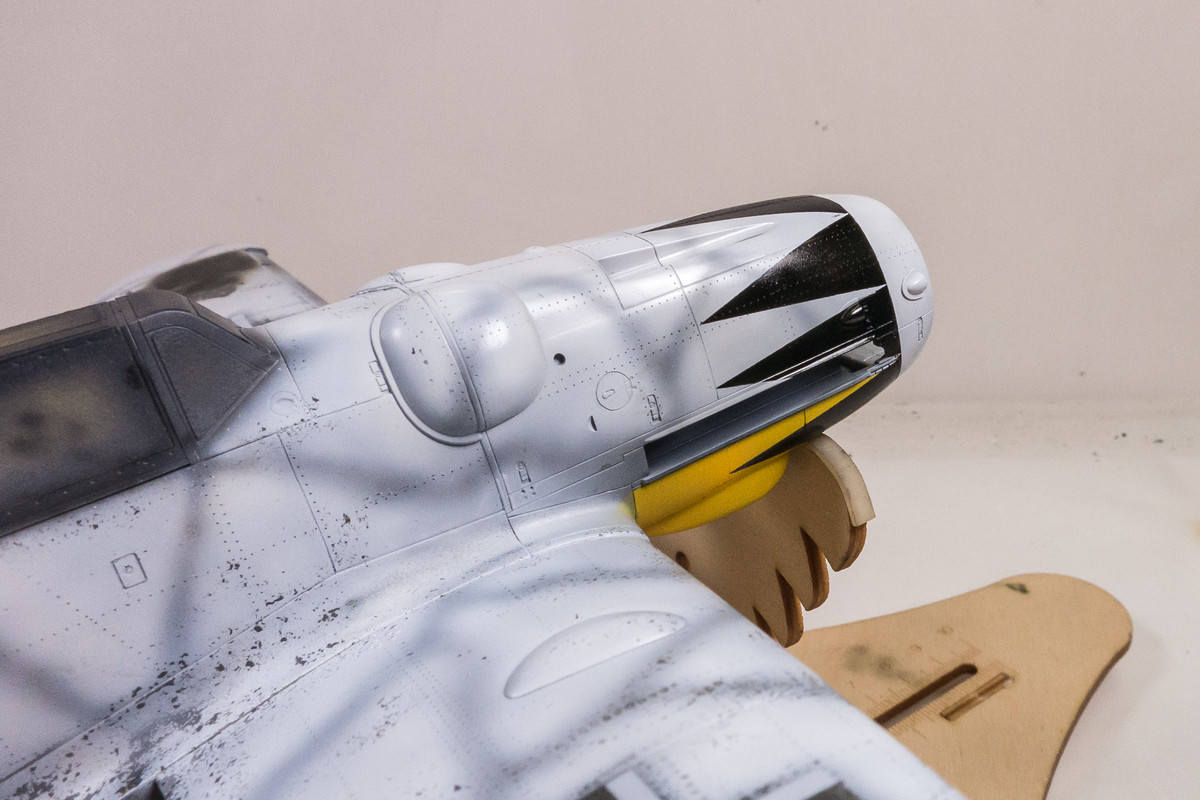
One area repaired! There is a bit of black overspray above the chevron that I need to take care of but it looks good otherwise.
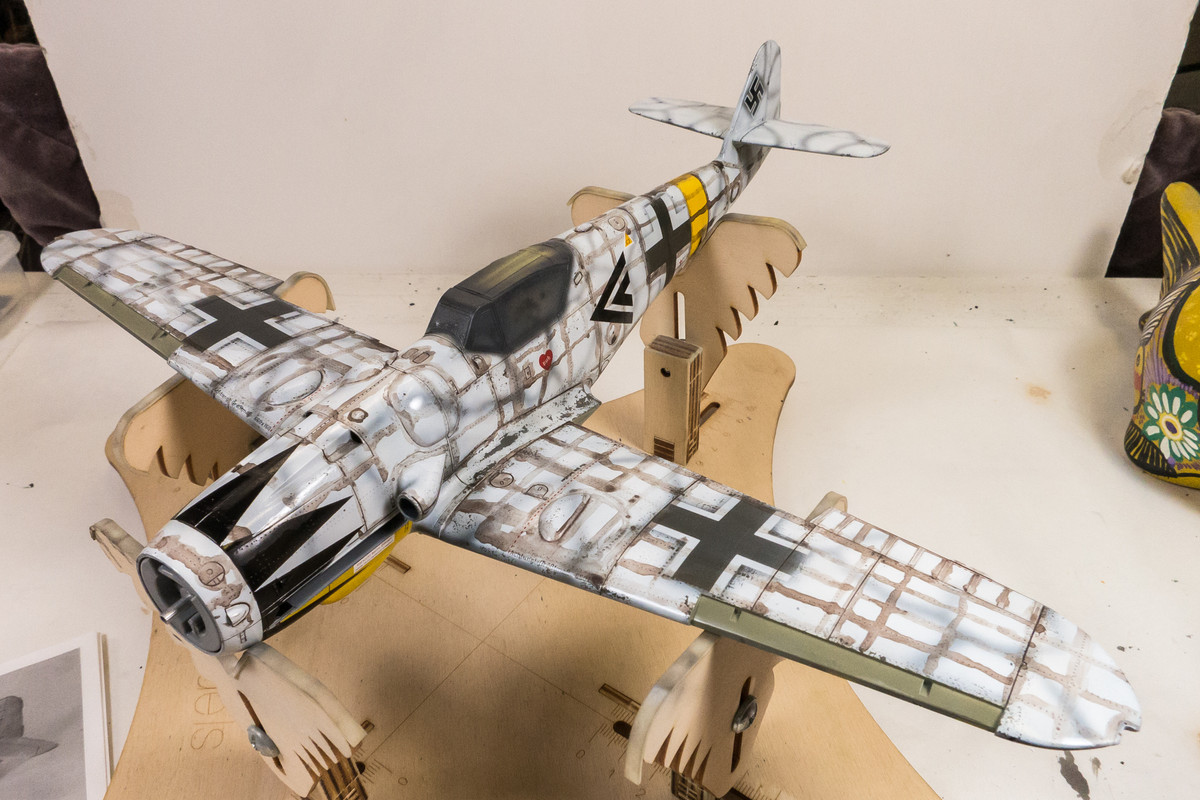
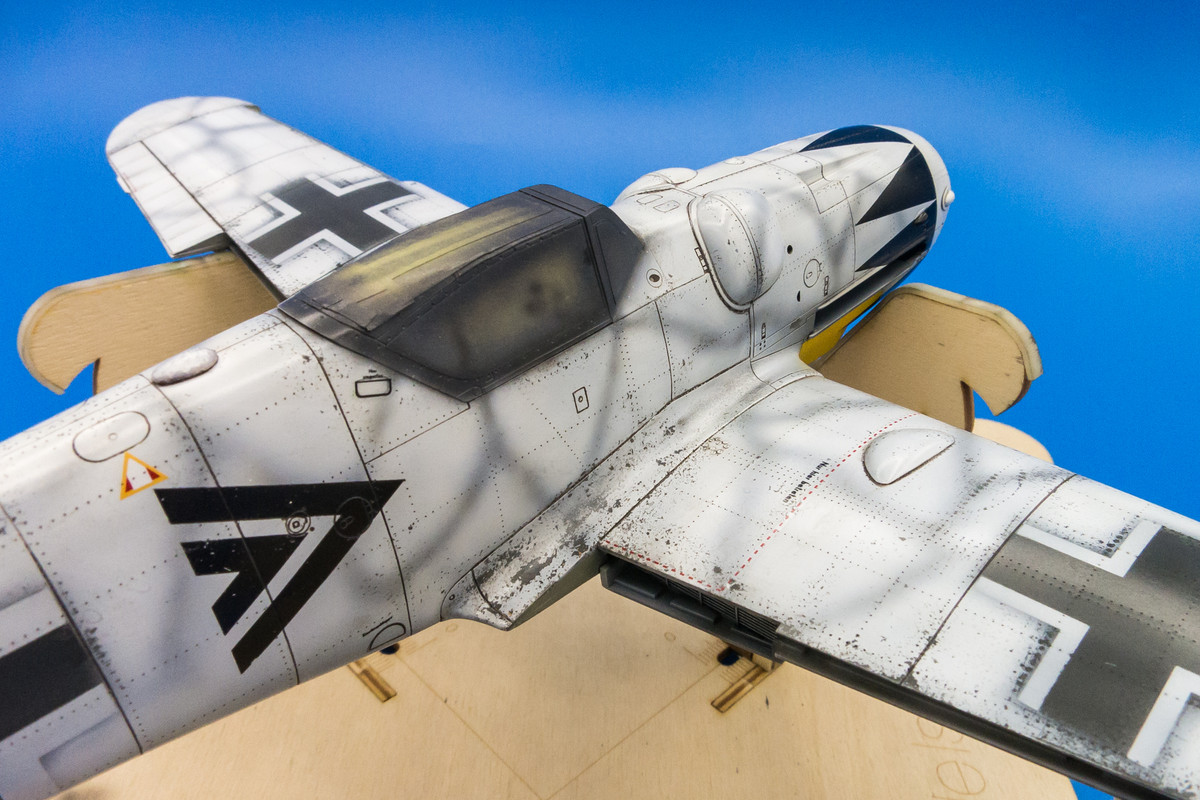
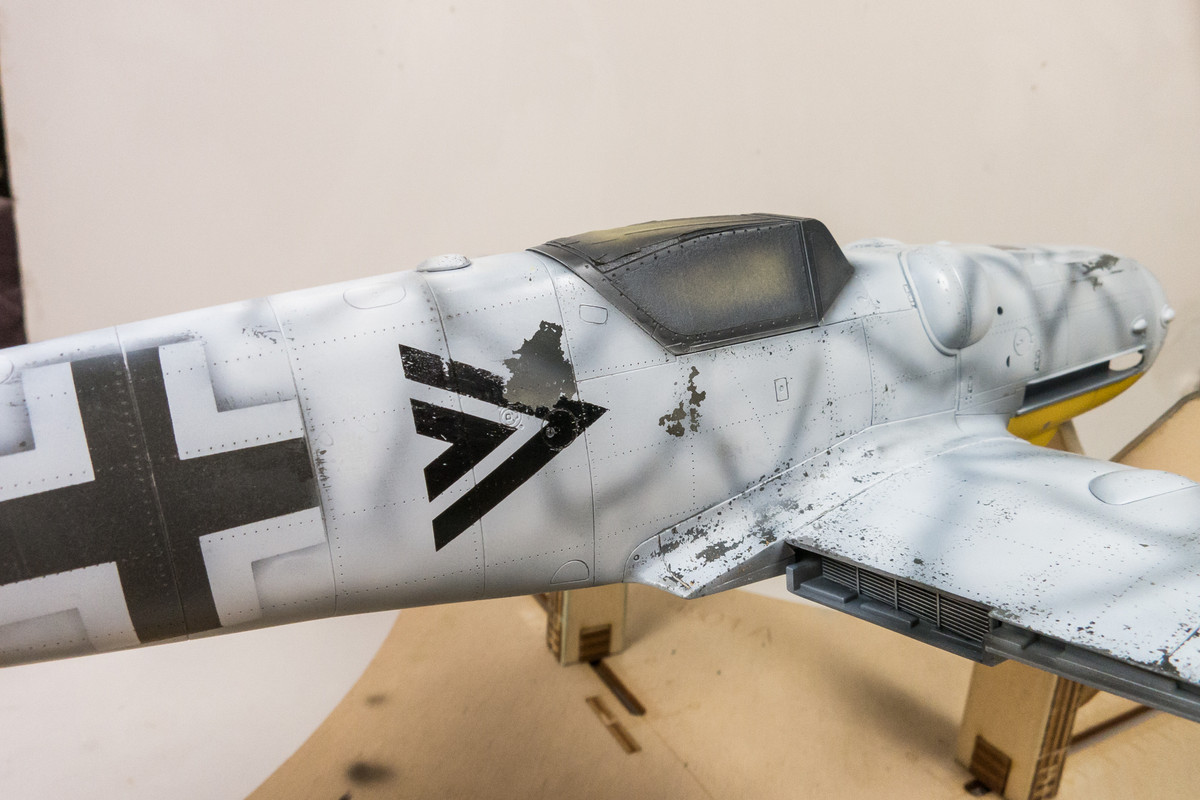
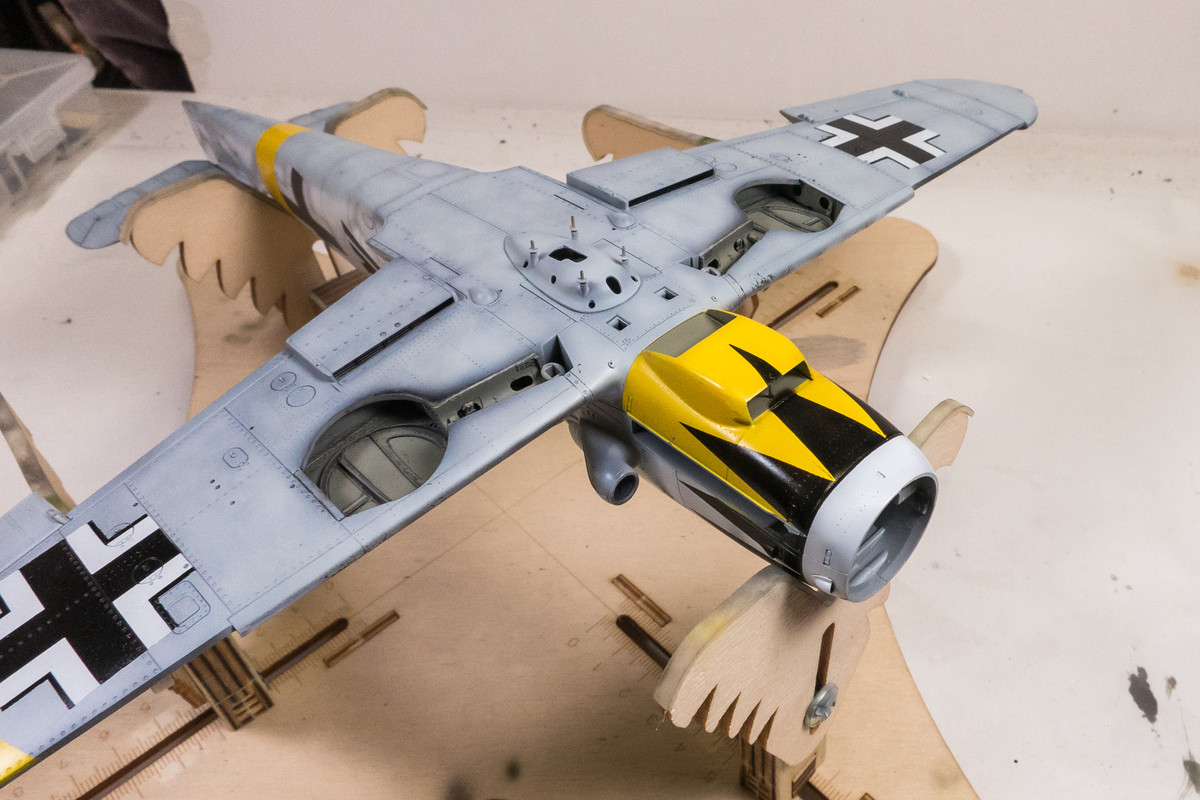
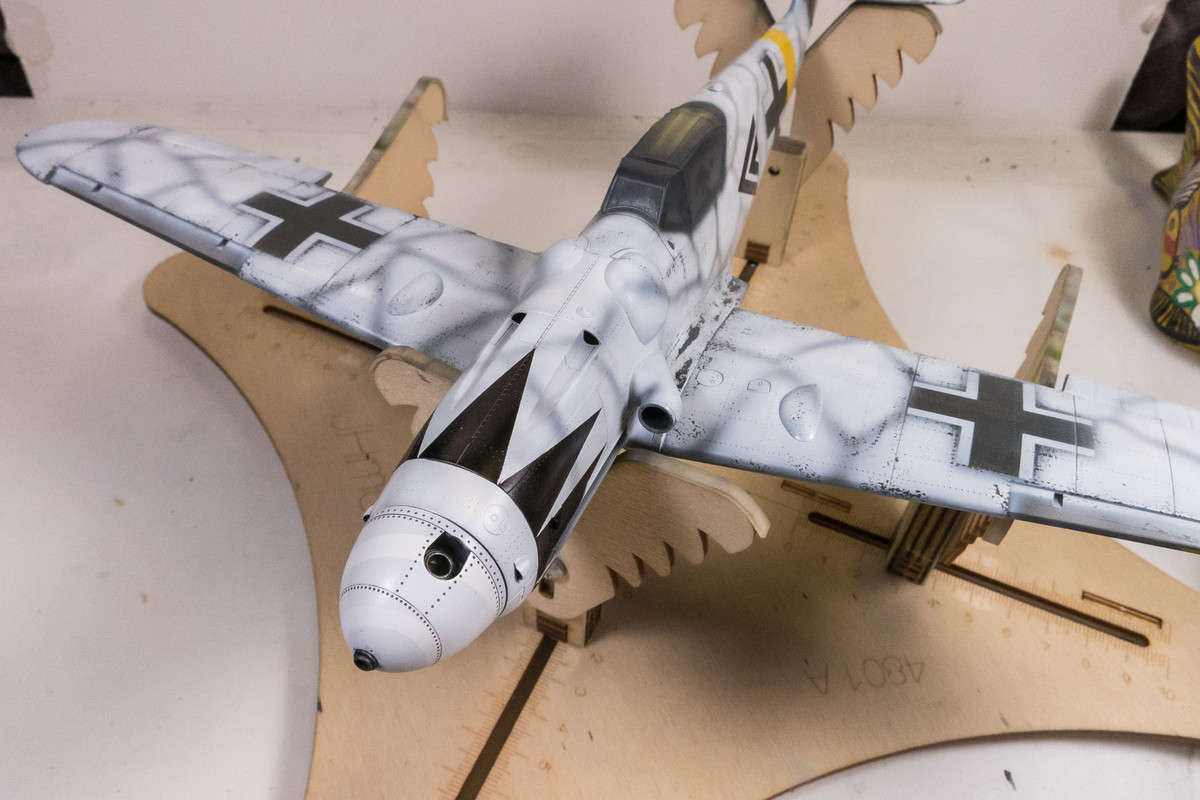
In addition to paint repairing various areas, I want to get the black tulip around the nose as well. I know that the extensive masking required for the tulip will probably lift more paint but I'm hoping for the best.
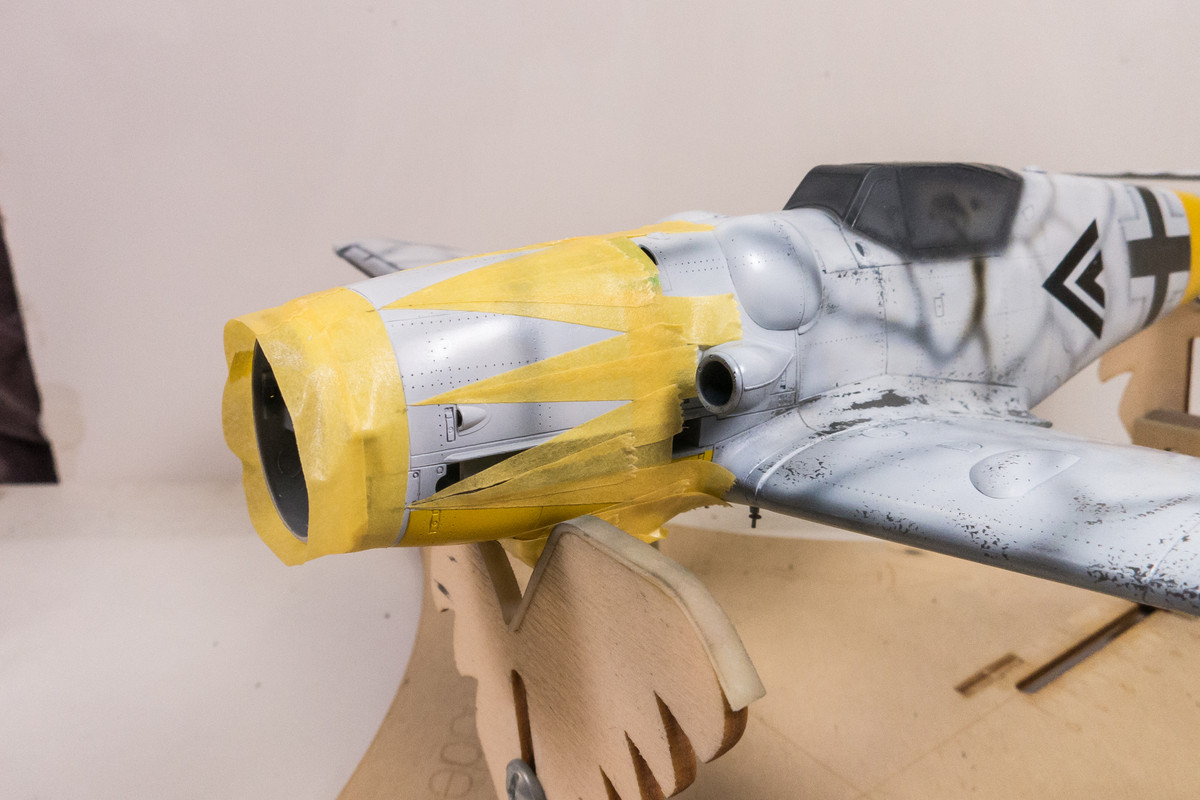
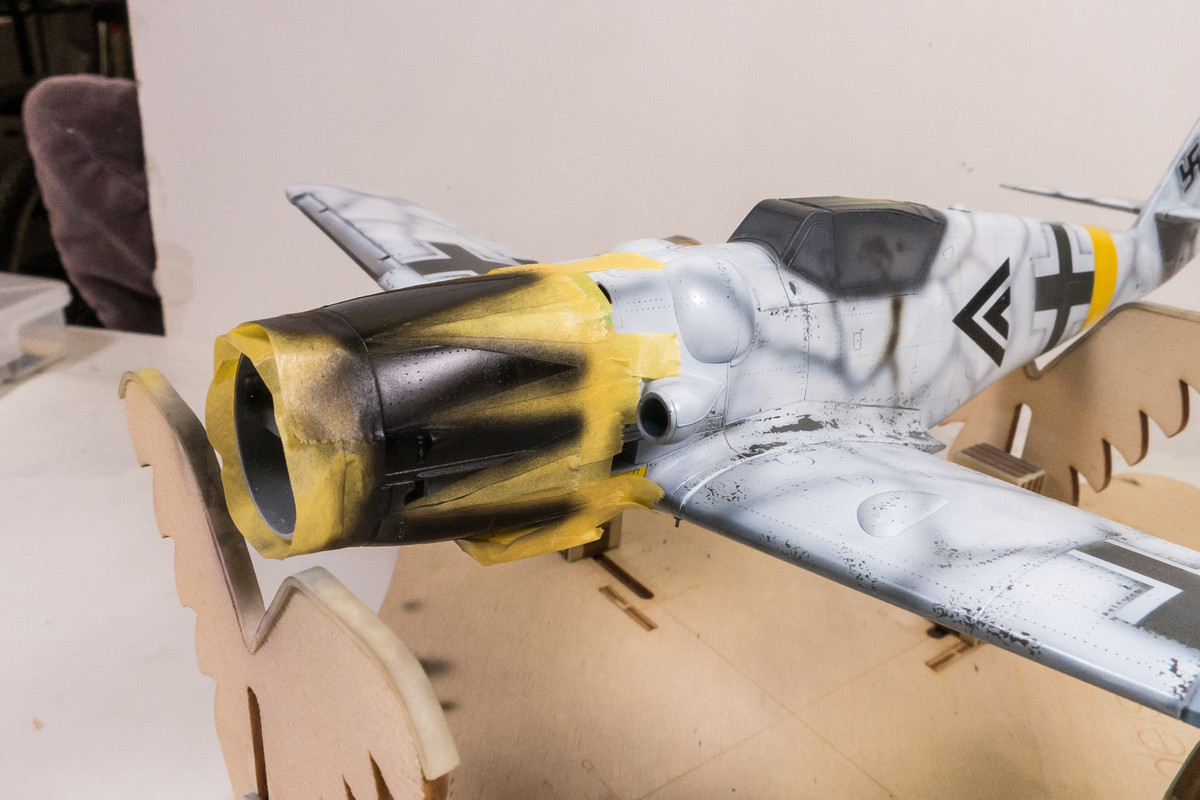
After spraying the black, I removed the tape as carefully as possible.
A bit of paint lifting on the engine cowling but thankfully, it is well away from the black tulip.
Better results than expected, paint lifting-wise. I'll let this dry completely before I perform the touch-ups necessary.
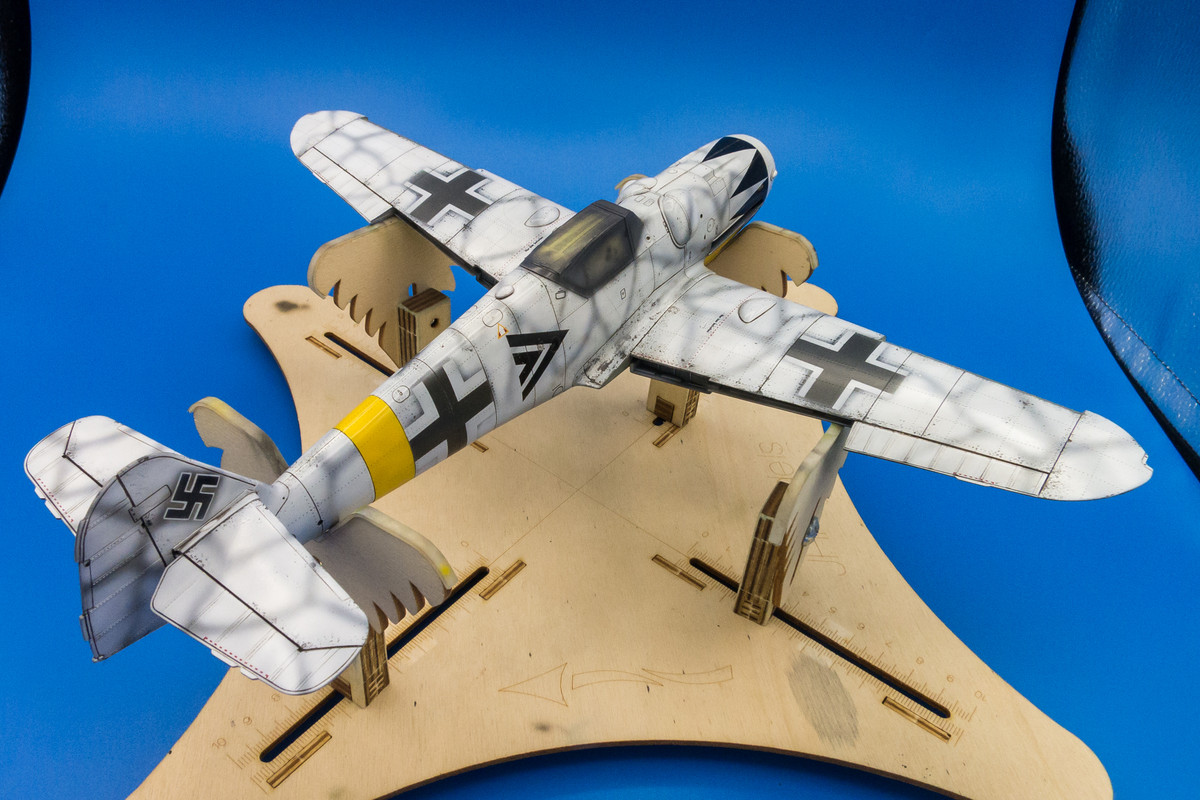
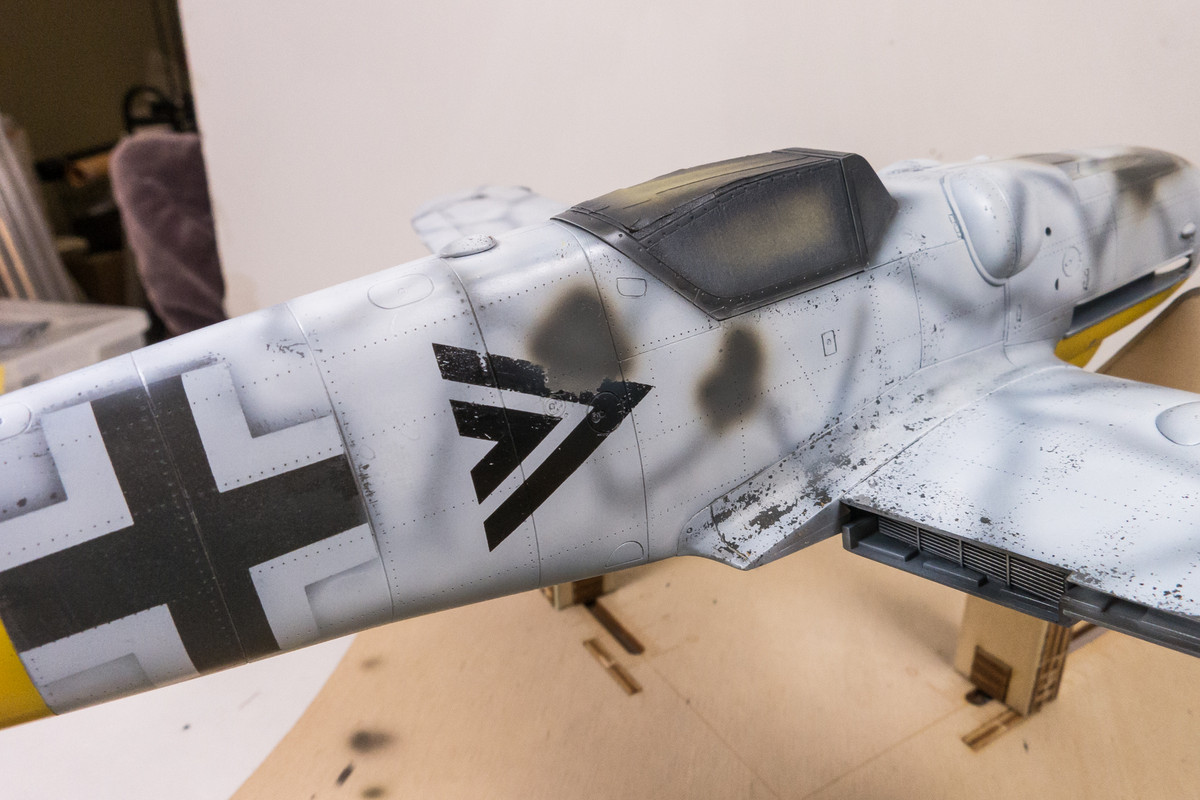
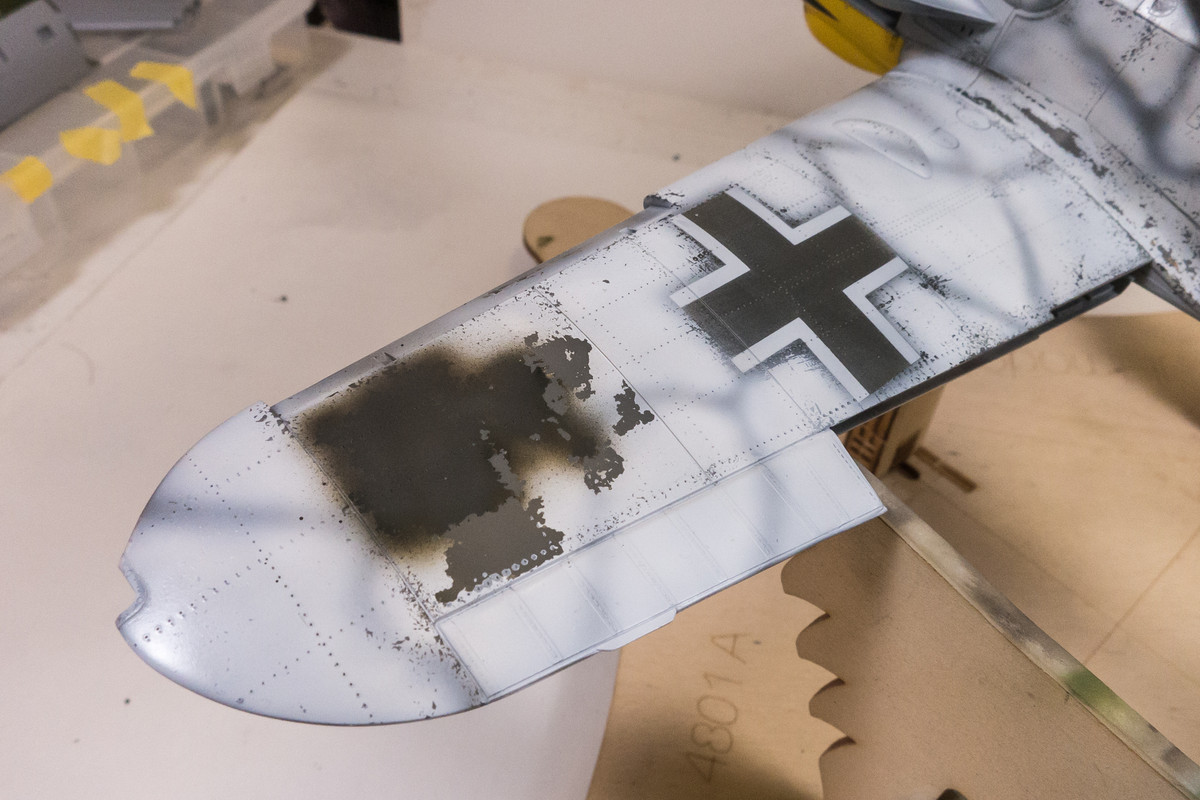
Look at that spot on the port wing.
Like I said, two steps forward, one step back...
Re: 1/32 Hasegawa Bf109G-14 Hartmann
Posted: Fri Jul 17, 2020 7:57 pm
by LyleW
John, very impressive repair work! Well done.
Re: 1/32 Hasegawa Bf109G-14 Hartmann
Posted: Fri Jul 17, 2020 8:03 pm
by Floki
Your repair work is fantastic! It's just too bad you have so much to repair it can be really discouraging.
Re: 1/32 Hasegawa Bf109G-14 Hartmann
Posted: Fri Jul 17, 2020 9:19 pm
by jkim
Thanks guys! Not too discouraged. Just something that happens and since I know WHY it happened, I can't really get mad at it.
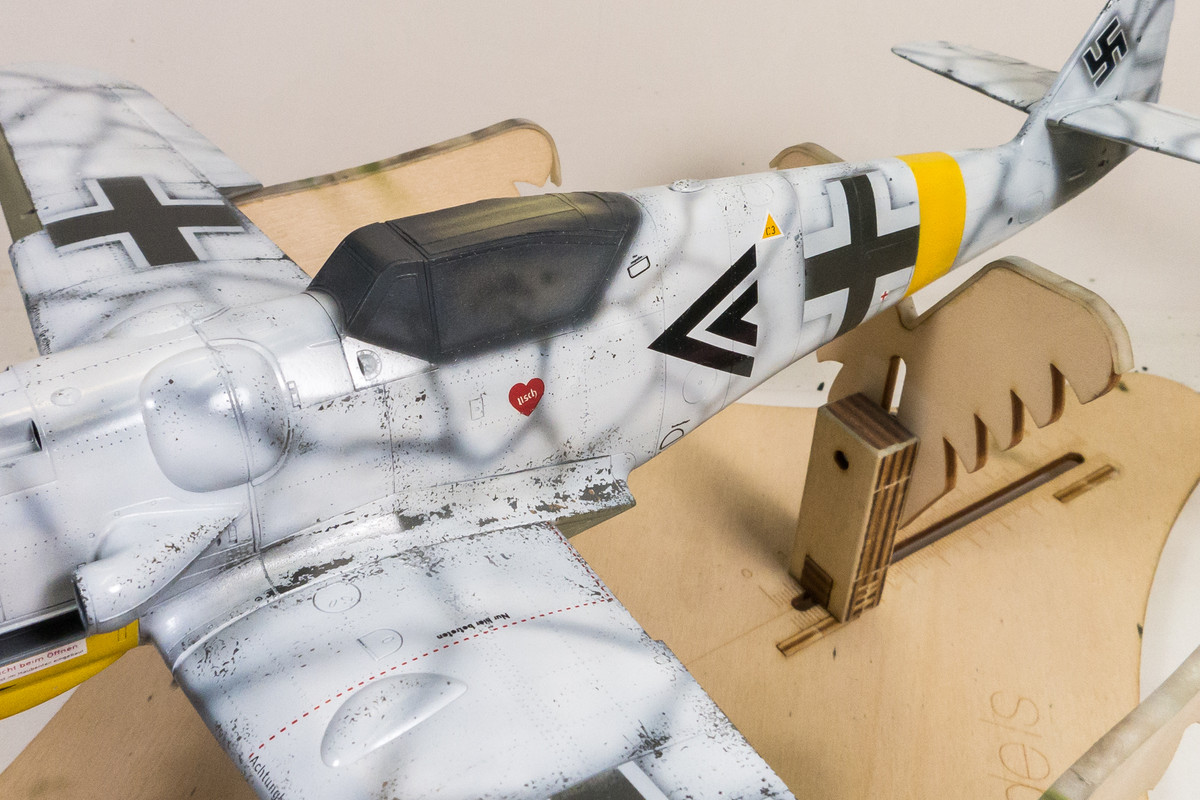
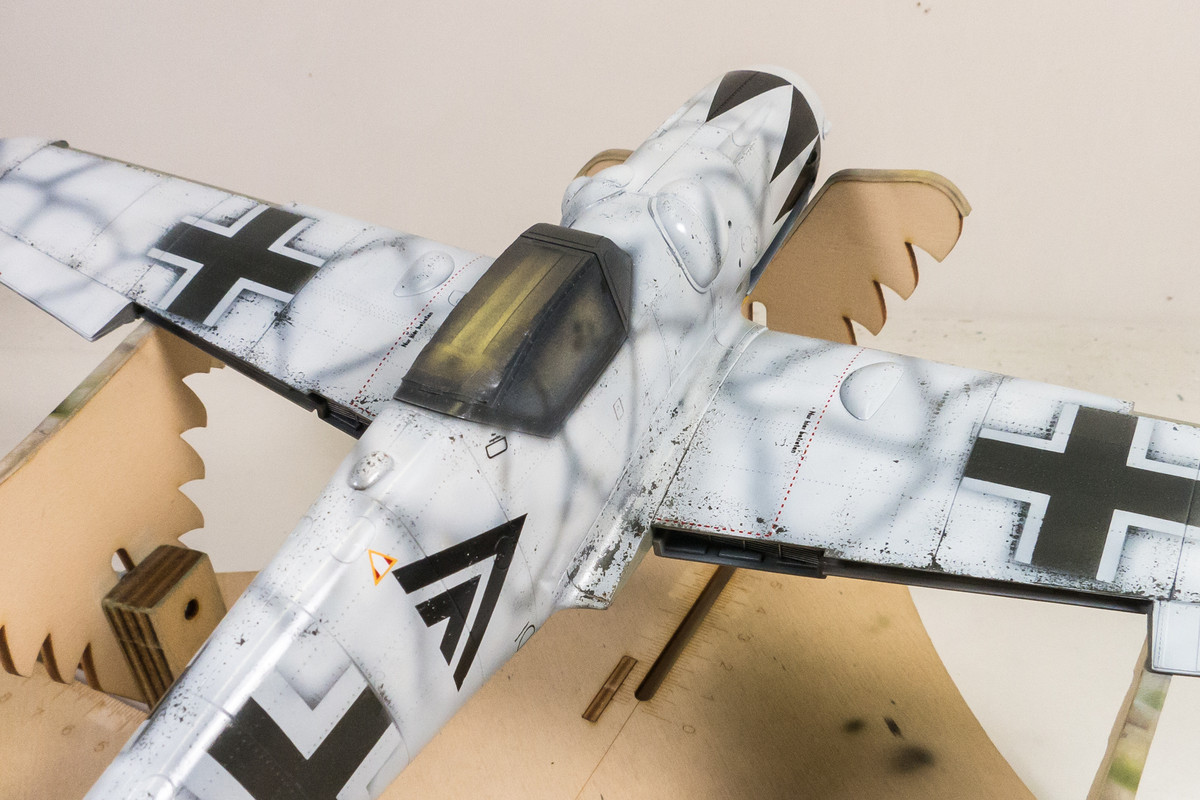
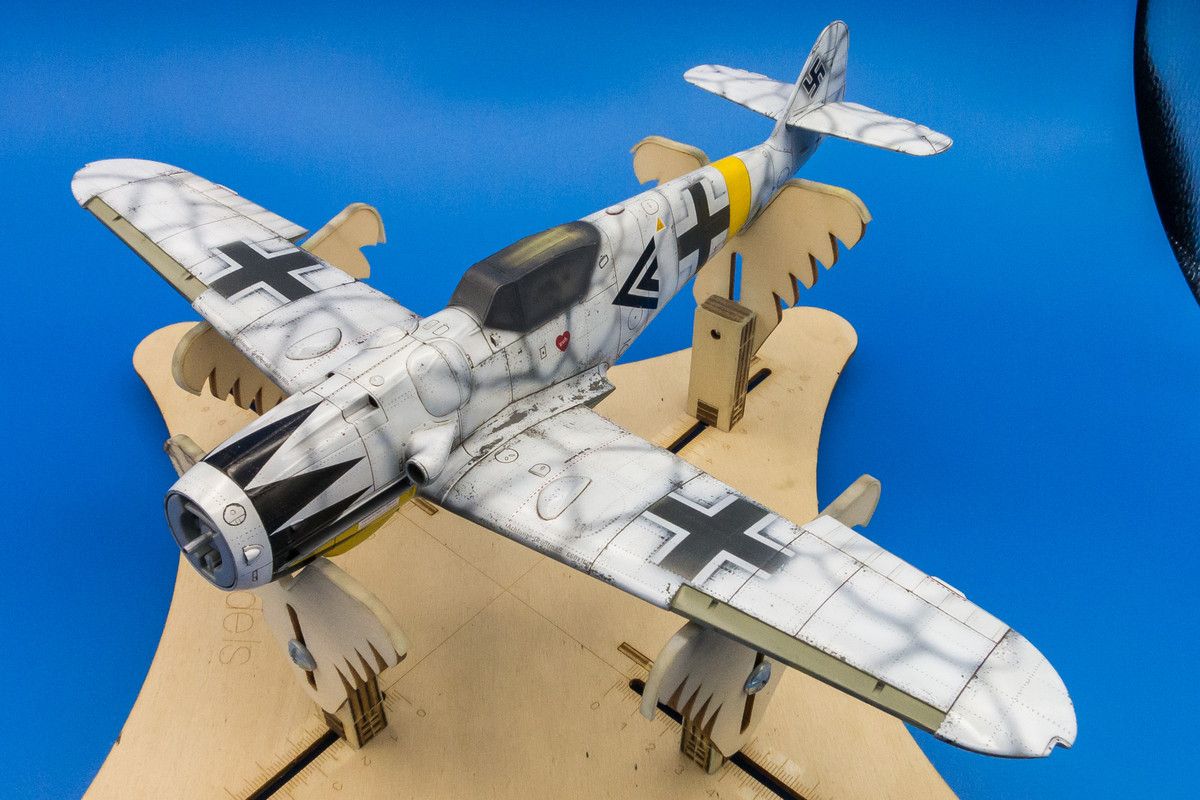
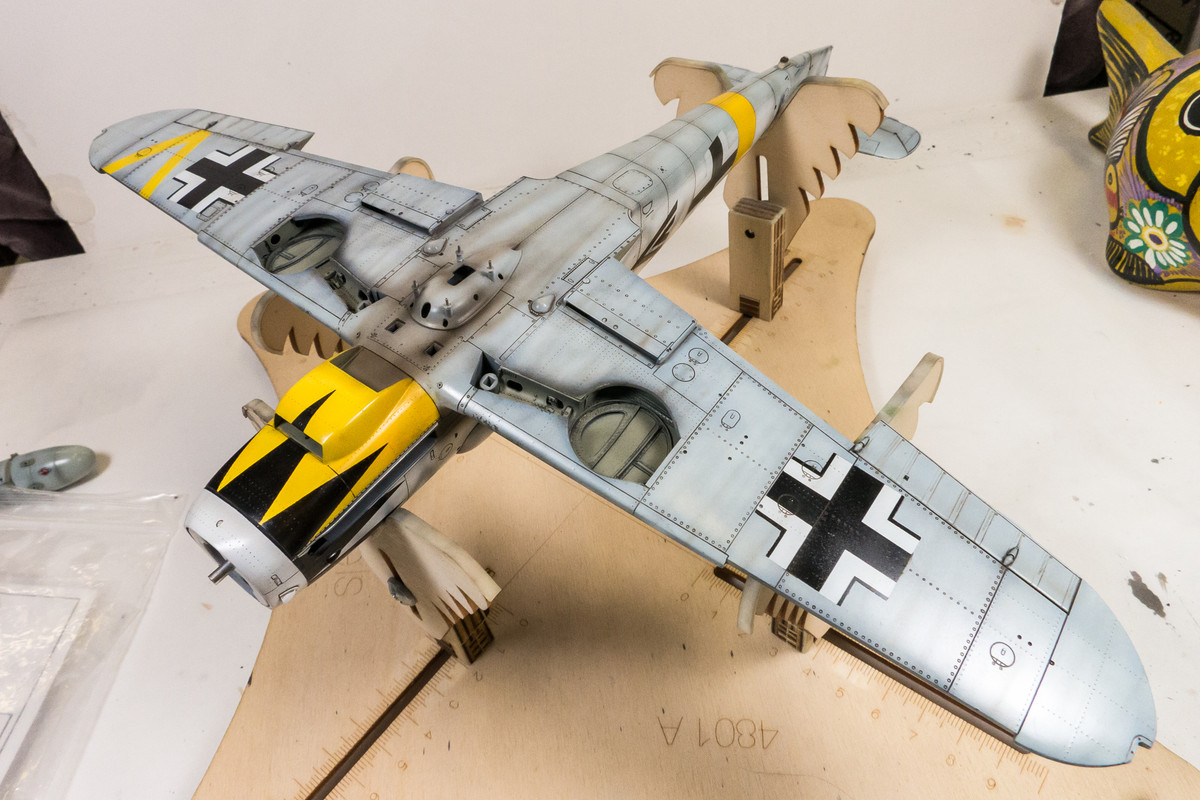
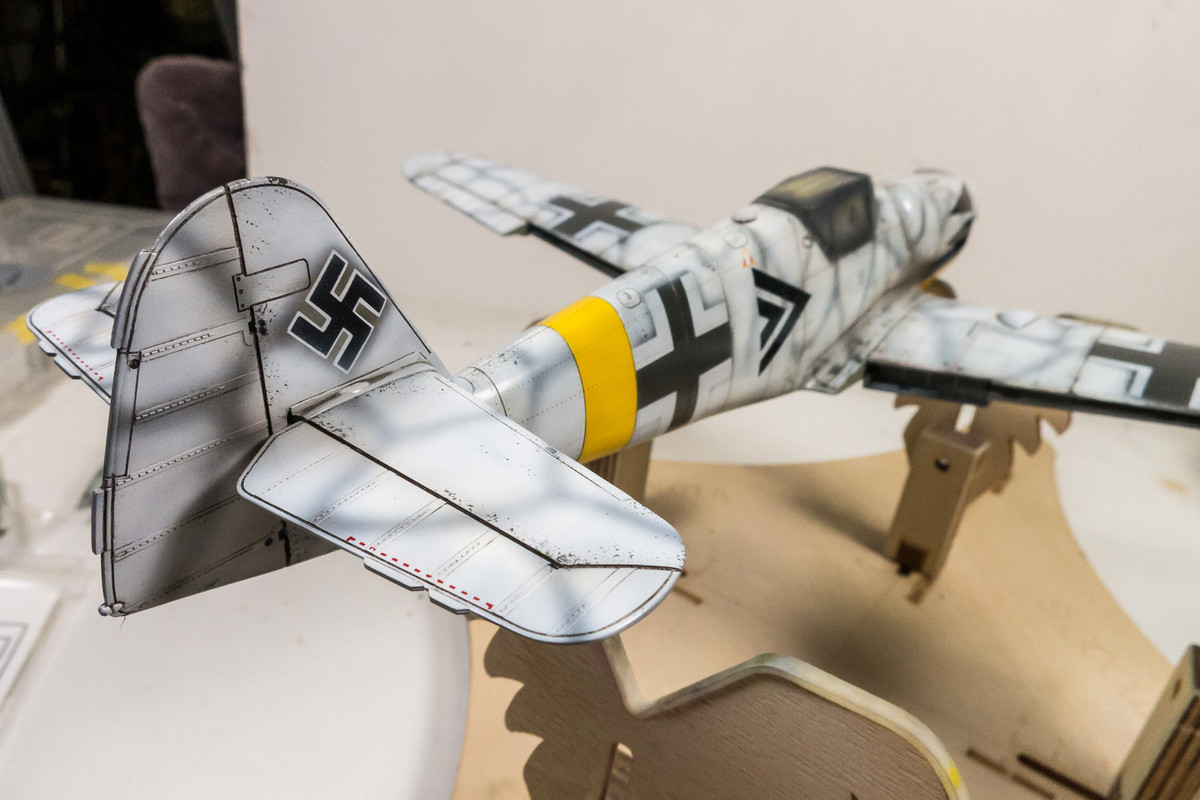
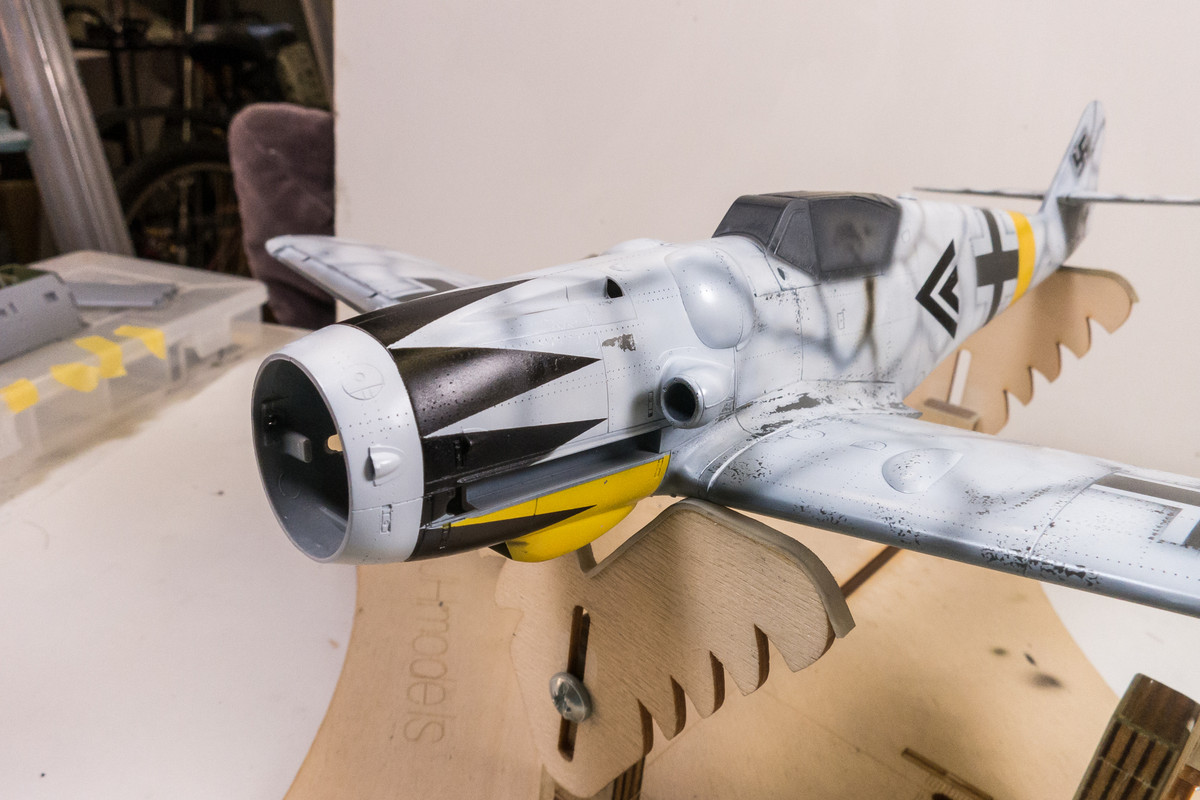
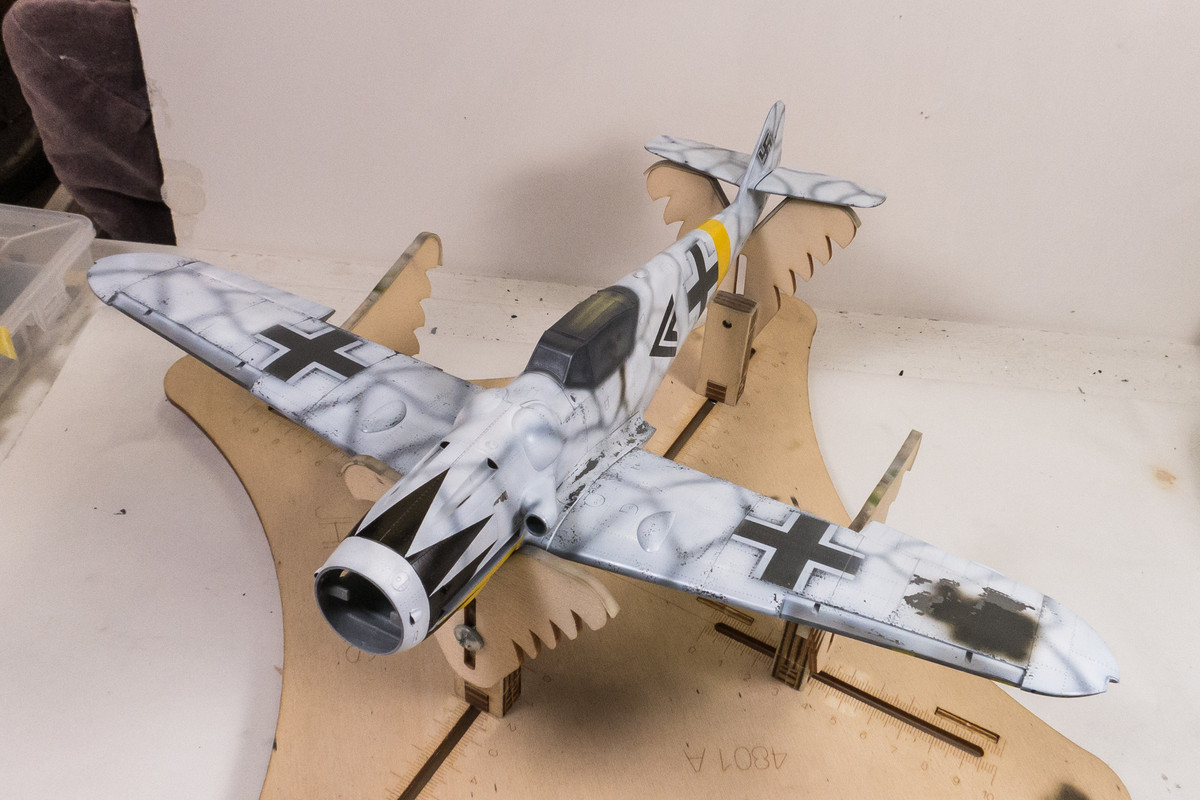
Some paint repairs have been made including the one by the black tulip and the one on the port wing. Other areas have popped up but they are getting smaller and less.
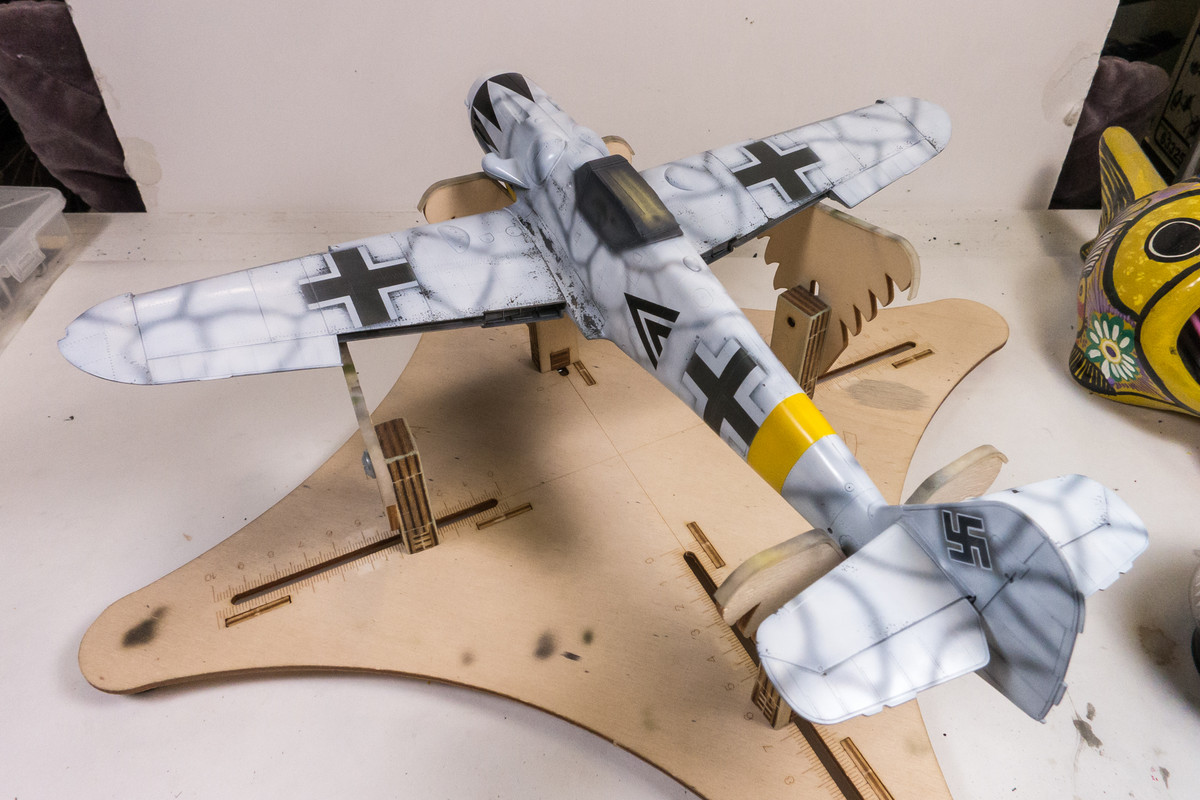
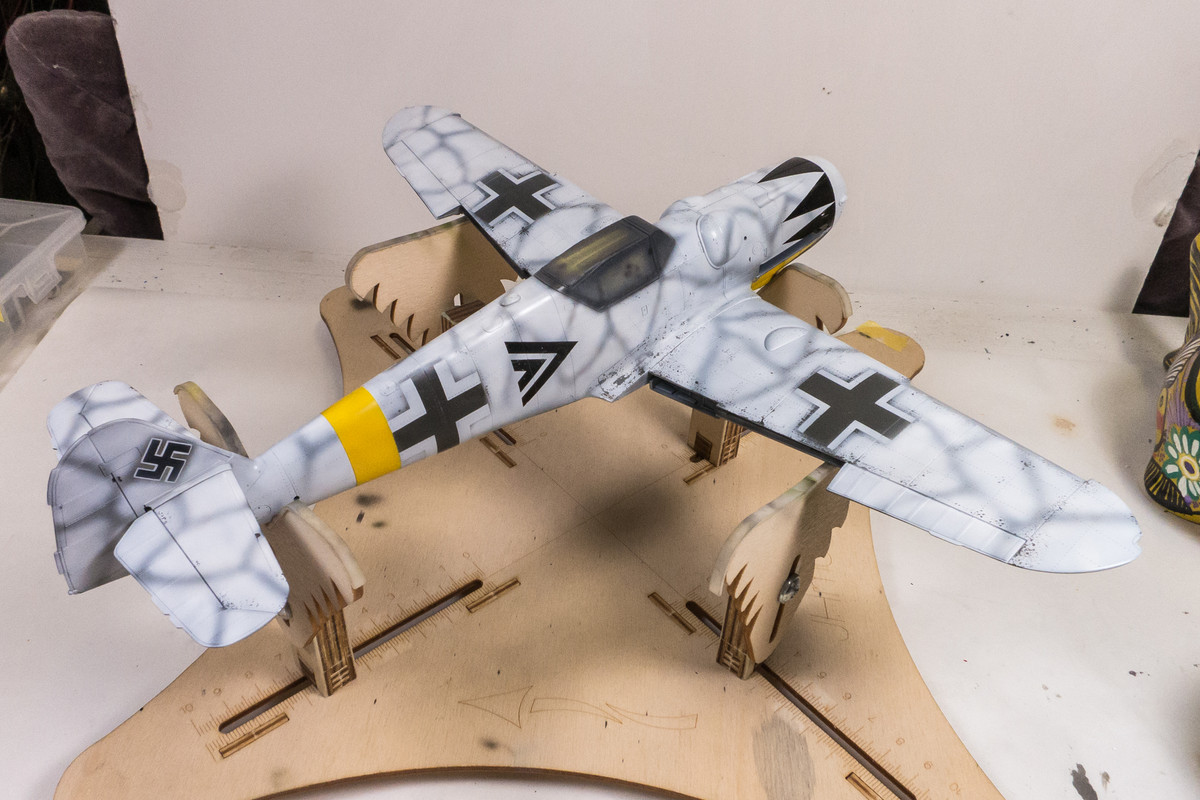
Popped the painted spinner onto the front to give us an idea of where we are headed.
Re: 1/32 Hasegawa Bf109G-14 Hartmann
Posted: Sun Jul 19, 2020 6:48 pm
by jkim
Re: 1/32 Hasegawa Bf109G-14 Hartmann
Posted: Sun Jul 19, 2020 11:48 pm
by jkim
Re: 1/32 Hasegawa Bf109G-14 Hartmann
Posted: Mon Jul 20, 2020 12:30 am
by Floki
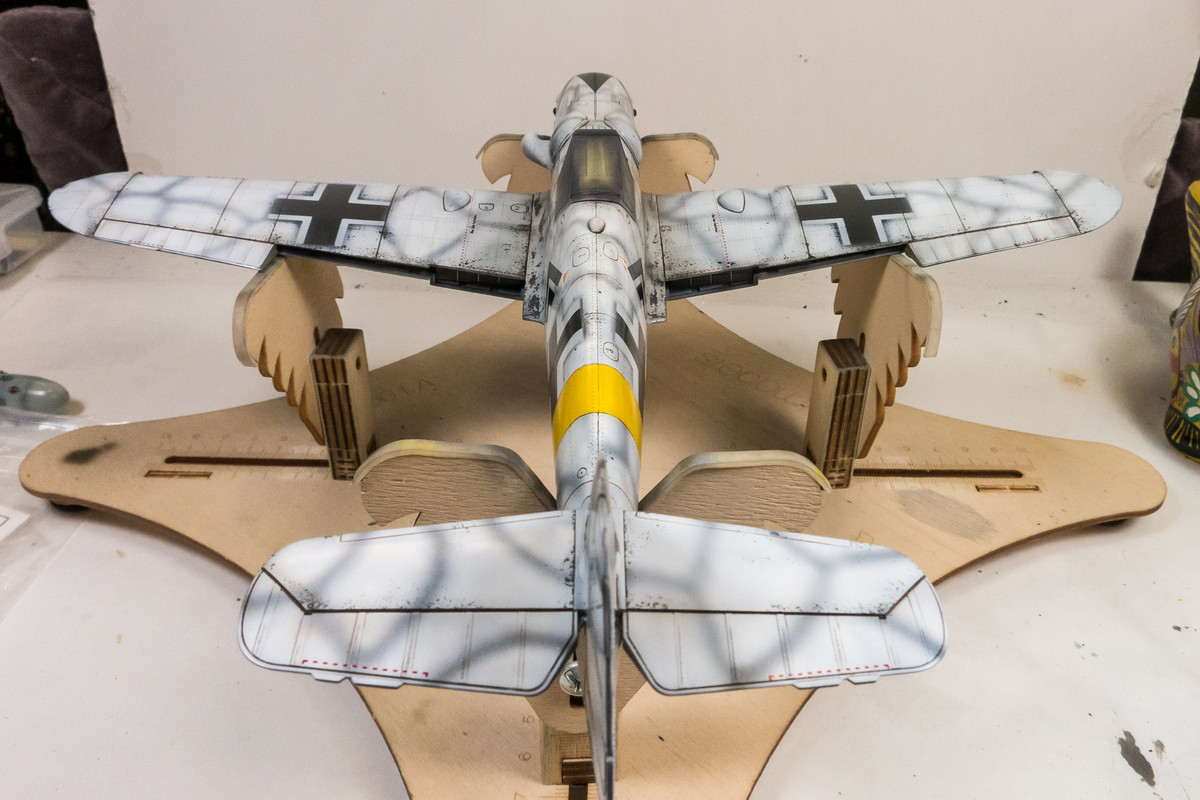
Beautiful weathering. You're capturing the look of a aircraft operating in cold weather and muddy conditions perfectly.
Re: 1/32 Hasegawa Bf109G-14 Hartmann
Posted: Mon Jul 20, 2020 4:21 am
by mustang1989
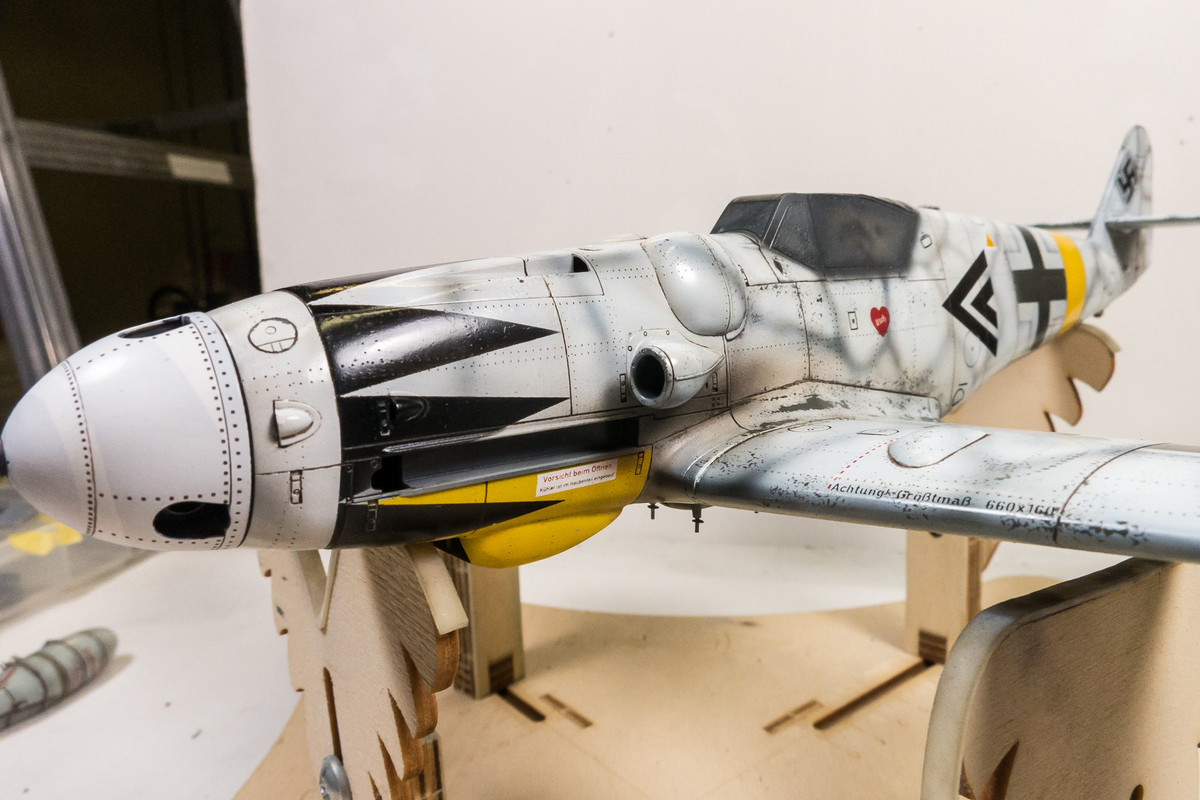
And there you have it! It looks as if there were never any problems to start with. That turned out truly remarkable John.
Re: 1/32 Hasegawa Bf109G-14 Hartmann
Posted: Mon Jul 20, 2020 9:08 am
by jeaton01
John, I say great recovery too. I quit using Oramask almost entirely, just using it once in a while for non critical things. Tamiya makes sheets of their masking tape and I cut that in my vinyl cutter, also a Cameo. The Tamiya part number is 87130**500. Each pack has 5 sheets of 7 X 9.5. Oramask shrinks over time, the adhesive is not near as good as the Tamiya product, and I also had a reaction with a clear coat that put me nearly back to step one on a wing. Grrr. Mostly use it for R/C stuff now.