Stik and Kari: It is a weird thing for two reasons , 1.) I never realized just how much difference there is between 1/24 and 1/25 scale and 2.) Just how out of proportion the old Monogram Camaros actually were. Things that make you go
Monogram 1969 Z to SS Camaro-MOVED TO COMPLETED-07/20
- mustang1989
- Moderator
- Posts: 5035
- Joined: Tue Mar 18, 2014 8:35 pm
Re: Monogram 1969 Z-28 Camaro-A Minor Setback-02/14
Thanks you guys for the good comments.
Stik and Kari: It is a weird thing for two reasons , 1.) I never realized just how much difference there is between 1/24 and 1/25 scale and 2.) Just how out of proportion the old Monogram Camaros actually were. Things that make you go
- Stikpusher
- Moderator
- Posts: 21180
- Joined: Sat Apr 05, 2014 8:37 pm
- Location: Ceti Alpha 5
Re: Monogram 1969 Z-28 Camaro-A Minor Setback-02/14
mustang1989 wrote:Thanks you guys for the good comments.
Stik and Kari: It is a weird thing for two reasons , 1.) I never realized just how much difference there is between 1/24 and 1/25 scale and 2.) Just how out of proportion the old Monogram Camaros actually were. Things that make you go
Sort of reminds me of comparing other "close" modeling scales: 1/72 to 1/76, 1/48 to 1/50, 1/35 to 1/32 or 1/40. The larger the scale is, the more pronounced the differences can appear to be proportionally.
"Surely I have made my meaning plain? I intend to avenge myself upon you, Admiral. I have deprived your ship of power, and when I swing 'round, I intend to deprive you of your life."
FLSM
FLSM
Re: Monogram 1969 Z-28 Camaro-A Minor Setback-02/14
Really interesting size difference.
Stuart Templeton 'I may not be good but I'm slow...'
- mustang1989
- Moderator
- Posts: 5035
- Joined: Tue Mar 18, 2014 8:35 pm
Re: Monogram 1969 Z-28 Camaro-A Minor Setback-02/14
Well folks I apologize for the long absence. Life's thrown me a bit of a curve ball so it's difficult for me to hit the forums like I wished I could. It's all good with the wife but I'm a lot busier than I used to be trying to help make things "work" around here. I'm not out or nuthin' like that but slowed a little.
I'm at a tough point in this build. I actually had this thing primed and painted as of last Friday but then things went wrong...........REALLY wrong. I had sanded all of the molded emblems from the body and primed with Tamiya Primer. Using automotive paint (Mystic Teal Metallic) I began to shoot the color onto the body. It all looked superb! I mean it was the best coat of color I've laid down yet , and then.....................it went south................in a hurry! My emblems all came back but instead of being raised they were sunken in. I'll Illustrate:
Additionally there were small ripples in the plastic!!!!!!!!!! Dammit!! I've since stripped all of the paint from the body and have been sanding all dang week. I put some plastic sprue shavings in a jar and mixed some Tamiya thin cement with it to form a liquid plastic and applied it to all areas where the emblems were, let it harden and smoothed all of those back out. I still have some touch up to go but should be ready for AIRBRUSHING this paint on in thin layers by the end of the weekend. I just shot the paint on way to thick is all that happened and the bad thing is ...................I know better. I finally got it back in primer as of yesterday morning:
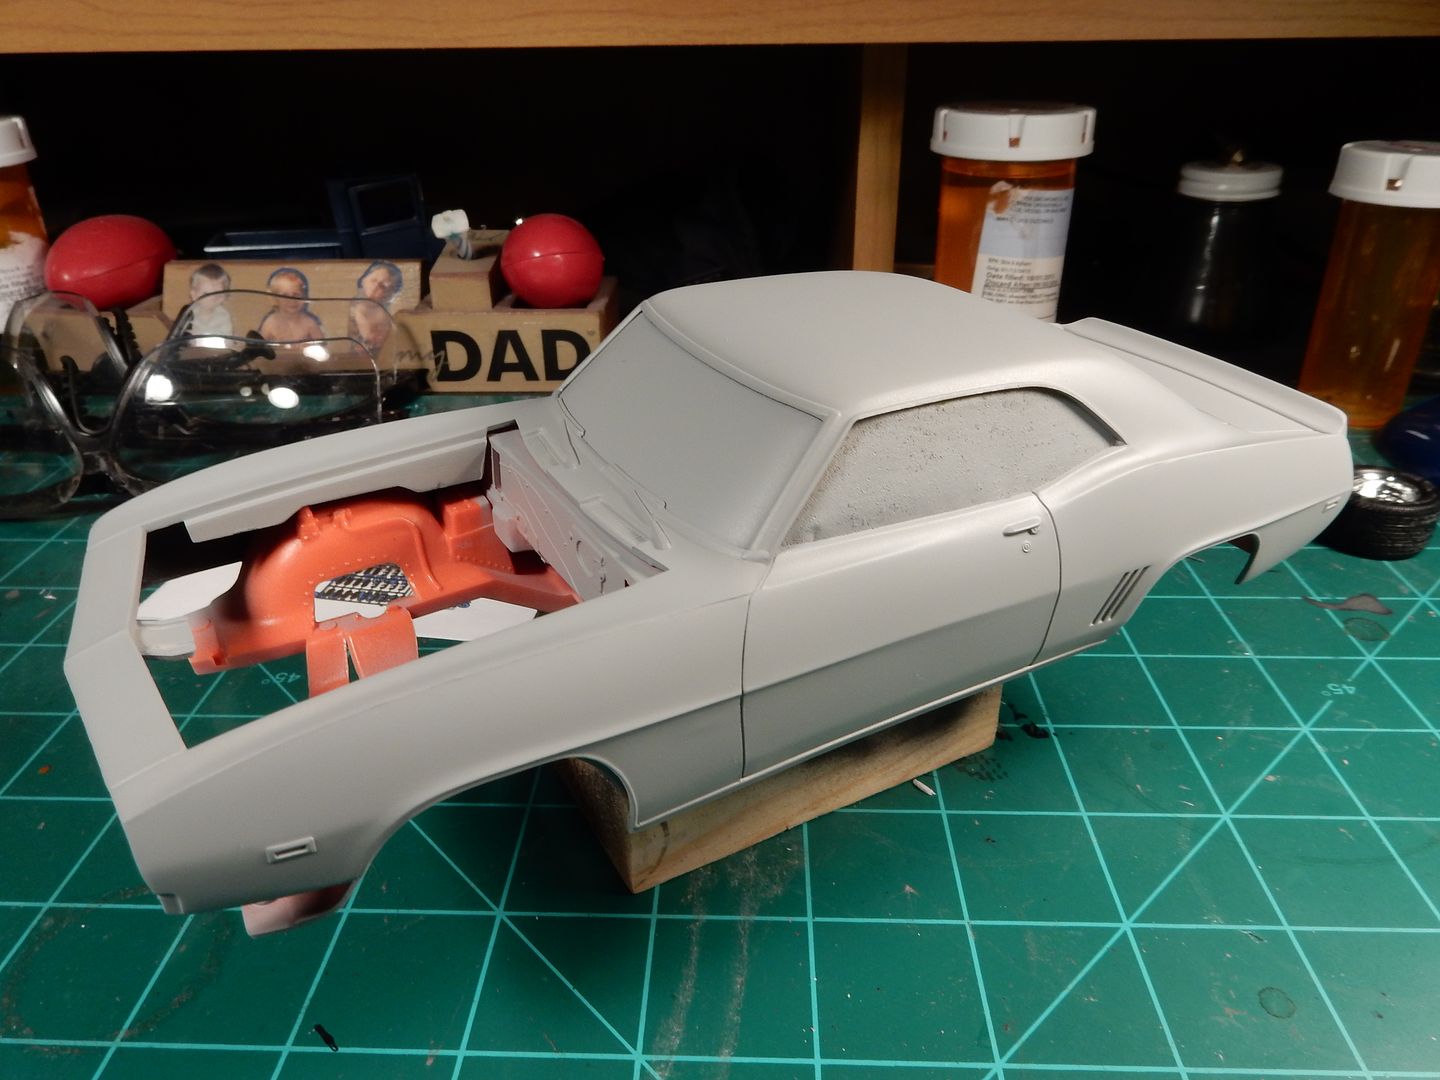
So far so good there. I'll let it dry for a couple of days and try the base coat again with the airbrush.
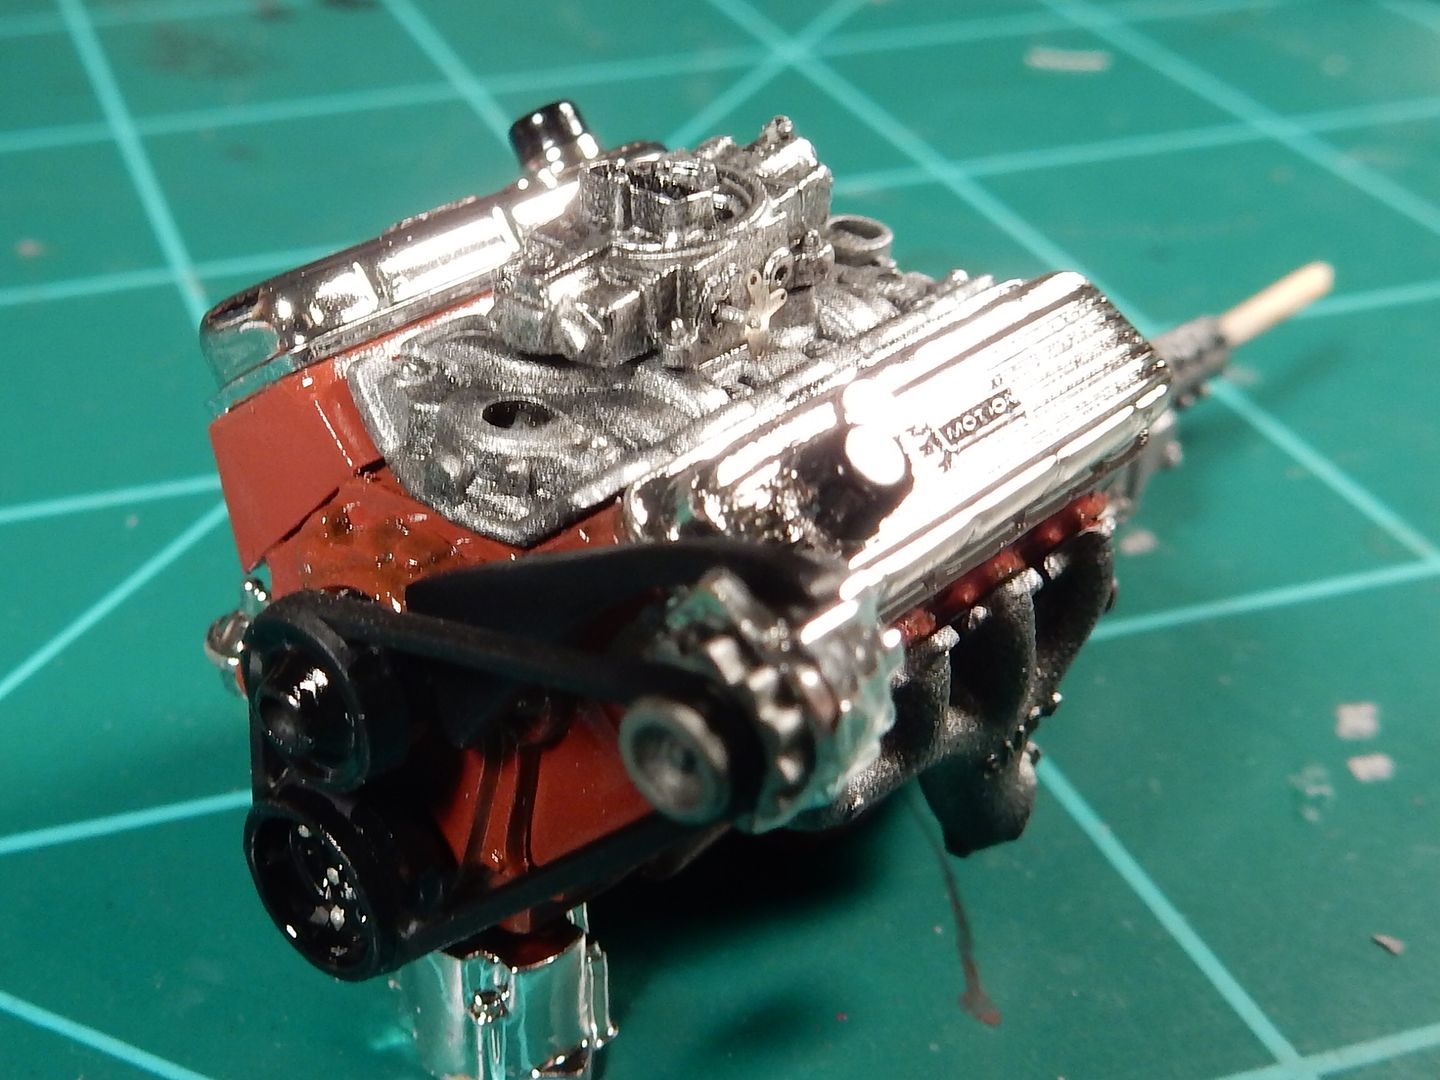
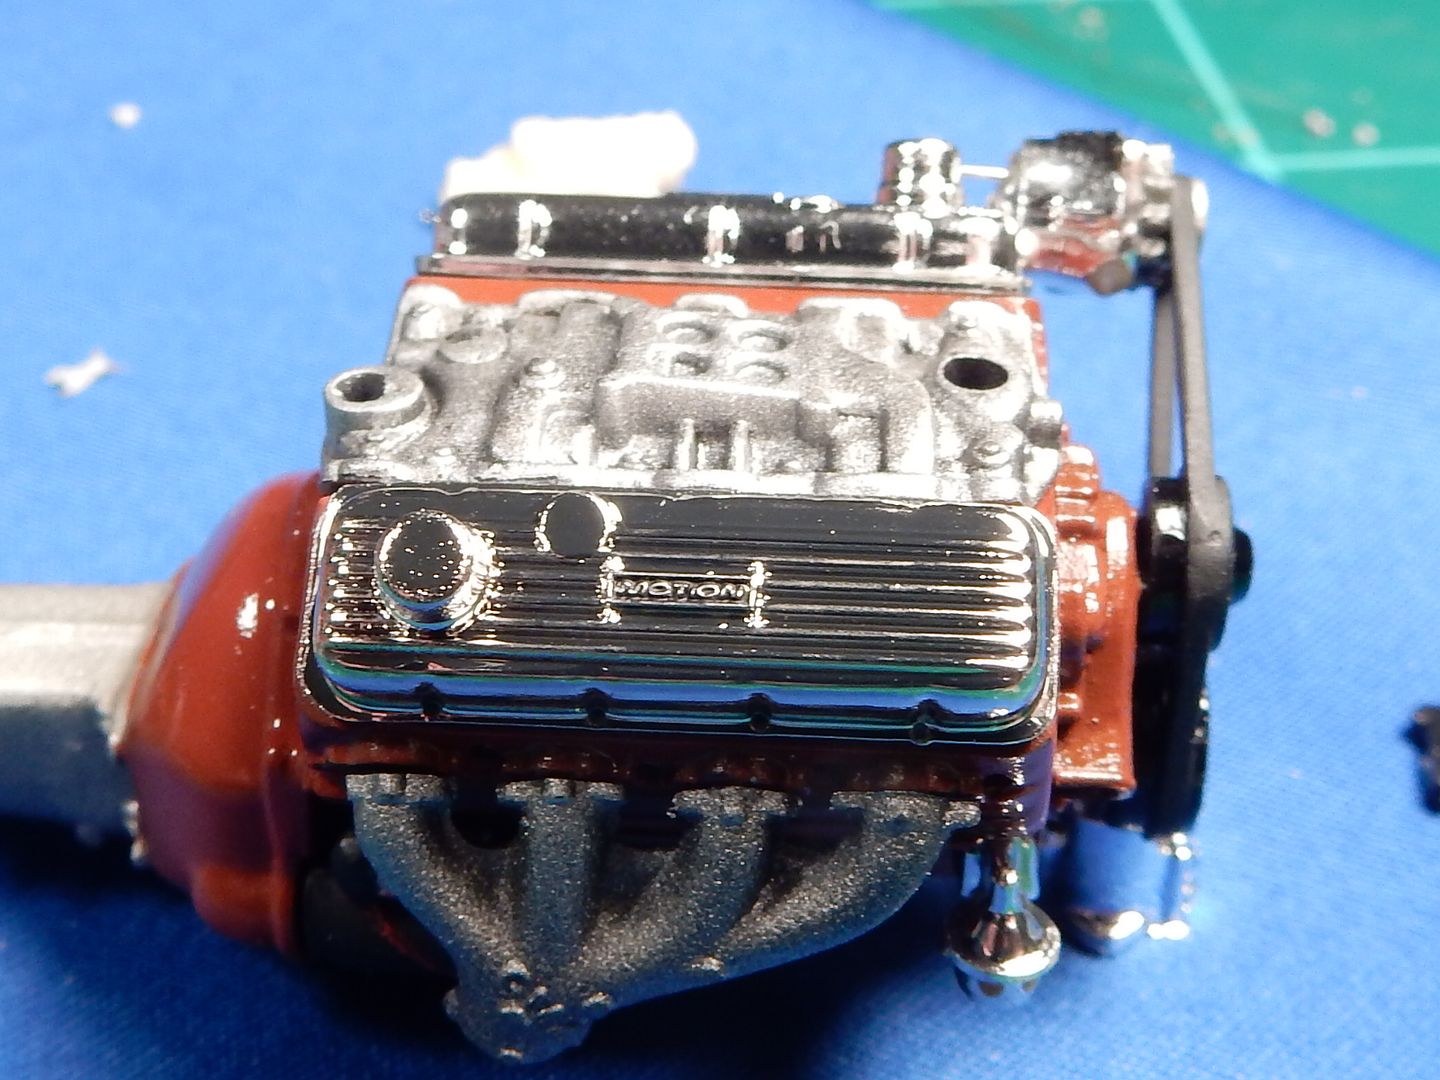
While all that's going on I ended up switching out the rocker covers with a set of Baldwin Motion ones. I shot a coat of Tamiya Smoke over 'em and brought out the "Motion" letters by filling the insert in with black and gently scraping the paint off of the letters.. I drilled the holes out for the rocker cover "wing bolts" that I'll be installing at a later point in the engine build. I also switched out the intake manifold and painted that this morning. Belt and alternator are now mounted and I'm fabricating an alternator mount for it so we don't have that mysterious floating alternator out there. I'll be breaking out that Molotow chrome pen to fill in the sprue attachment points on the alternator and clip that pin that's hanging out of the back of the alternator closer and install a terminal end with the ckt going to it and a retaining nut over the terminal end. In short..............there's some work to do.
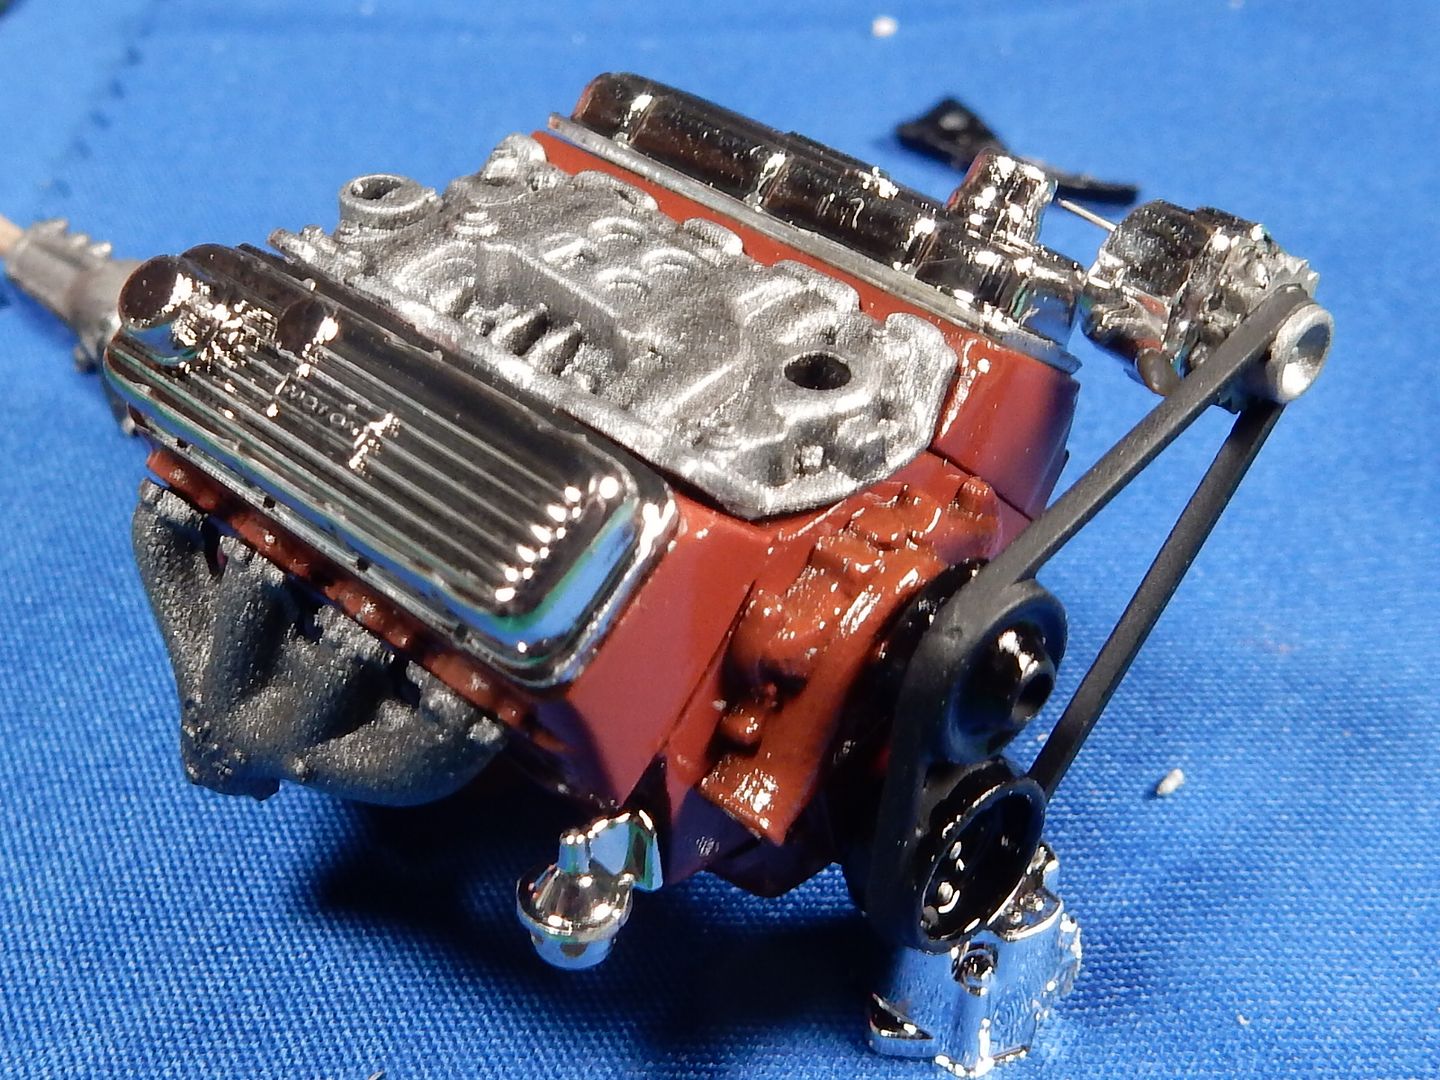
I also have some additional detailing to do to the rocker covers but we'll get to it:
I'm at a tough point in this build. I actually had this thing primed and painted as of last Friday but then things went wrong...........REALLY wrong. I had sanded all of the molded emblems from the body and primed with Tamiya Primer. Using automotive paint (Mystic Teal Metallic) I began to shoot the color onto the body. It all looked superb! I mean it was the best coat of color I've laid down yet , and then.....................it went south................in a hurry! My emblems all came back but instead of being raised they were sunken in. I'll Illustrate:

Additionally there were small ripples in the plastic!!!!!!!!!! Dammit!! I've since stripped all of the paint from the body and have been sanding all dang week. I put some plastic sprue shavings in a jar and mixed some Tamiya thin cement with it to form a liquid plastic and applied it to all areas where the emblems were, let it harden and smoothed all of those back out. I still have some touch up to go but should be ready for AIRBRUSHING this paint on in thin layers by the end of the weekend. I just shot the paint on way to thick is all that happened and the bad thing is ...................I know better. I finally got it back in primer as of yesterday morning:

So far so good there. I'll let it dry for a couple of days and try the base coat again with the airbrush.
While all that's going on I ended up switching out the rocker covers with a set of Baldwin Motion ones. I shot a coat of Tamiya Smoke over 'em and brought out the "Motion" letters by filling the insert in with black and gently scraping the paint off of the letters.. I drilled the holes out for the rocker cover "wing bolts" that I'll be installing at a later point in the engine build. I also switched out the intake manifold and painted that this morning. Belt and alternator are now mounted and I'm fabricating an alternator mount for it so we don't have that mysterious floating alternator out there. I'll be breaking out that Molotow chrome pen to fill in the sprue attachment points on the alternator and clip that pin that's hanging out of the back of the alternator closer and install a terminal end with the ckt going to it and a retaining nut over the terminal end. In short..............there's some work to do.

I also have some additional detailing to do to the rocker covers but we'll get to it:

- BlackSheep214
- Elite Member
- Posts: 13412
- Joined: Sun Apr 06, 2014 8:47 pm
Re: Monogram 1969 Z-28 Camaro-Back in the Saddle-03/11
I've been wondering where'd you been. Looking good so far. BTW - you need to fill in the sink mark on the fan belt...

“Who controls the skies, controls the fate of this Earth”
Author unknown- 352nd Fighter Group, Blue-Nosed Bastards of Bodney
“Send one plane it’s a sortie; send two planes it’s a flight; send four planes it’s a test of airpower. - Richard Kohn
Author unknown- 352nd Fighter Group, Blue-Nosed Bastards of Bodney
“Send one plane it’s a sortie; send two planes it’s a flight; send four planes it’s a test of airpower. - Richard Kohn
- mustang1989
- Moderator
- Posts: 5035
- Joined: Tue Mar 18, 2014 8:35 pm
Re: Monogram 1969 Z-28 Camaro-Back in the Saddle-03/11
Thanks for the good word Tom. The sink mark on the belt.......Good ol' Macro shots. I couldn't even see that before the pic. lolBlackSheep214 wrote:I've been wondering where'd you been. Looking good so far. BTW - you need to fill in the sink mark on the fan belt...![]()
![]()
- Stikpusher
- Moderator
- Posts: 21180
- Joined: Sat Apr 05, 2014 8:37 pm
- Location: Ceti Alpha 5
Re: Monogram 1969 Z-28 Camaro-Back in the Saddle-03/11
Man that engine is looking real good... and very realistic!!! 
"Surely I have made my meaning plain? I intend to avenge myself upon you, Admiral. I have deprived your ship of power, and when I swing 'round, I intend to deprive you of your life."
FLSM
FLSM
Re: Monogram 1969 Z-28 Camaro-Back in the Saddle-03/11
shhhhh don't tell him that - He'll actually try and fill it!BlackSheep214 wrote:I've been wondering where'd you been. Looking good so far. BTW - you need to fill in the sink mark on the fan belt...![]()
![]()
Sorry to hear you've been busy and had some p!astic issues - glad to see you back though. That engine is looking awesome.
Stuart Templeton 'I may not be good but I'm slow...'
- mustang1989
- Moderator
- Posts: 5035
- Joined: Tue Mar 18, 2014 8:35 pm
Re: Monogram 1969 Z-28 Camaro-Back in the Saddle-03/11
Thanks Carlos and Stuart! No chance of me filling that little divot. I'll be installing a flex cooling fan and some other goodies that'll hopefully distract. lol
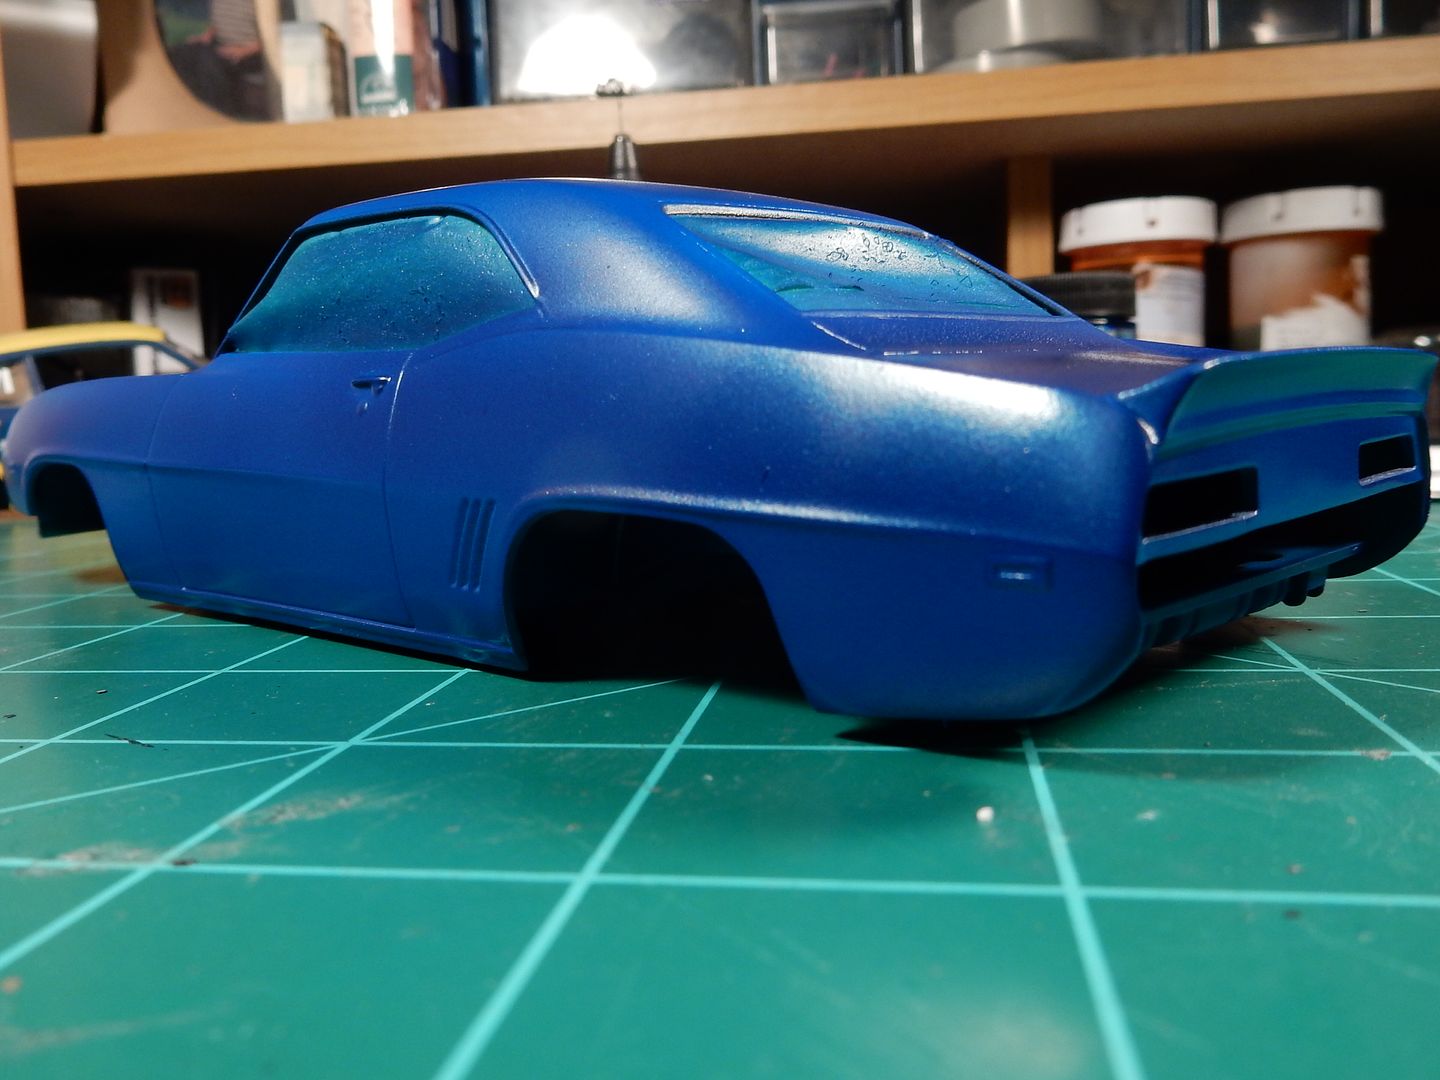
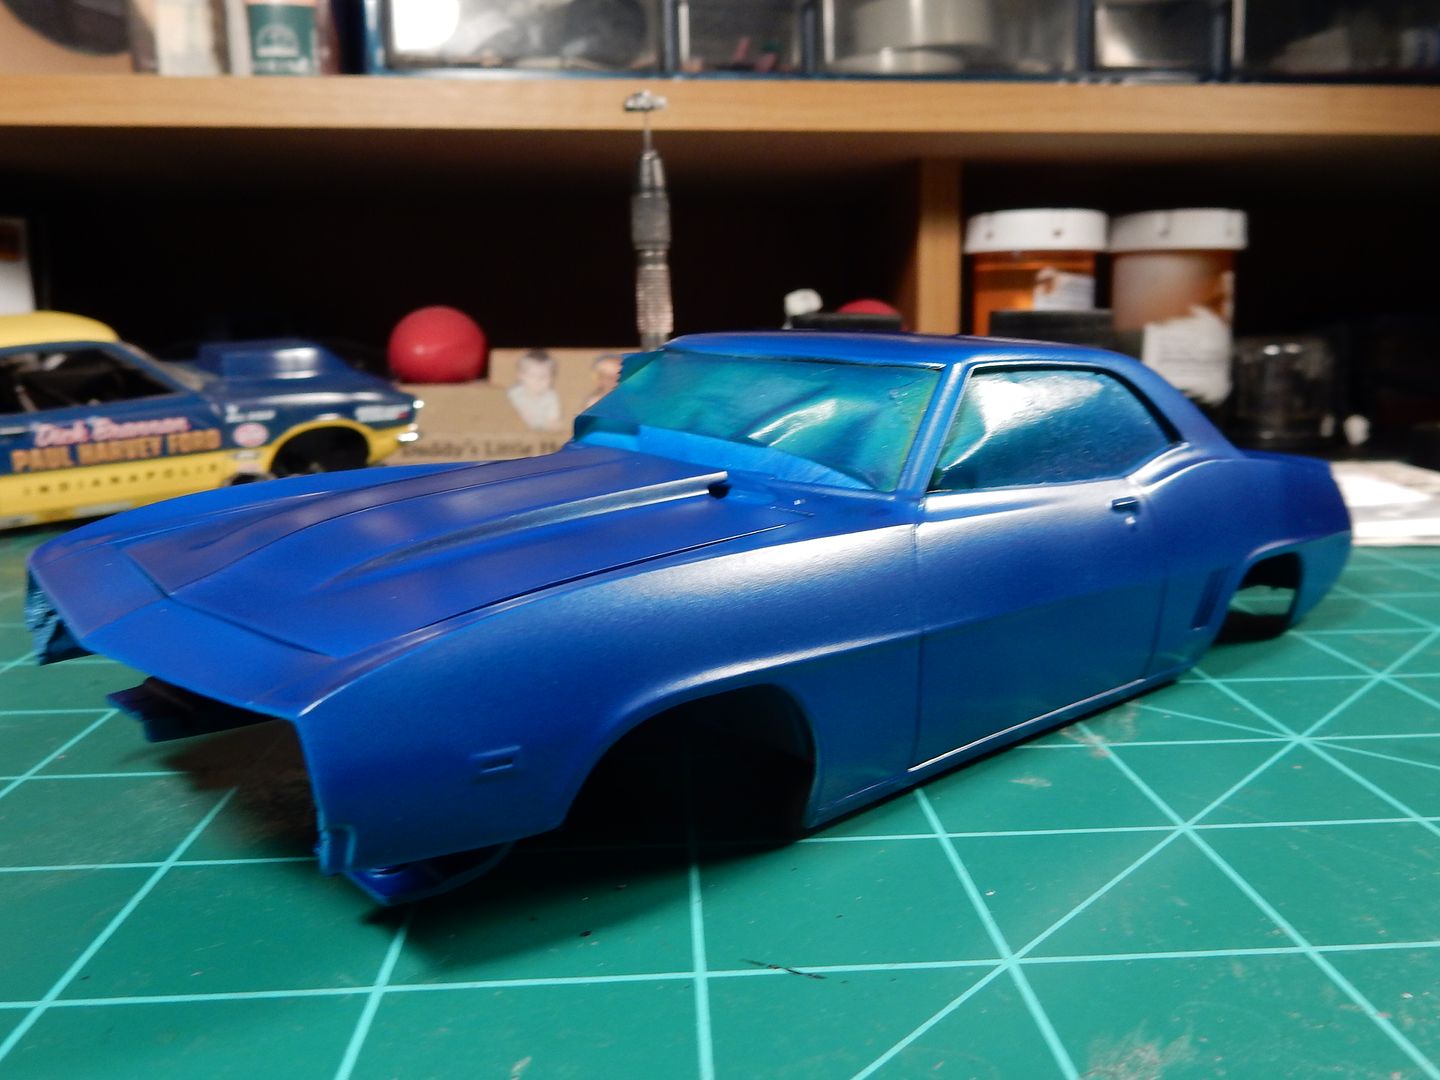
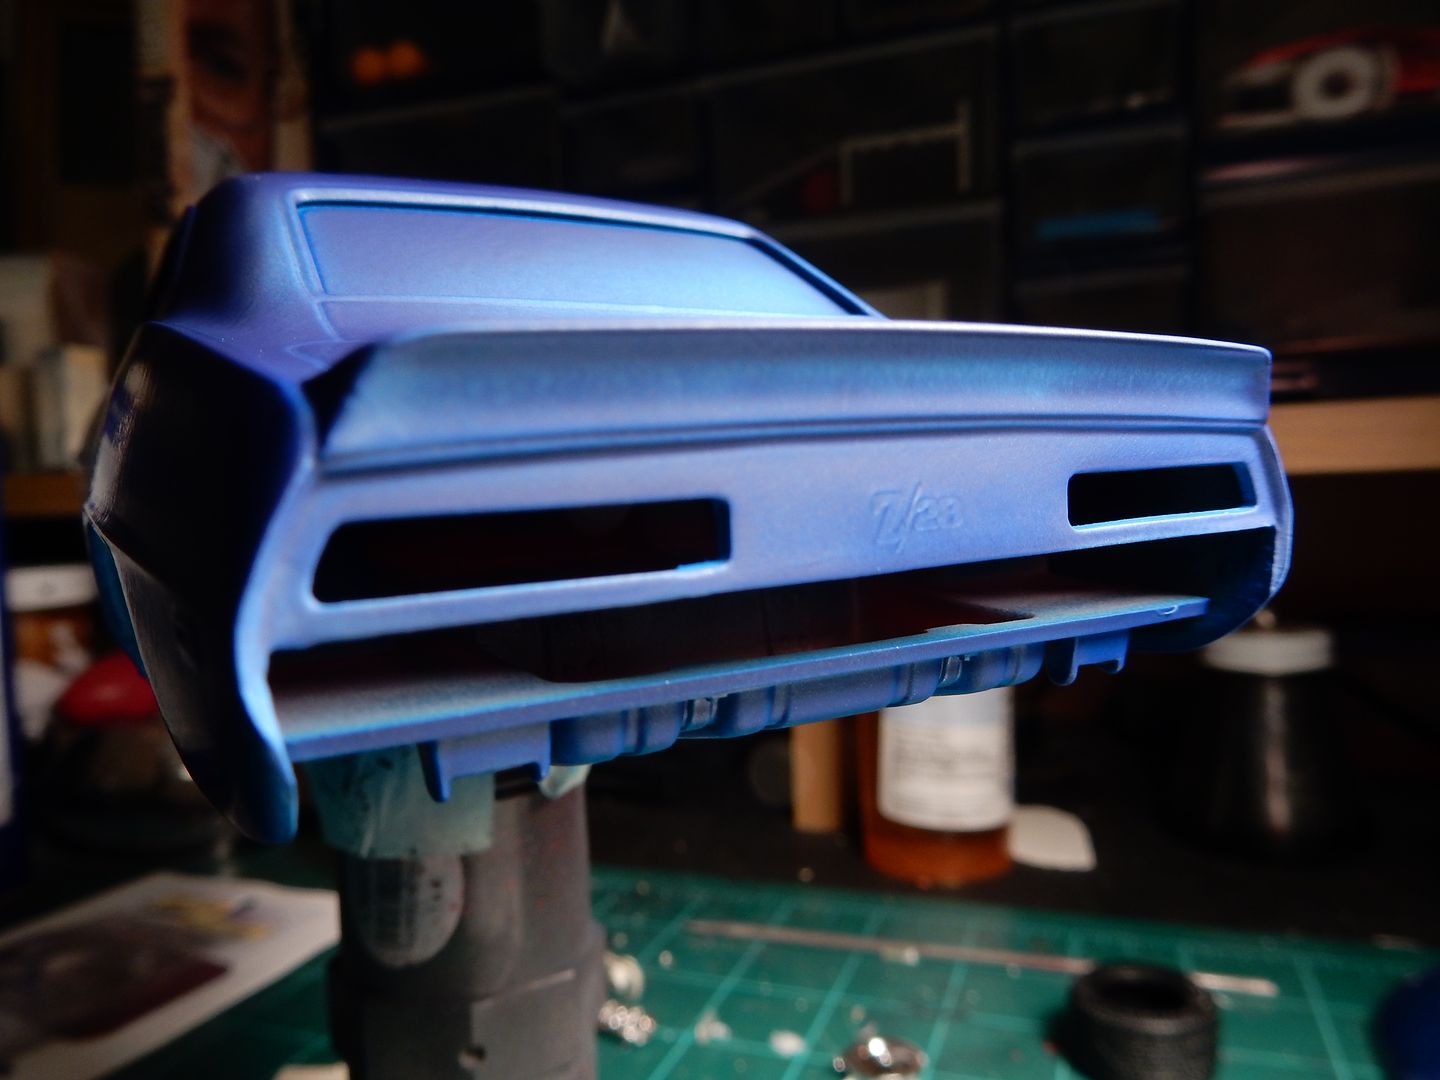
I've got COLOR!!! I ended up applying another coat of primer and smoothed all the imperfections out (a couple of freekin' dog hairs and some dust particles) and dispensed the paint into a paint jar and shot it through my airbrush. I had ALOT better results this time around fellas, however this paint does not play well with the air brush. Even after thinning the crap out of it I had difficulty in getting a uniform spray pattern to come out. I can't complaint too much as I'll be able to make this work out good in the end. These pics were taken after the results from my Badger 200. After these I decided to break out the much simpler Badger 350 and had a lot better luck with the pattern and a more consistent coat. I'm really going to be very happy with this color on this car is all I've gotta say:


Engine is still coming along. Resin Holley test fitted onto the motor complete with throttle shaft and throttle lever.

I've got COLOR!!! I ended up applying another coat of primer and smoothed all the imperfections out (a couple of freekin' dog hairs and some dust particles) and dispensed the paint into a paint jar and shot it through my airbrush. I had ALOT better results this time around fellas, however this paint does not play well with the air brush. Even after thinning the crap out of it I had difficulty in getting a uniform spray pattern to come out. I can't complaint too much as I'll be able to make this work out good in the end. These pics were taken after the results from my Badger 200. After these I decided to break out the much simpler Badger 350 and had a lot better luck with the pattern and a more consistent coat. I'm really going to be very happy with this color on this car is all I've gotta say:


Engine is still coming along. Resin Holley test fitted onto the motor complete with throttle shaft and throttle lever.

- BlackSheep214
- Elite Member
- Posts: 13412
- Joined: Sun Apr 06, 2014 8:47 pm
Re: Monogram 1969 Z-28 Camaro-We've got COLOR!!-03/19
Loving the color and the engine progress!
“Who controls the skies, controls the fate of this Earth”
Author unknown- 352nd Fighter Group, Blue-Nosed Bastards of Bodney
“Send one plane it’s a sortie; send two planes it’s a flight; send four planes it’s a test of airpower. - Richard Kohn
Author unknown- 352nd Fighter Group, Blue-Nosed Bastards of Bodney
“Send one plane it’s a sortie; send two planes it’s a flight; send four planes it’s a test of airpower. - Richard Kohn