1/32 Hasegawa Bf109G-14 Hartmann

Re: 1/32 Hasegawa Bf109G-14 Hartmann
The weathering and chipping are all well done. The oxygen regulator looks fantastic as well. Looking at the IP the ammo counter PE blends in great with the work you did on the resin. Overall a amazing job and one to be proud of. Now just need to see them belts in there
March as one, Don't look back
Odin's sons... Attack!
Unleash hell! Do not repent! Warfare grants us no lament
Let your weapons slash and tear This is no place for fear
Hold the lines! Move as one! In unity our victory's won
Our shields will form a mighty wall
United we shall never fall
Odin's sons... Attack!
Unleash hell! Do not repent! Warfare grants us no lament
Let your weapons slash and tear This is no place for fear
Hold the lines! Move as one! In unity our victory's won
Our shields will form a mighty wall
United we shall never fall

Re: 1/32 Hasegawa Bf109G-14 Hartmann
Thank you guys! Going full bore on two builds right now, which helps pass the time. I think this is one ideal pandemic-suited hobby.
Can't really tell from the pics but the fuselage has been riveted.
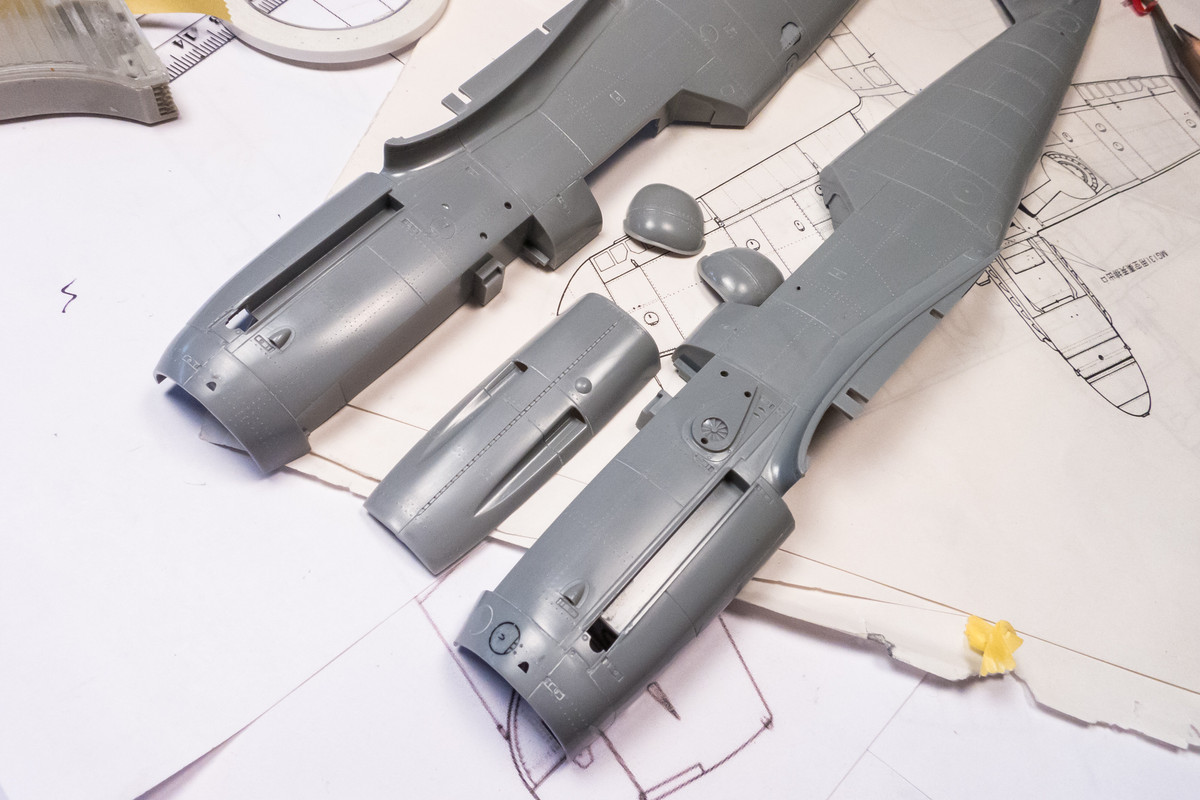
Before I glued the port sidewall into place, I painted a few of the wires in yellow to kick up the visual interest.
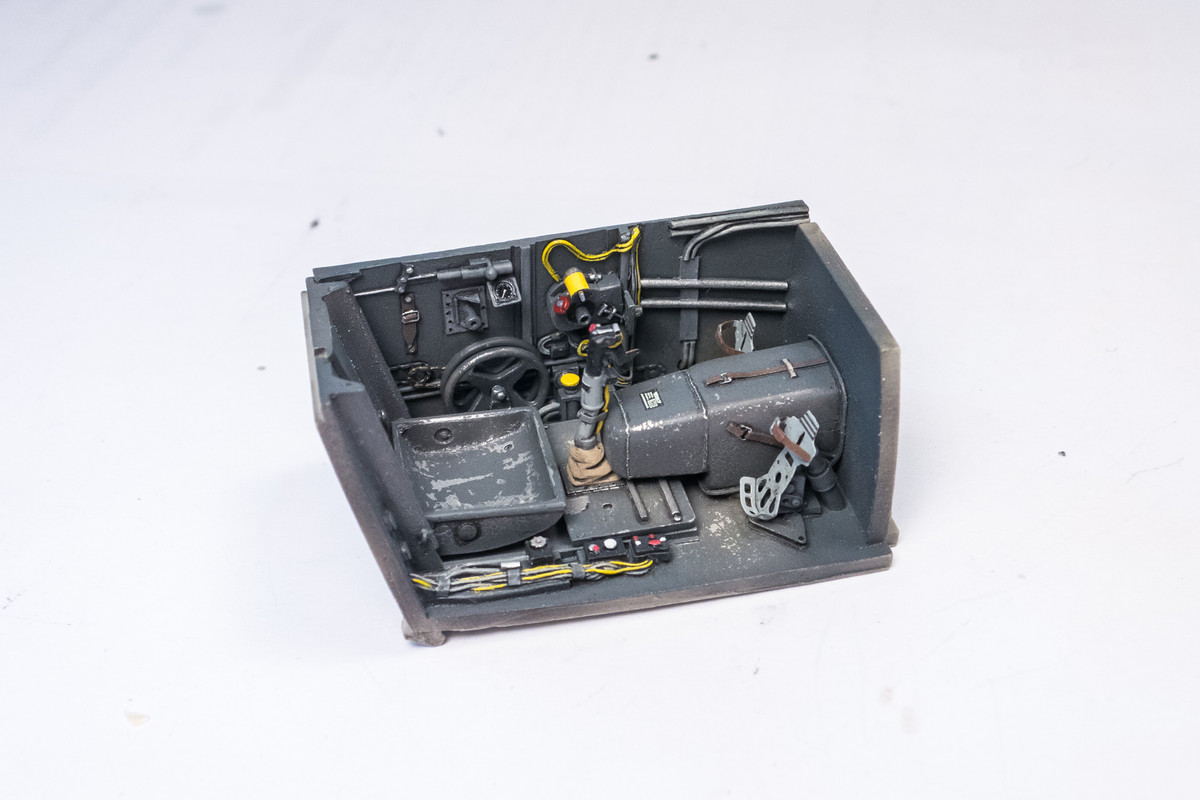
I also put the seat belts on. The attachment still needs to be worked out later so I've chosen glue spots somewhat below so I can move the belts out of the way when I have to smooth out the rear deck of the cockpit.
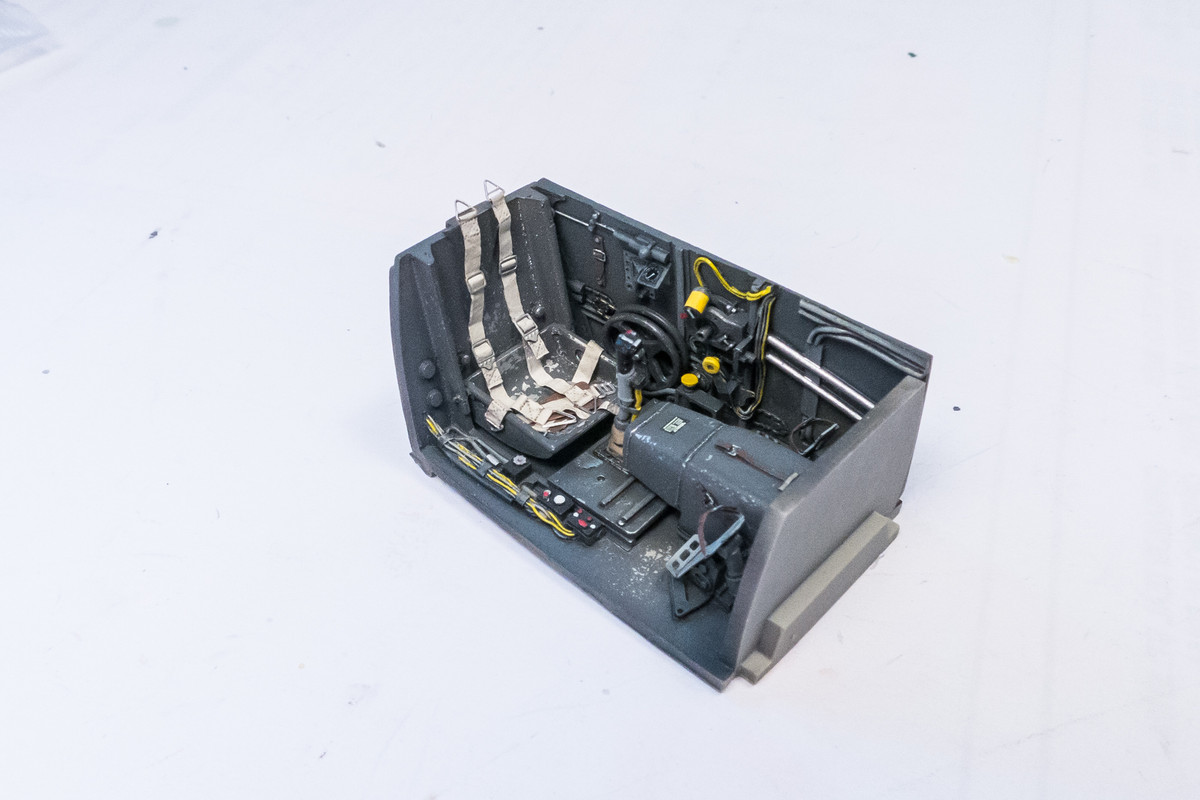
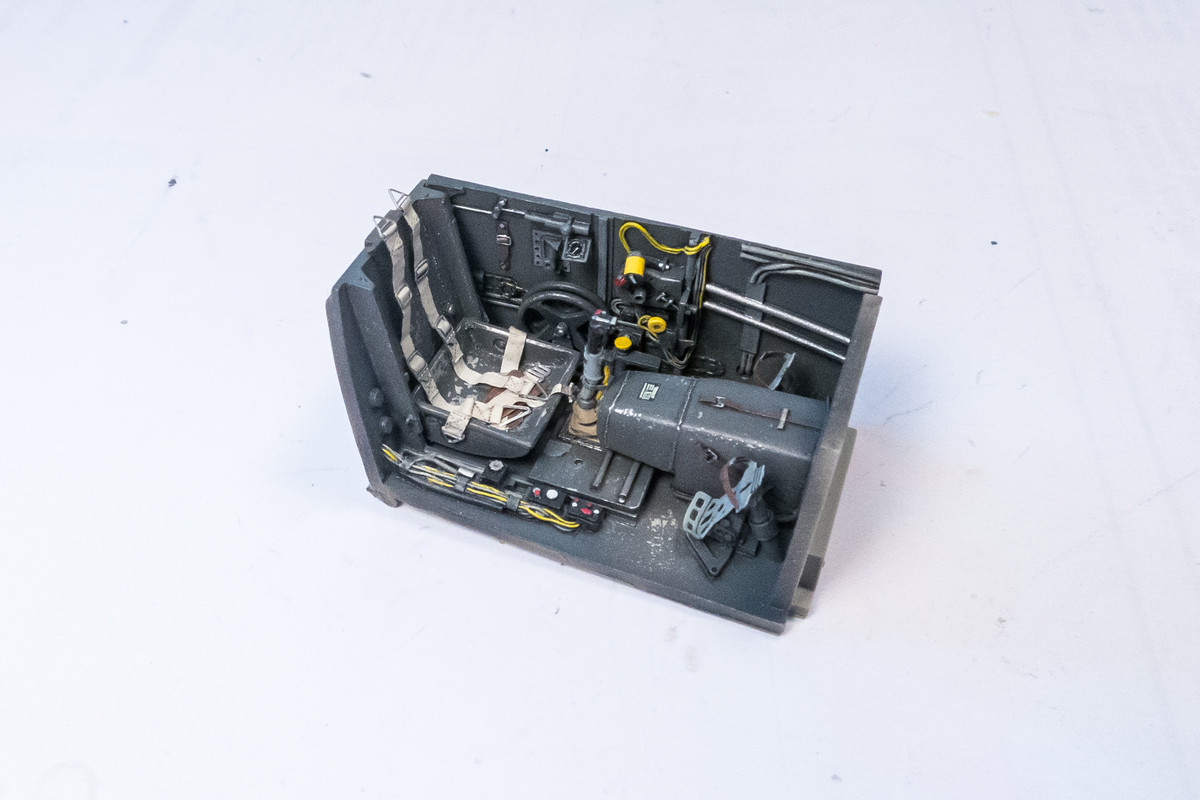
Since the riveting is done, I've glued the fuselage sides together. Kinda cool doing this now with nothing else in inside of the fuselage. I'll attend to the center seam before moving on.
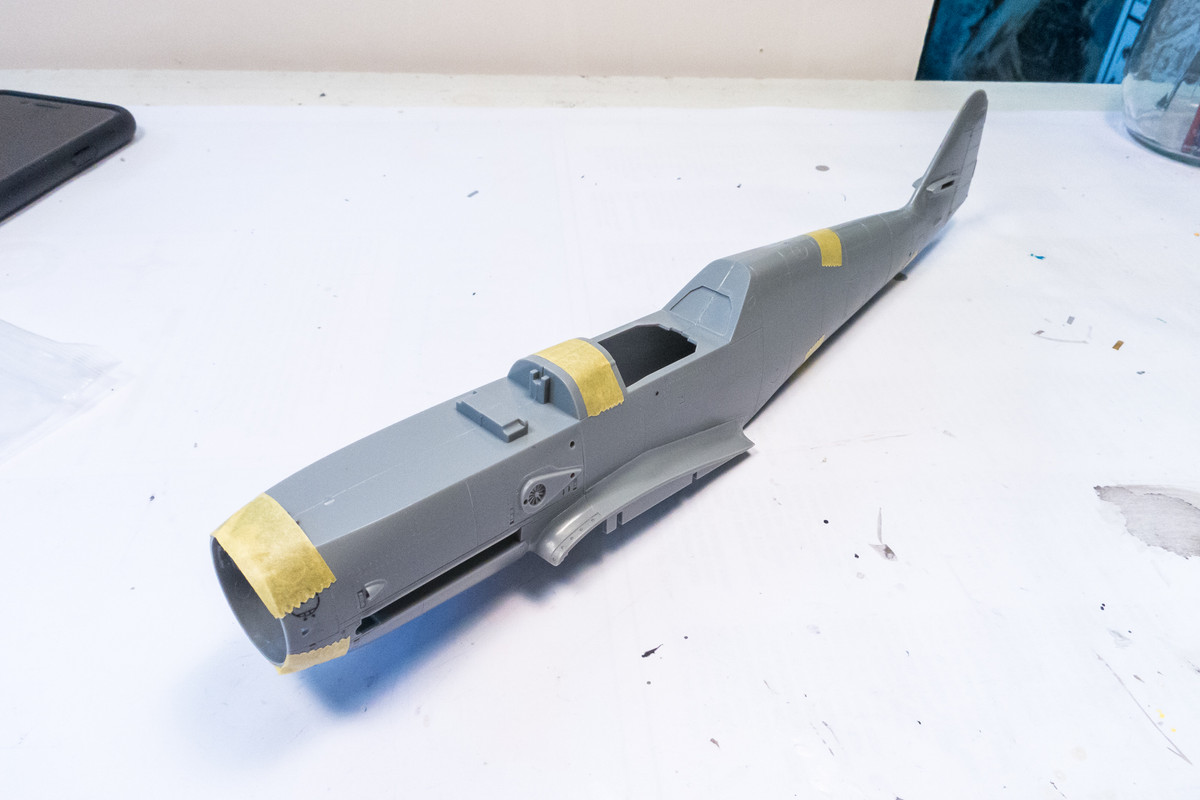
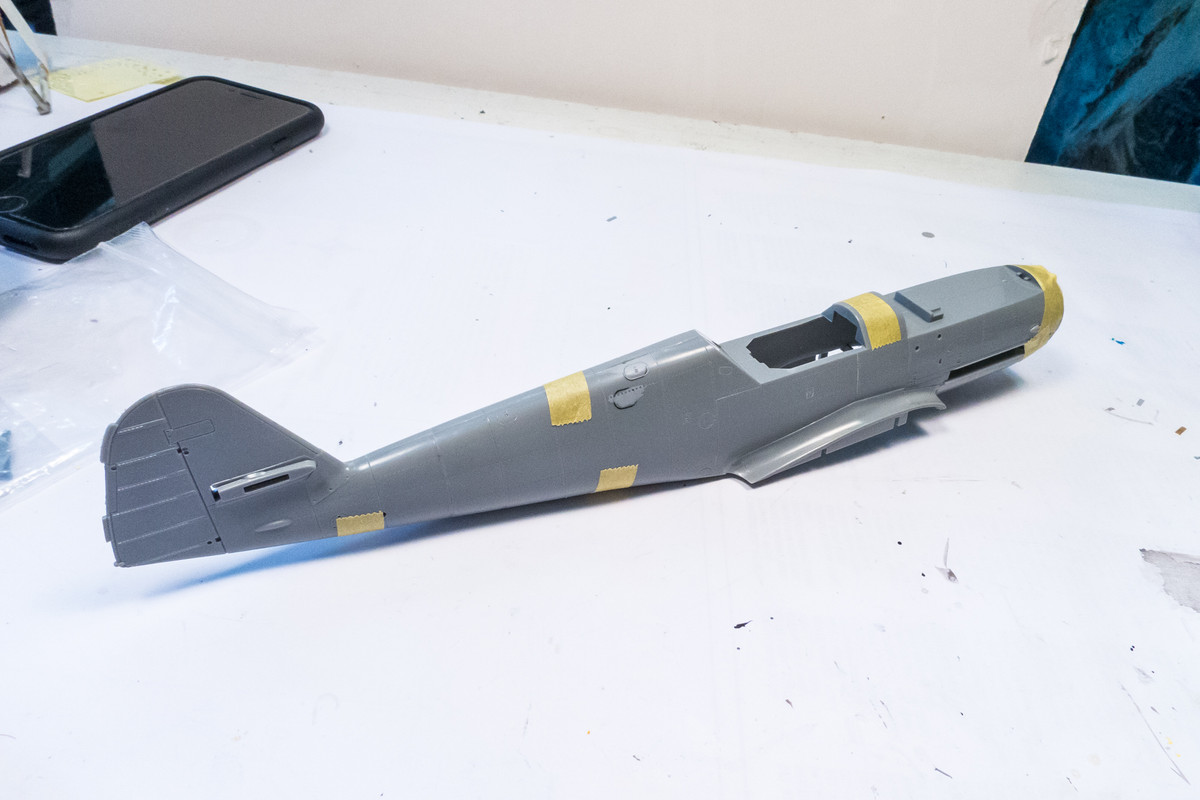
Can't really tell from the pics but the fuselage has been riveted.
Before I glued the port sidewall into place, I painted a few of the wires in yellow to kick up the visual interest.
I also put the seat belts on. The attachment still needs to be worked out later so I've chosen glue spots somewhat below so I can move the belts out of the way when I have to smooth out the rear deck of the cockpit.
Since the riveting is done, I've glued the fuselage sides together. Kinda cool doing this now with nothing else in inside of the fuselage. I'll attend to the center seam before moving on.
John aka JKim
-----------<><

-----------<><
Re: 1/32 Hasegawa Bf109G-14 Hartmann
Not a very popular build I'm guessing, based on the lack of comments. I don't blame you guys! My 109/190 builds kinda blend into one another... even I'm starting to get confused. 
Slow going on the G-14. I've spend alot of time on the fuselage seam. Filling it first and then re-scribing the line separating the right and left halves. Why go through the trouble of removing the joint when you end up re-scribing it? Because it has to look like a panel line and not a glue joint! I'm not precise enough in my cementing process to get a clean line in most cases so this is the only way I can get a relatively neat panel line. I've also finished off the riveting along the joints.
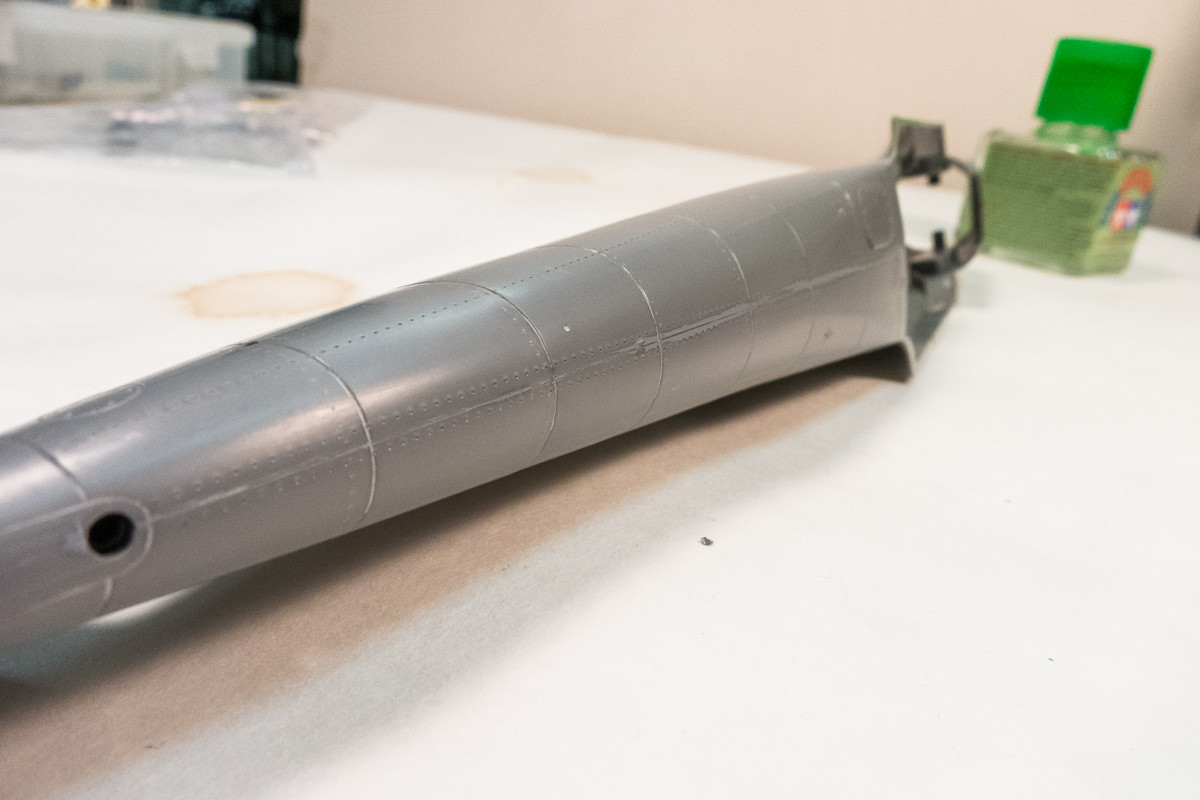
The gun cowling, which has also been riveted, is glued into place. Pretty clean with a few gaps that will need to be filled with White Milliput.
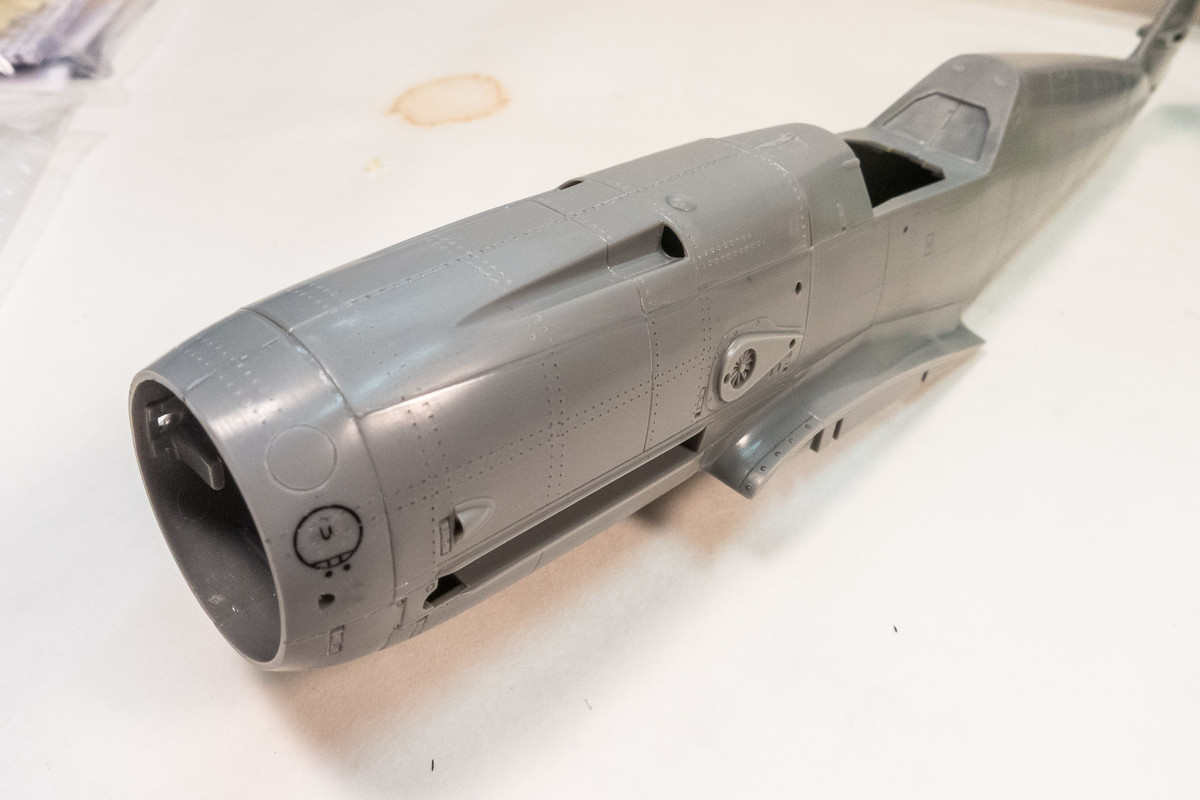
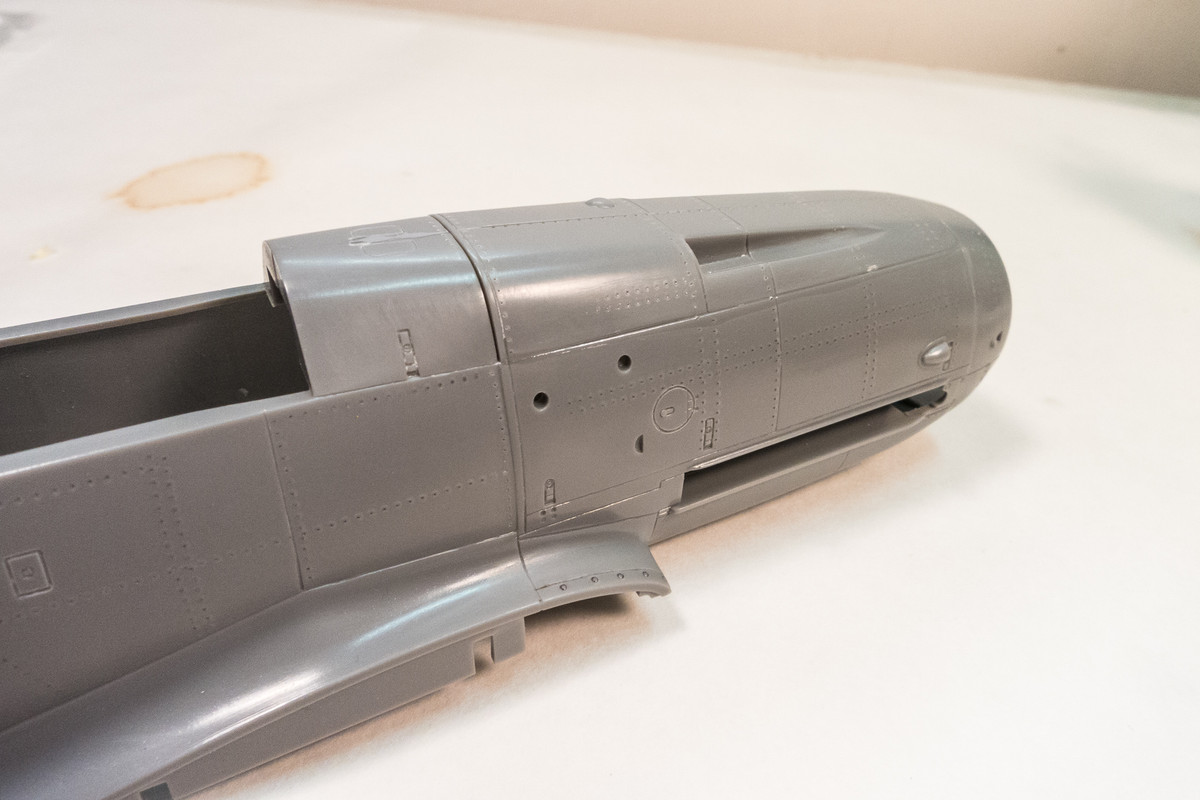
The characteristic gun bulges have been riveted. I've also scribed a secondary panel line on the bulges to match the fuselage.
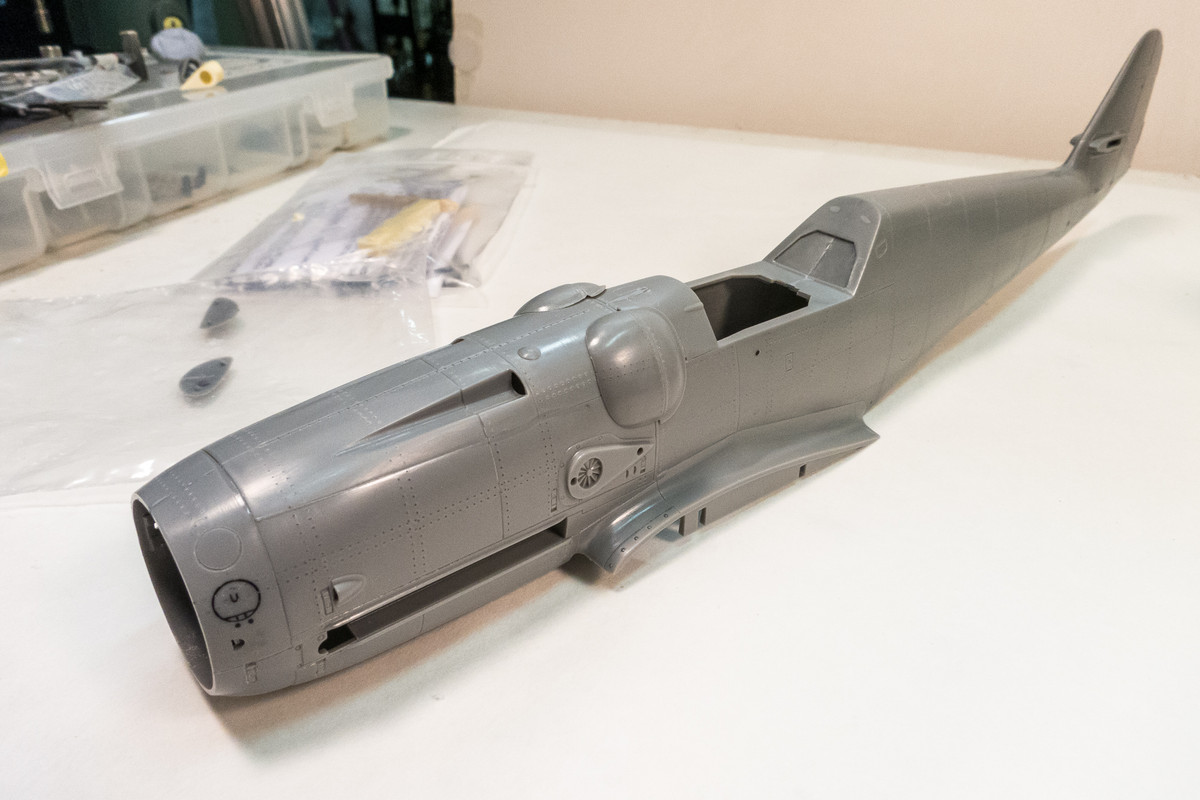

Slow going on the G-14. I've spend alot of time on the fuselage seam. Filling it first and then re-scribing the line separating the right and left halves. Why go through the trouble of removing the joint when you end up re-scribing it? Because it has to look like a panel line and not a glue joint! I'm not precise enough in my cementing process to get a clean line in most cases so this is the only way I can get a relatively neat panel line. I've also finished off the riveting along the joints.
The gun cowling, which has also been riveted, is glued into place. Pretty clean with a few gaps that will need to be filled with White Milliput.
The characteristic gun bulges have been riveted. I've also scribed a secondary panel line on the bulges to match the fuselage.
John aka JKim
-----------<><
-----------<><
-
Medicman71

- Elite Member
- Posts: 11396
- Joined: Mon Apr 07, 2014 9:32 am
- Location: Houston, Tx
Re: 1/32 Hasegawa Bf109G-14 Hartmann
Man your riveting work is awesome. 
Mike
Sponsored by Boeing, Lockheed Martin, Northrop Grumman, Saab, BAE, and Dassault
Sponsored by Boeing, Lockheed Martin, Northrop Grumman, Saab, BAE, and Dassault
-
speedgraflex

- Moderator
- Posts: 11534
- Joined: Fri Feb 10, 2017 11:08 pm
- Contact:
Re: 1/32 Hasegawa Bf109G-14 Hartmann
To riff on what Mike wrote, “Those belts are awesome, too.” Seriously. I don’t think I have ever seen seat belts executed with such skill before! I like that you added the colored electrical cabling to the cockpit as well. Again, this was done with such skill, John. Seriously. There are builds and then there are your builds, which tend to breathe the ether so well that I find myself without a great deal of useful information or advice to give you. I do think this is an important subject and you are building it to the highest standard possible!
Make more models!
-
Stikpusher

- Moderator
- Posts: 21383
- Joined: Sat Apr 05, 2014 8:37 pm
- Location: Ceti Alpha 5
Re: 1/32 Hasegawa Bf109G-14 Hartmann
I like the method of attaching the free ends of the harness in first. That replicates the natural gravity of them in the seat better. Once you have the cockpit installed and the seams on the decking cleaned up, the anchor points can be attached with no fuss.
As far your fuselage work goes... well, I’m waiting for you to work your voodoo magic...

As far your fuselage work goes... well, I’m waiting for you to work your voodoo magic...
"Surely I have made my meaning plain? I intend to avenge myself upon you, Admiral. I have deprived your ship of power, and when I swing 'round, I intend to deprive you of your life."
FLSM
FLSM
-
Duke Maddog

- Elite Member
- Posts: 7700
- Joined: Tue Jun 03, 2014 11:22 am
- Location: Rowland Heights, CA
Re: 1/32 Hasegawa Bf109G-14 Hartmann
Your work is far from uninteresting. I don't comment because I haven't the words to express my awe at what you are doing.
The Duke
Virtuoso of Miniatures
"Do you know what the chain of command is? It's the chain I get and beat you with 'till you understand who's in ruttin' command!"
-Jayne Cobb, Firefly Episode 2 "The Train Job"
We are modelers - the same in spirit, in hunger to insanely buy newly released kits, hustlers in hiding our stash from our better halves and experts in using garbage as replacements for after-market parts.
Virtuoso of Miniatures
"Do you know what the chain of command is? It's the chain I get and beat you with 'till you understand who's in ruttin' command!"
-Jayne Cobb, Firefly Episode 2 "The Train Job"
We are modelers - the same in spirit, in hunger to insanely buy newly released kits, hustlers in hiding our stash from our better halves and experts in using garbage as replacements for after-market parts.
Re: 1/32 Hasegawa Bf109G-14 Hartmann
Thanks guys! Most of fuselage voodoo is done but you just can't see it because of the lack of contrast between the riveting, grey putty and grey plastic. I've debated about using a dark wash to highlight to work so that I can check it but I'm always worried about loading up the rivet holes with paint/excess sanding material before I get to the painting stage.
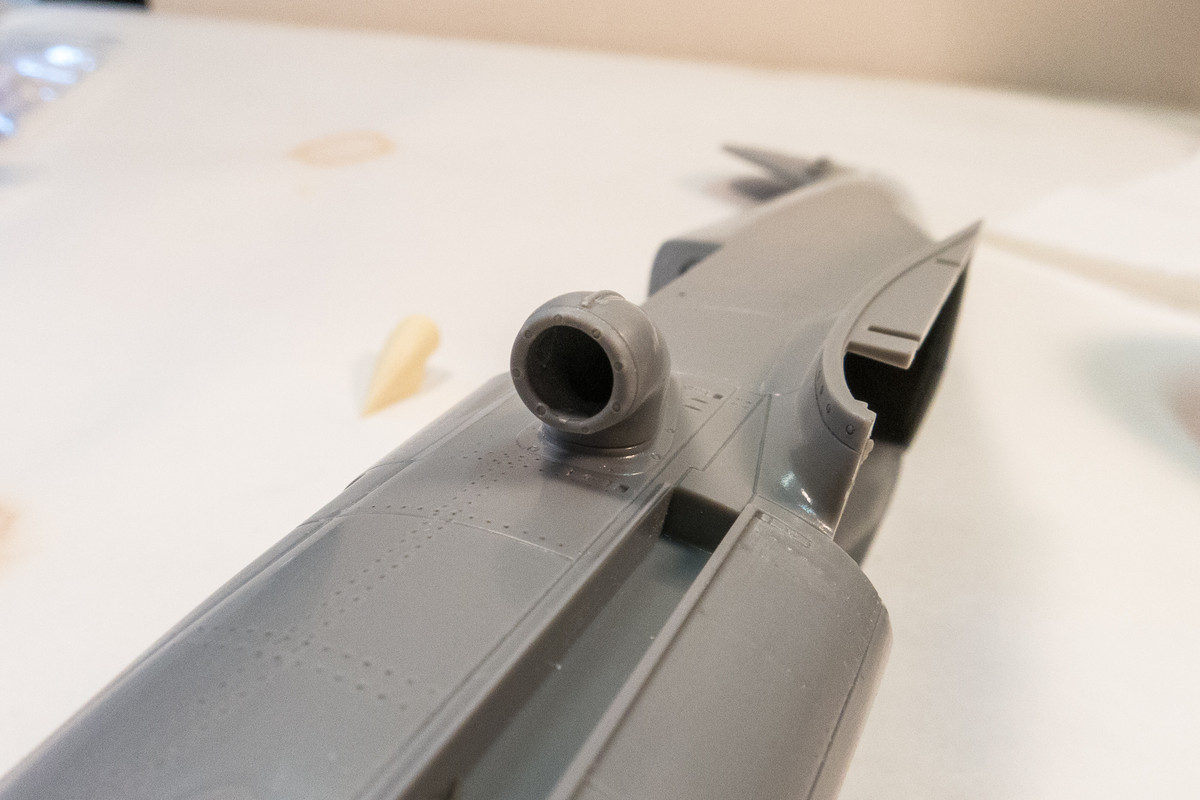
I have a spare supercharger intake from Barracuda but it is for Revell kit and is every so slightly undersized.
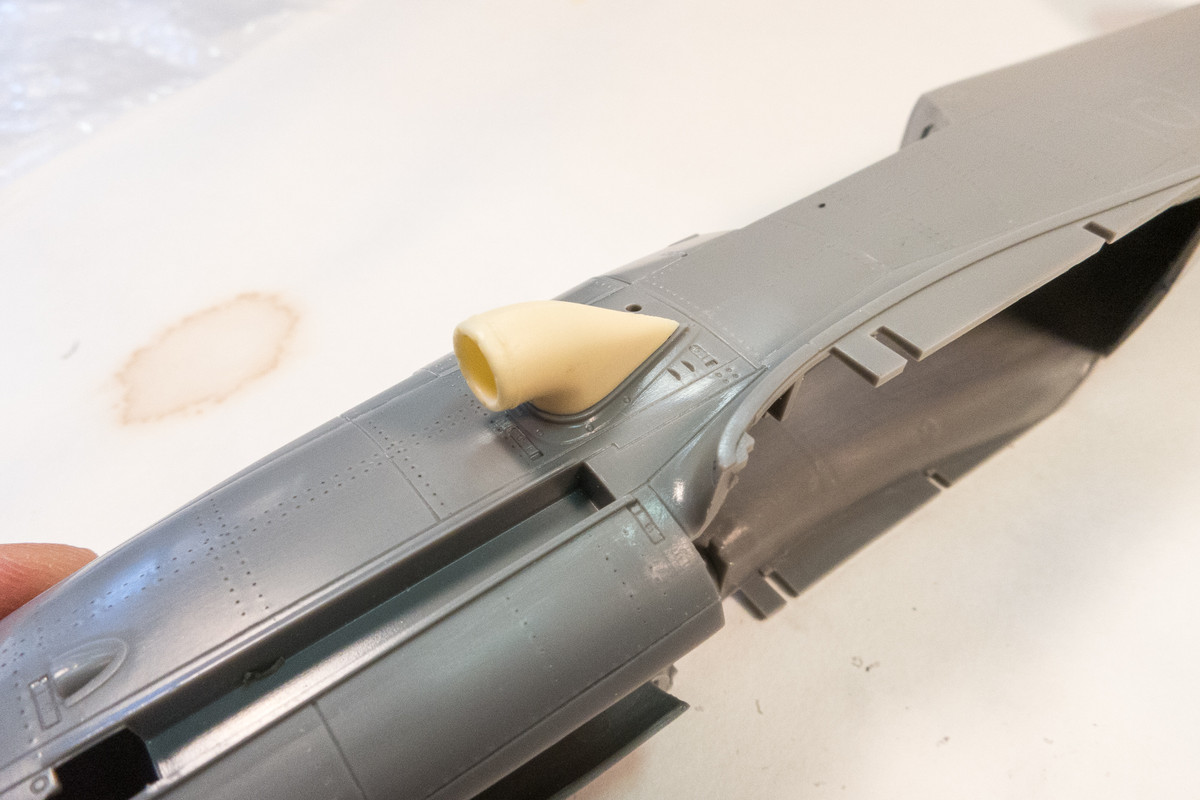
The kit supercharger fits much better so I've replaced the damaged weld line (Hasegawa stupidly put TWO sprue attachment points on the weld line) with stretched sprue.
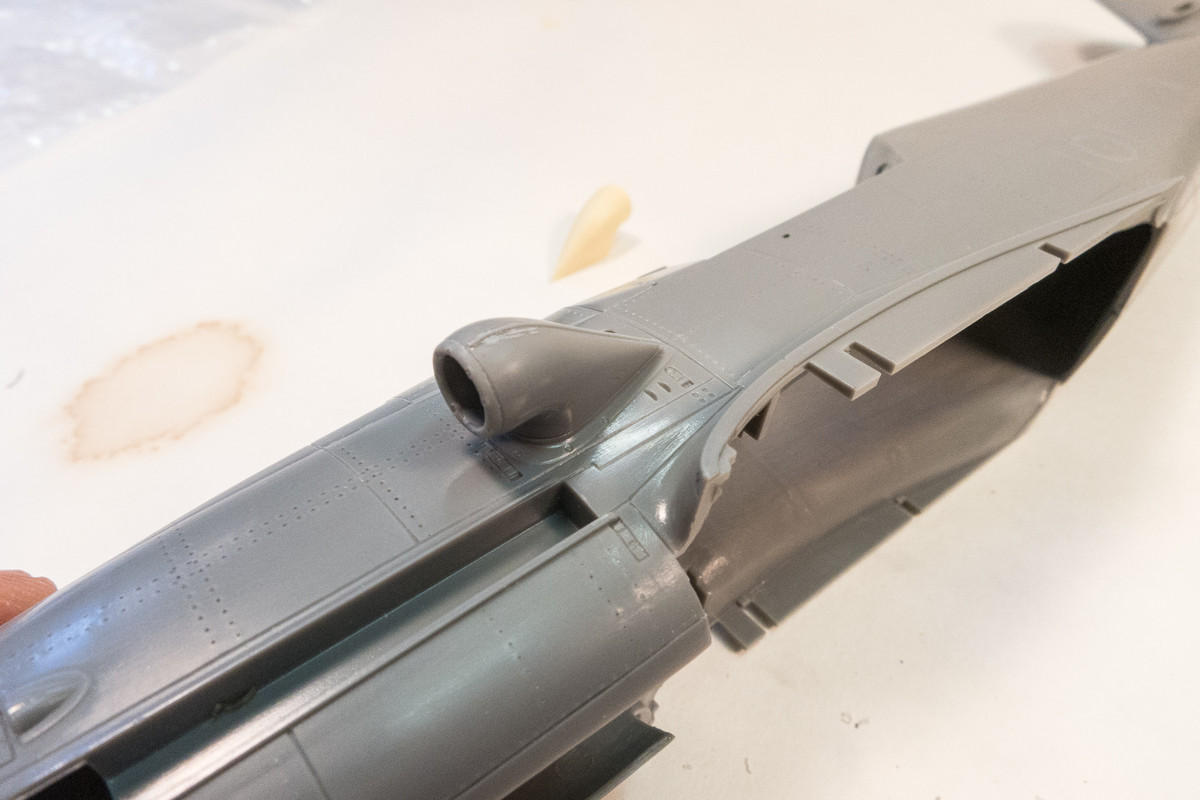
I've also added some bolt details to the front face of the intake.
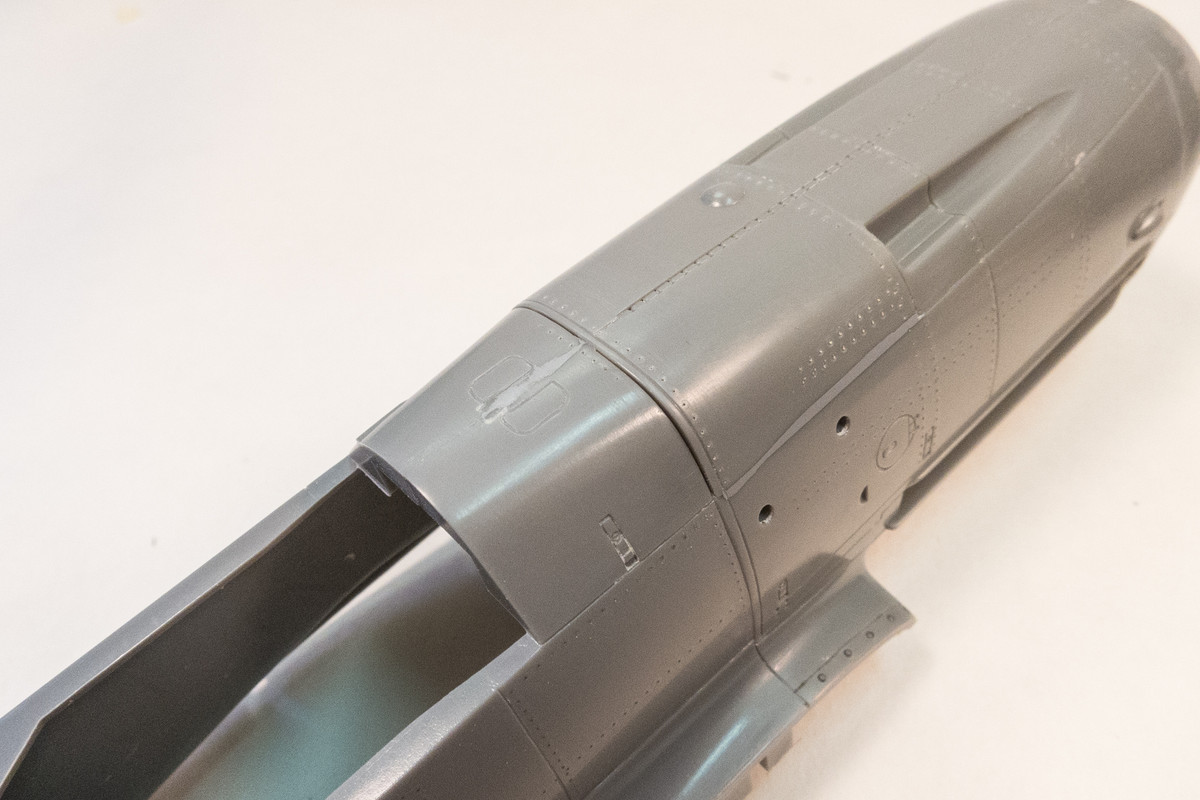
The gun cowling has been glued into place but there is a slight gap at the rear. It's very narrow and not very noticeable but I like all of my panel lines to have a finite "bottom" for visual consistency.
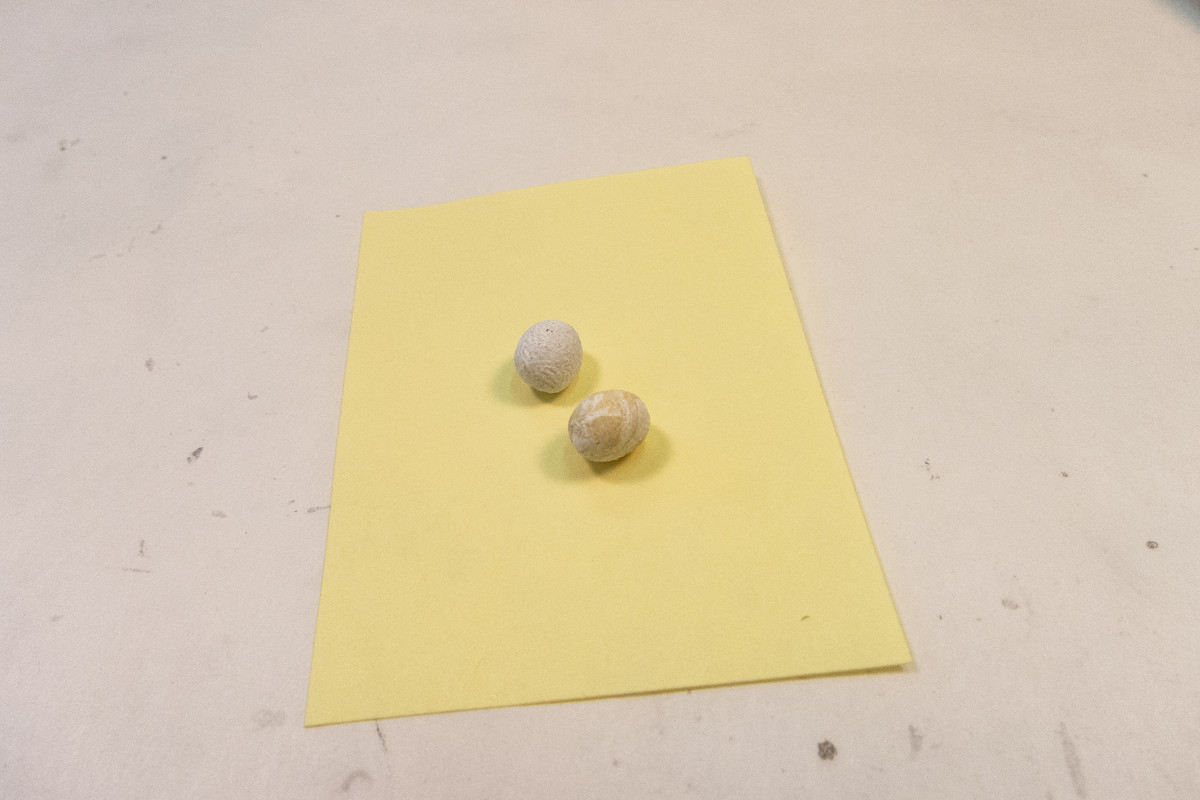
A great way to address these lengthy narrow gaps is Milliput. Milliput is a two-part epoxy that comes in different grades of fineness. I use White which is the finest grade. It has the consistency of clay so it has different uses than liquid putties. You just pinch off two equal sized bits of putty and knead them together until they are one uniform color.
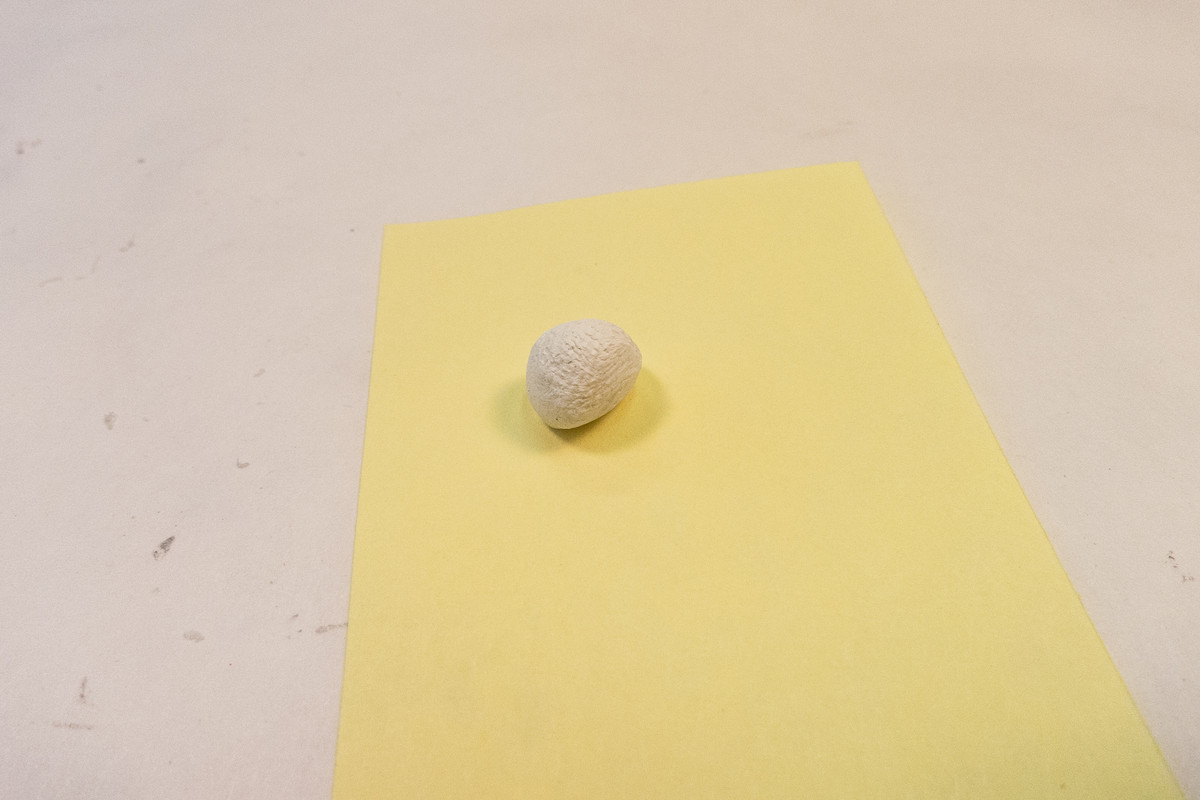
I use the tip of a toothpick to apply the putty. Turning the toothpick tip can help force the putty into the crack.
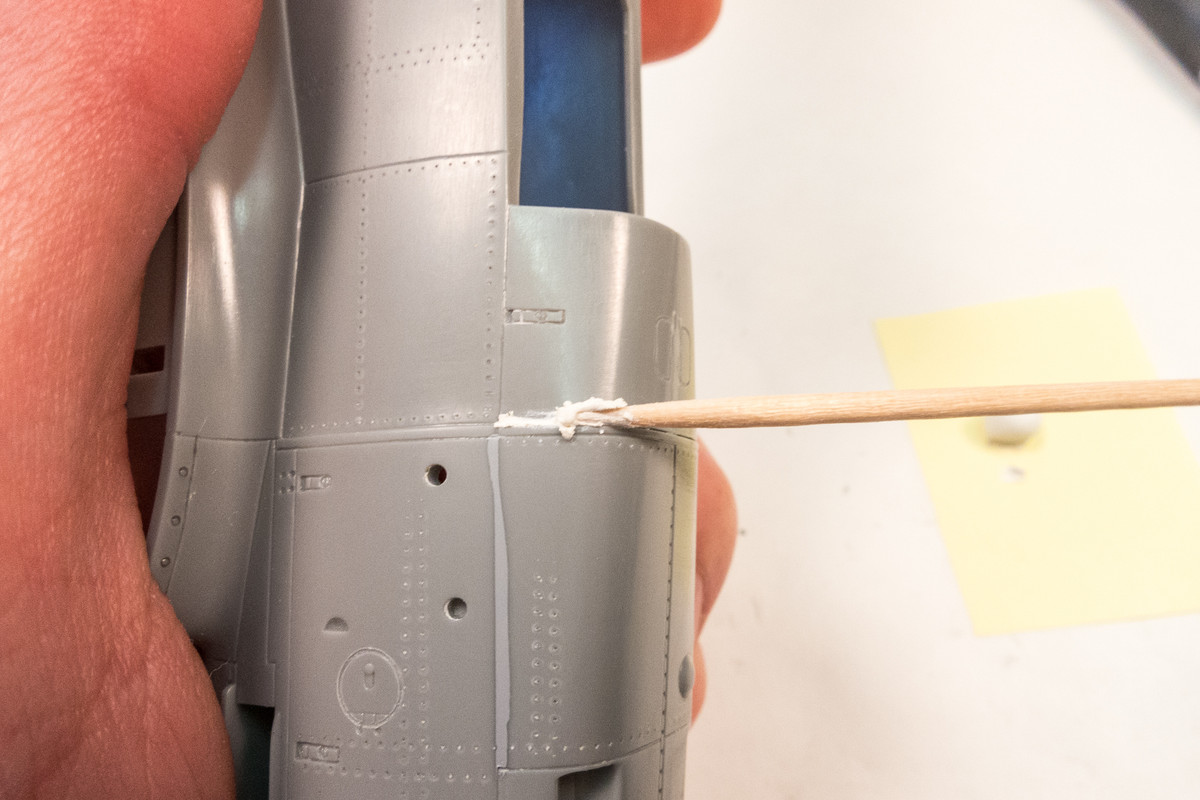
Work your way down the crack until it is completely filled. You can take your time because Milliput is a very slow cure epoxy and won't start hardening for at least 30 minutes. This is the stage where most putty applications end. Normally, you can wait until this dries and then start sanding away. But this is where Milliput really shines.
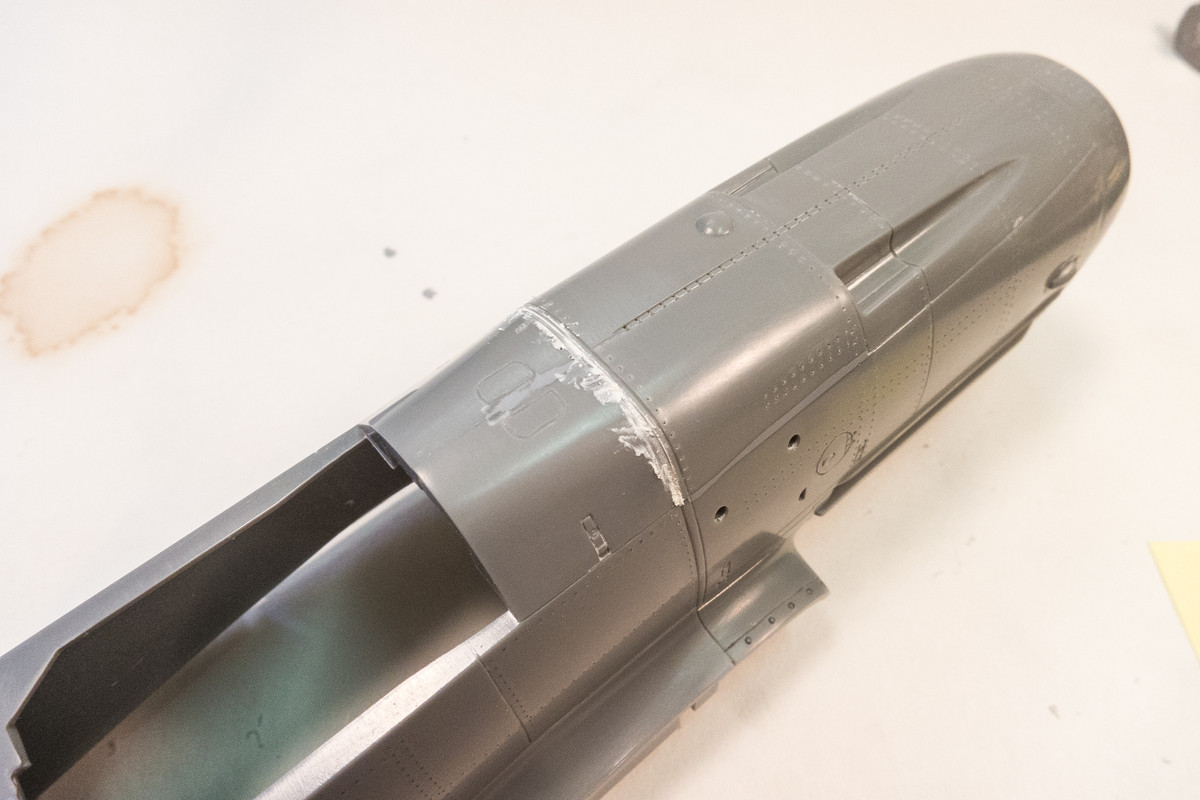
Wet your finger and start rubbing along the putty application, Water will cut into the Milliput, simultaneously removing and smoothing the putty.
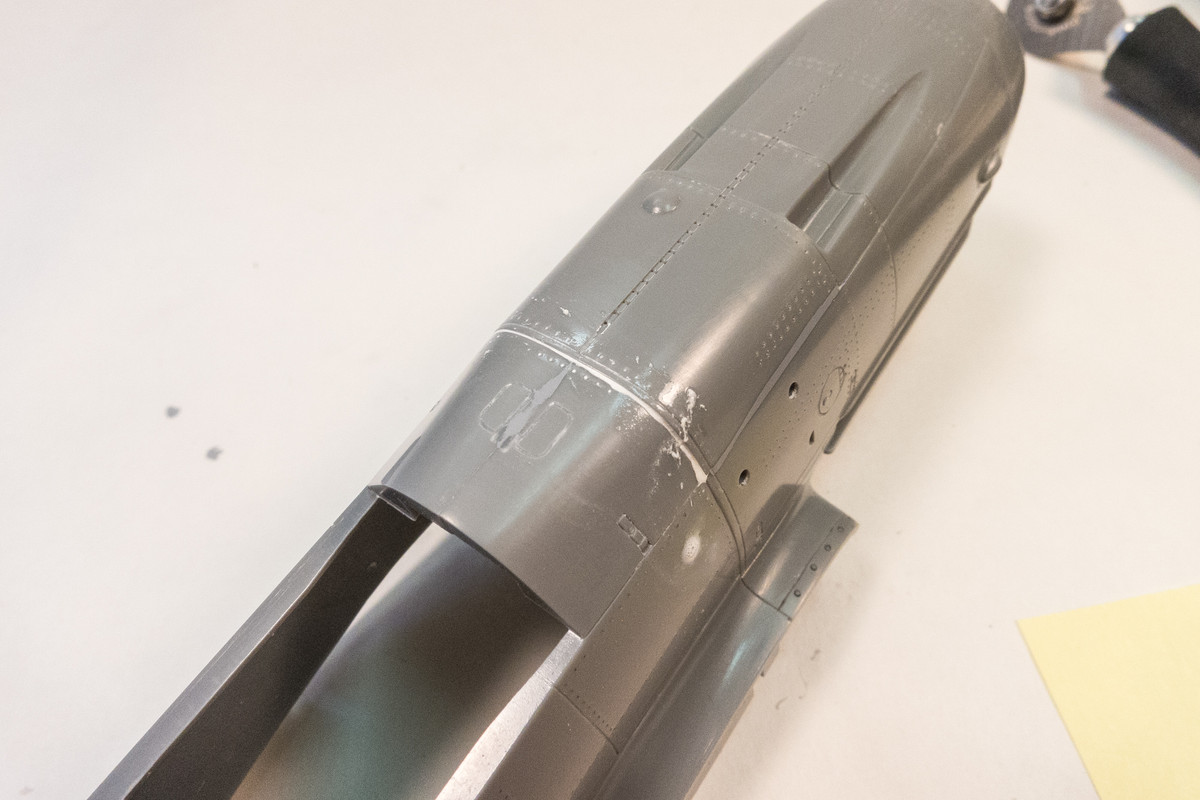
I want to remove the excess so I switch to a piece of damp paper towel and continue to rub down the area. Depending on how aggressive you rub, you can remove the putty until it is level with the surrounding plastic or even below it. This joint is a panel line so I'm not trying to eliminate the gap, just put a consistent bottom to it.
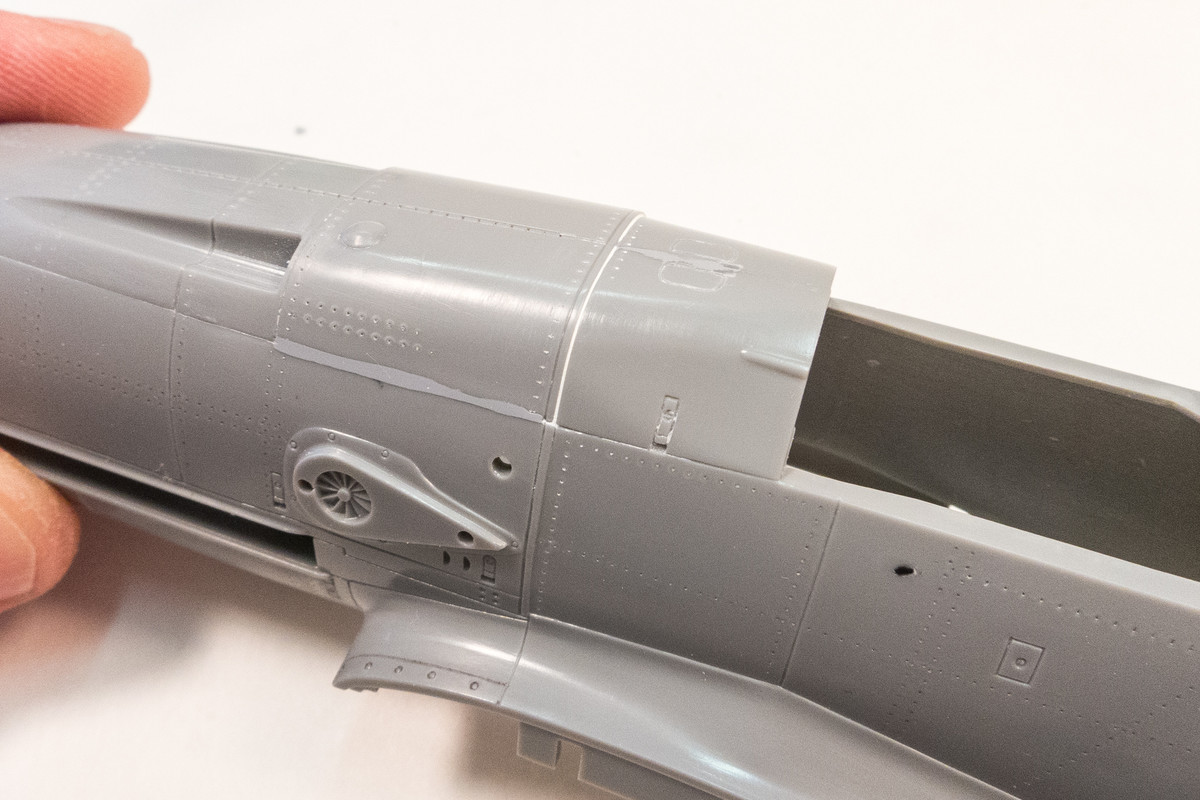
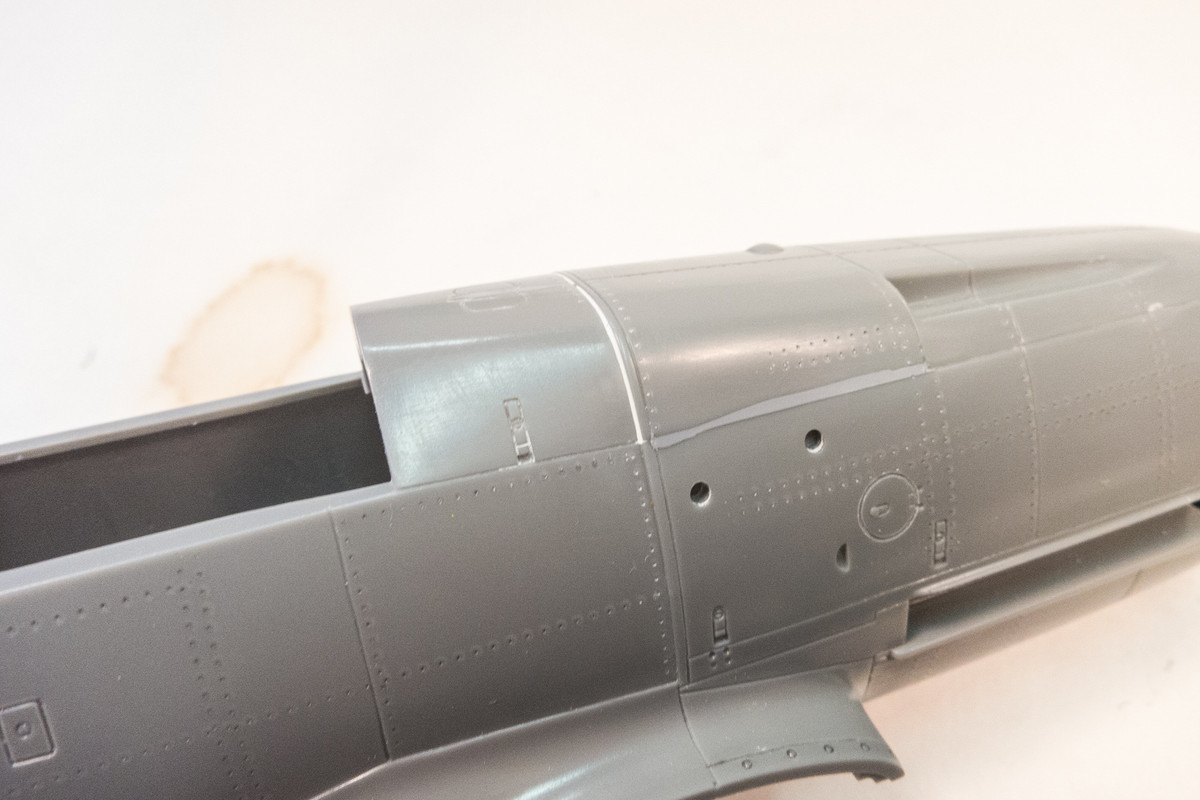
After the application, this area will need no further attention. No sanding required. You can do this type of thing with other putties but you'd need some sort of solvent. I like water because it will not harm plastic or even paint.
I have a spare supercharger intake from Barracuda but it is for Revell kit and is every so slightly undersized.
The kit supercharger fits much better so I've replaced the damaged weld line (Hasegawa stupidly put TWO sprue attachment points on the weld line) with stretched sprue.
I've also added some bolt details to the front face of the intake.
The gun cowling has been glued into place but there is a slight gap at the rear. It's very narrow and not very noticeable but I like all of my panel lines to have a finite "bottom" for visual consistency.
A great way to address these lengthy narrow gaps is Milliput. Milliput is a two-part epoxy that comes in different grades of fineness. I use White which is the finest grade. It has the consistency of clay so it has different uses than liquid putties. You just pinch off two equal sized bits of putty and knead them together until they are one uniform color.
I use the tip of a toothpick to apply the putty. Turning the toothpick tip can help force the putty into the crack.
Work your way down the crack until it is completely filled. You can take your time because Milliput is a very slow cure epoxy and won't start hardening for at least 30 minutes. This is the stage where most putty applications end. Normally, you can wait until this dries and then start sanding away. But this is where Milliput really shines.
Wet your finger and start rubbing along the putty application, Water will cut into the Milliput, simultaneously removing and smoothing the putty.
I want to remove the excess so I switch to a piece of damp paper towel and continue to rub down the area. Depending on how aggressive you rub, you can remove the putty until it is level with the surrounding plastic or even below it. This joint is a panel line so I'm not trying to eliminate the gap, just put a consistent bottom to it.
After the application, this area will need no further attention. No sanding required. You can do this type of thing with other putties but you'd need some sort of solvent. I like water because it will not harm plastic or even paint.
John aka JKim
-----------<><
-----------<><
-
BlackSheep214

- Elite Member
- Posts: 13596
- Joined: Sun Apr 06, 2014 8:47 pm
Re: 1/32 Hasegawa Bf109G-14 Hartmann
“Who controls the skies, controls the fate of this Earth”
Author unknown- 352nd Fighter Group, Blue-Nosed Bastards of Bodney
“Send one plane it’s a sortie; send two planes it’s a flight; send four planes it’s a test of airpower. - Richard Kohn
Author unknown- 352nd Fighter Group, Blue-Nosed Bastards of Bodney
“Send one plane it’s a sortie; send two planes it’s a flight; send four planes it’s a test of airpower. - Richard Kohn
Re: 1/32 Hasegawa Bf109G-14 Hartmann
Your seam work is great and thank you for going into detail on how you work with miliput. I use it but since it's on the expensive side I tend to use Perfect Plastic Putty unless I need the joint to hold really well.
March as one, Don't look back
Odin's sons... Attack!
Unleash hell! Do not repent! Warfare grants us no lament
Let your weapons slash and tear This is no place for fear
Hold the lines! Move as one! In unity our victory's won
Our shields will form a mighty wall
United we shall never fall
Odin's sons... Attack!
Unleash hell! Do not repent! Warfare grants us no lament
Let your weapons slash and tear This is no place for fear
Hold the lines! Move as one! In unity our victory's won
Our shields will form a mighty wall
United we shall never fall