Tamiya 1/32 Spitfire XIVe Conversion

Re: Tamiya 1/32 Spitfire XIVe Conversion
John, I have no adequate words for your builds. All are educational, entertaining, next level, life-like, loose to perfect, well detailed and well, just amazing.
To make each build less crappy than the last one. Or, put another way, "Better than the last one, not as good as the next one!"..

Re: Tamiya 1/32 Spitfire XIVe Conversion
Thanks so much for the comment Lyle! I will say this... this is fun for me. At times, my OCD takes over and I can't let well enough alone. Sometimes it pushes me to painting an engine, fully knowing that it will be buried it inside the fuselage, never to be seen again. Or multiple iterations of an assembly, this build's instrument panel for example. Always searching for increments of improvement. But that's what I enjoy doing. I realize that not everyone derives pleasure in the same way as me. You and I share a very cool hobby and so I'm super thankful for these message boards because it allows me to share my work with others. I don't know anyone personally that builds plastic models and I think I have, like the rest of you, a desire to share this stuff with others. So thank you! Blessed to be part of a community.
When I painted up my kit instrument panel, Mathieu from Laminar Flow Design hinted that it would look better if I highlighted the individual bolts around each instrument. I kept a mental note of that and when he sent me his new instrument panel print, I noticed how painstakingly rendered each bolt, not only making it raised but providing a recessed ring around each bolt. You can see this in the photo of the primered panel a few posts back. So that's why I went through the trouble of highlighting the bolts on this panel.
That was pretty fiddly but nothing compared to trying to play Scrabble with a tiny stencil decal from Barracuda...
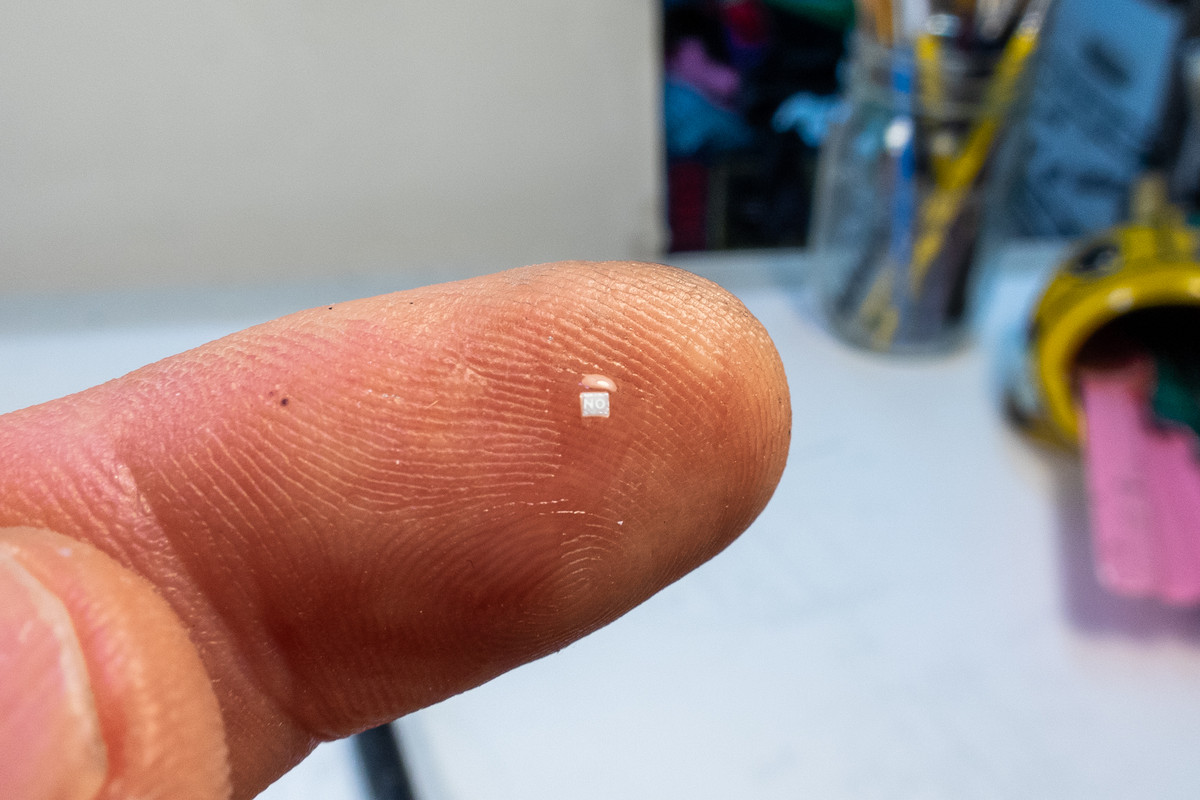
Cutting these individual letters and arranging them took a few tries. And the result is not 100% satisfactory as I botched the first "NO" and had no choice but to use bigger letters the second time around. So yes, I changed my mind yet again and decided to add the sun shade on top of the Type II gyro gun sight.
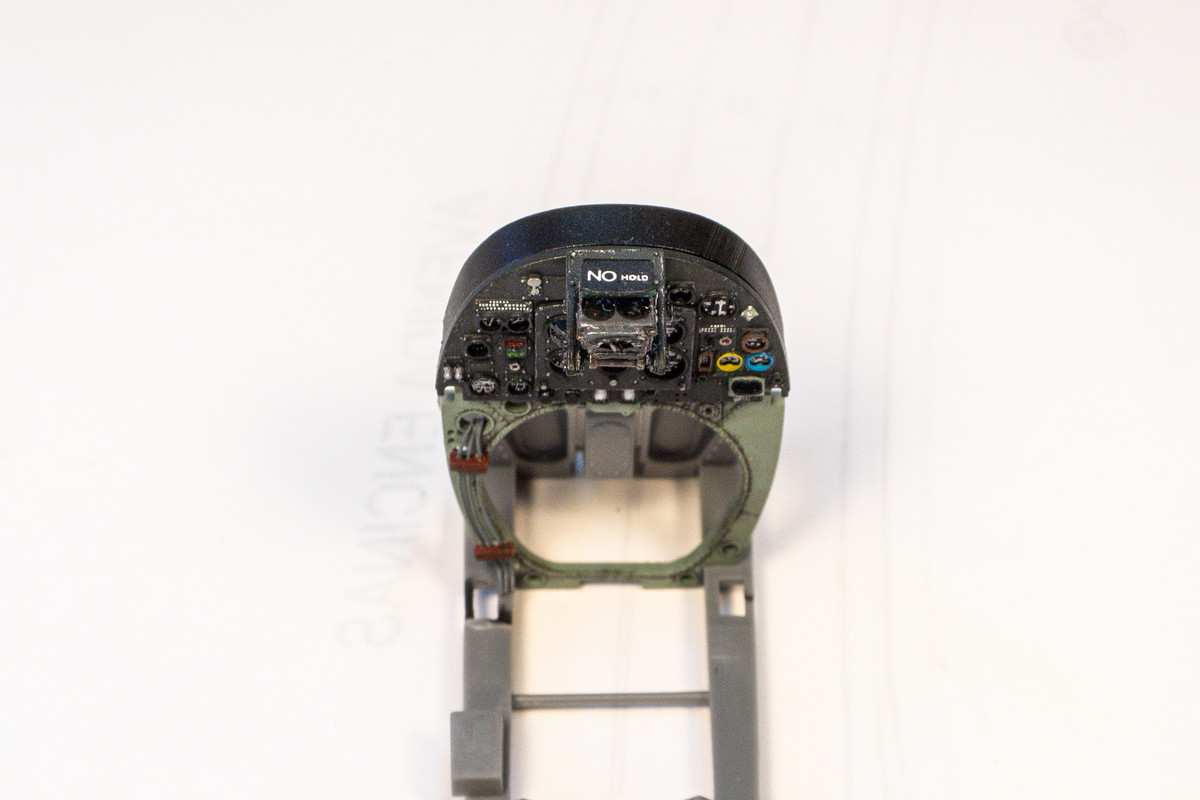
Here is the gun sight temporarily placed on the instrument panel. The mount is from Barracuda and the gun sight is from the Special Hobby Tempest kit (probably CMK).
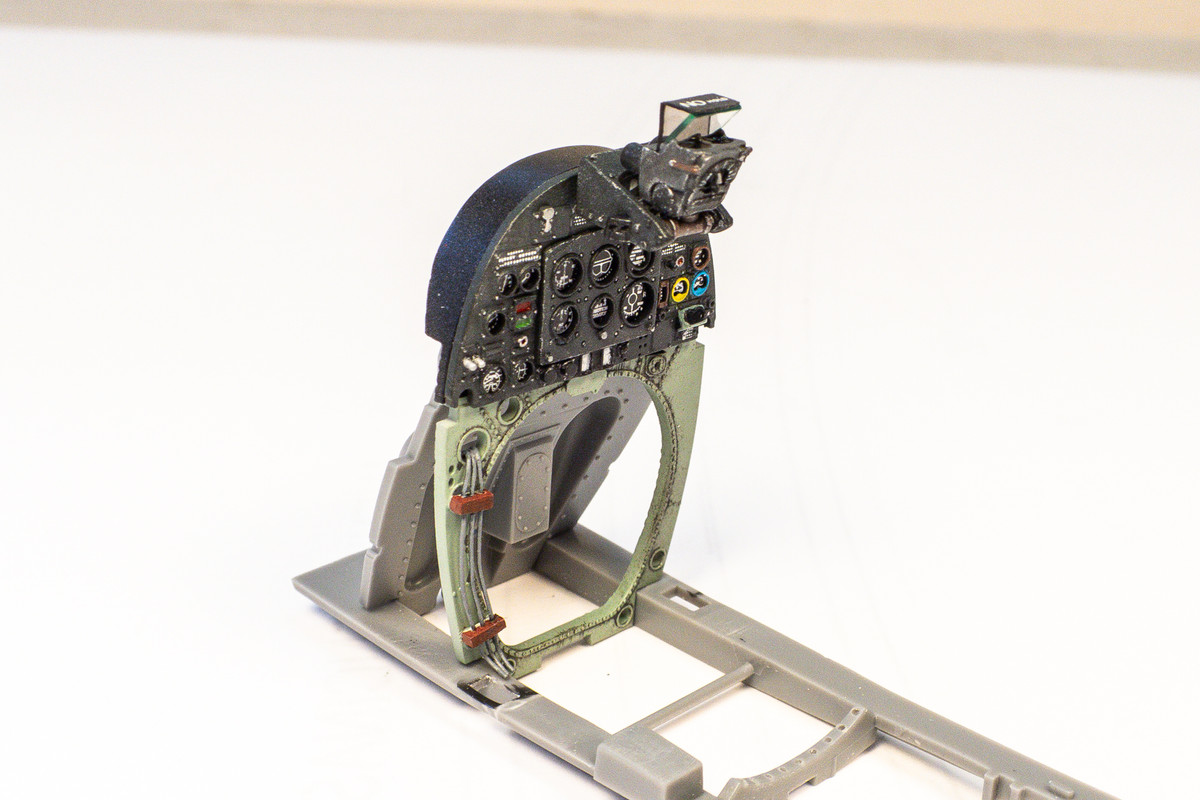
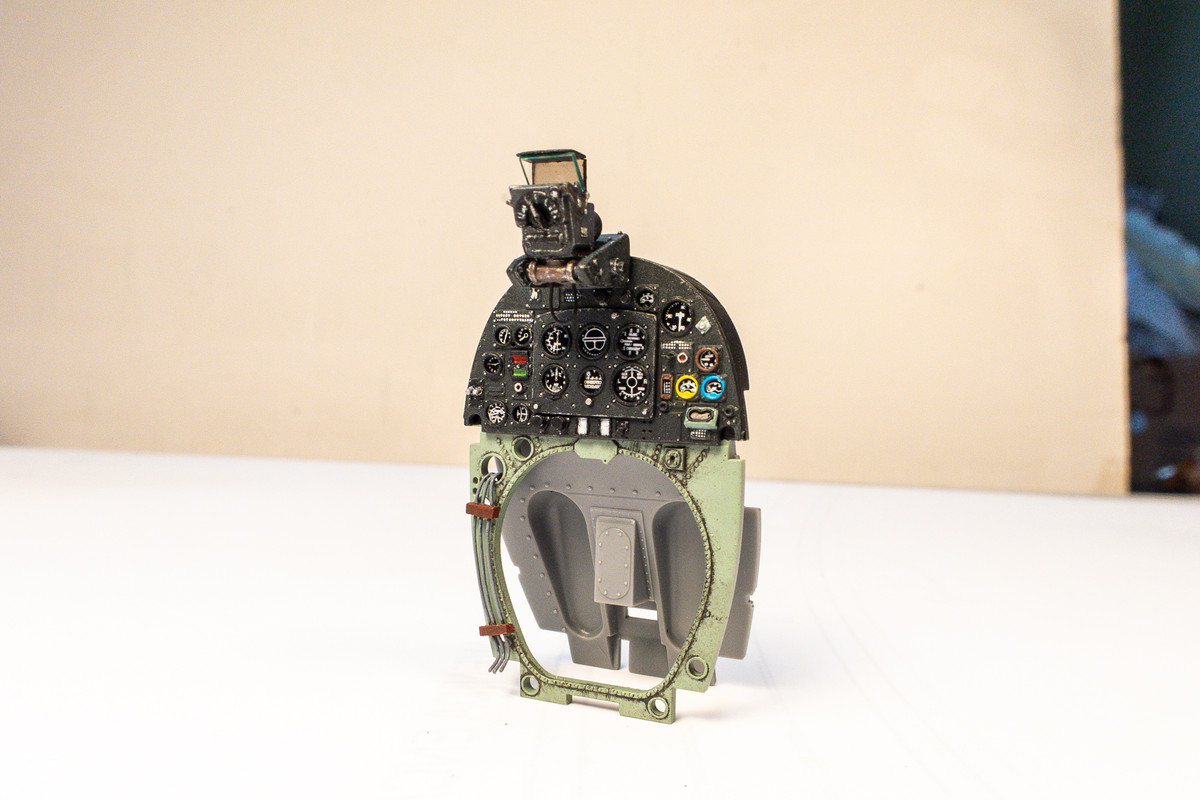
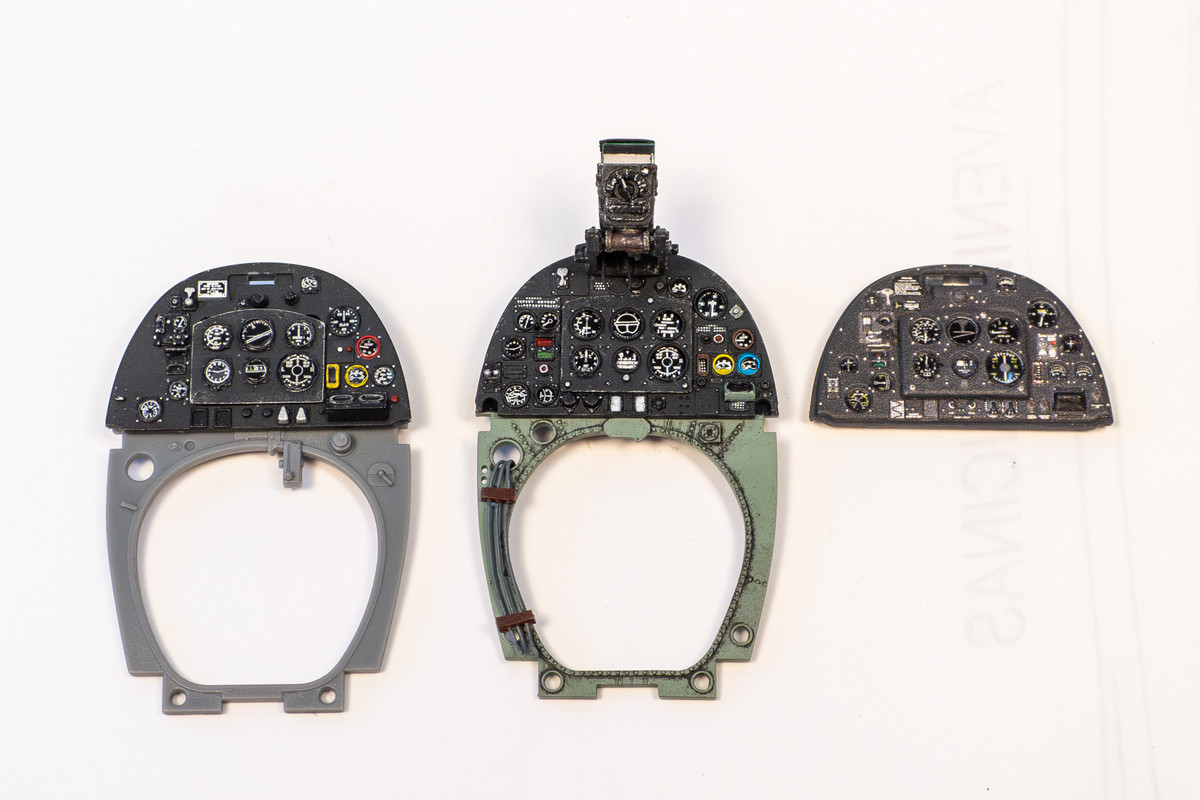
Another view of the three instrument panels. I think all of them are good in their own ways but I'm going with the Laminar Flow Design panel.
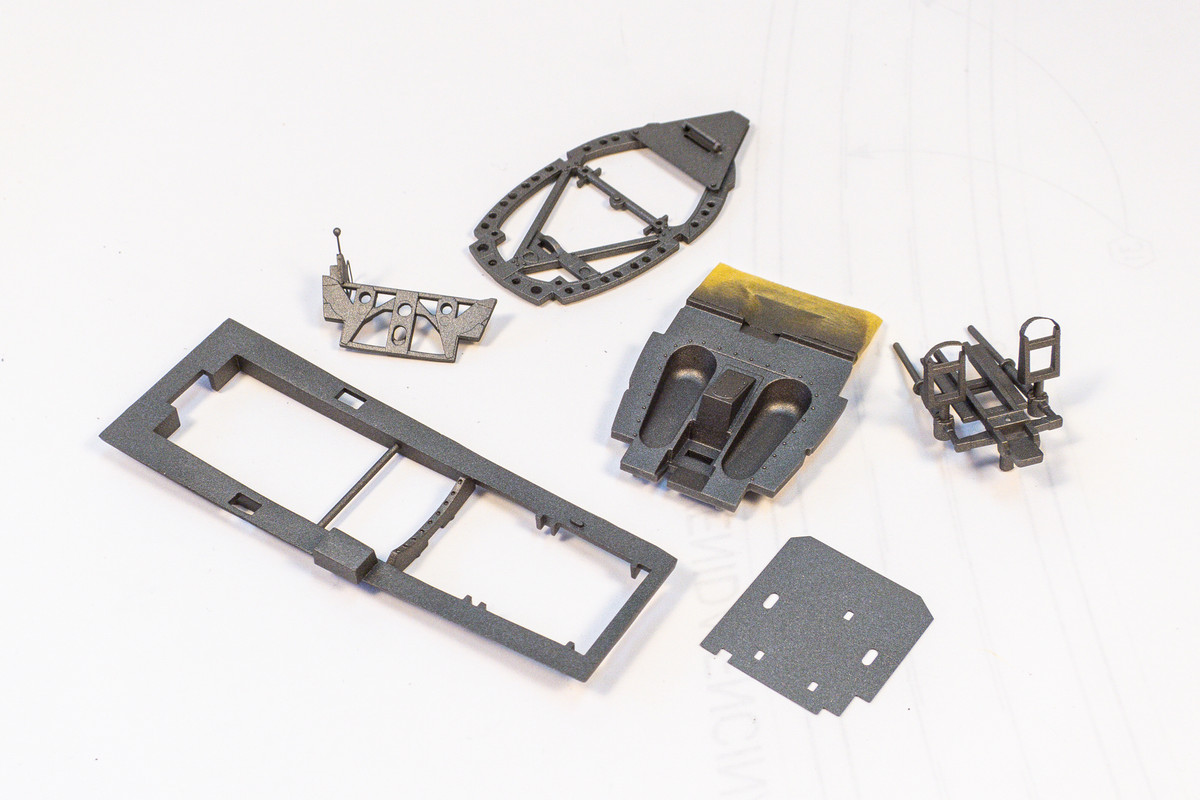
Some of the cockpit components are going to get the hairspray chipping treatment. So I've given these parts a base coat of a dark metal color. I find that I get more consistent chipping results if the hairspray is applied to a matte surface, compared a glossy surface where the hairspray tends to bead and pool. So I mixed Tamiya AS-12 Silver with some Tamiya Flat Black for this base metal color.
When I painted up my kit instrument panel, Mathieu from Laminar Flow Design hinted that it would look better if I highlighted the individual bolts around each instrument. I kept a mental note of that and when he sent me his new instrument panel print, I noticed how painstakingly rendered each bolt, not only making it raised but providing a recessed ring around each bolt. You can see this in the photo of the primered panel a few posts back. So that's why I went through the trouble of highlighting the bolts on this panel.
That was pretty fiddly but nothing compared to trying to play Scrabble with a tiny stencil decal from Barracuda...
Cutting these individual letters and arranging them took a few tries. And the result is not 100% satisfactory as I botched the first "NO" and had no choice but to use bigger letters the second time around. So yes, I changed my mind yet again and decided to add the sun shade on top of the Type II gyro gun sight.
Here is the gun sight temporarily placed on the instrument panel. The mount is from Barracuda and the gun sight is from the Special Hobby Tempest kit (probably CMK).
Another view of the three instrument panels. I think all of them are good in their own ways but I'm going with the Laminar Flow Design panel.
Some of the cockpit components are going to get the hairspray chipping treatment. So I've given these parts a base coat of a dark metal color. I find that I get more consistent chipping results if the hairspray is applied to a matte surface, compared a glossy surface where the hairspray tends to bead and pool. So I mixed Tamiya AS-12 Silver with some Tamiya Flat Black for this base metal color.
John aka JKim
-----------<><

-----------<><
-
Stikpusher

- Moderator
- Posts: 21386
- Joined: Sat Apr 05, 2014 8:37 pm
- Location: Ceti Alpha 5
Re: Tamiya 1/32 Spitfire XIVe Conversion
Seriously those are some tough choices to make among those. All three look fantastic. I suppose it comes down to personal taste. Any of those will do nicely.
"Surely I have made my meaning plain? I intend to avenge myself upon you, Admiral. I have deprived your ship of power, and when I swing 'round, I intend to deprive you of your life."
FLSM
FLSM
-
BlackSheep214

- Elite Member
- Posts: 13598
- Joined: Sun Apr 06, 2014 8:47 pm
Re: Tamiya 1/32 Spitfire XIVe Conversion
Stikpusher wrote: ↑Thu May 30, 2024 8:10 pm Seriously those are some tough choices to make among those. All three look fantastic. I suppose it comes down to personal taste. Any of those will do nicely.

What he said….

“Who controls the skies, controls the fate of this Earth”
Author unknown- 352nd Fighter Group, Blue-Nosed Bastards of Bodney
“Send one plane it’s a sortie; send two planes it’s a flight; send four planes it’s a test of airpower. - Richard Kohn
Author unknown- 352nd Fighter Group, Blue-Nosed Bastards of Bodney
“Send one plane it’s a sortie; send two planes it’s a flight; send four planes it’s a test of airpower. - Richard Kohn
-
tempestjohnny

- Elite Member
- Posts: 3826
- Joined: Sat Oct 15, 2016 4:51 am
- Location: Naples. FL
Re: Tamiya 1/32 Spitfire XIVe Conversion
The detail choices we now have for building kits is fantastic. Remember what we had before all this came about
Re: Tamiya 1/32 Spitfire XIVe Conversion
Thanks for the comments guys! Appreciate it!
Just when I thought my instrument panel was finished, this little envelope showed up in my post box...
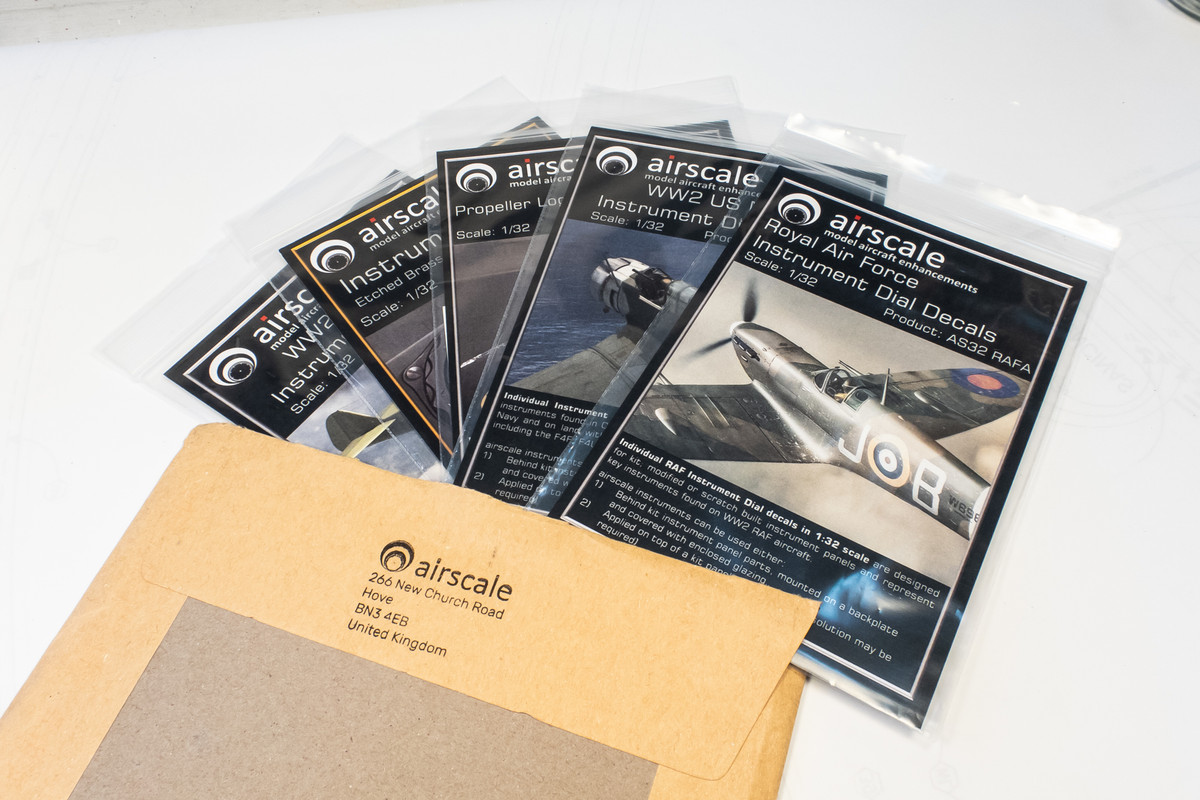
My much needed re-supply of Airscale products. Thank you so much, Peter! I noticed right away that RAF instrument panel sheet must've been updated because it looks different than the one I used. This one has color!
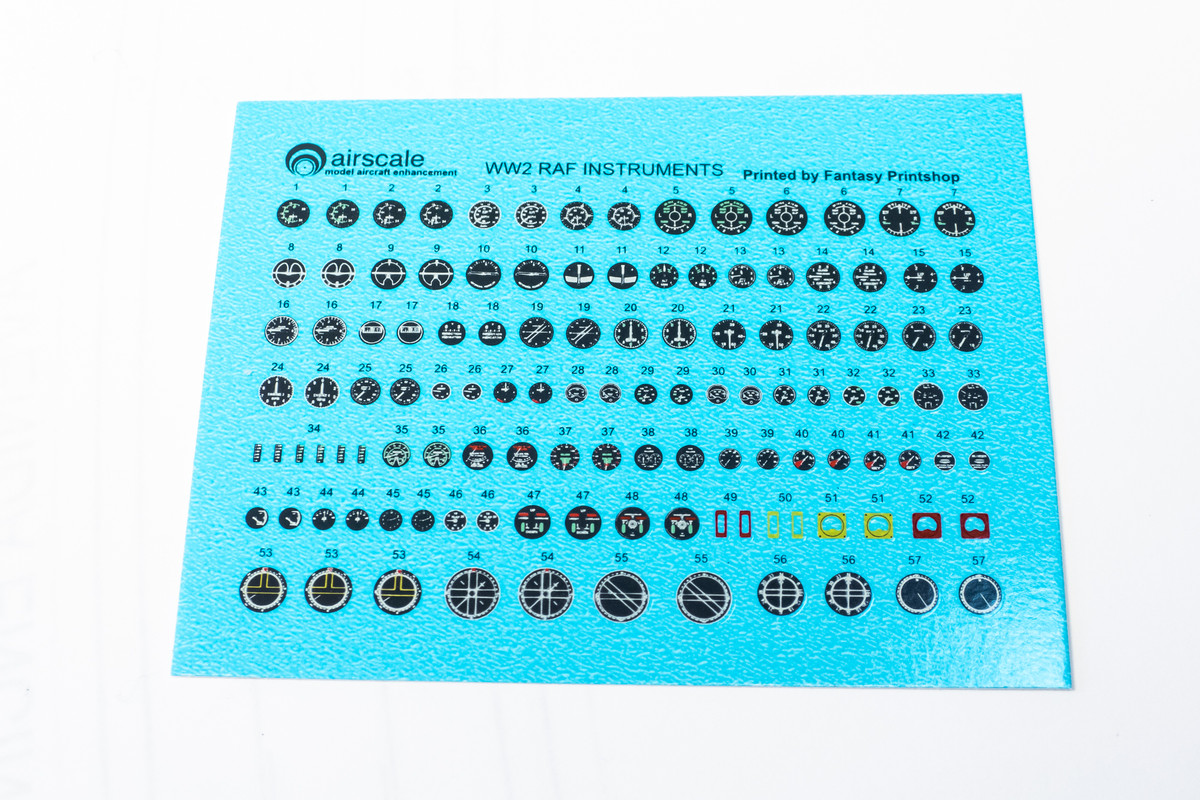
I ended up replacing four of the instruments including the artificial horizon, direction finder, oxygen supply (dash of red) and brake pressure (bits of green).
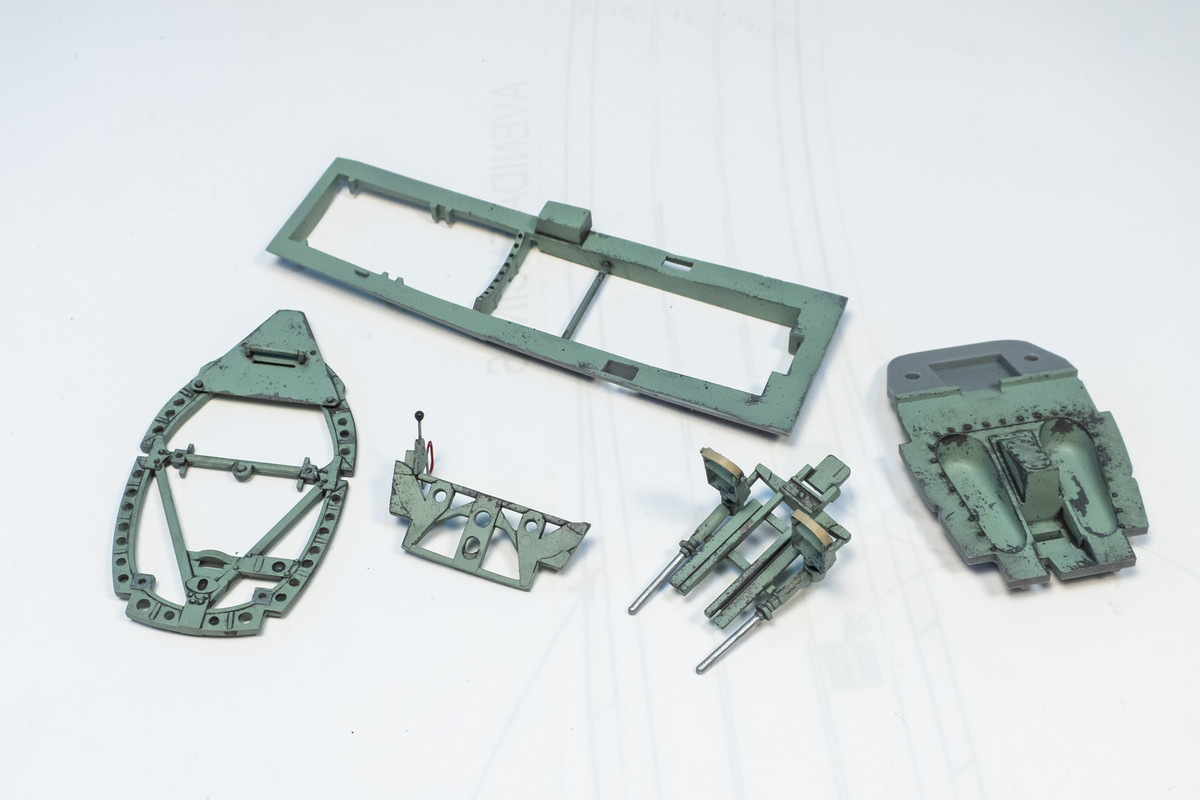
The select group of parts have been given a coat of hairspray and then the interior green (which is AK Real Color RAF Cockpit Grey-Green, RC293). These parts have been chipped using water and a stiff-bristled paint brush.
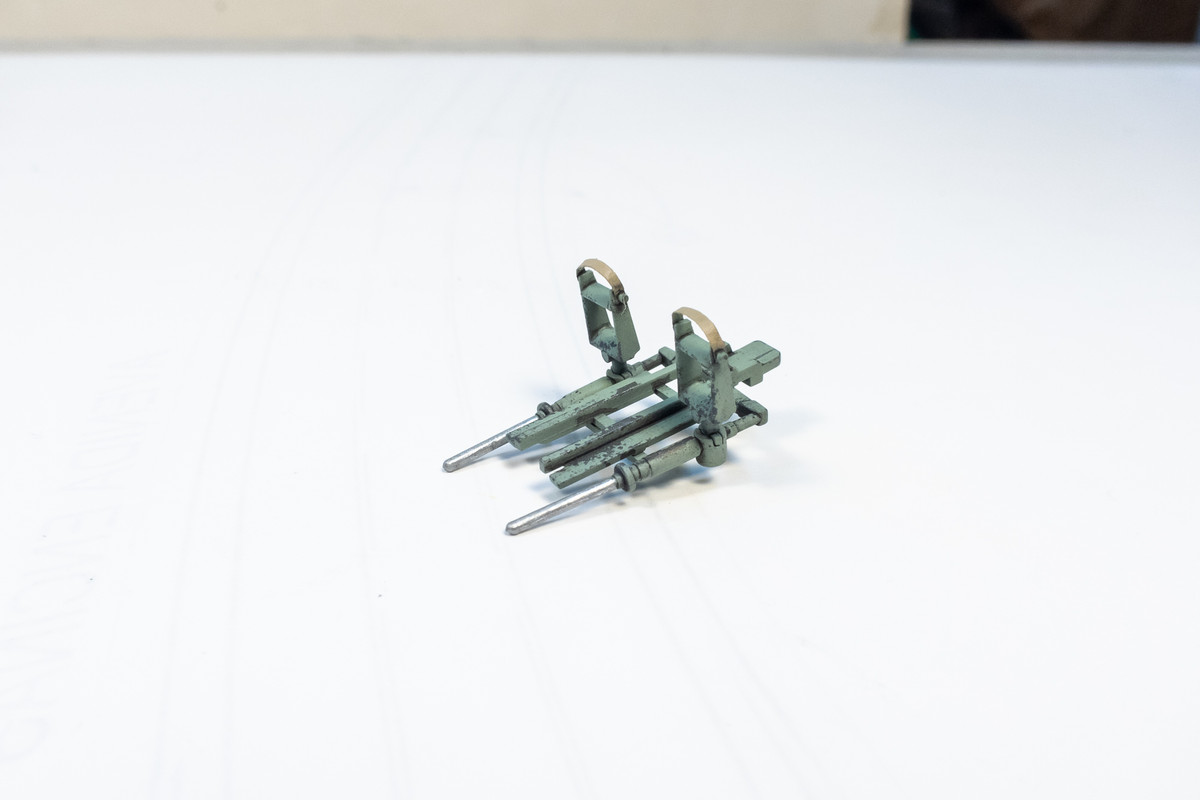
I've added straps to tops of the foot pedals using strips of Tamiya tape.
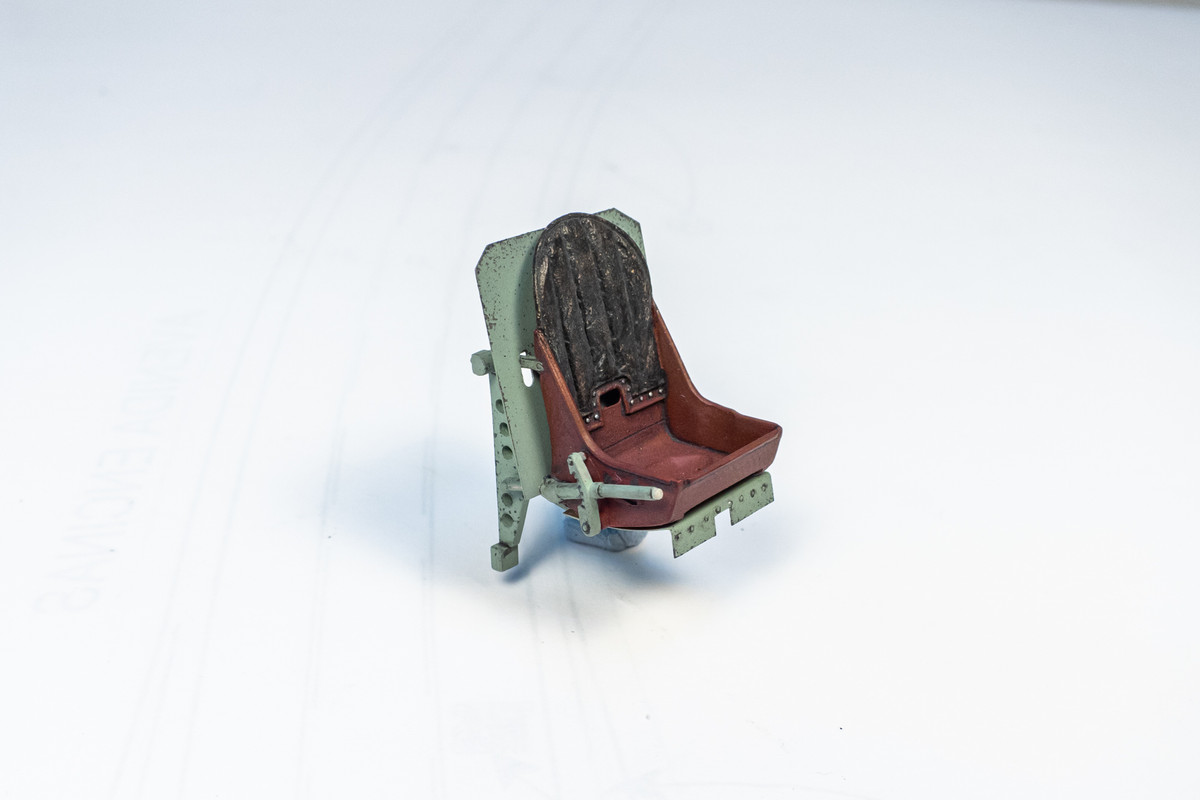
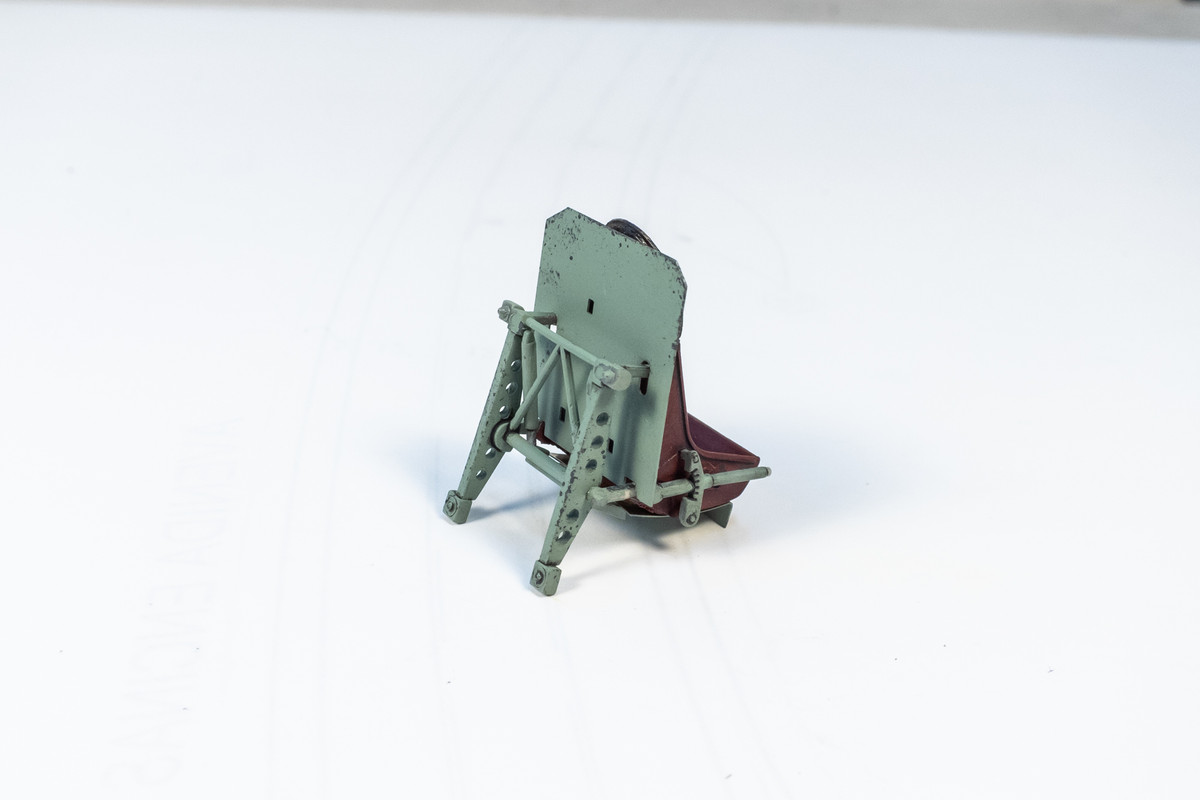
Here is the painted seat. Lightening holes have been drilled out of the seat frame. Instead of a flare rack, I fabricated an armor plate from brass sheet dressed up with Archer's raised rivets.
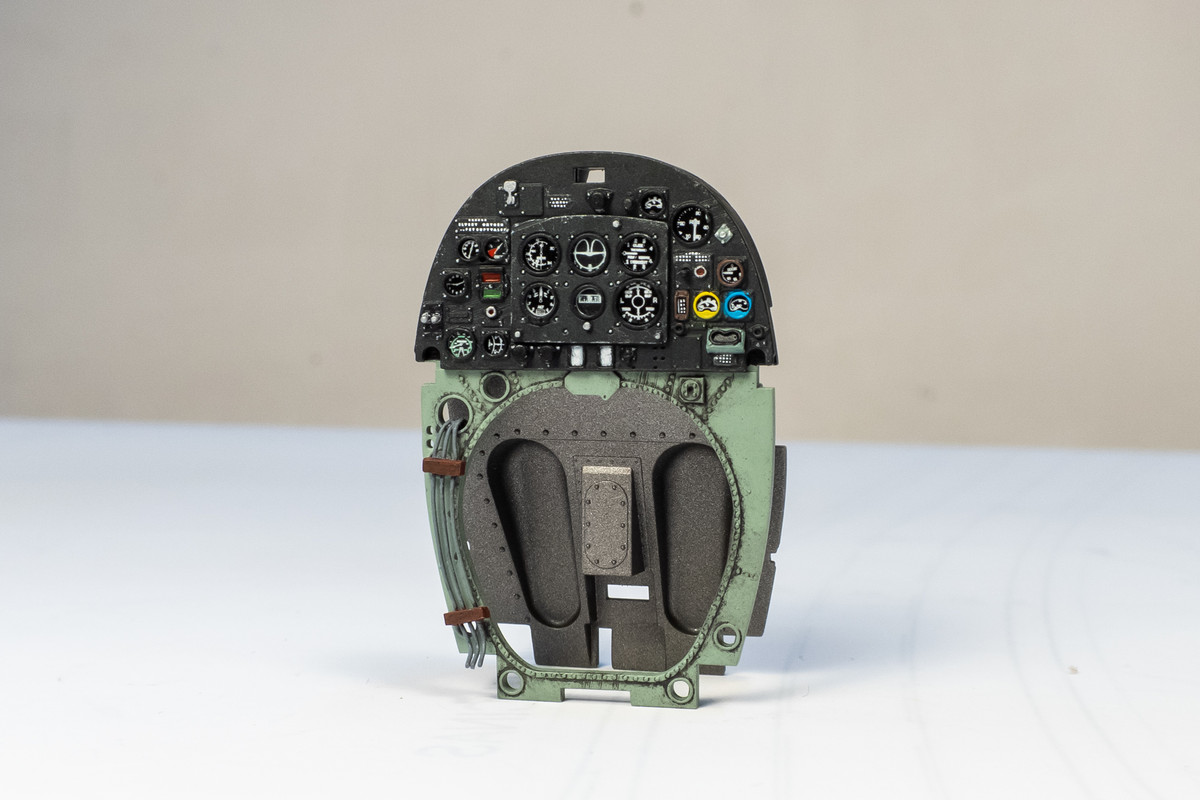
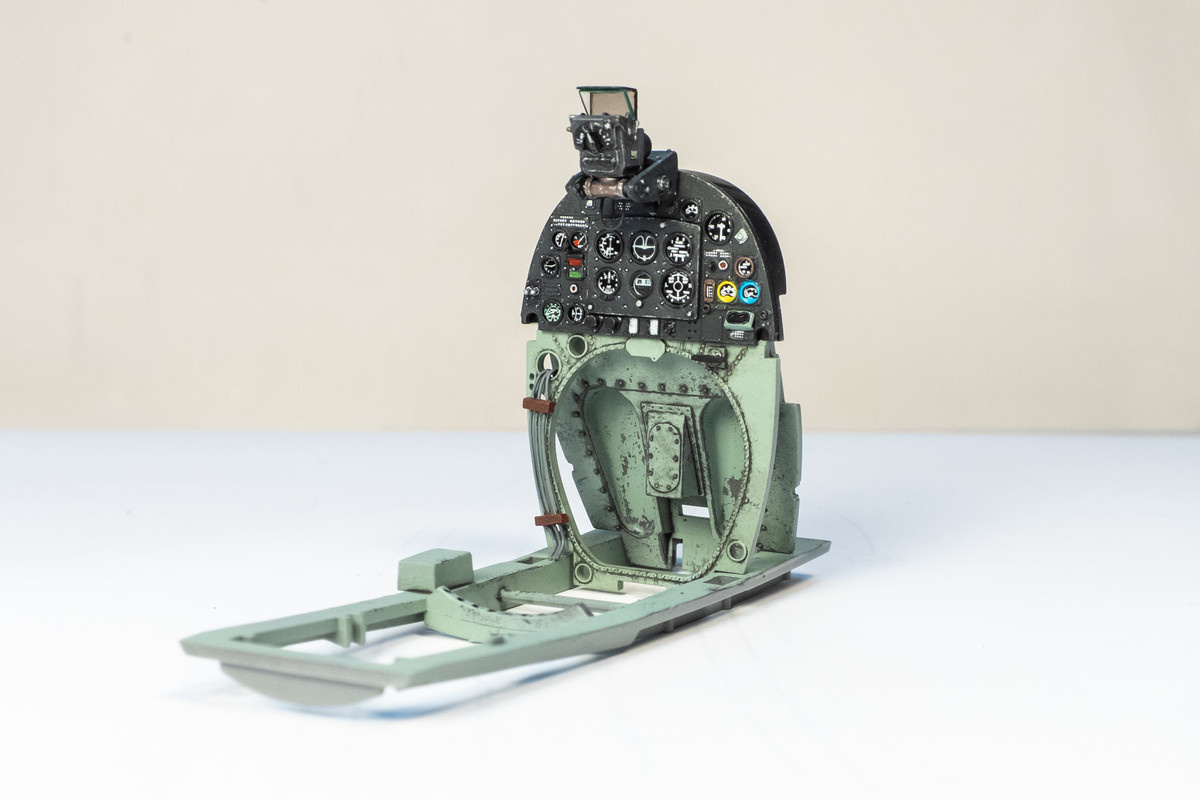
Finally, the "completed" instrument panel mounted on the fully-painted front bulkhead.
It's off to Kansas City for a couple days so I'll be taking a short break from model building!
I totally agree! I think the hobby is way better than it was when I first started in the 70's and 80's. So many new kits and products coming out and they are ALL within reach. I know some do but I have zero desire to build vintage kits when the models are so much better now.tempestjohnny wrote: ↑Fri May 31, 2024 3:07 am The detail choices we now have for building kits is fantastic. Remember what we had before all this came about
Just when I thought my instrument panel was finished, this little envelope showed up in my post box...
My much needed re-supply of Airscale products. Thank you so much, Peter! I noticed right away that RAF instrument panel sheet must've been updated because it looks different than the one I used. This one has color!
I ended up replacing four of the instruments including the artificial horizon, direction finder, oxygen supply (dash of red) and brake pressure (bits of green).
The select group of parts have been given a coat of hairspray and then the interior green (which is AK Real Color RAF Cockpit Grey-Green, RC293). These parts have been chipped using water and a stiff-bristled paint brush.
I've added straps to tops of the foot pedals using strips of Tamiya tape.
Here is the painted seat. Lightening holes have been drilled out of the seat frame. Instead of a flare rack, I fabricated an armor plate from brass sheet dressed up with Archer's raised rivets.
Finally, the "completed" instrument panel mounted on the fully-painted front bulkhead.
It's off to Kansas City for a couple days so I'll be taking a short break from model building!
John aka JKim
-----------<><
-----------<><
Re: Tamiya 1/32 Spitfire XIVe Conversion
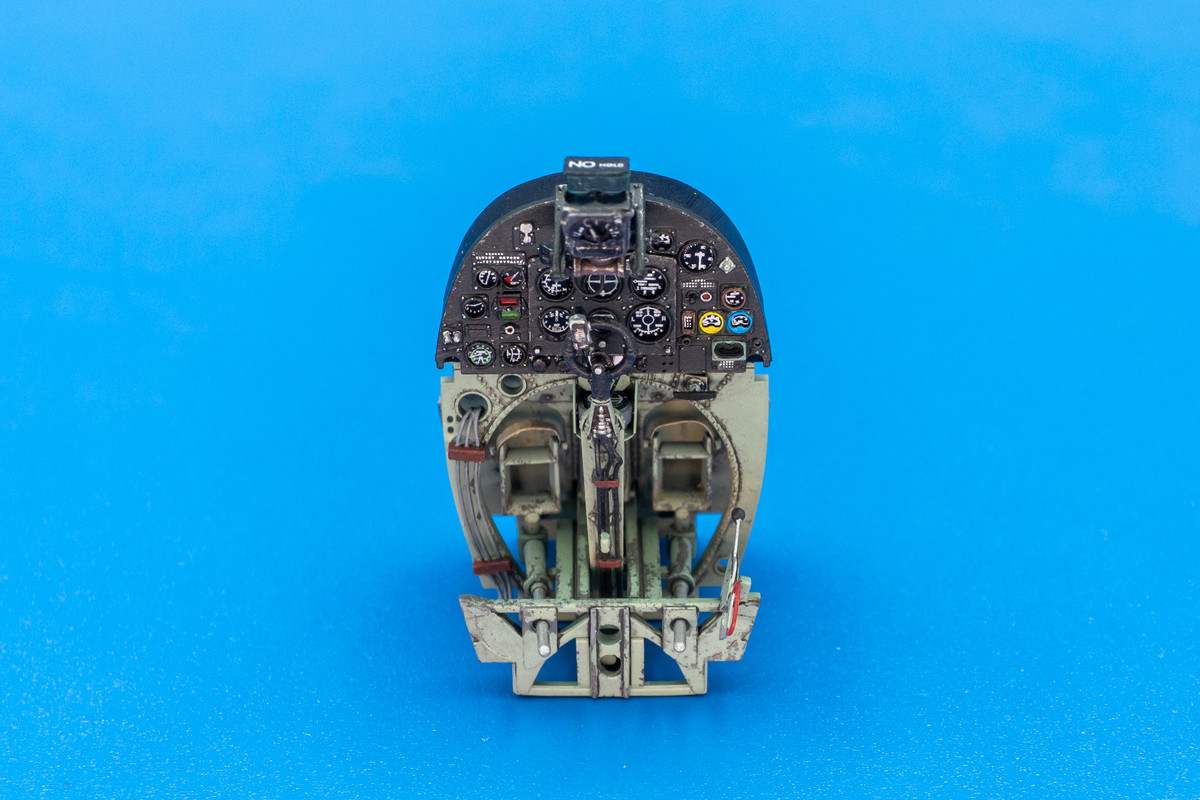
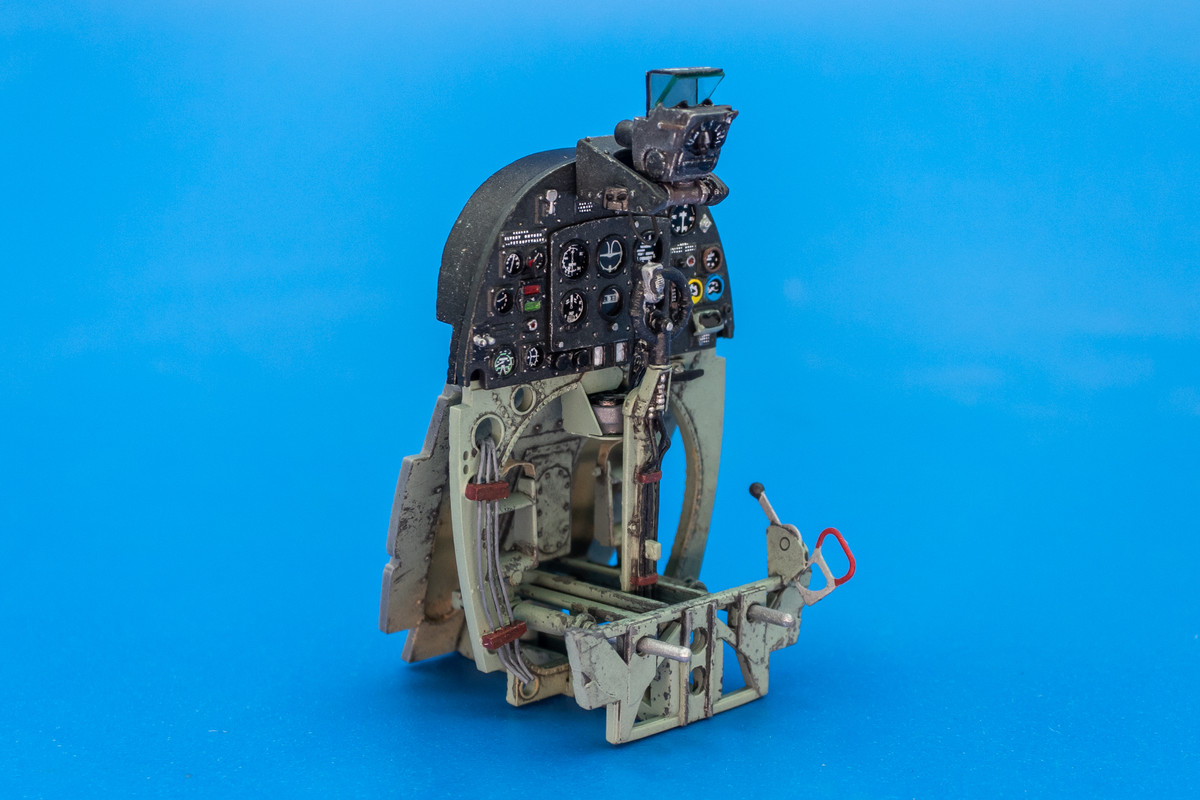
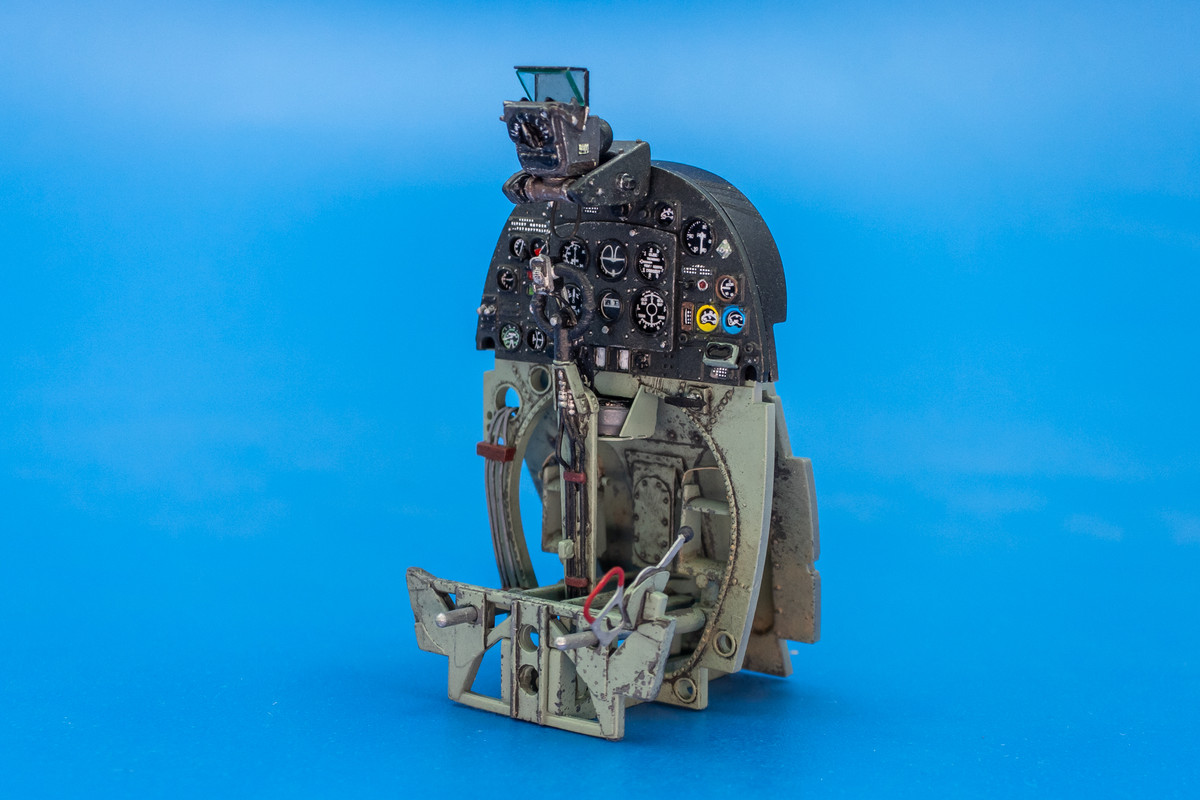
I've started to glue together some of the cockpit subassemblies. Here is the front part of the cockpit including the instrument panel (I've added the compass), front bulkhead and foot pedals. You can't really make it out but the lower regions have been dirtied up a little bit with dry pastels.
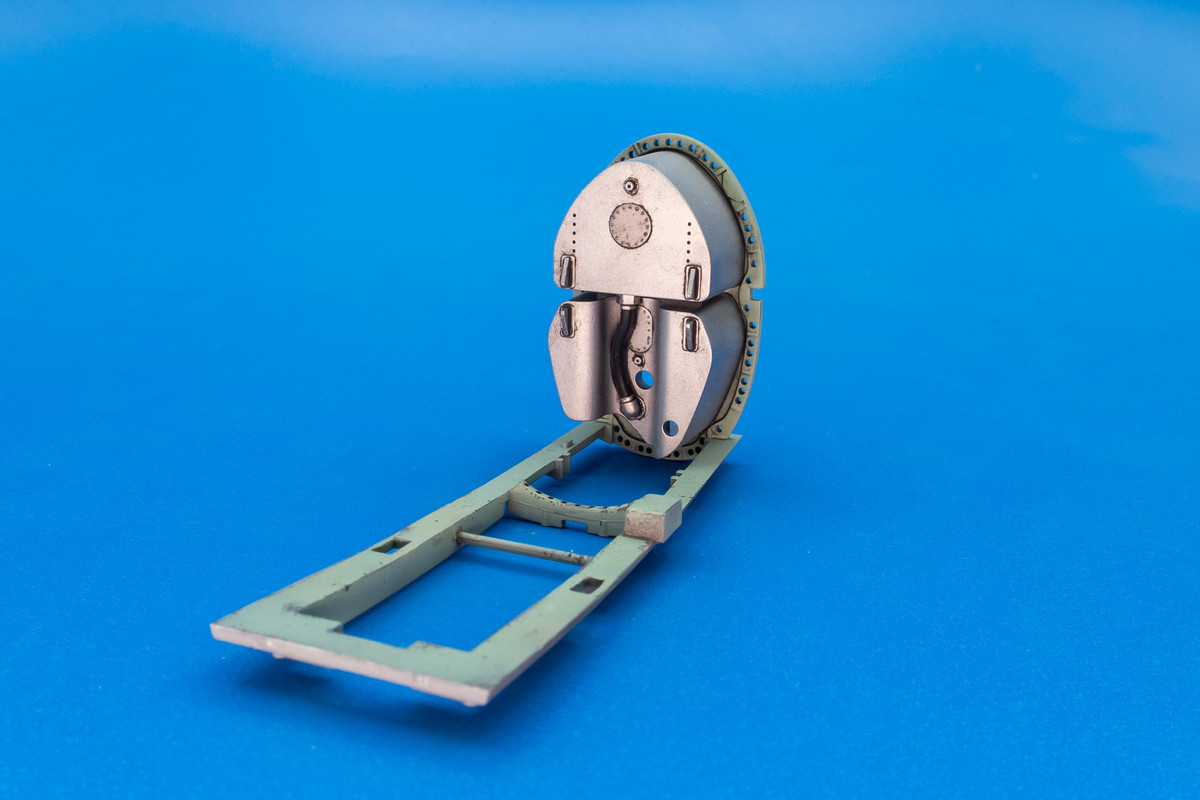
The fuel tank has been painted but I suspect that you won't be able to see much of it once installed into the fuselage.
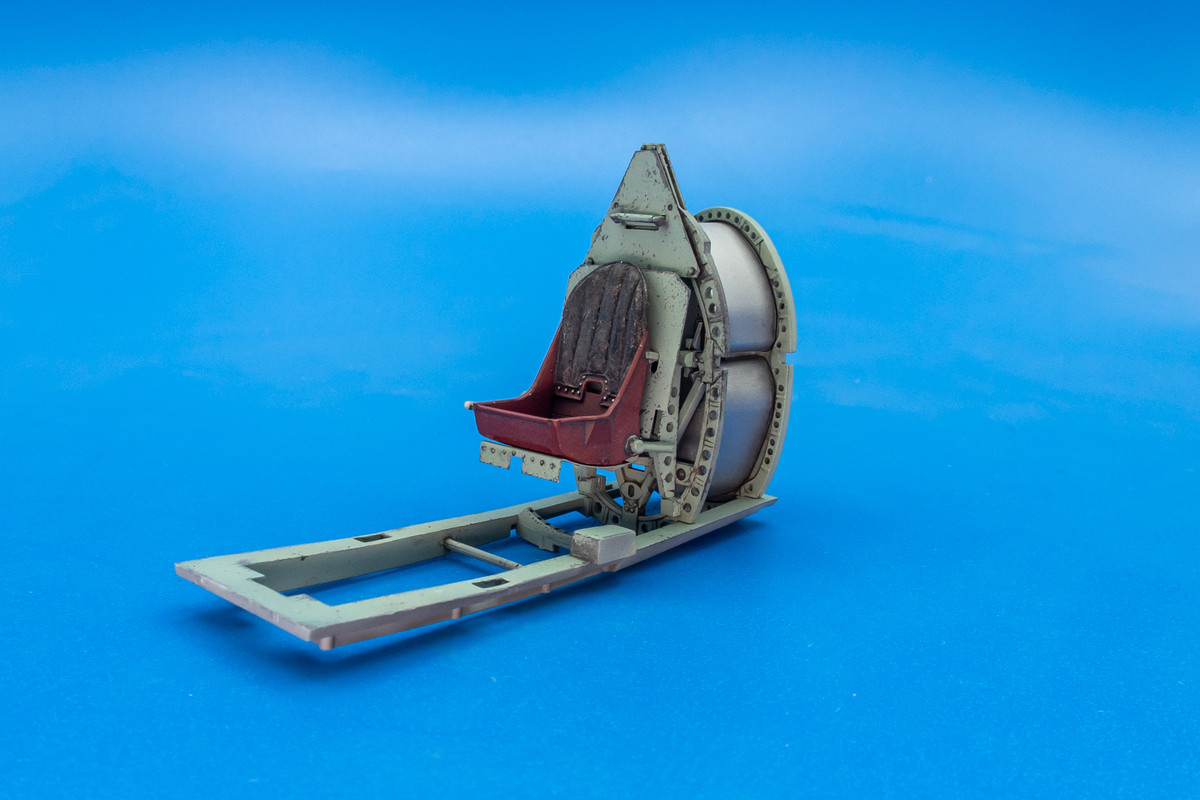
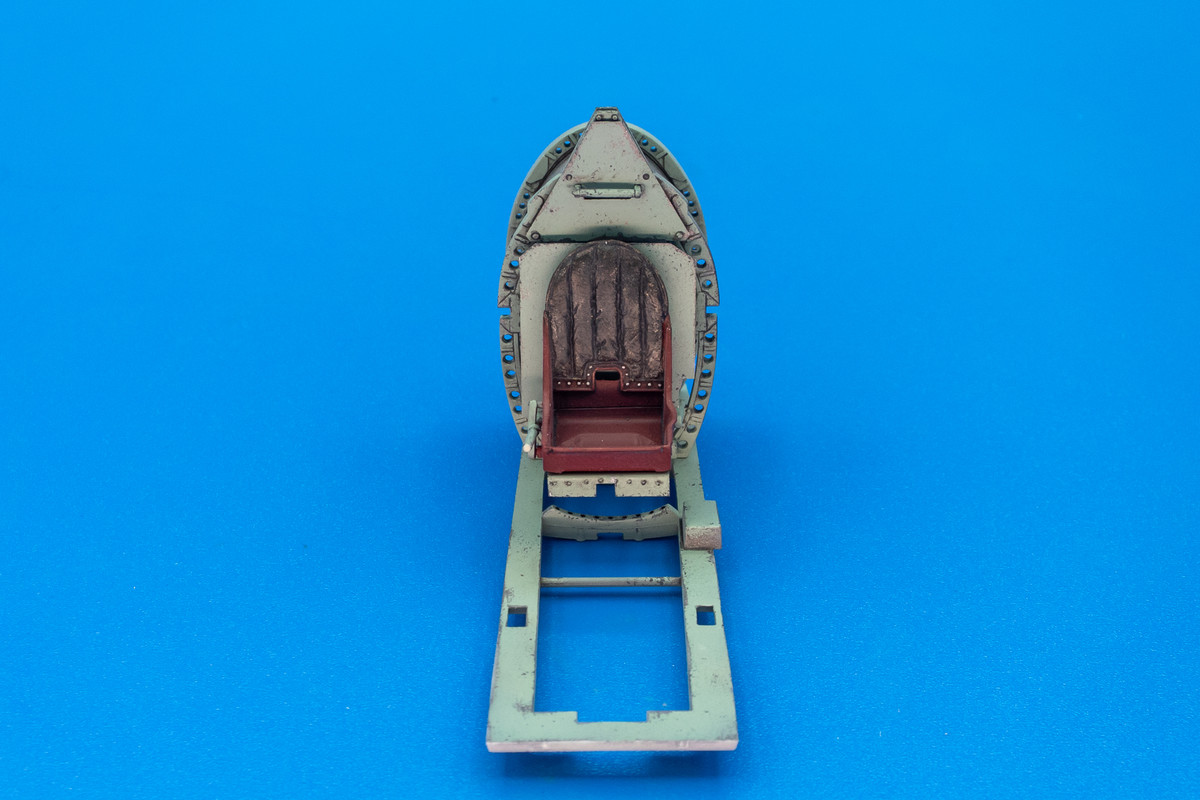
The seat + armor have been glued onto the seat frame and the frame has been glued onto the bulkhead. I won't glue these components onto the cockpit floor until I've attached the seat harnesses.
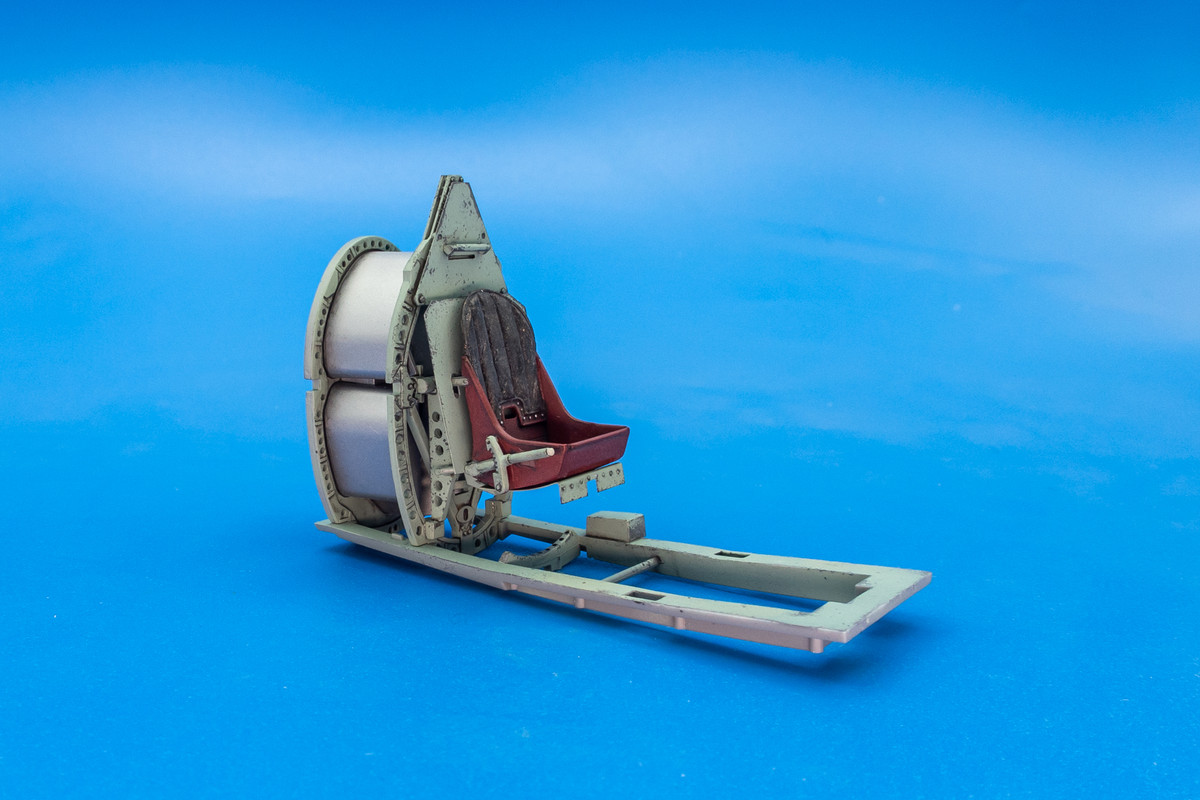
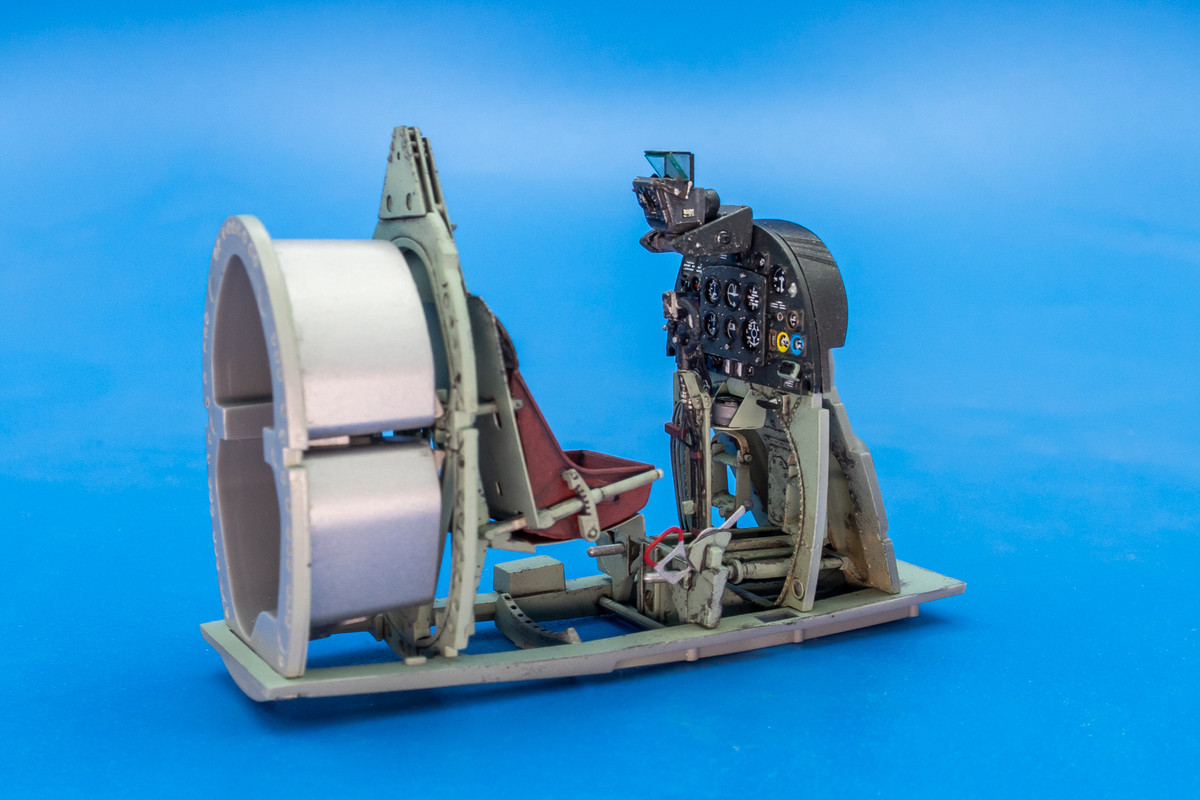
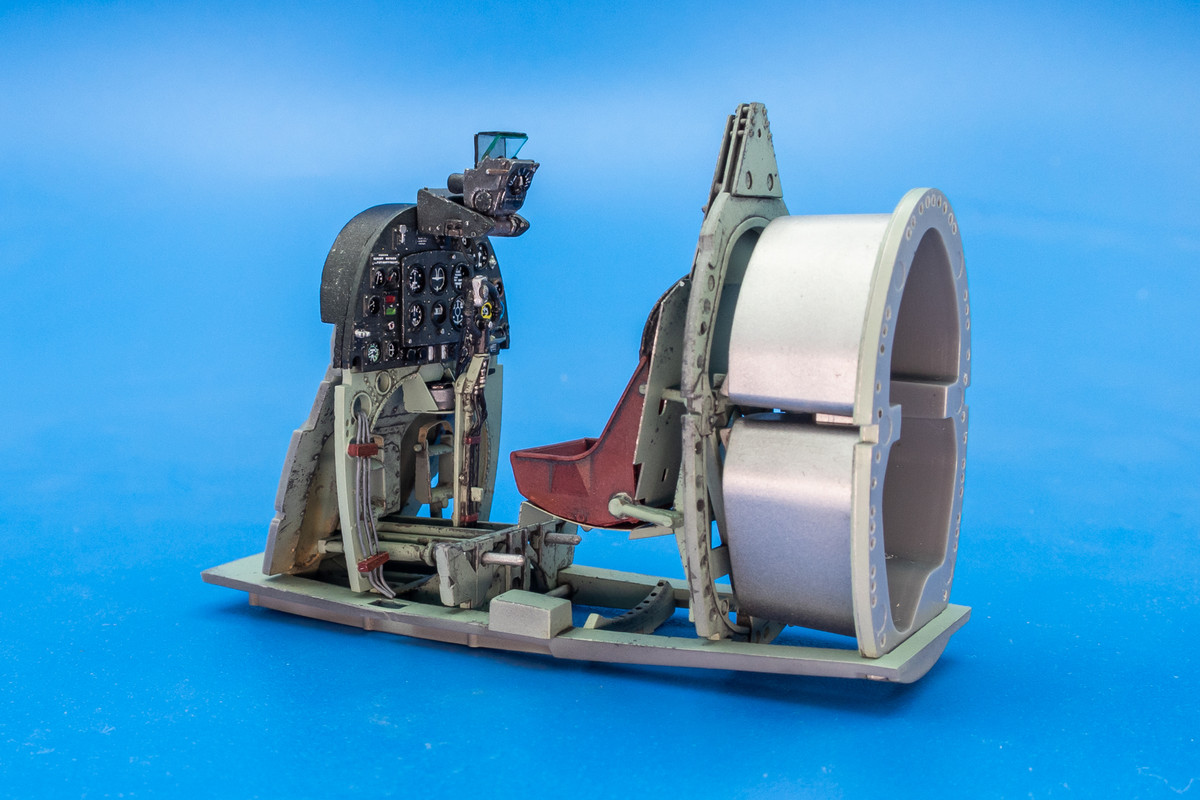
The central cockpit components have been painted and we can now see how this area will look when put together.
The fuel tank has been painted but I suspect that you won't be able to see much of it once installed into the fuselage.
The seat + armor have been glued onto the seat frame and the frame has been glued onto the bulkhead. I won't glue these components onto the cockpit floor until I've attached the seat harnesses.
The central cockpit components have been painted and we can now see how this area will look when put together.
John aka JKim
-----------<><
-----------<><
-
tempestjohnny
- Elite Member
- Posts: 3826
- Joined: Sat Oct 15, 2016 4:51 am
- Location: Naples. FL
Re: Tamiya 1/32 Spitfire XIVe Conversion
Beautiful finish on that cockpit and IP
Re: Tamiya 1/32 Spitfire XIVe Conversion
Thanks Johnny!
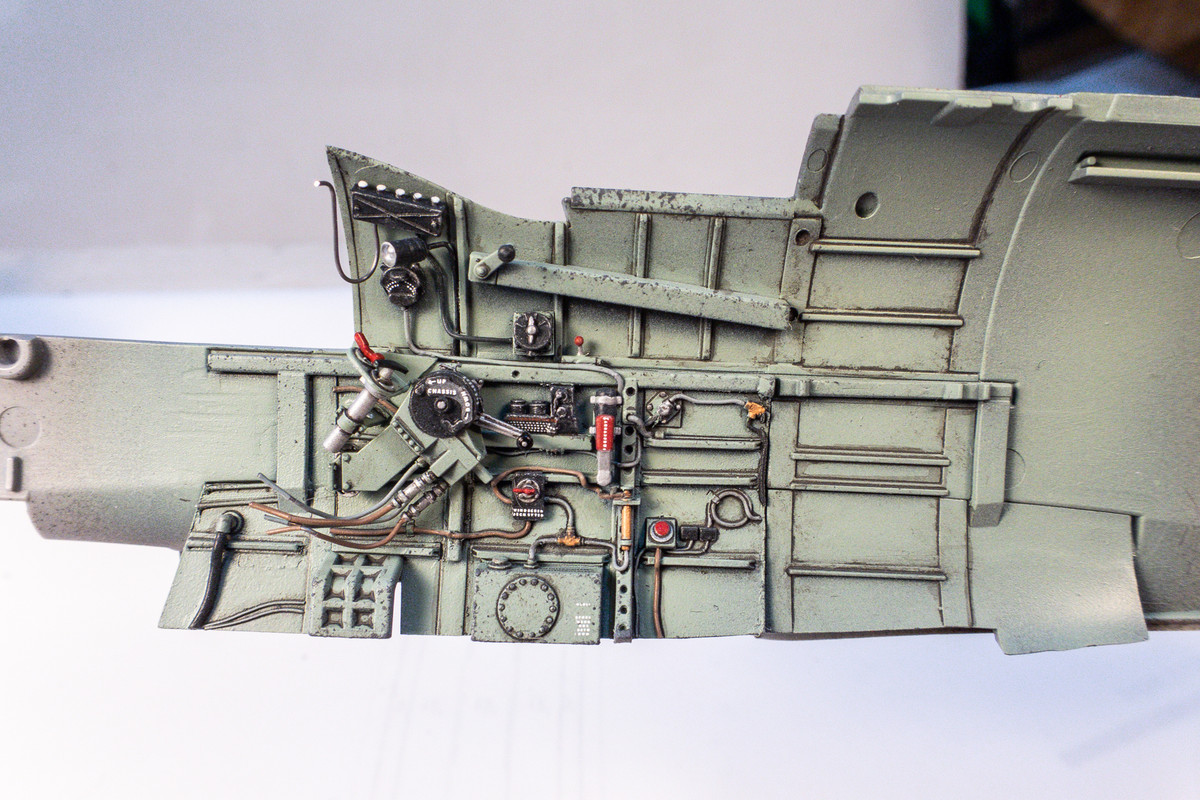
The cockpit painting continues with the sidewalls. I start with the interior color (AK Real Colors RC293 RAF Cockpit Grey-Green) over a black base.
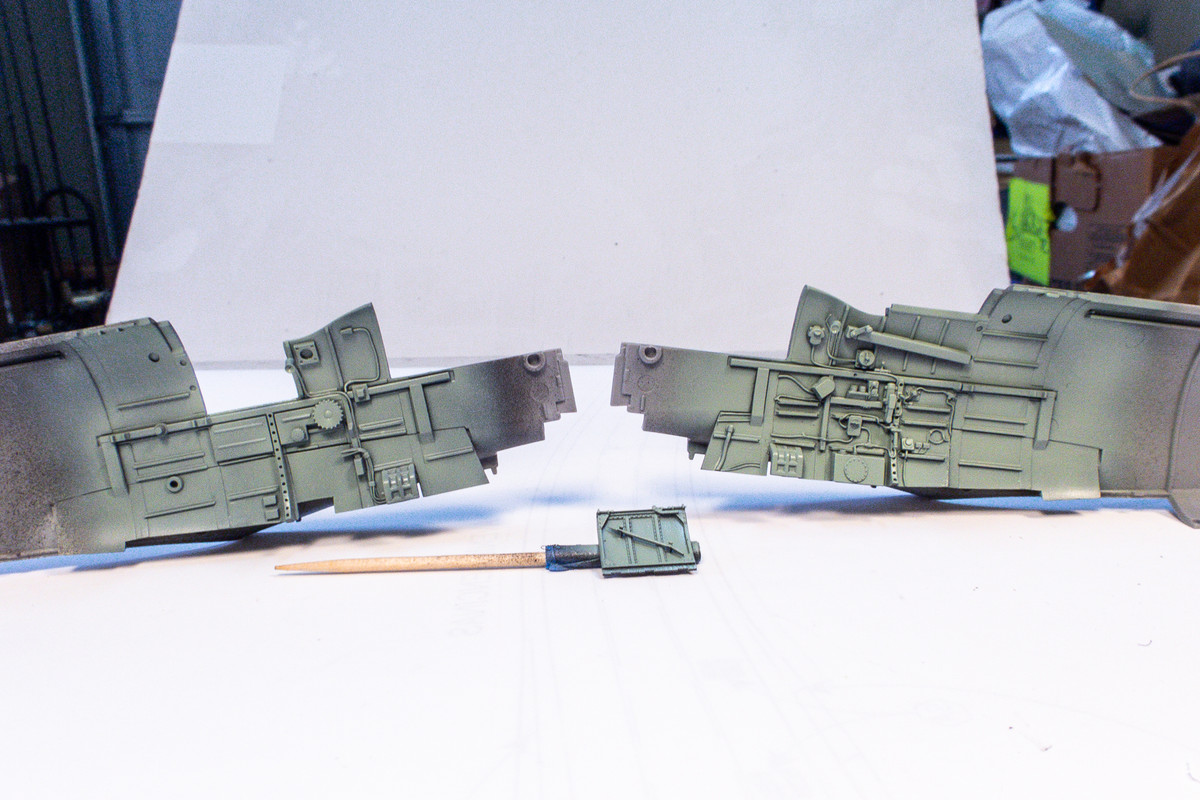
After the interior color, I brush paint various details. I figured that hairspray chipping would be difficult with such an uneven surface so I elected to add chipping effects using a sponge. Cockpit stencils were added from the Barracuda Cockpit enhancement set.
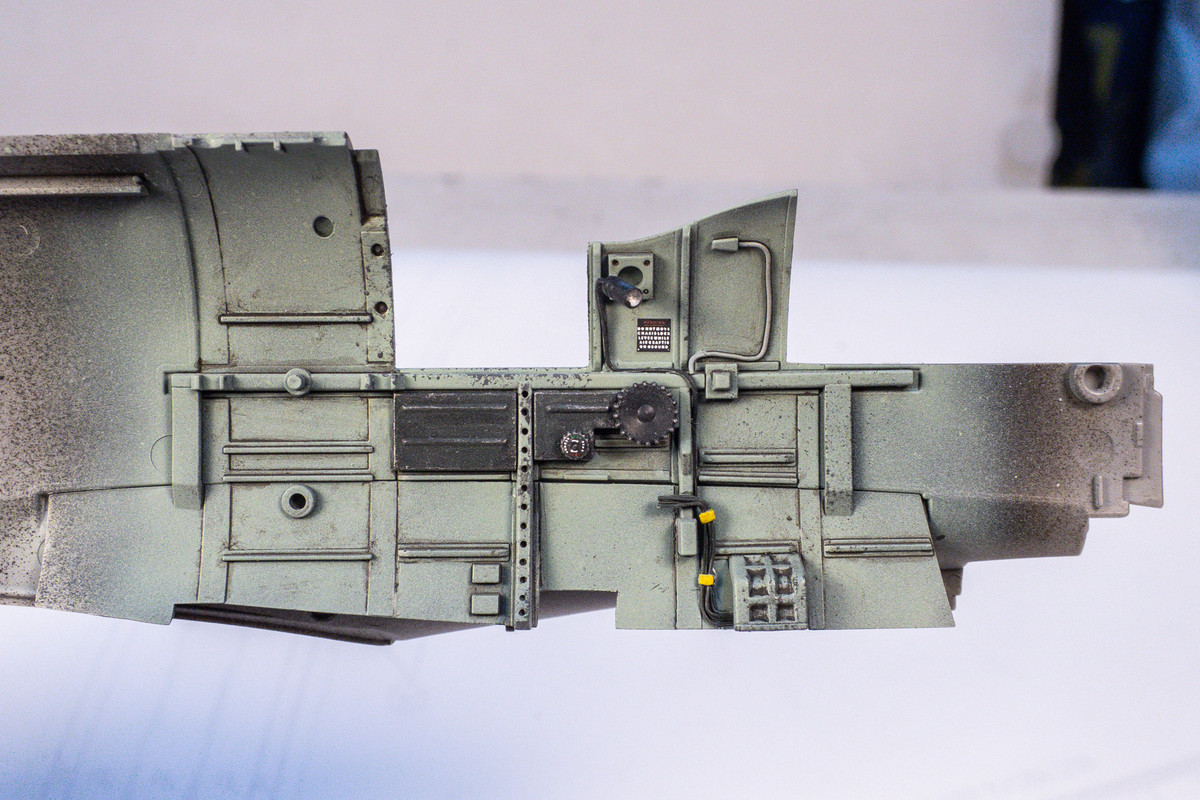
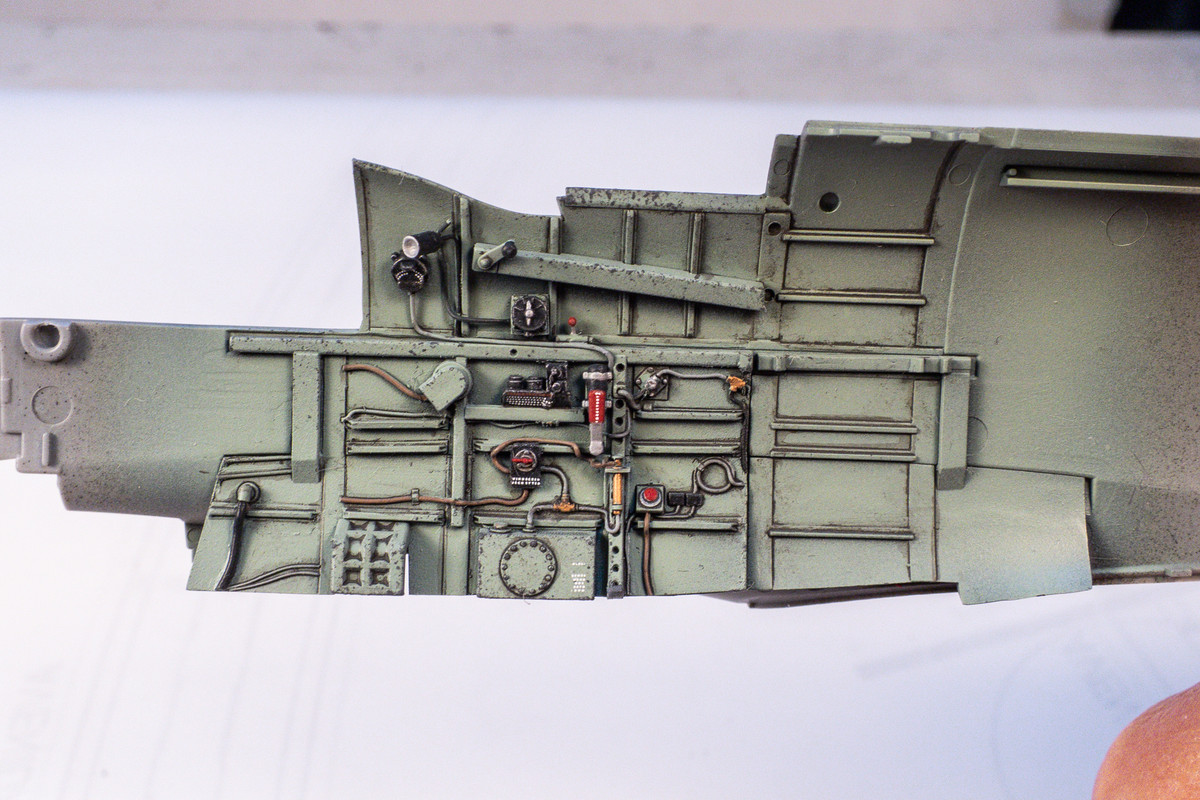
Other details are painted separately before attaching to the cockpit sidewalls.
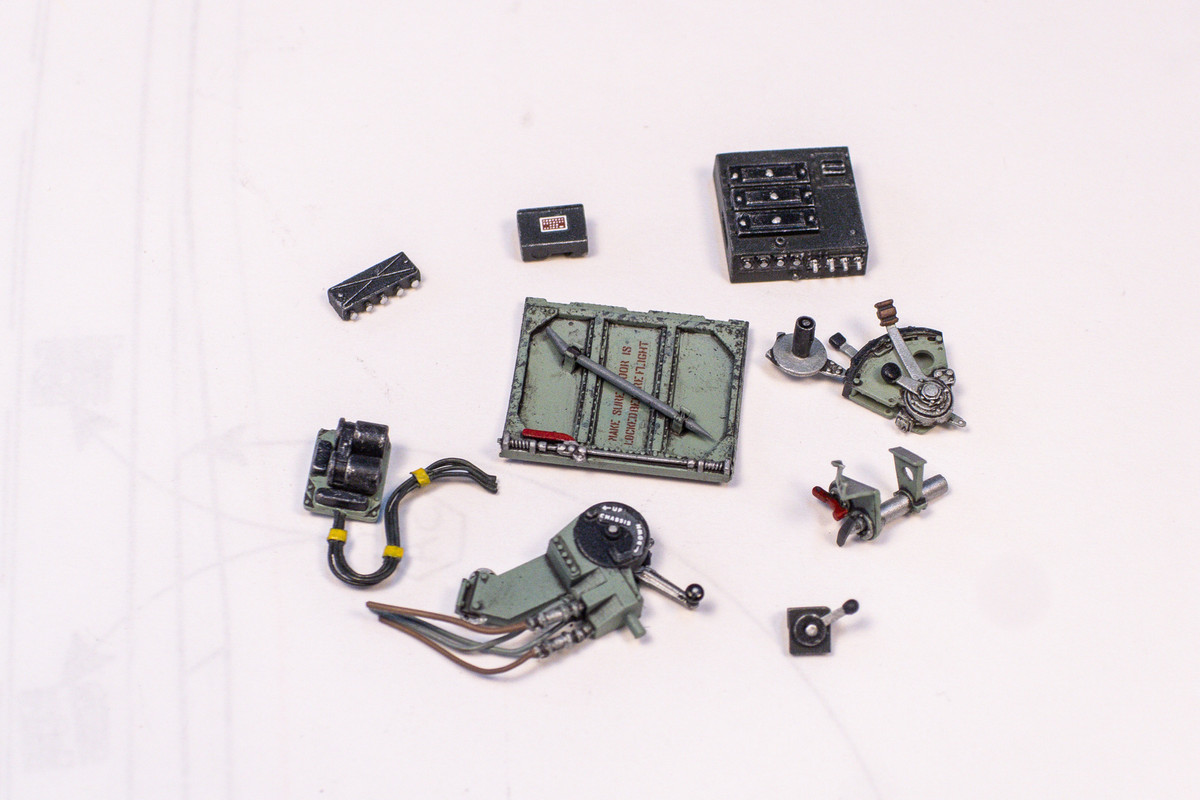
Those parts are then attached to the cockpit.
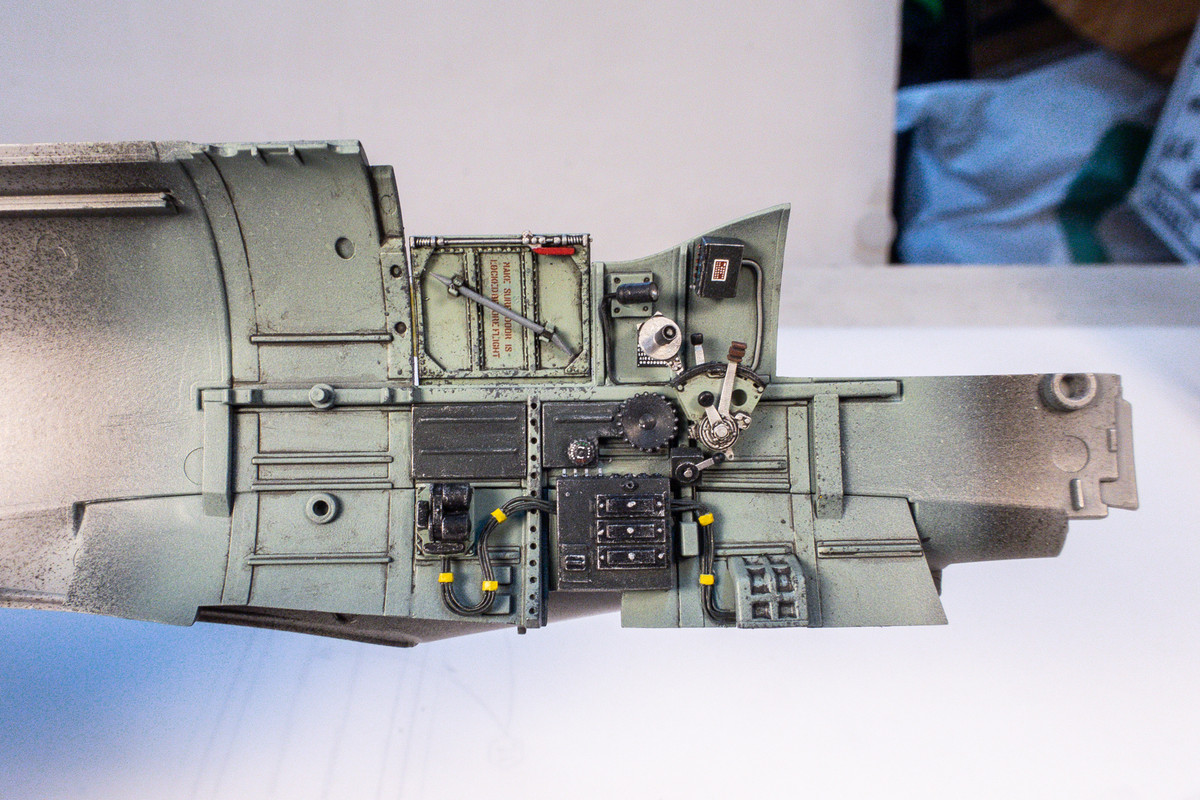
Now I have to figure out the fit of the separate cockpit components. Some adjustments are going to have to be made to make everything fit. For example, the voltage regulator relocation conflicts with the seat frame. But here's a preview of the instrument panel sub-assembly mated into the starboard fuselage.
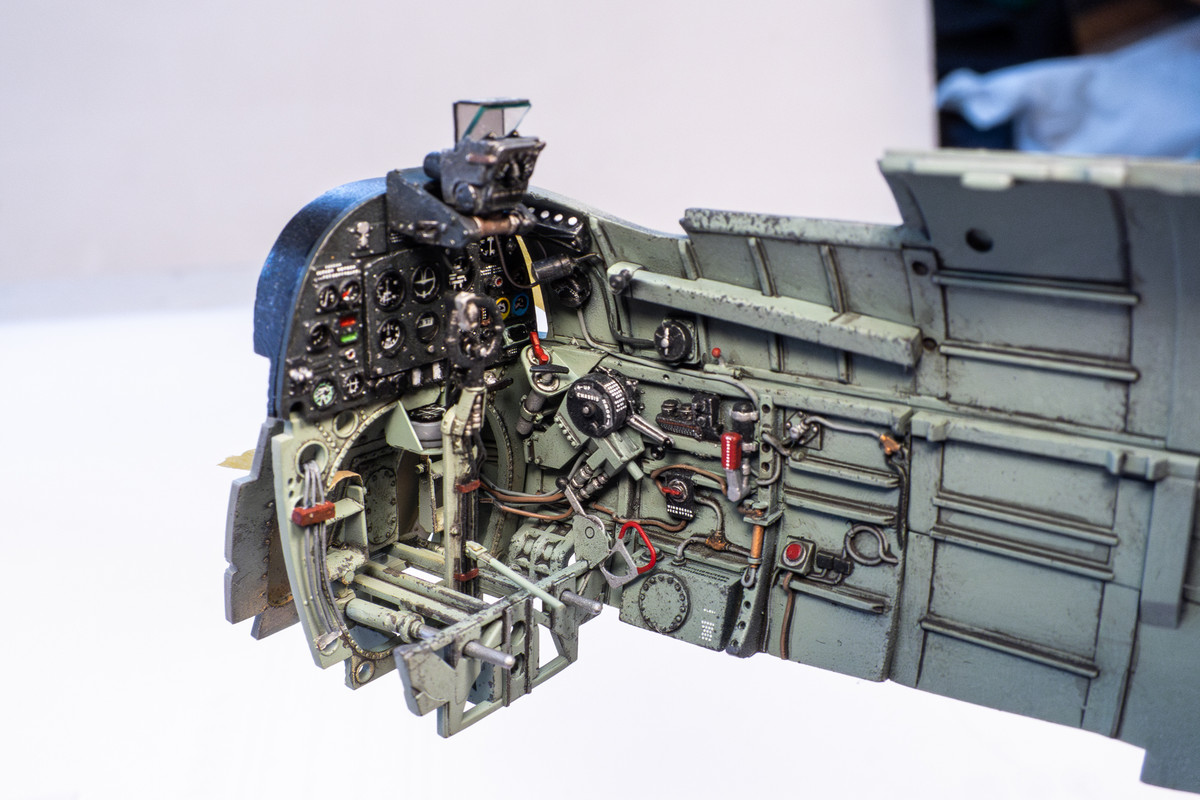
The cockpit painting continues with the sidewalls. I start with the interior color (AK Real Colors RC293 RAF Cockpit Grey-Green) over a black base.
After the interior color, I brush paint various details. I figured that hairspray chipping would be difficult with such an uneven surface so I elected to add chipping effects using a sponge. Cockpit stencils were added from the Barracuda Cockpit enhancement set.
Other details are painted separately before attaching to the cockpit sidewalls.
Those parts are then attached to the cockpit.
Now I have to figure out the fit of the separate cockpit components. Some adjustments are going to have to be made to make everything fit. For example, the voltage regulator relocation conflicts with the seat frame. But here's a preview of the instrument panel sub-assembly mated into the starboard fuselage.
John aka JKim
-----------<><
-----------<><
-
Gary Brantley

- Elite Member
- Posts: 2773
- Joined: Tue Apr 08, 2014 9:40 pm
- Location: Cameron, Texas
Re: Tamiya 1/32 Spitfire XIVe Conversion
That truly looks fantastic, John! 