Incredible work on the cockpit. I never seen a red (or maroon, whatever the color is) seat in a Spitfire before. I like it.
Tamiya 1/32 Spitfire XIVe Conversion
- BlackSheep214
- Elite Member
- Posts: 13409
- Joined: Sun Apr 06, 2014 8:47 pm
Re: Tamiya 1/32 Spitfire XIVe Conversion
Model porn!
Incredible work on the cockpit. I never seen a red (or maroon, whatever the color is) seat in a Spitfire before. I like it.
“Who controls the skies, controls the fate of this Earth”
Author unknown- 352nd Fighter Group, Blue-Nosed Bastards of Bodney
“Send one plane it’s a sortie; send two planes it’s a flight; send four planes it’s a test of airpower. - Richard Kohn
Author unknown- 352nd Fighter Group, Blue-Nosed Bastards of Bodney
“Send one plane it’s a sortie; send two planes it’s a flight; send four planes it’s a test of airpower. - Richard Kohn
- Gary Brantley
- Elite Member
- Posts: 2738
- Joined: Tue Apr 08, 2014 9:40 pm
- Location: Cameron, Texas
Re: Tamiya 1/32 Spitfire XIVe Conversion
I believe those seats were made of Bakelite or something similar, iirc.
Re: Tamiya 1/32 Spitfire XIVe Conversion
Thanks for the comments!


Still working on fitting the cockpit components to the fuselage. Here is the instrument panel assembly slotted into the port fuselage side.
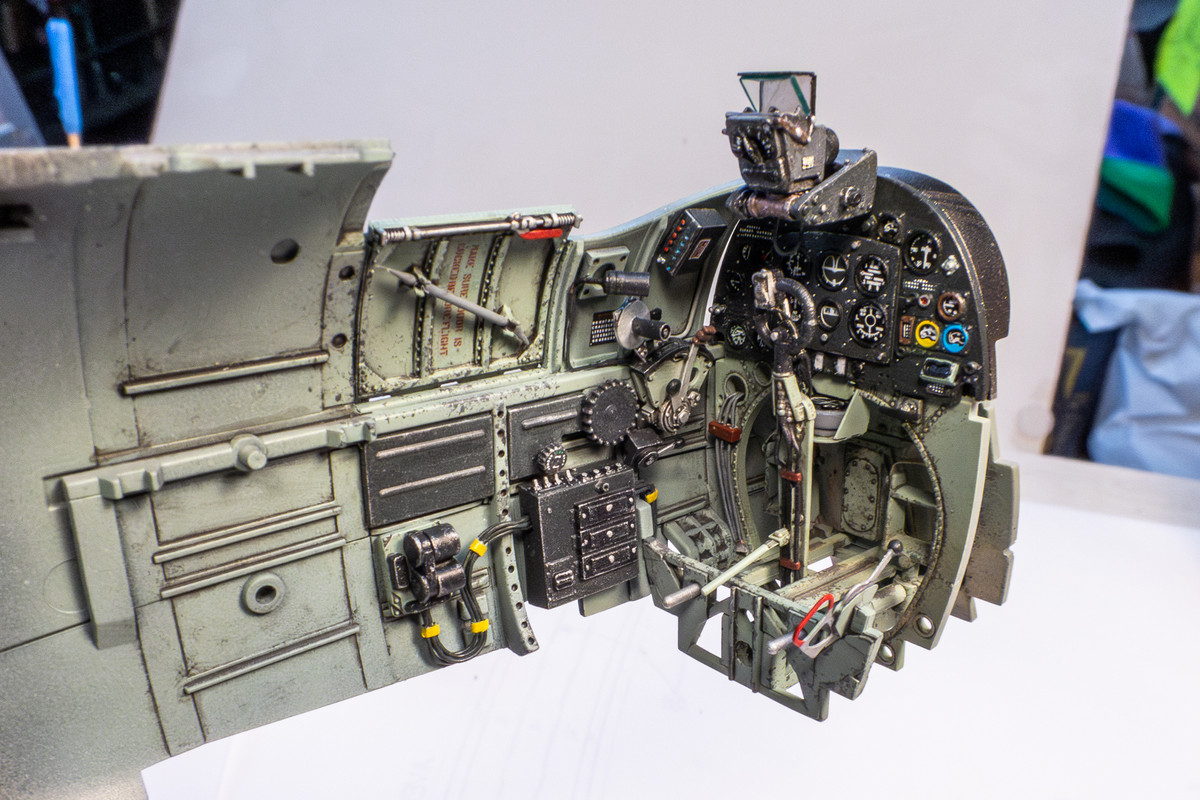
As I stated previously, the voltage regulator is in direct conflict with the seat frame. I didn't want to mess with moving the voltage regulator due to the wiring so instead, I cut a notch out of the seat frame.
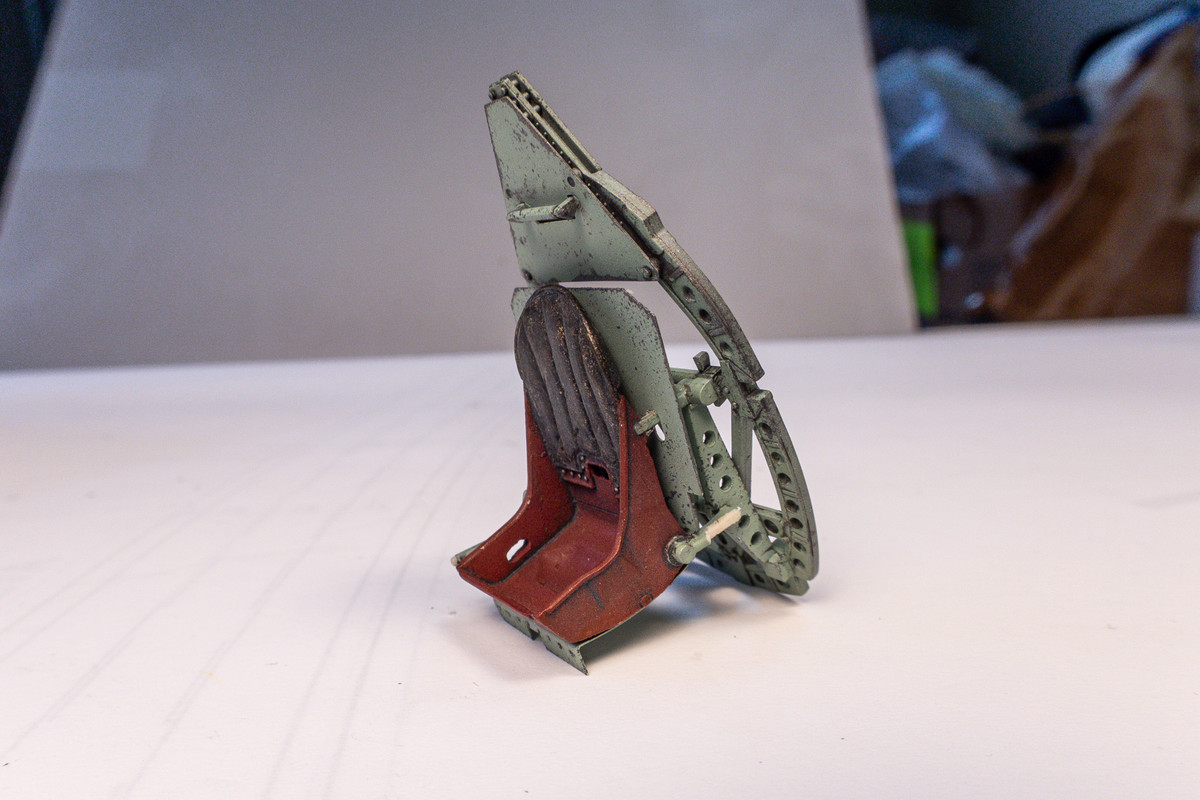
Before the cockpit is actually attached to the fuselage, I need to get the harnesses on the seat so I embarked on assembling the HGW fabric belts.

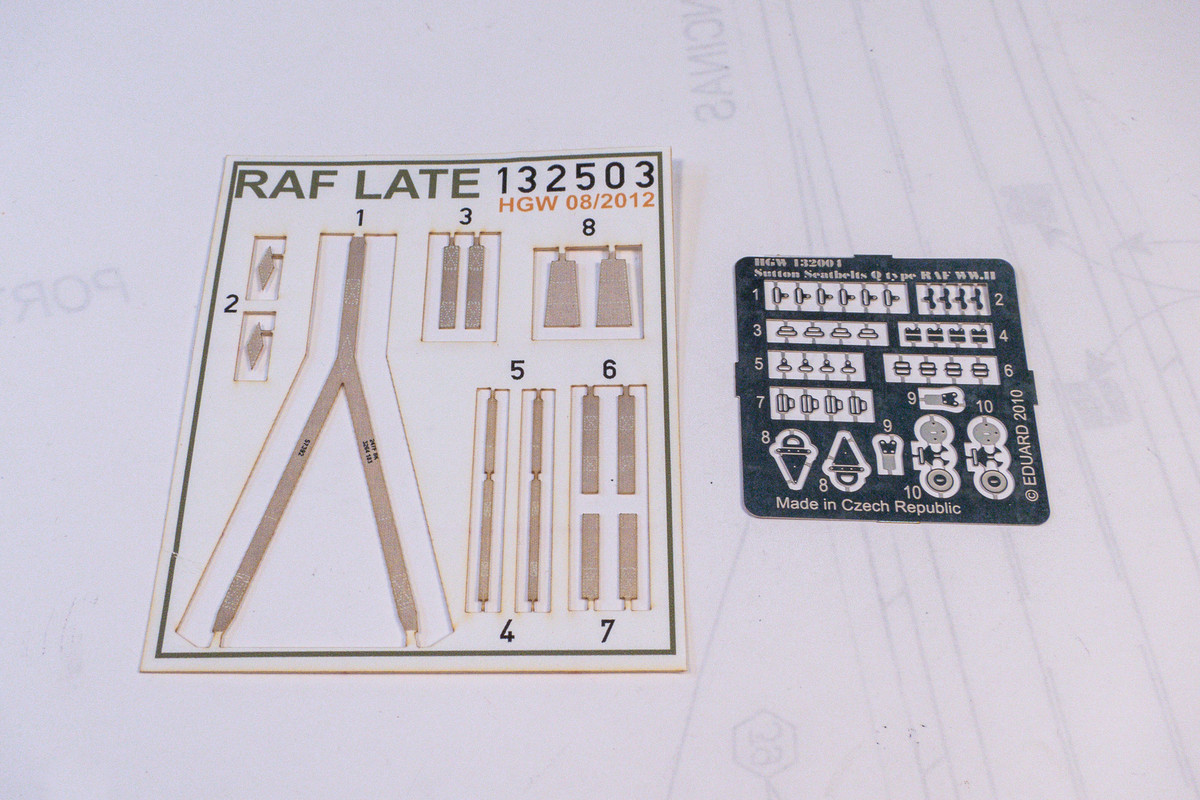
The first thing to remember about the HGW belts is that you need to remove the paper backing from each fabric piece.
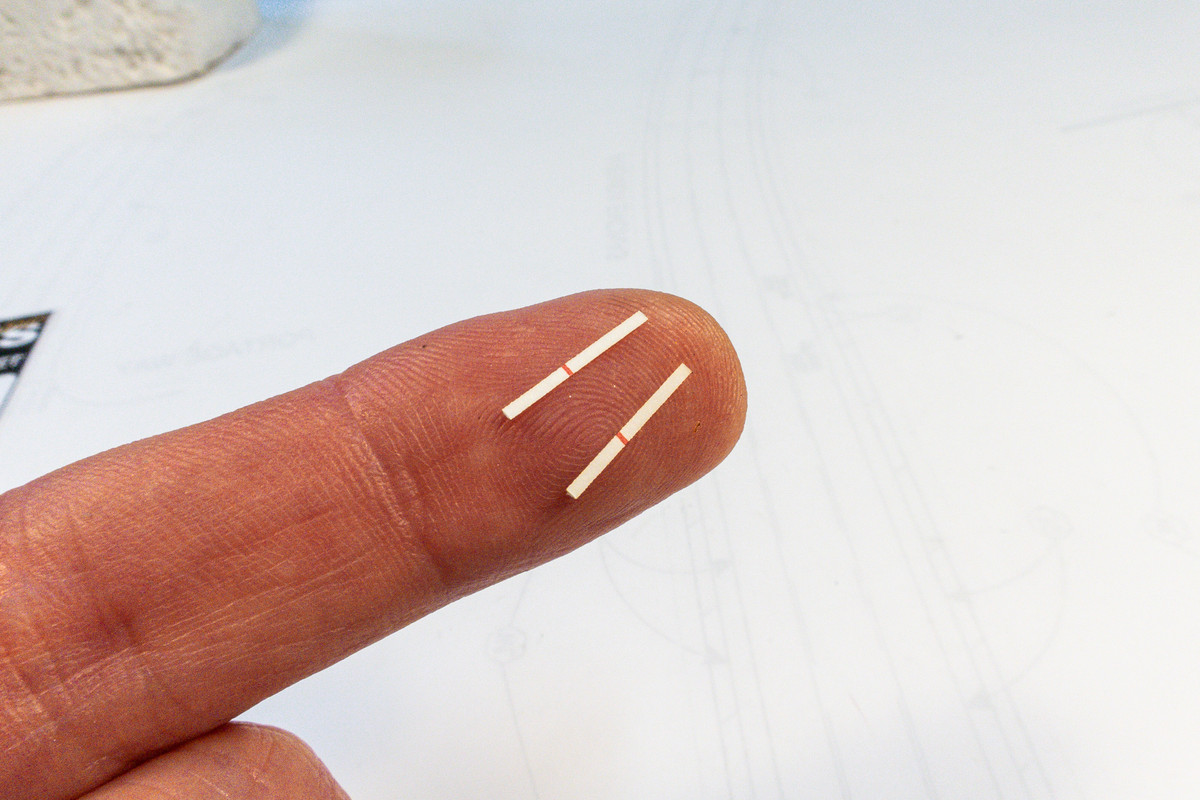
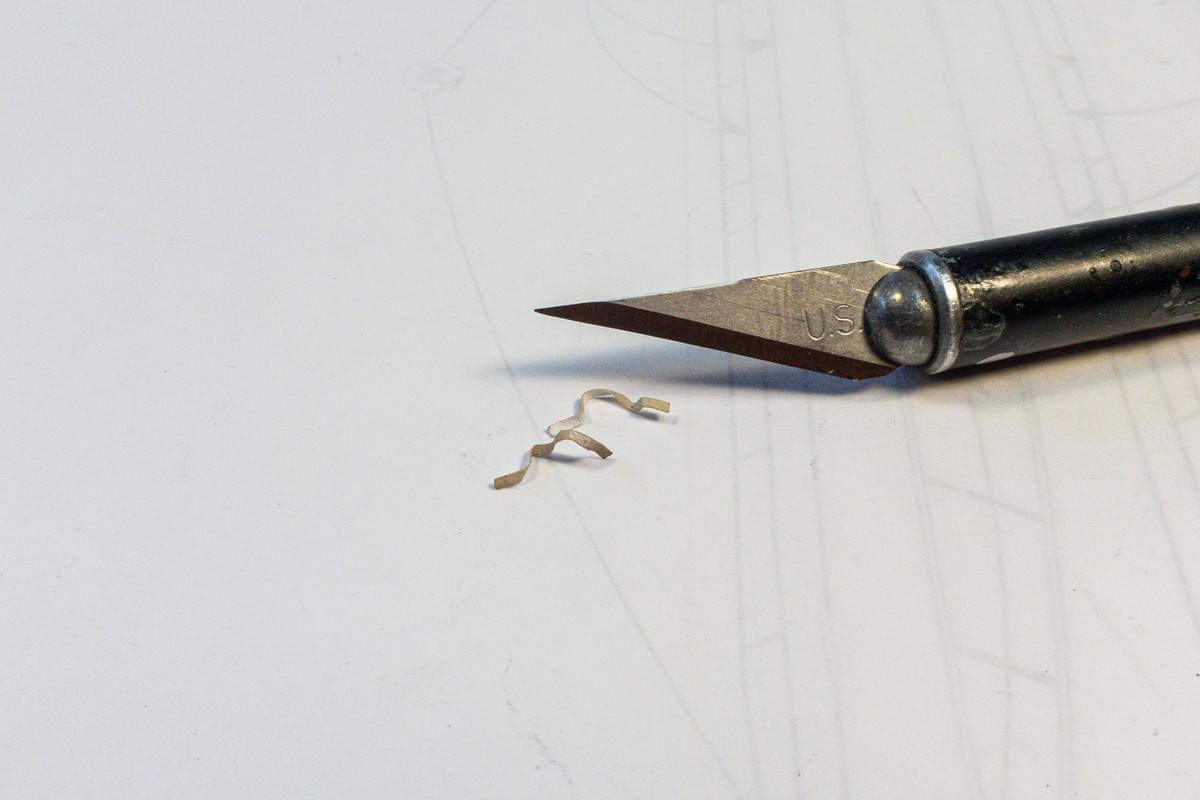
An optional step but one that I recommend is to crumple the fabric pieces gently before assembly for a more natural, distressed look.
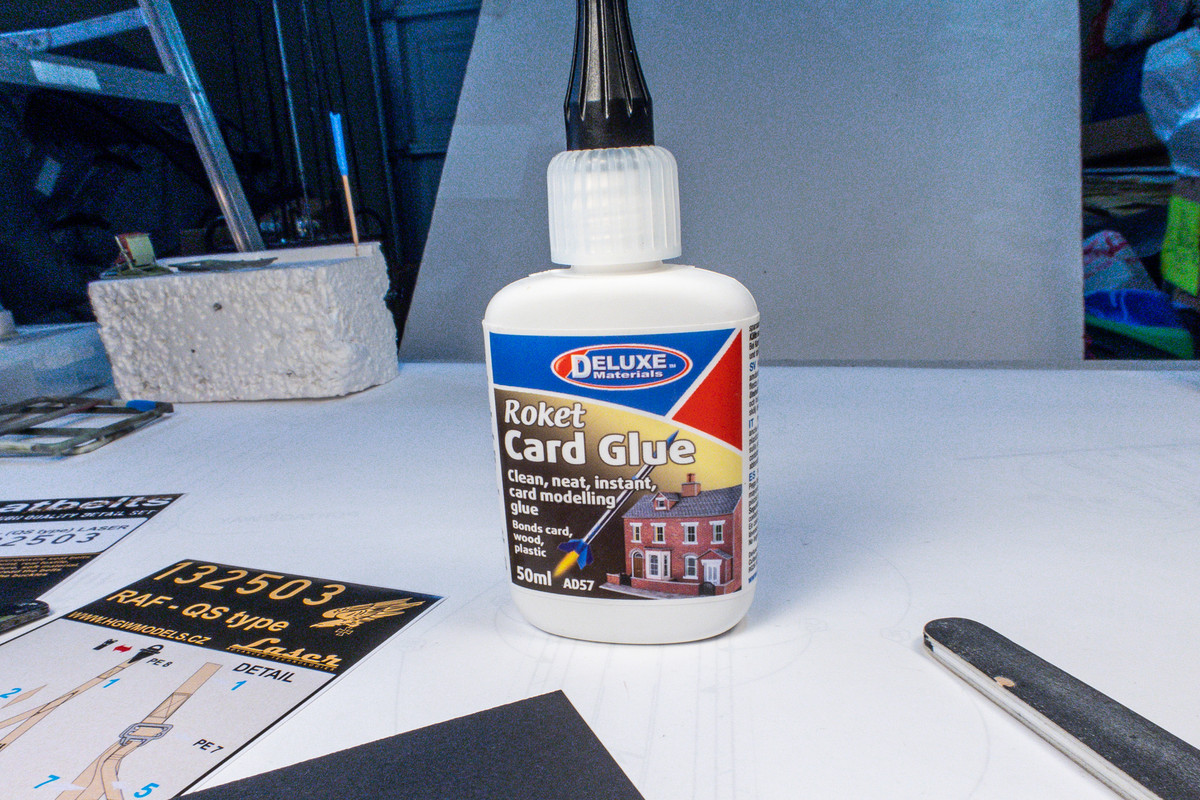
This is my glue of choice when it comes to assembling the HGW fabric belts. It's a stronger form of PVA glue (water-soluble) but much more forgiving than CA.
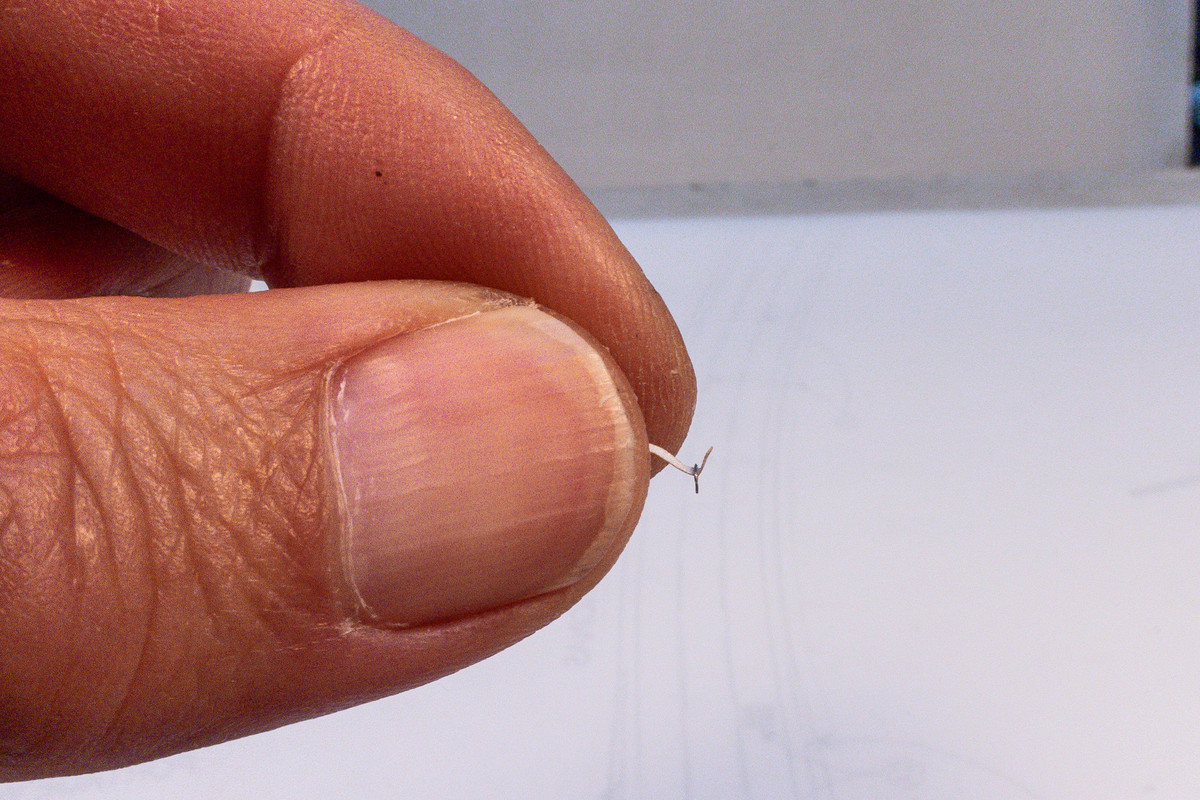
The harnesses are assembled per instructions. It's fiddly stuff but manageable. Another hint is when attaching the end hardware, I like to crease the harness at the fold location and then use gravity to hang the buckle at that fold. Then it is easy to add a dab of glue and complete the fold.
The crumpling step does make handling of the assembled harnesses more of a challenge.
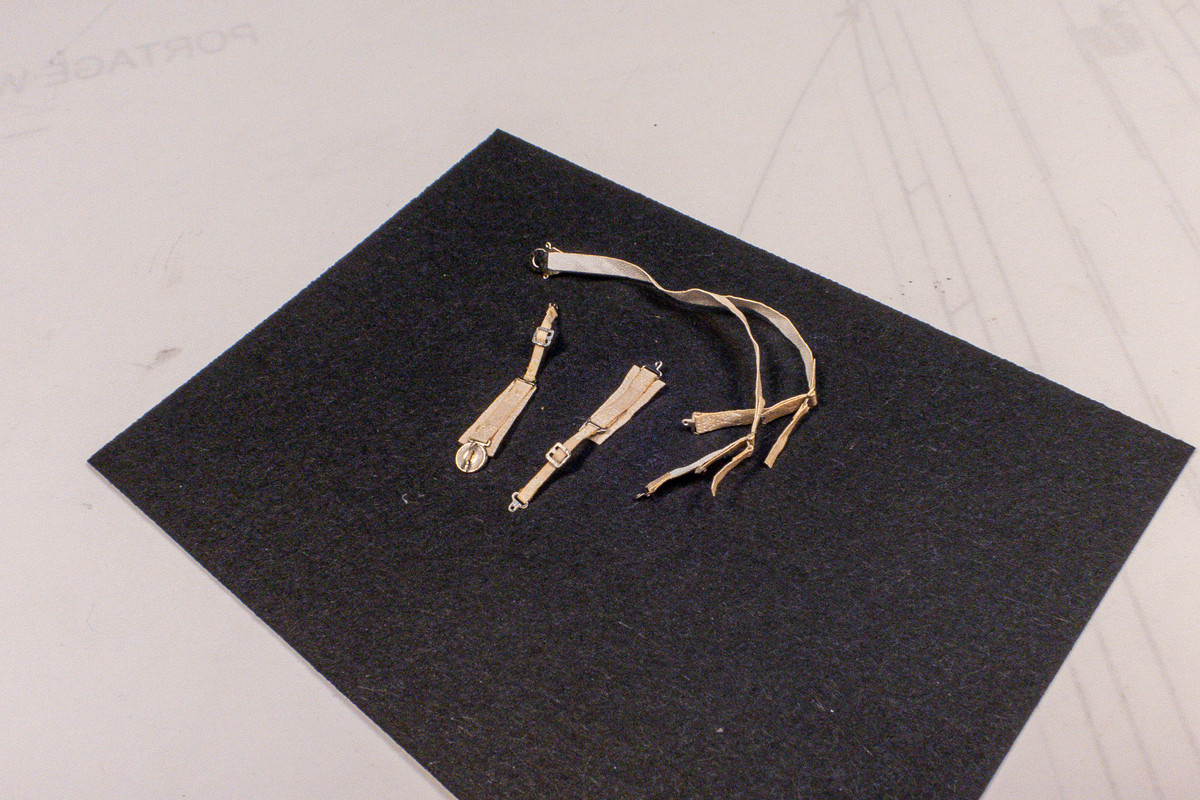
I like to use the adhesive side of a Post-It to hold down the harnesses flat. One of the most impressive things about these HGW harnesses is that there is stitching detail etched onto the surface of each belt piece. A wash brings out this detail. Typically, I've glued the harnesses onto the seat, sprayed the whole seat with clear gloss and then applied the wash to bring out the stitching. But this time, I elected to spray the harness with a clear gloss before putting them on the seat.
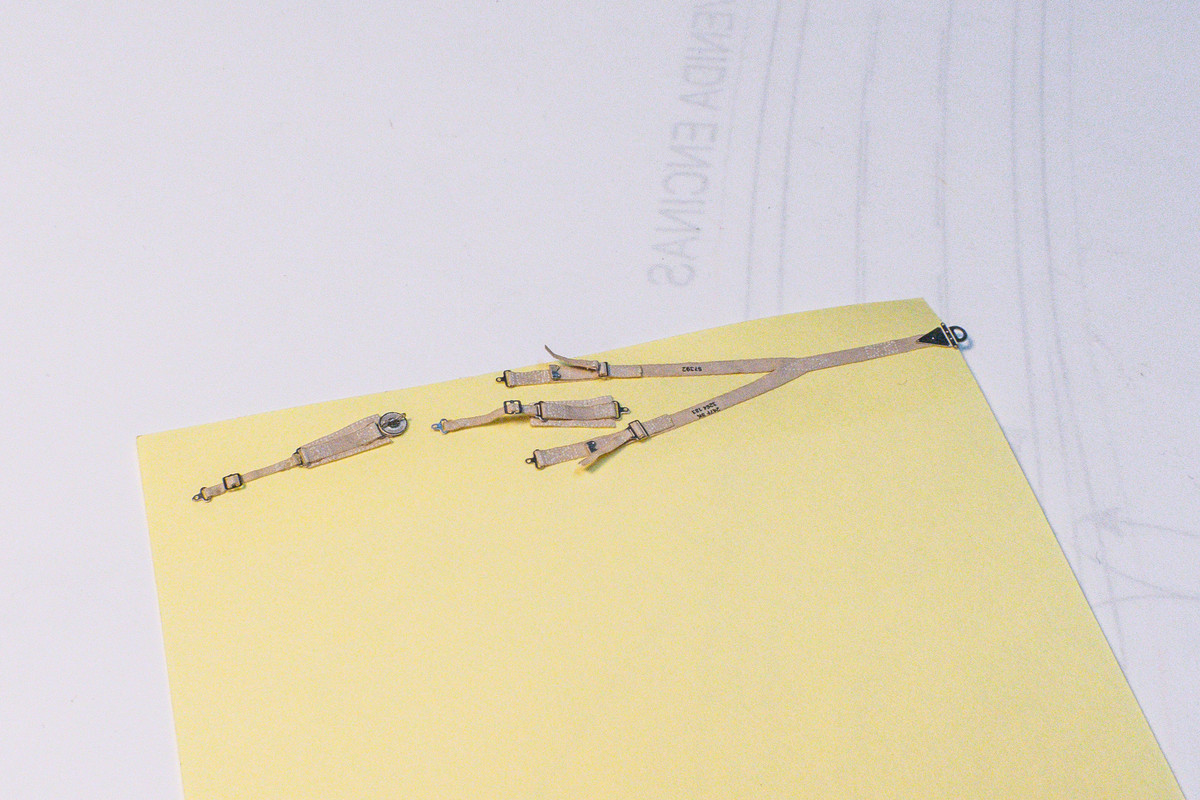
Not putting on enough clear gloss resulted in more staining from the wash that I would've liked but here are the completed harnesses glued onto the seat.
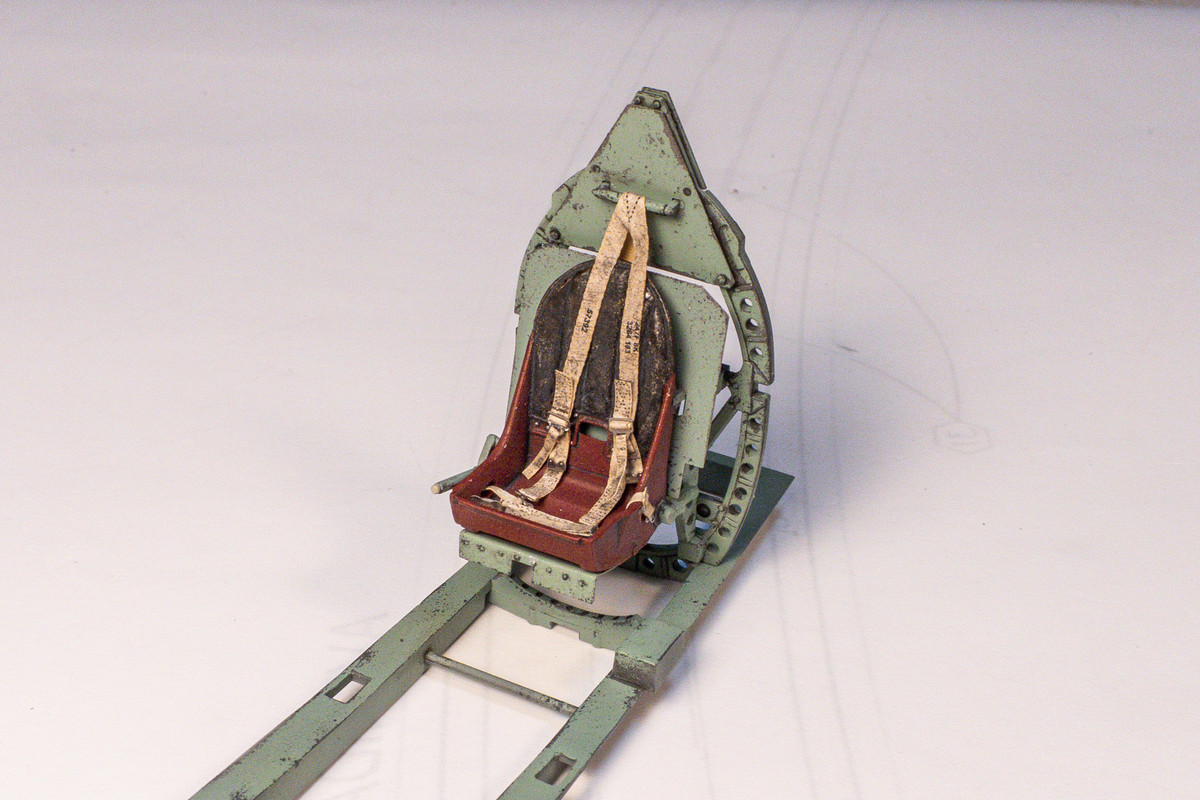
With that finished, I've elected to glue the central cockpit assemblies (instrument panel, seat, fuel tank) onto the cockpit floor and then confirm the fit of the cockpit to the fuselage. After trimming the seat frame, fit into the port fuselage half was trouble-free.
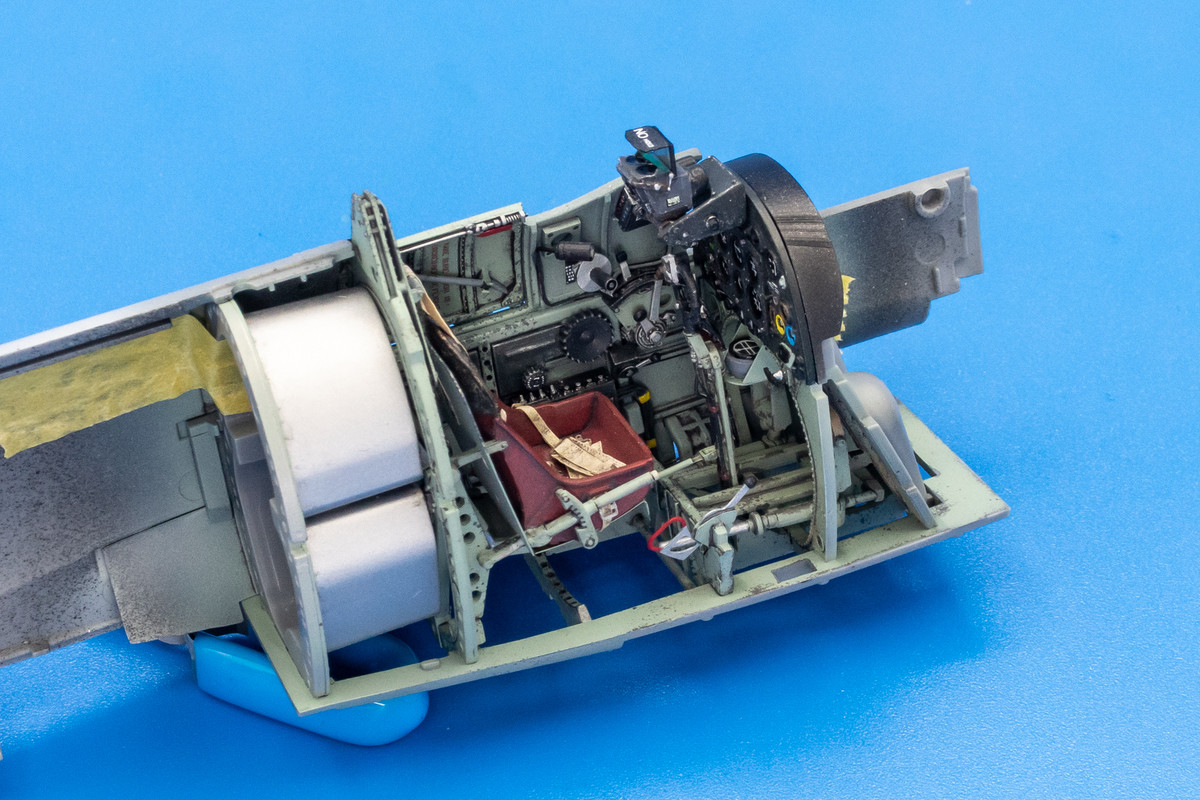
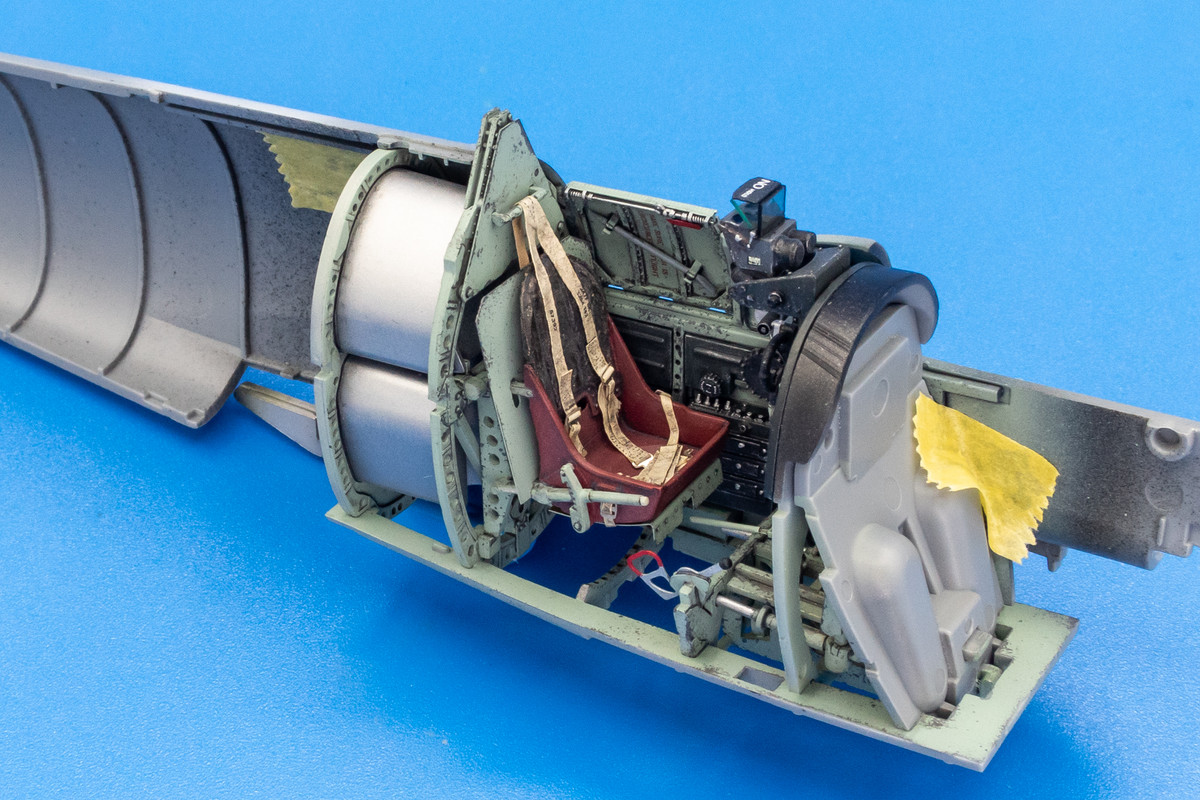
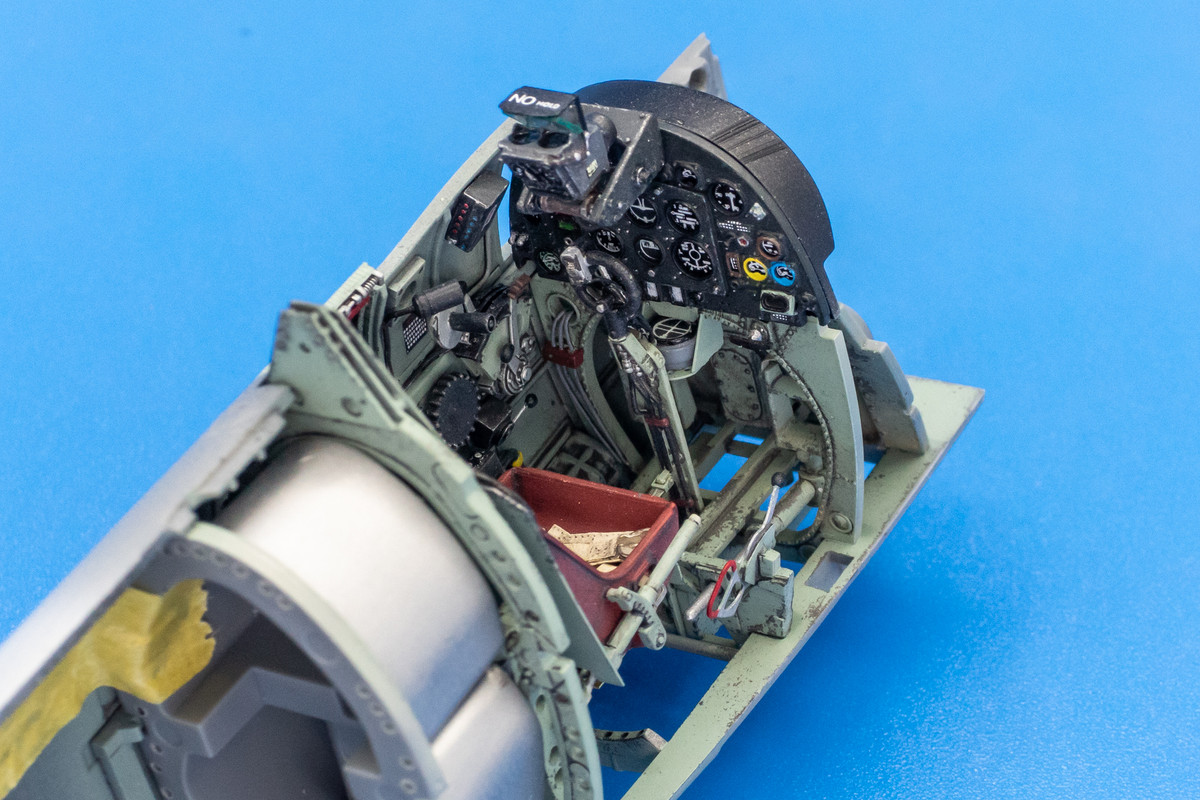
The fit of the cockpit into the starboard side was a little more complicated. First, is the issue of the wiring from the landing gear selector having to up and around the instrument panel frame. There is also an unattached wire floating near the top that comes out of the junction box that will need to be connected to the gyro gunsight frame. Lastly, a raised detail on the front portion of the Barracuda starboard sidewall needed to be shaved off so that it doesn't conflict with the front bulkhead.
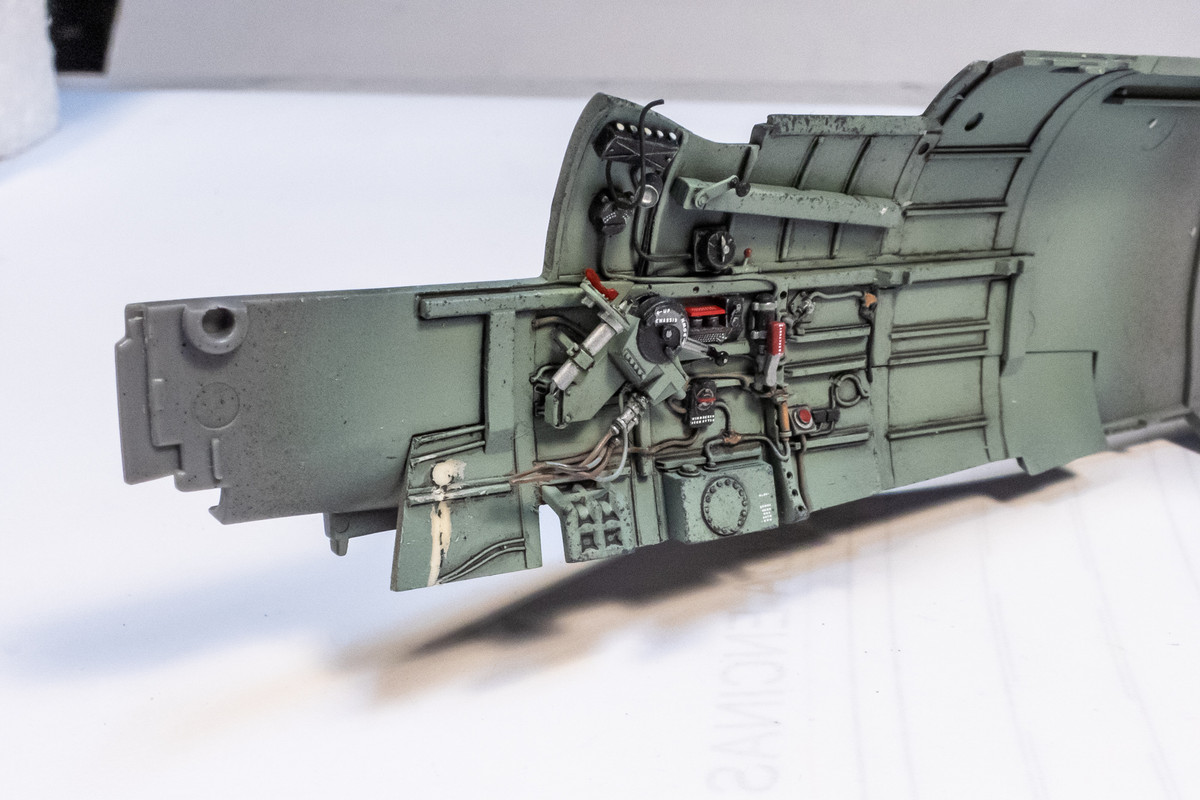
Because of these issues, I am going to place the cockpit assembly into the starboard fuselage side and secure it into place first.
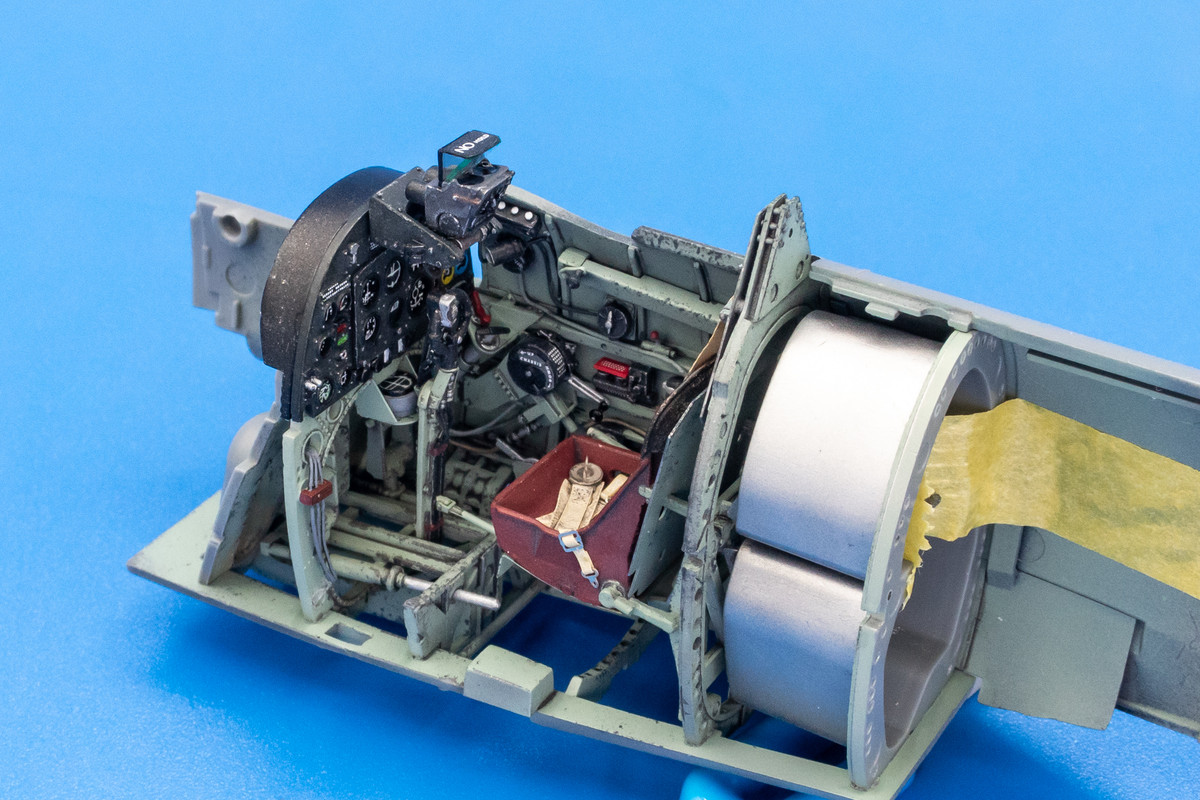

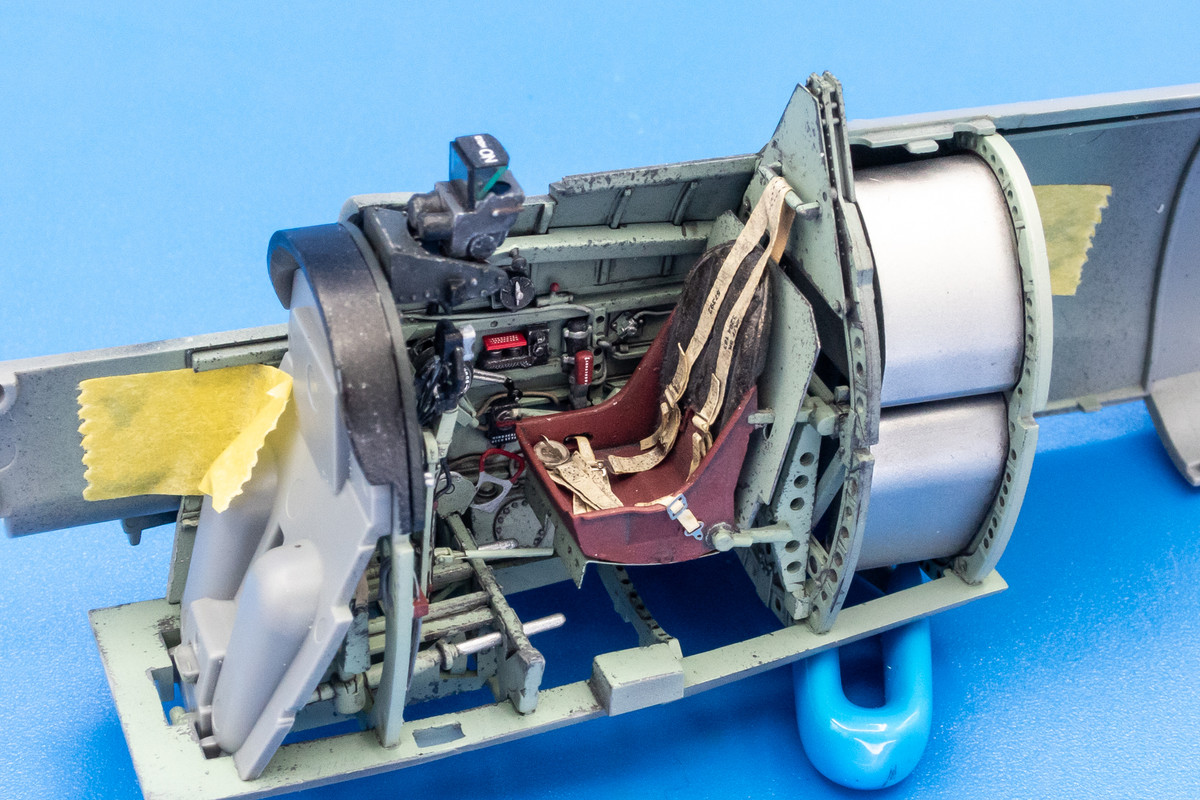
As we can see, the assembly of the cockpit parts into the fuselage starts to block our visibility into all of the detail that we've added. Closing up the fuselage blocks the view even more.
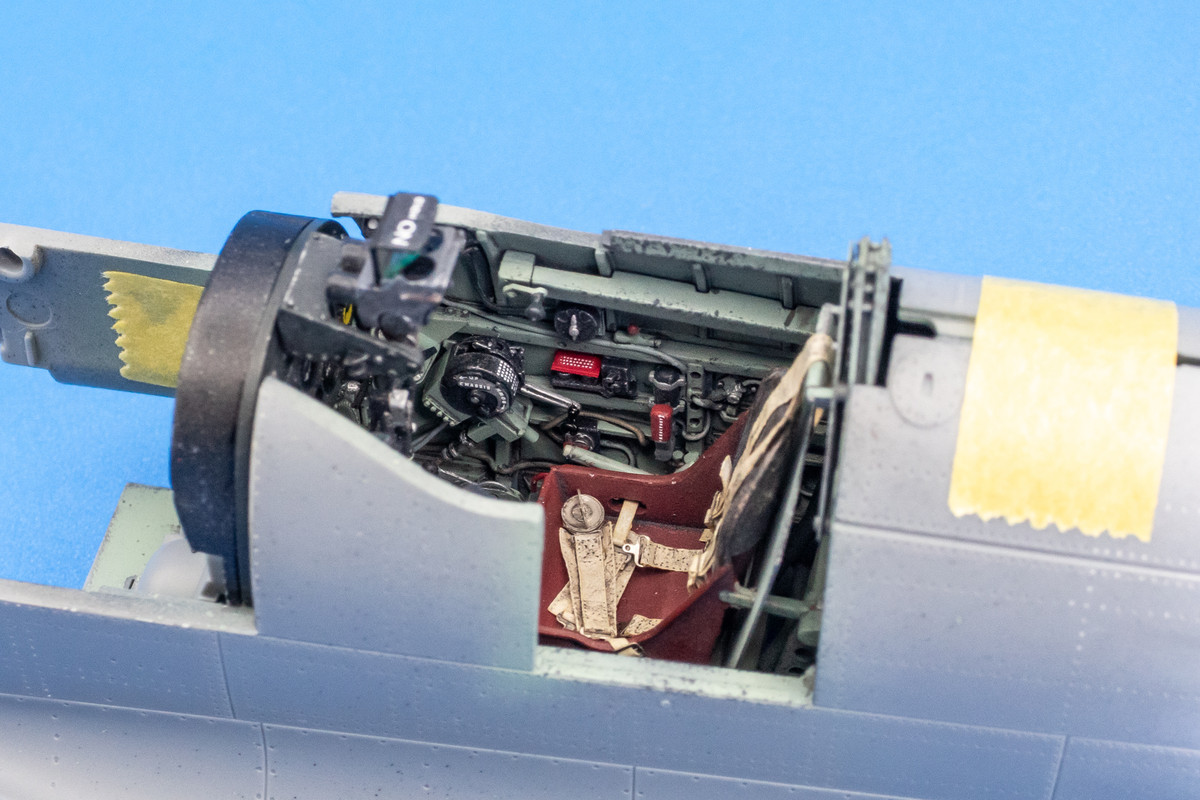
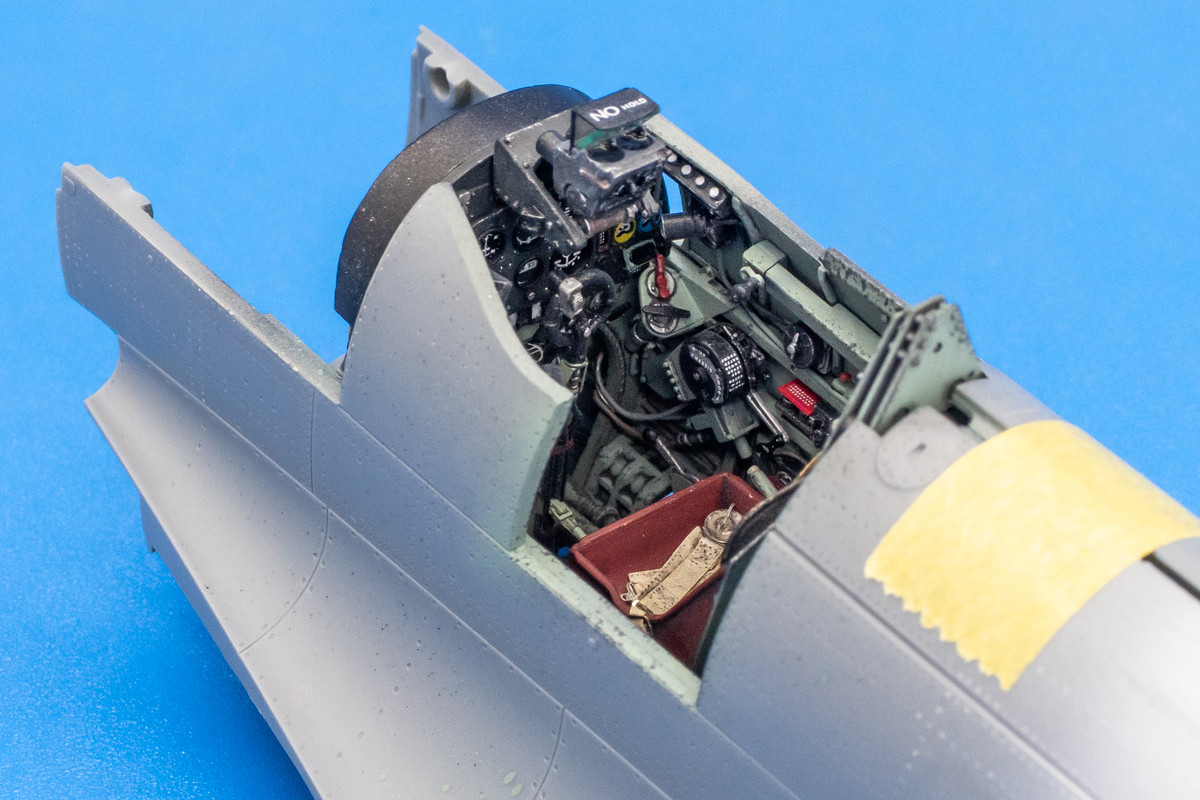
The fuselage halves are not glued together yet. I still need to figure out a few things before that.

The plastic (actually synthetic resin bonded paper) seats were introduced in 1940 as an alternative to metal seats.BlackSheep214 wrote: ↑Wed Jun 05, 2024 7:06 pm Model porn!![]()
![]()
![]()
Incredible work on the cockpit. I never seen a red (or maroon, whatever the color is) seat in a Spitfire before. I like it.


Still working on fitting the cockpit components to the fuselage. Here is the instrument panel assembly slotted into the port fuselage side.

As I stated previously, the voltage regulator is in direct conflict with the seat frame. I didn't want to mess with moving the voltage regulator due to the wiring so instead, I cut a notch out of the seat frame.

Before the cockpit is actually attached to the fuselage, I need to get the harnesses on the seat so I embarked on assembling the HGW fabric belts.


The first thing to remember about the HGW belts is that you need to remove the paper backing from each fabric piece.

An optional step but one that I recommend is to crumple the fabric pieces gently before assembly for a more natural, distressed look.

This is my glue of choice when it comes to assembling the HGW fabric belts. It's a stronger form of PVA glue (water-soluble) but much more forgiving than CA.

The harnesses are assembled per instructions. It's fiddly stuff but manageable. Another hint is when attaching the end hardware, I like to crease the harness at the fold location and then use gravity to hang the buckle at that fold. Then it is easy to add a dab of glue and complete the fold.

The crumpling step does make handling of the assembled harnesses more of a challenge.

I like to use the adhesive side of a Post-It to hold down the harnesses flat. One of the most impressive things about these HGW harnesses is that there is stitching detail etched onto the surface of each belt piece. A wash brings out this detail. Typically, I've glued the harnesses onto the seat, sprayed the whole seat with clear gloss and then applied the wash to bring out the stitching. But this time, I elected to spray the harness with a clear gloss before putting them on the seat.

Not putting on enough clear gloss resulted in more staining from the wash that I would've liked but here are the completed harnesses glued onto the seat.

With that finished, I've elected to glue the central cockpit assemblies (instrument panel, seat, fuel tank) onto the cockpit floor and then confirm the fit of the cockpit to the fuselage. After trimming the seat frame, fit into the port fuselage half was trouble-free.


The fit of the cockpit into the starboard side was a little more complicated. First, is the issue of the wiring from the landing gear selector having to up and around the instrument panel frame. There is also an unattached wire floating near the top that comes out of the junction box that will need to be connected to the gyro gunsight frame. Lastly, a raised detail on the front portion of the Barracuda starboard sidewall needed to be shaved off so that it doesn't conflict with the front bulkhead.

Because of these issues, I am going to place the cockpit assembly into the starboard fuselage side and secure it into place first.


As we can see, the assembly of the cockpit parts into the fuselage starts to block our visibility into all of the detail that we've added. Closing up the fuselage blocks the view even more.


The fuselage halves are not glued together yet. I still need to figure out a few things before that.
John aka JKim
-----------<><

-----------<><

Re: Tamiya 1/32 Spitfire XIVe Conversion
sufficiently busy cockpit! Those harnesses look fantastic.
I have the 1/48 version of the Barracuda control column - they are really well done.
Thanks,
John
John
- BlackSheep214
- Elite Member
- Posts: 13409
- Joined: Sun Apr 06, 2014 8:47 pm
Re: Tamiya 1/32 Spitfire XIVe Conversion
I have to try those harnesses too. What color did you use for the seats?
“Who controls the skies, controls the fate of this Earth”
Author unknown- 352nd Fighter Group, Blue-Nosed Bastards of Bodney
“Send one plane it’s a sortie; send two planes it’s a flight; send four planes it’s a test of airpower. - Richard Kohn
Author unknown- 352nd Fighter Group, Blue-Nosed Bastards of Bodney
“Send one plane it’s a sortie; send two planes it’s a flight; send four planes it’s a test of airpower. - Richard Kohn
Re: Tamiya 1/32 Spitfire XIVe Conversion
Thanks guys!
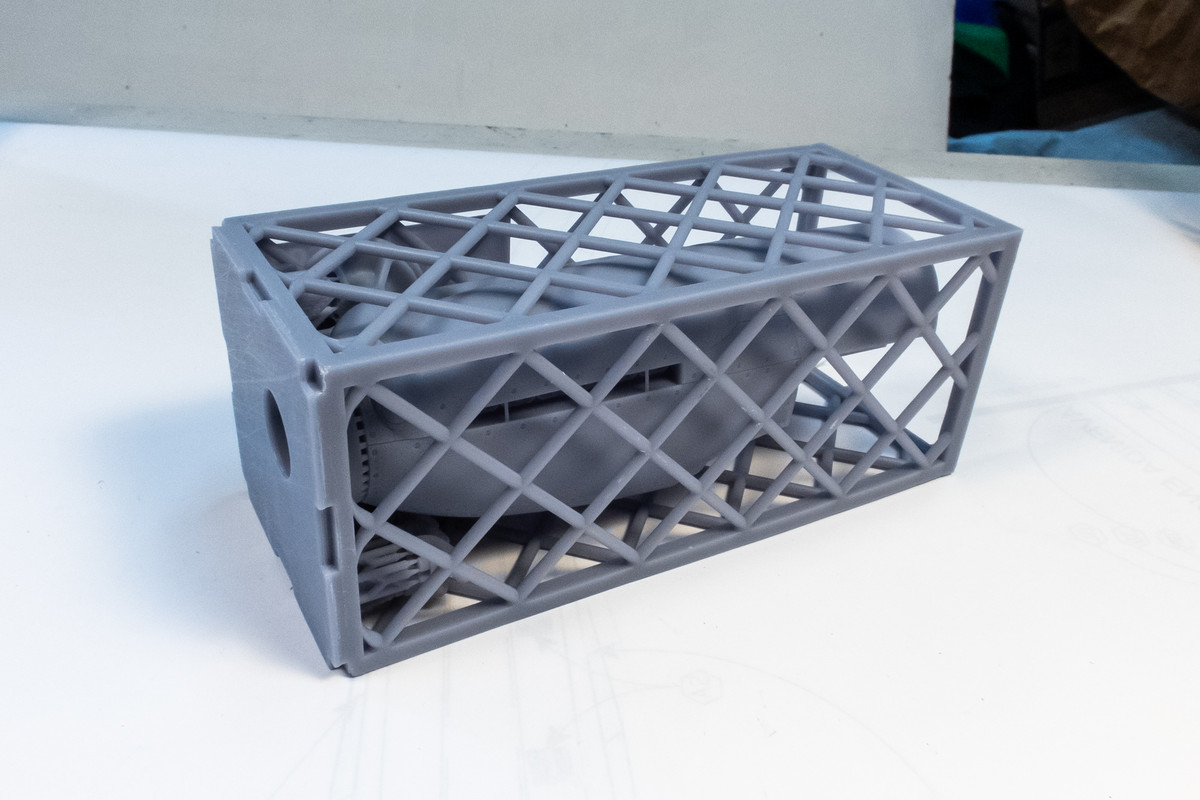
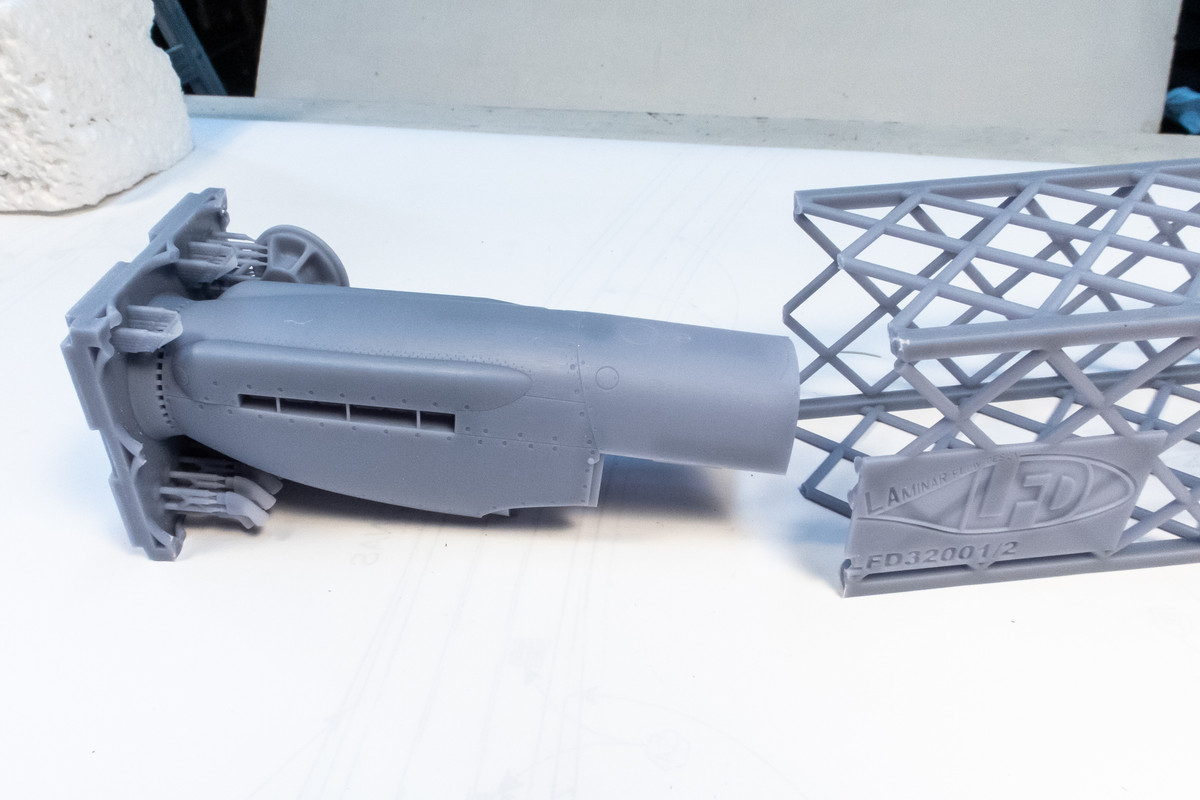
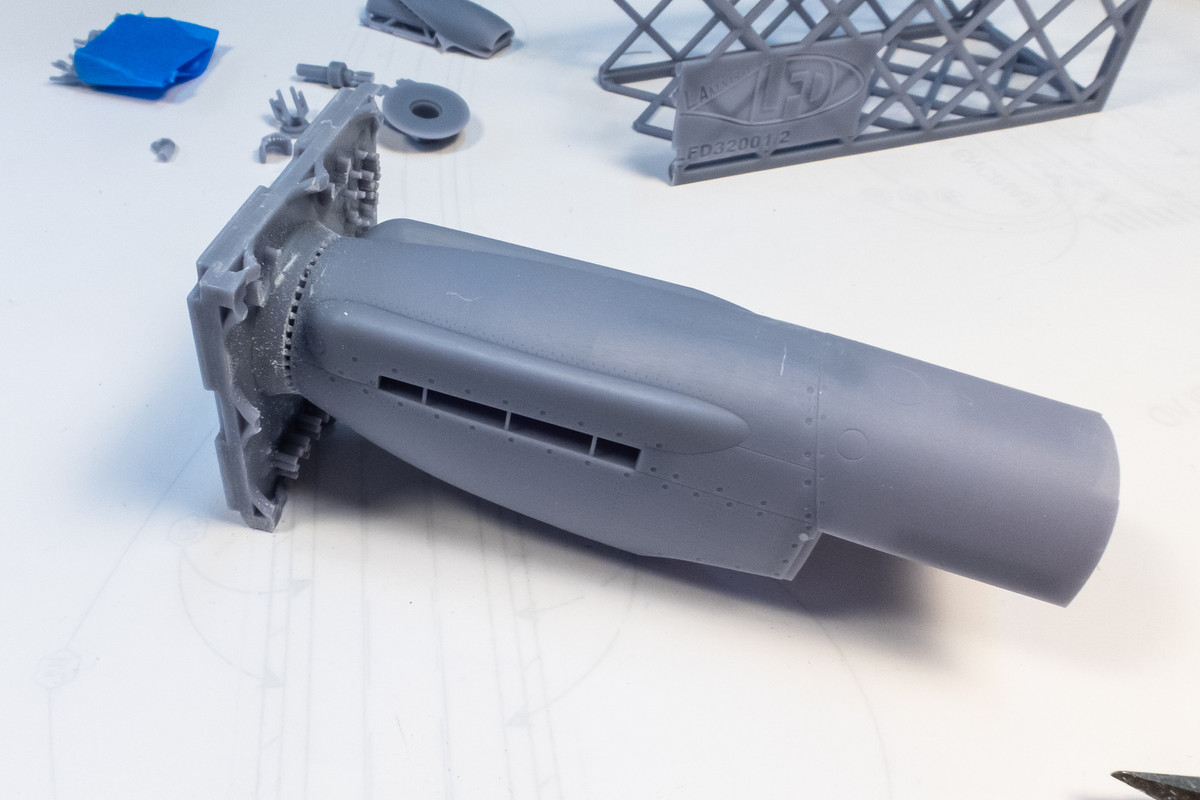
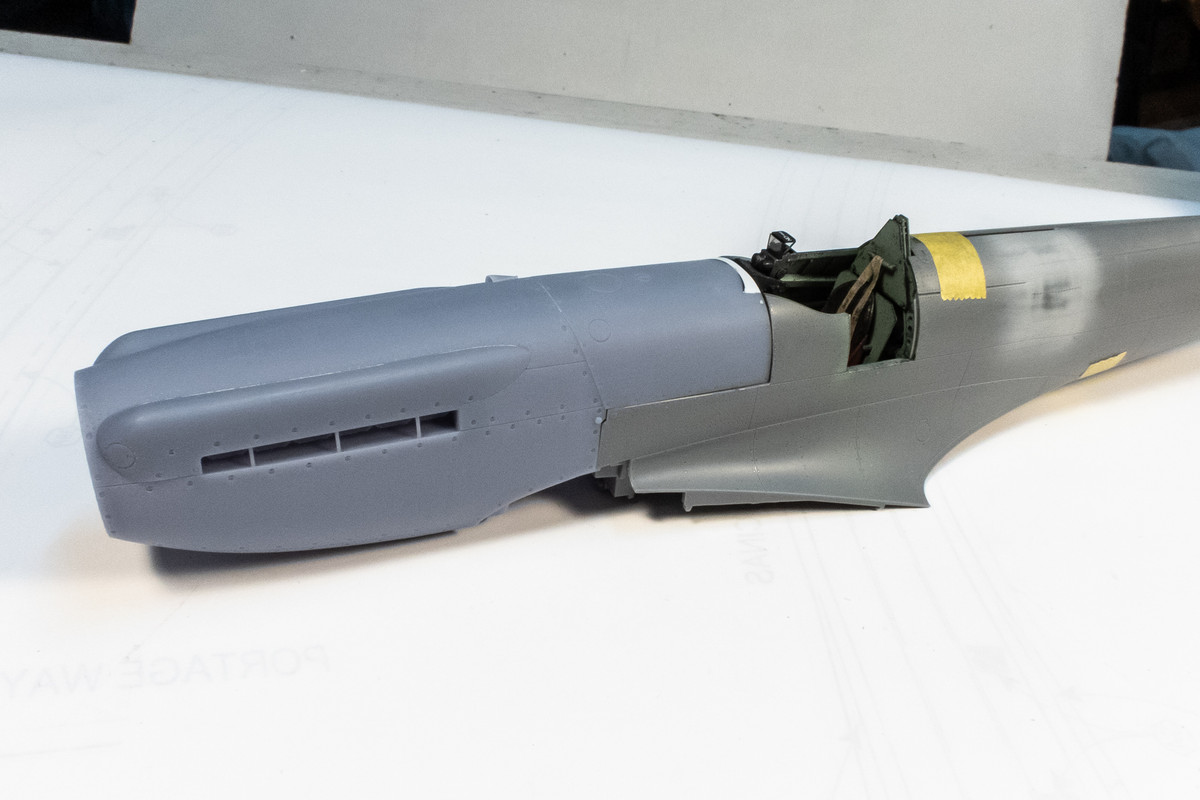
The cockpit tub has been glued into the starboard fuselage half but I'm not in a hurry to close up the fuselage just yet. Lots of other things I can play with in the meantime. Since Mathieu sent me another complete XIVe conversion set, I decided to bust the revised cowling out of its cage. Removal is a bit of a chore since you have to remove the cage first and then all of the bits on the outside before getting to cut the cowling, which is in the middle.
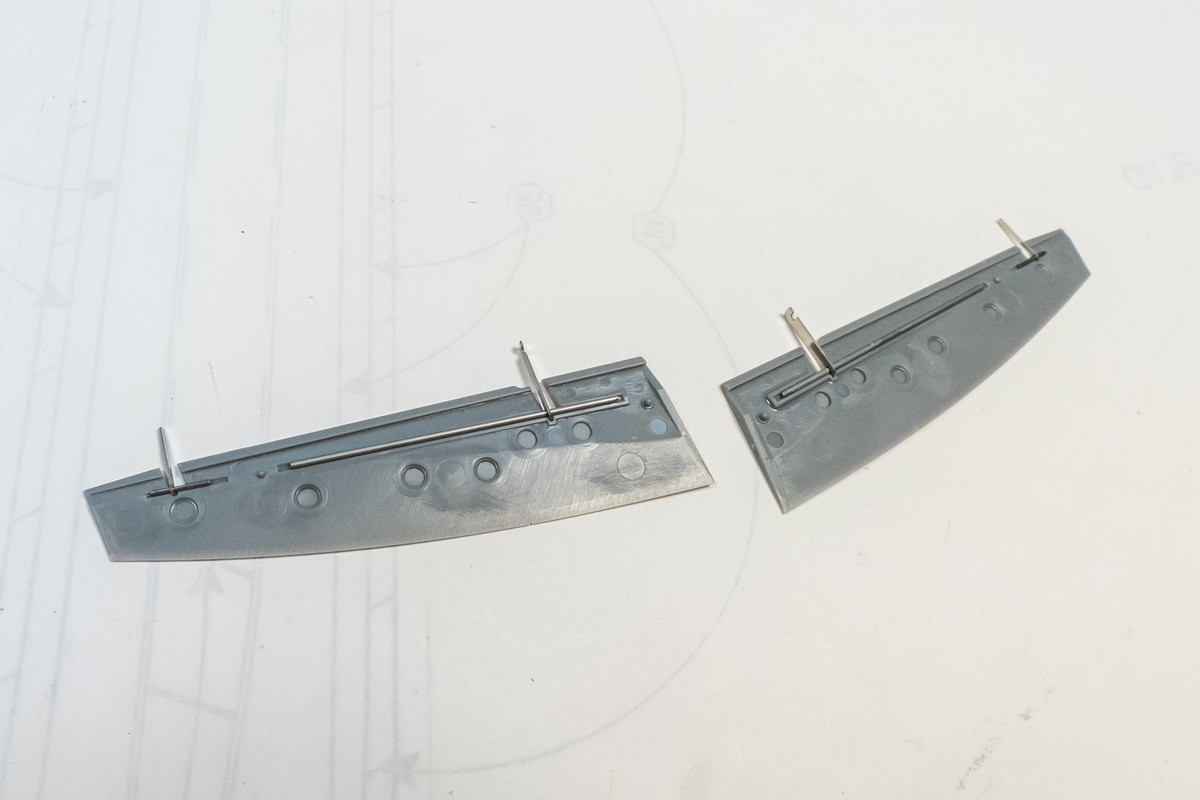


The only change I noticed was that the small scoop on the top of the cowling is now a separate part. The new cowling seems to fit ok, so I'm assuming the join end is unchanged. The white insert at the windscreen front edge is a piece of white styrene that LFD instructs to be glued into a small cut-out, which allows the use of normal plastic cement instead of CA glue so that you don't fog the clear windscreen part.


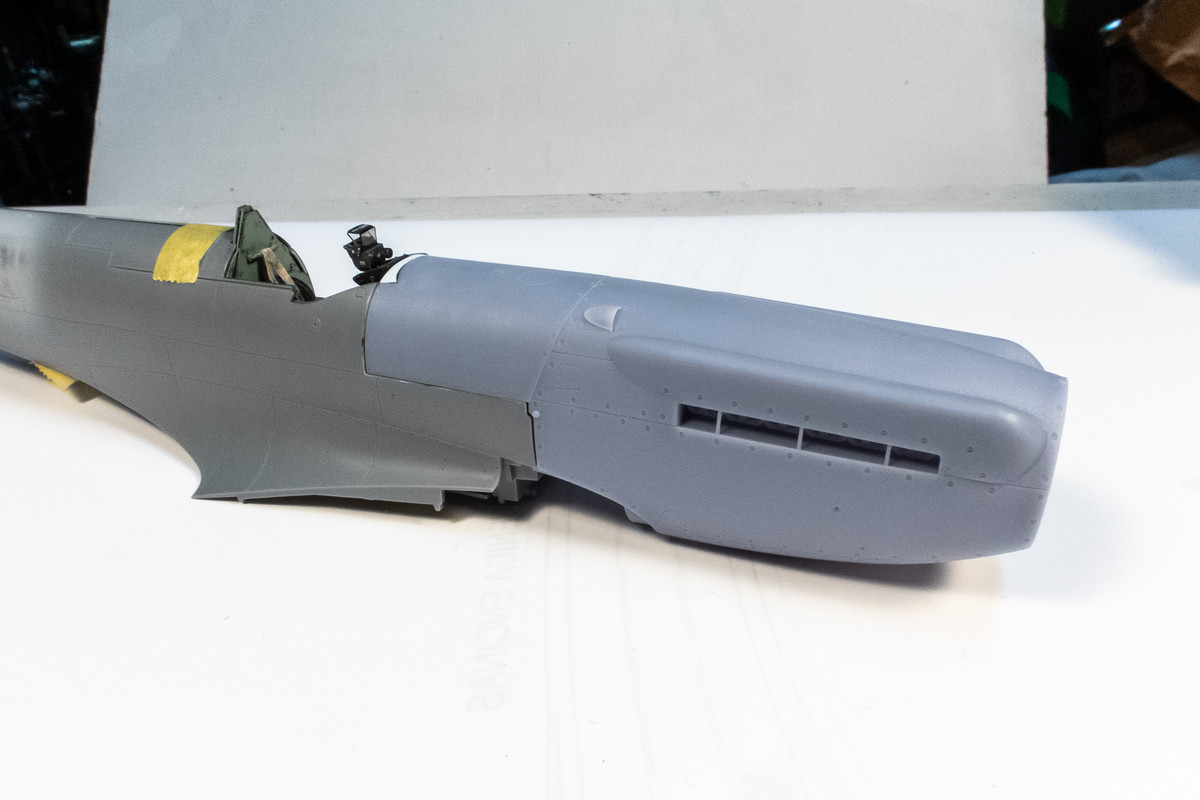
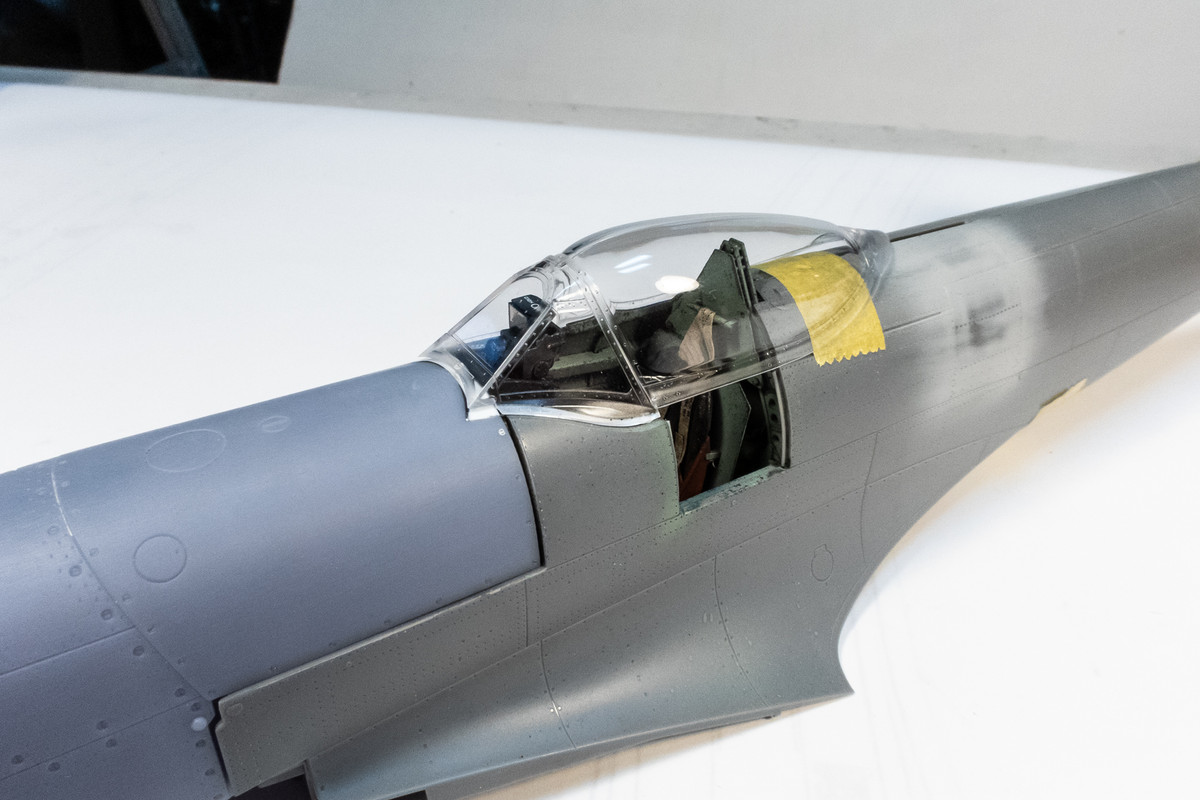
Speaking of clear parts, I tested the fit of the windscreen and canopy at this point. No issues here. Don't mind the gaps between the LFD cowling and kit fuselage... nothing but friction is holding things together.

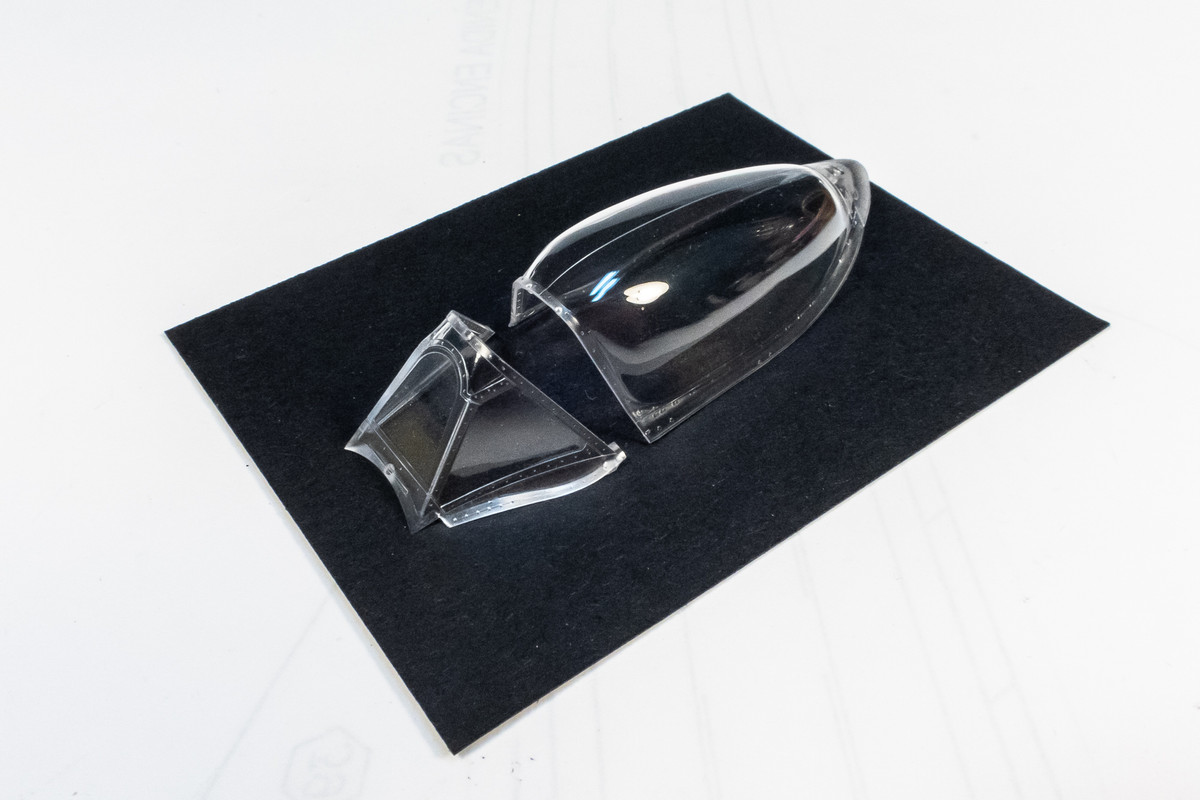
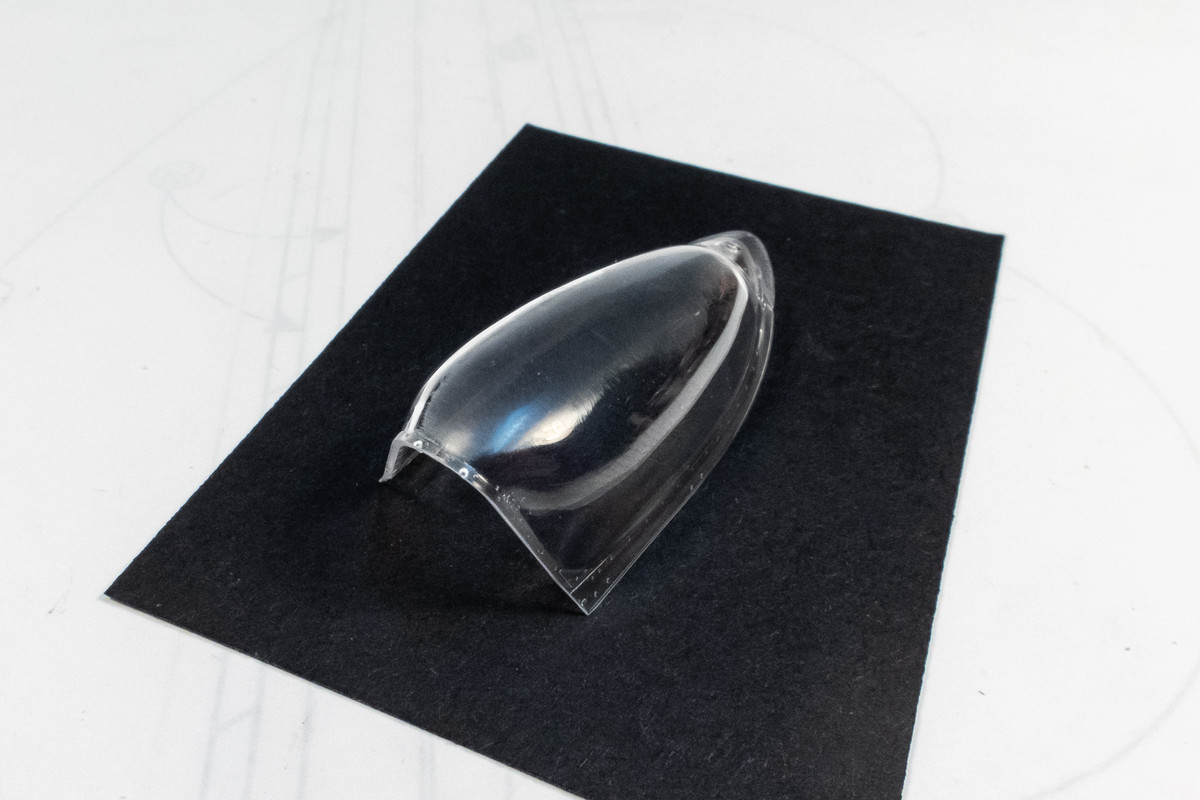
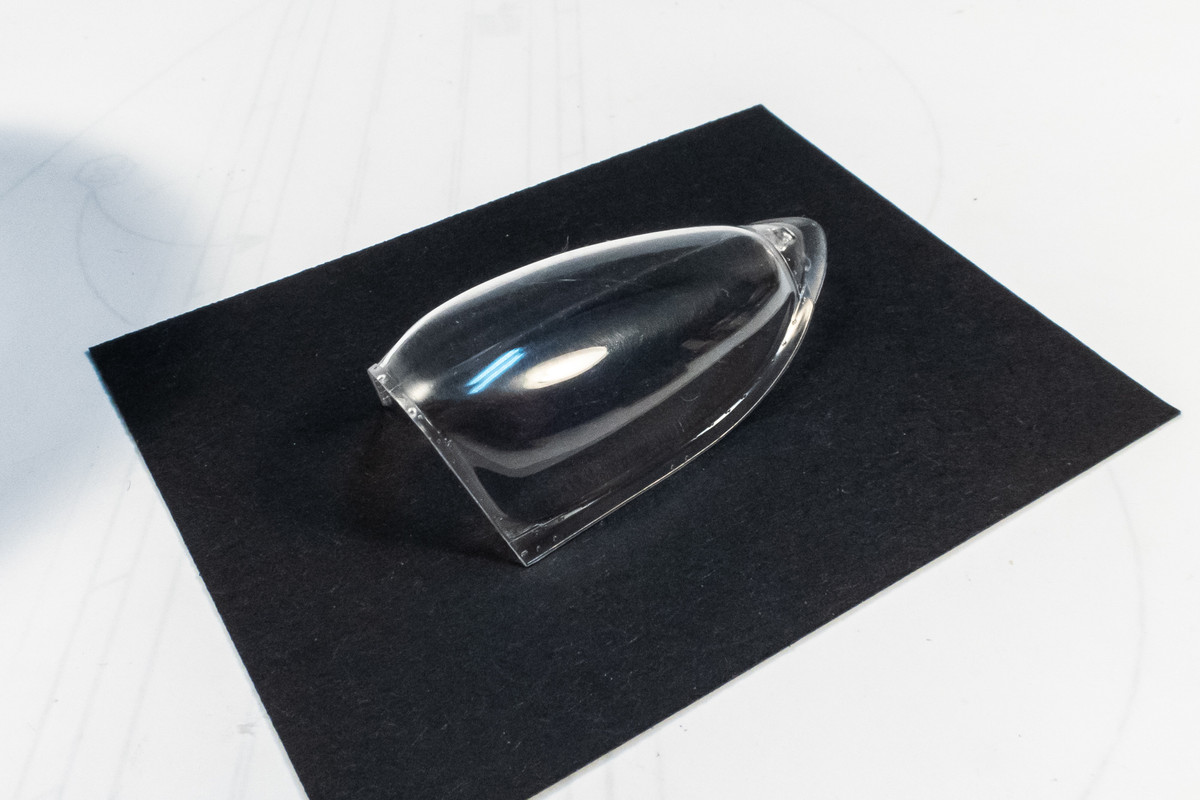
The bubble canopy is nice and clear but has a molding seam down the center, which needs to be removed.

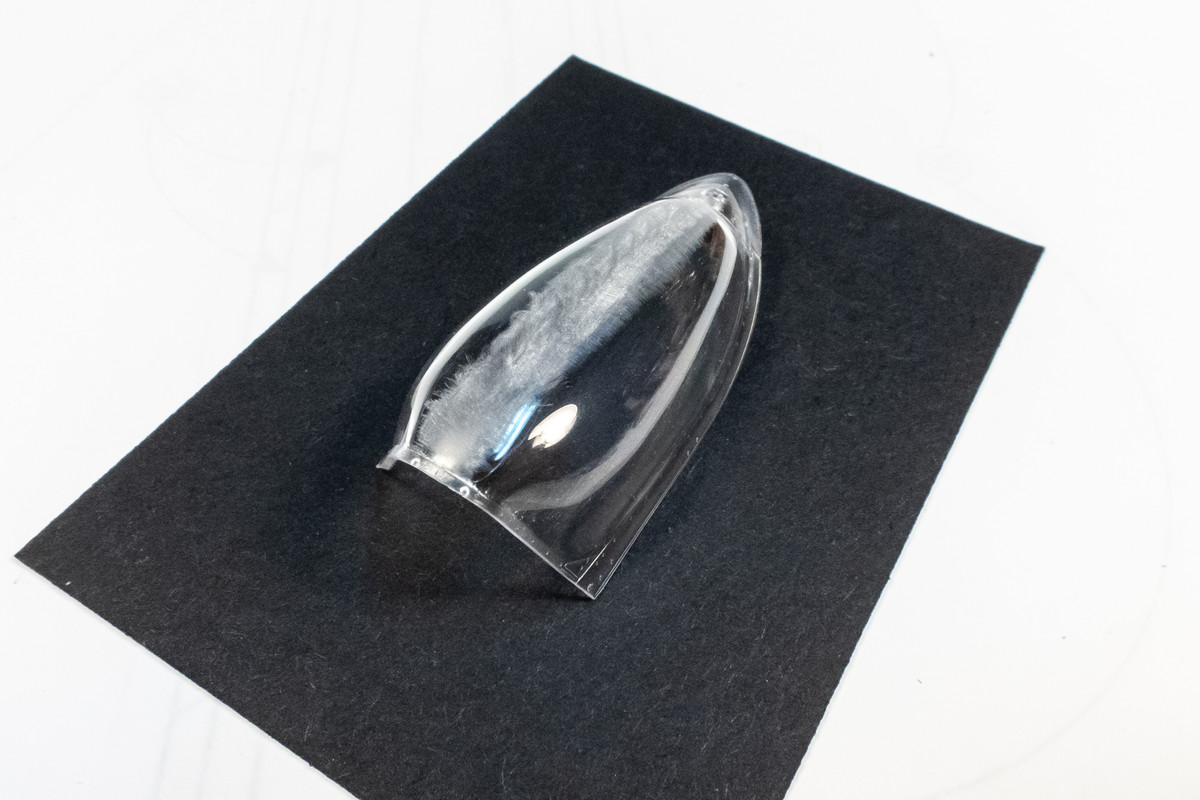
I used 600# sandpaper to get rid of the line.

#1000 and #2500 sandpaper was used to get rid of the scratches.

#800 and #12000 Micromesh helped to polish the canopy further.

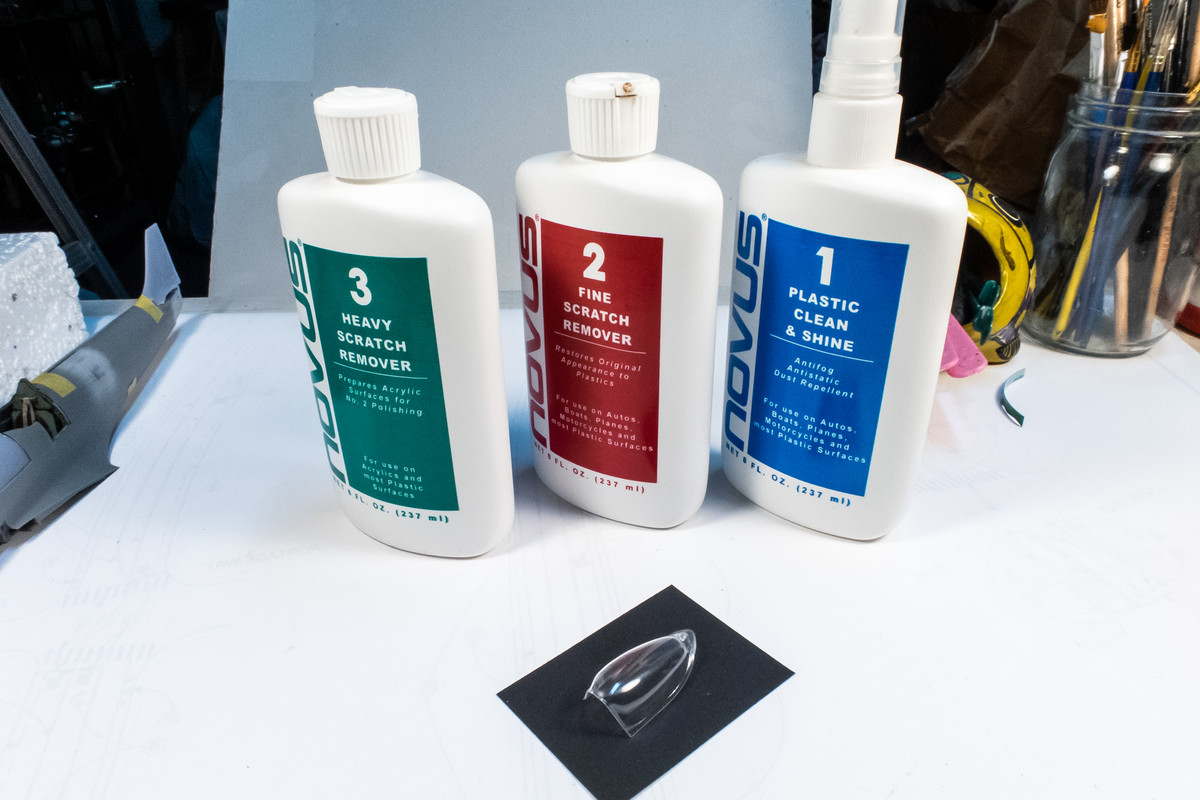
The final steps were to use Novus plastic polishing compounds.

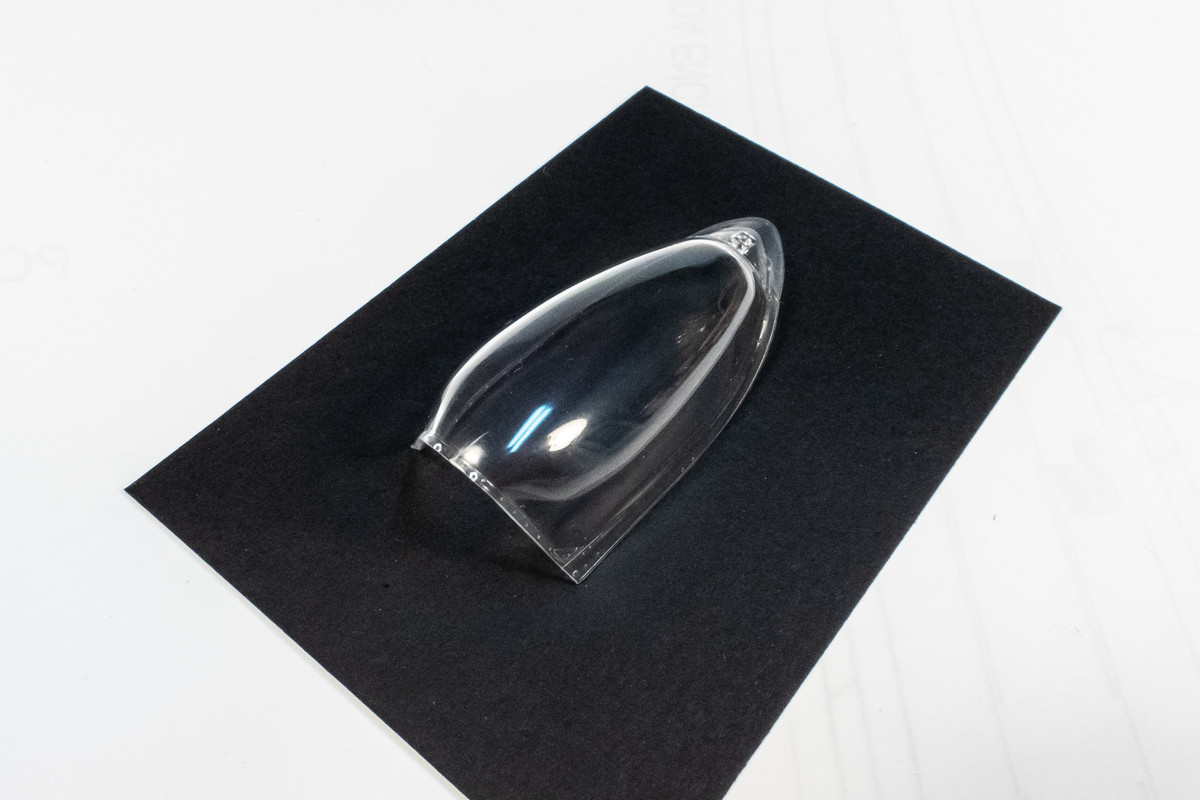
The mold line is gone and canopy is clear again. But...I put a little too much finger pressure on the canopy and a small crack appeared on top of the canopy from the front edge!!! Not good. Hopefully, I can purchase another clear part from Tamiya.

The spinner had a noticeable defect which I repaired with Black CA glue.


It was an eye-balled mixture of Tamiya Red (x-7) and Lineoleum Deck Brown (XF-79).
The cockpit tub has been glued into the starboard fuselage half but I'm not in a hurry to close up the fuselage just yet. Lots of other things I can play with in the meantime. Since Mathieu sent me another complete XIVe conversion set, I decided to bust the revised cowling out of its cage. Removal is a bit of a chore since you have to remove the cage first and then all of the bits on the outside before getting to cut the cowling, which is in the middle.


The only change I noticed was that the small scoop on the top of the cowling is now a separate part. The new cowling seems to fit ok, so I'm assuming the join end is unchanged. The white insert at the windscreen front edge is a piece of white styrene that LFD instructs to be glued into a small cut-out, which allows the use of normal plastic cement instead of CA glue so that you don't fog the clear windscreen part.


Speaking of clear parts, I tested the fit of the windscreen and canopy at this point. No issues here. Don't mind the gaps between the LFD cowling and kit fuselage... nothing but friction is holding things together.

The bubble canopy is nice and clear but has a molding seam down the center, which needs to be removed.

I used 600# sandpaper to get rid of the line.

#1000 and #2500 sandpaper was used to get rid of the scratches.

#800 and #12000 Micromesh helped to polish the canopy further.

The final steps were to use Novus plastic polishing compounds.

The mold line is gone and canopy is clear again. But...I put a little too much finger pressure on the canopy and a small crack appeared on top of the canopy from the front edge!!! Not good. Hopefully, I can purchase another clear part from Tamiya.

The spinner had a noticeable defect which I repaired with Black CA glue.


John aka JKim
-----------<><

-----------<><

Re: Tamiya 1/32 Spitfire XIVe Conversion
Ha, I just did the same canopy thing with the Bearcat I'm working on. First time I did it I thought for sure it was going in the bin. Well done.
Thanks,
John
John
Re: Tamiya 1/32 Spitfire XIVe Conversion
I have a replacement clear sprue (L-KK) on order with Tamiya which they estimate to be delivered in about six weeks. Hopefully, it will come sooner than that but at least I can move on with the build without it.
I've come down with a bit of a cold. It's hard to concentrate with my nose dripping like a faucet so I've been just mucking around with minor details. Here's a look at the vinyl kit tires compared to the Barracuda resin replacements.

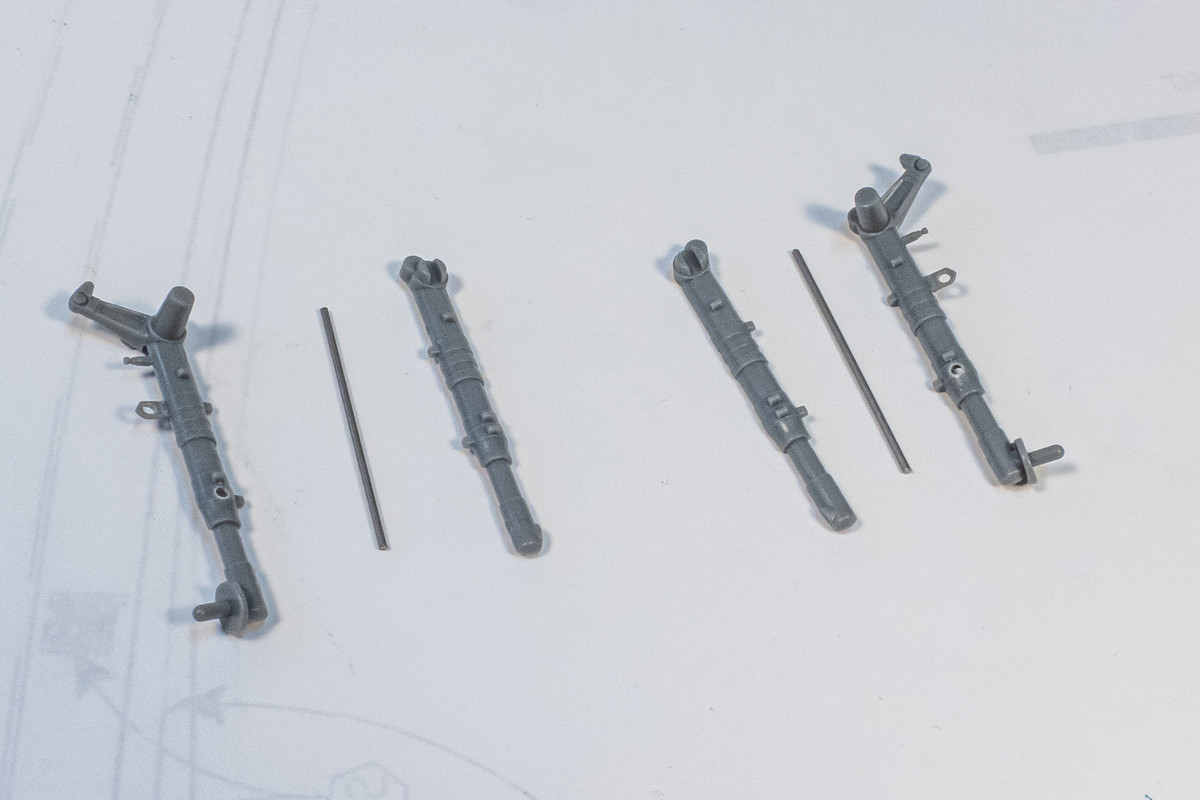
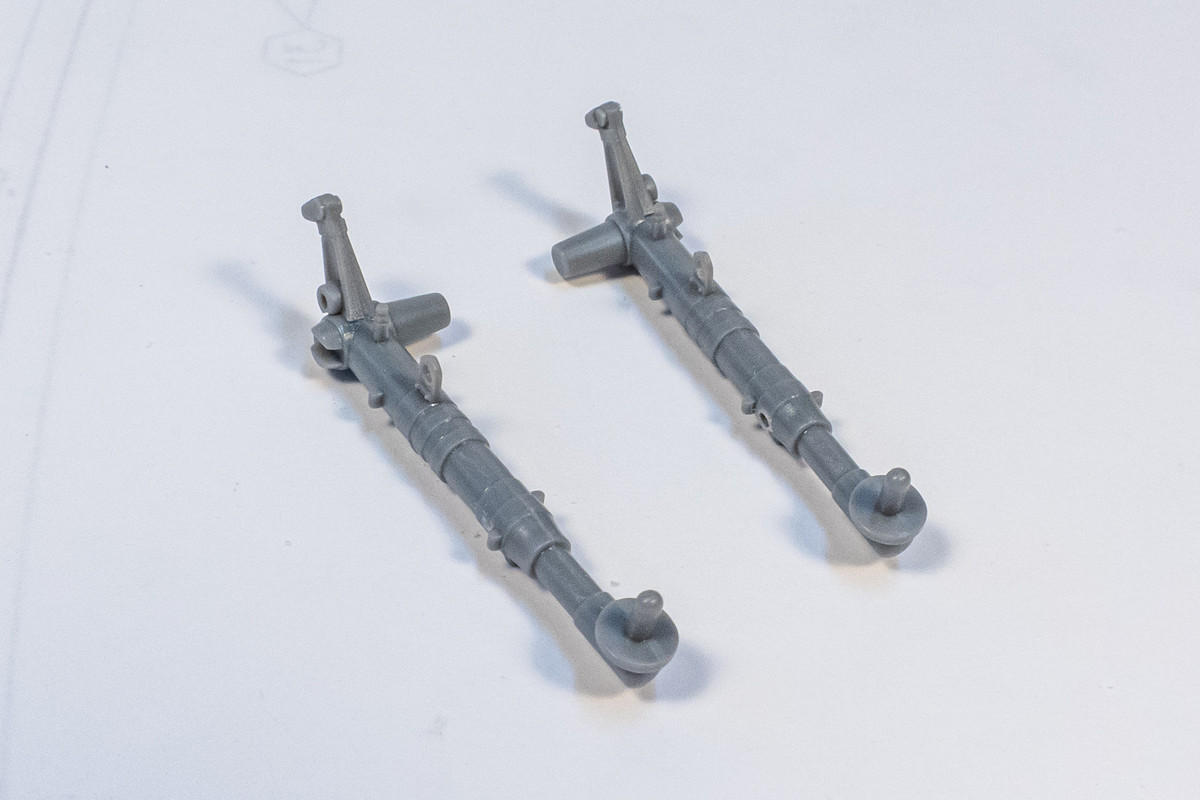
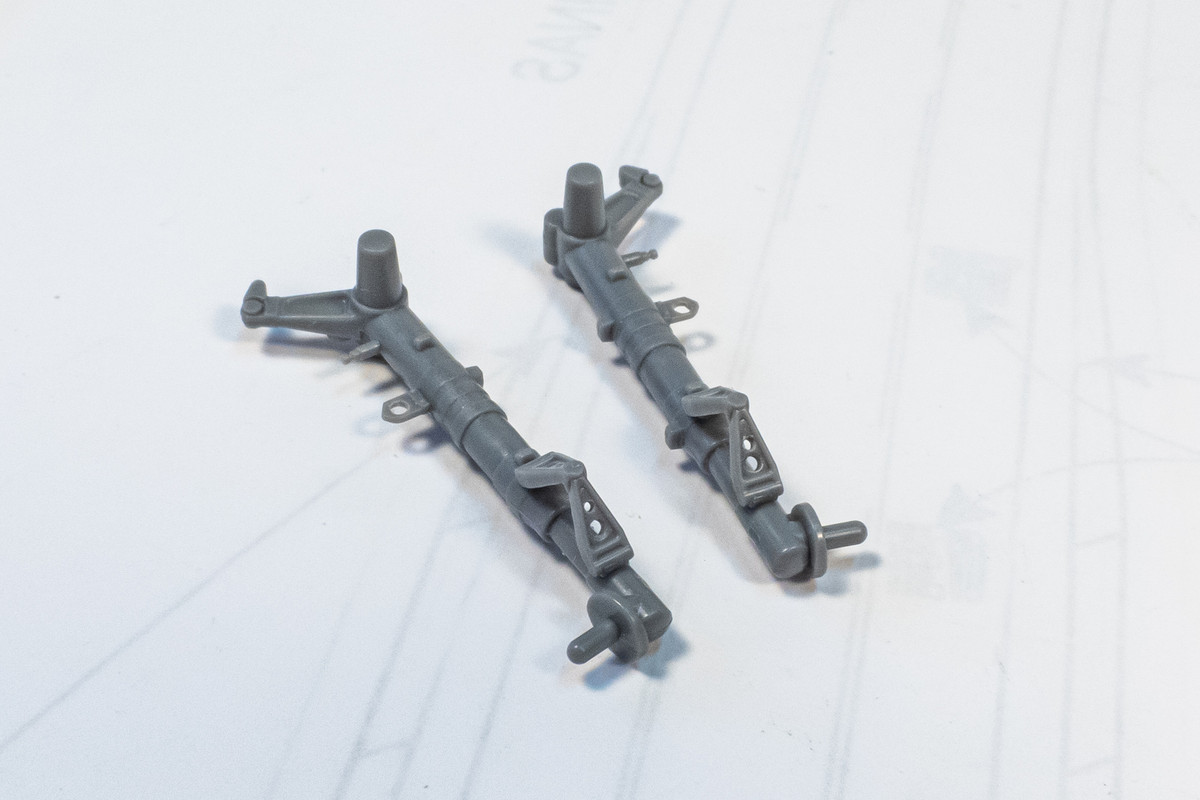
The landing gear legs are multi-part assemblies with a metal rod sandwiched between two halves, presumably to give strength to the legs.

The fit is Tamiya-good so it should be no problem getting rid of the glue seam.

Holes in the oleo scissors have been drilled out.

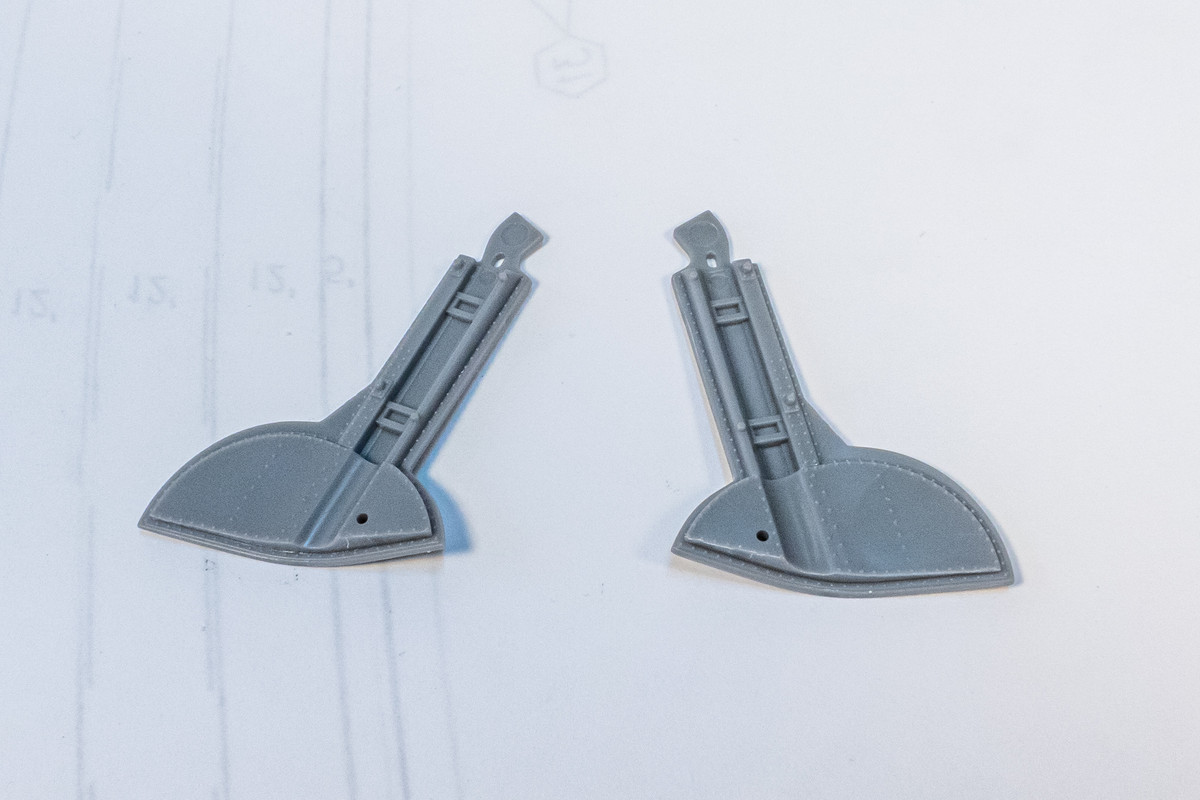
The landing gear covers are also 2-part affairs.

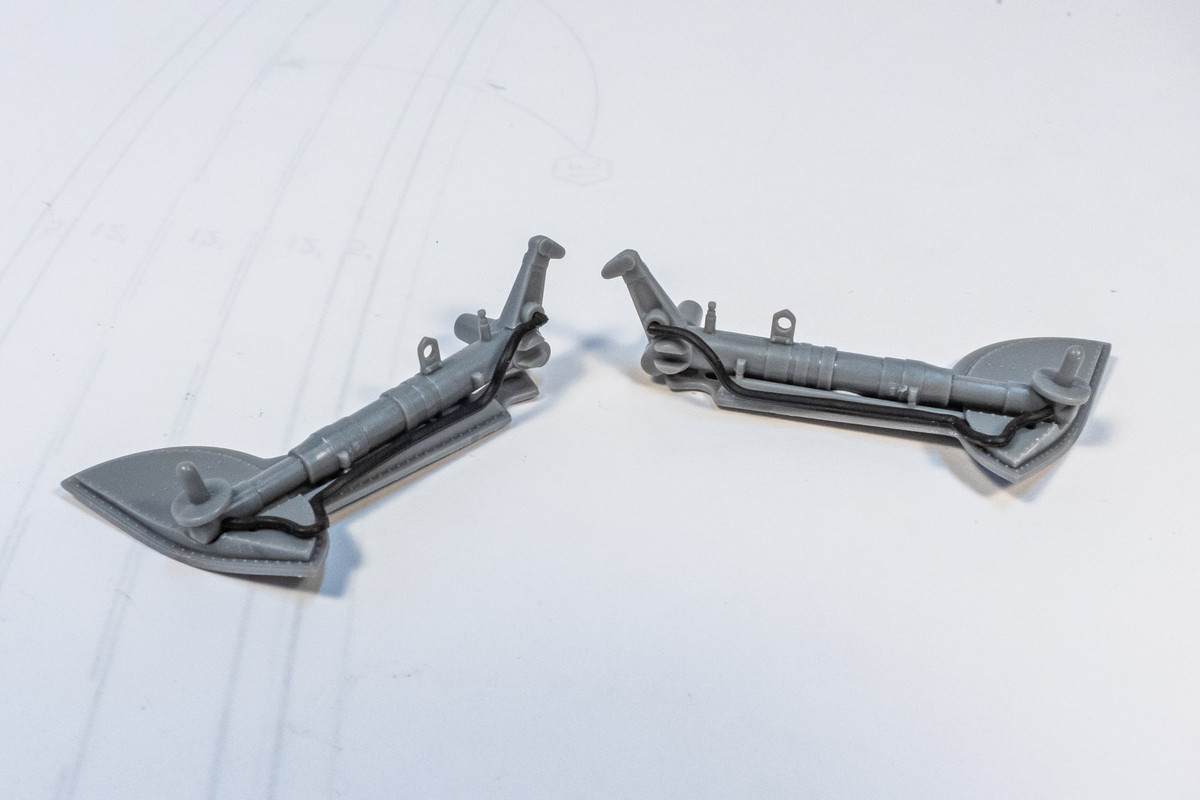
Interestingly, Tamiya supplies brake lines for landing gear in same black vinyl material as the tires. Commendable but they look overly thick to me so I"ll probably work up some replacements using wire.

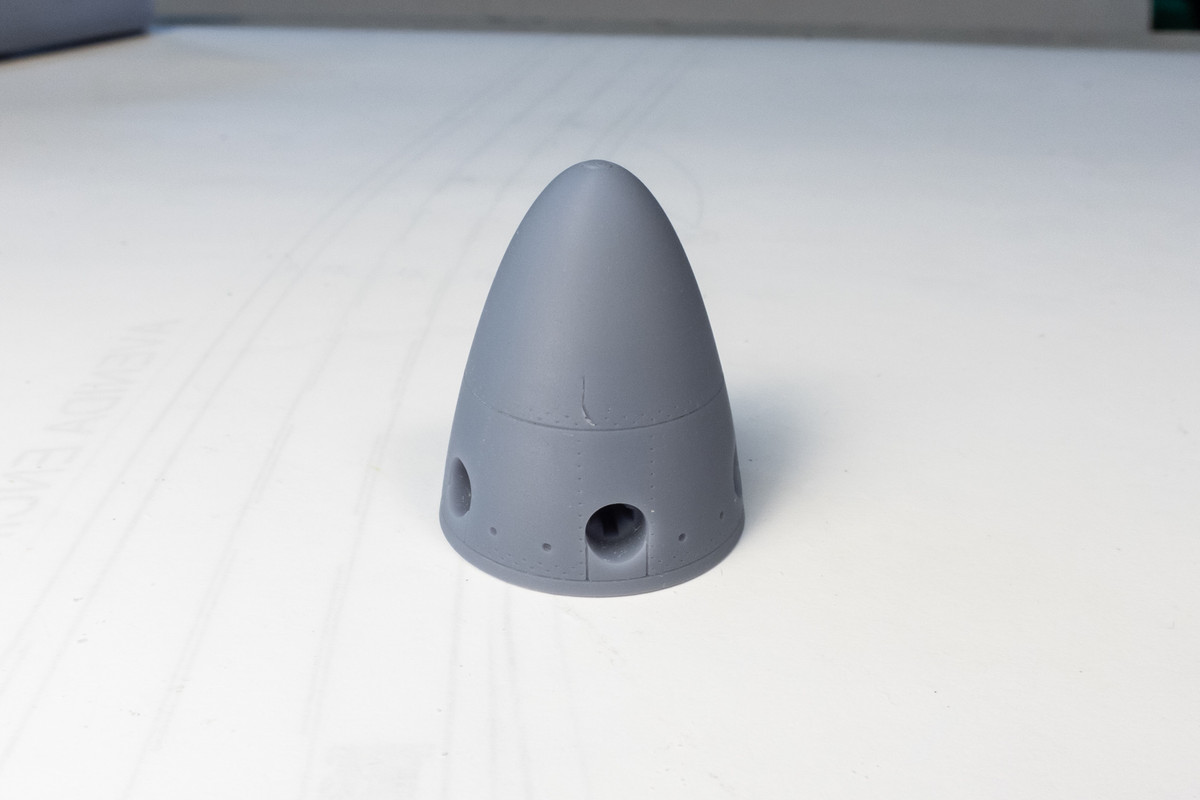
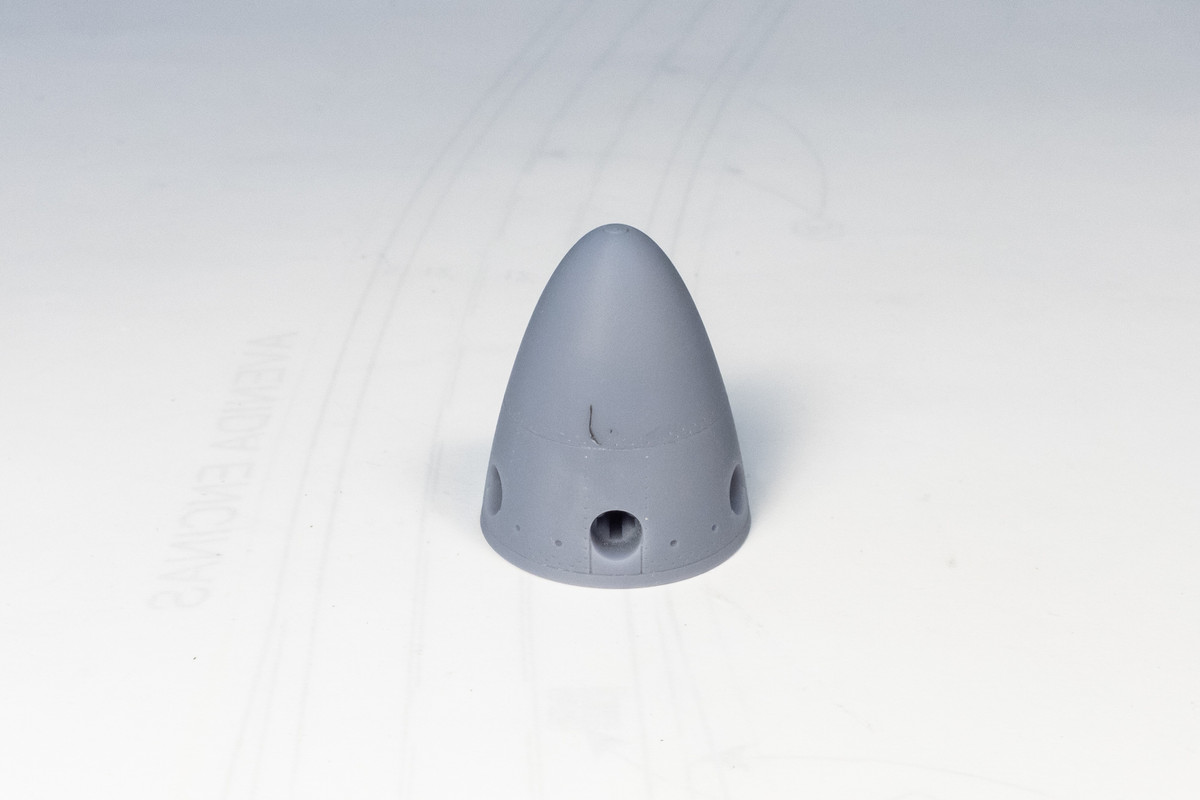
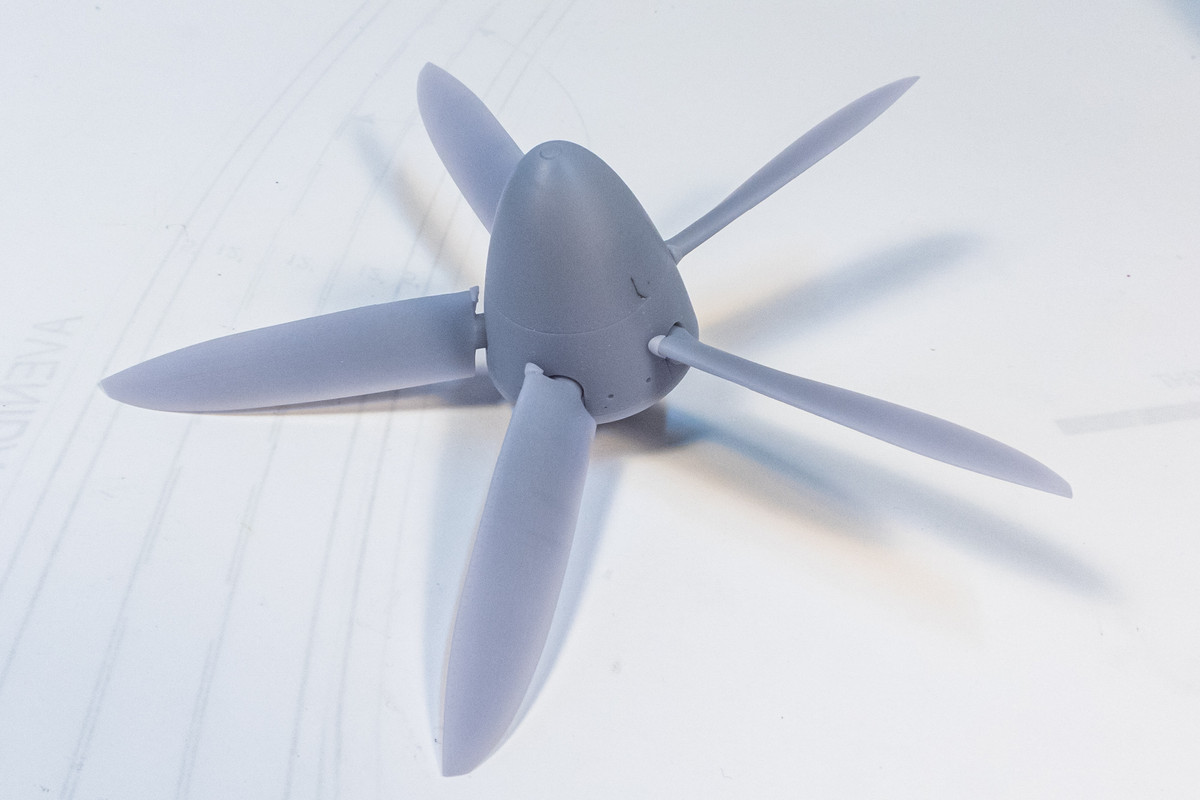
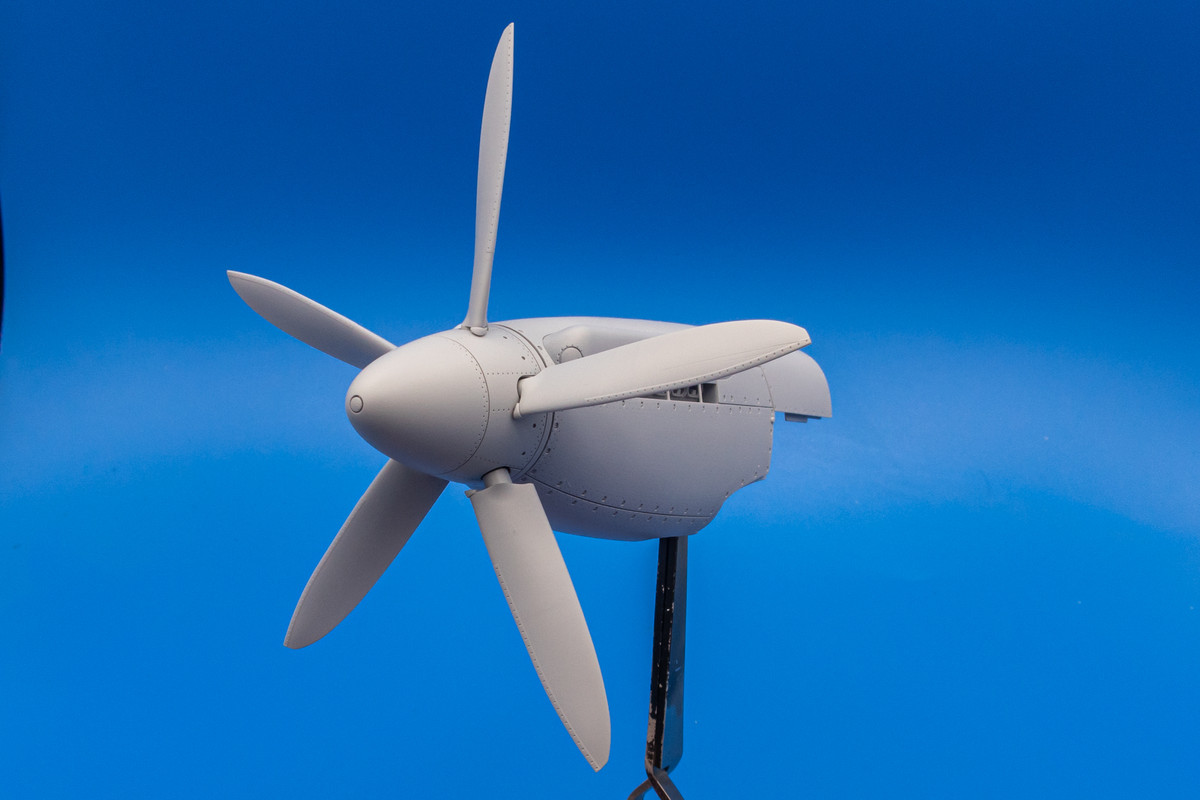
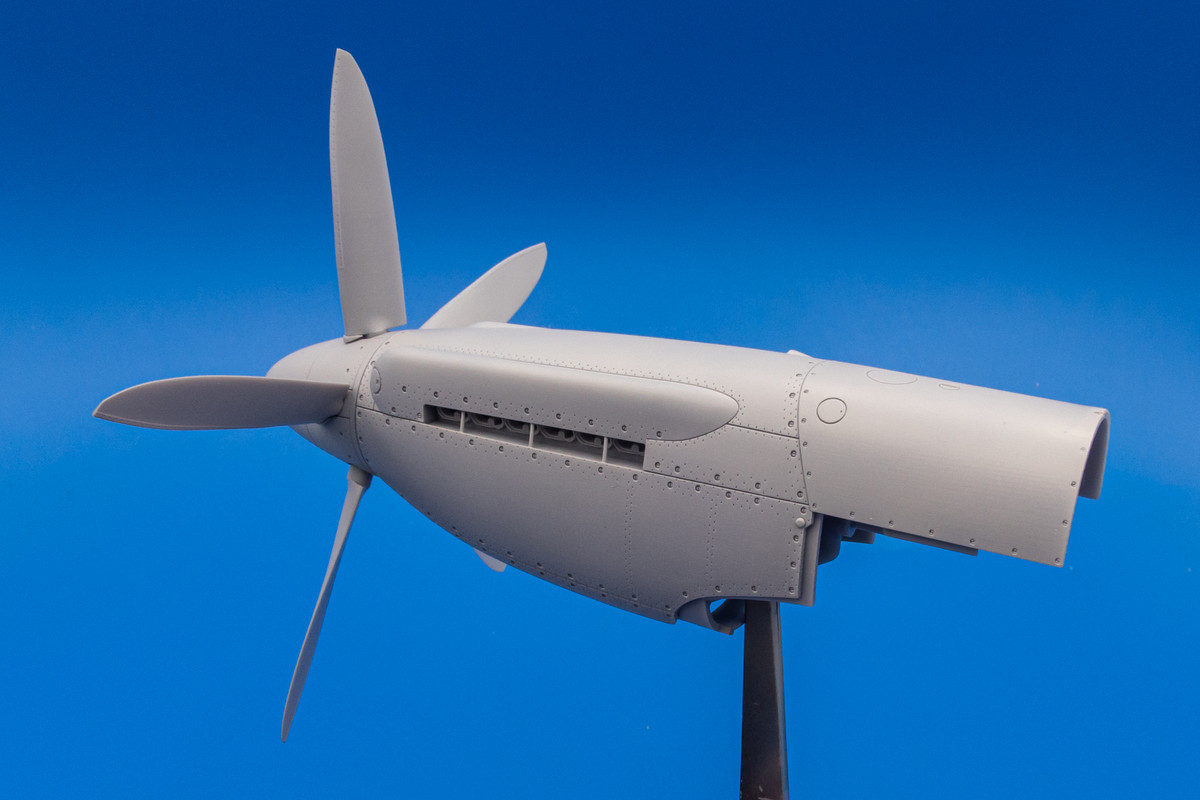
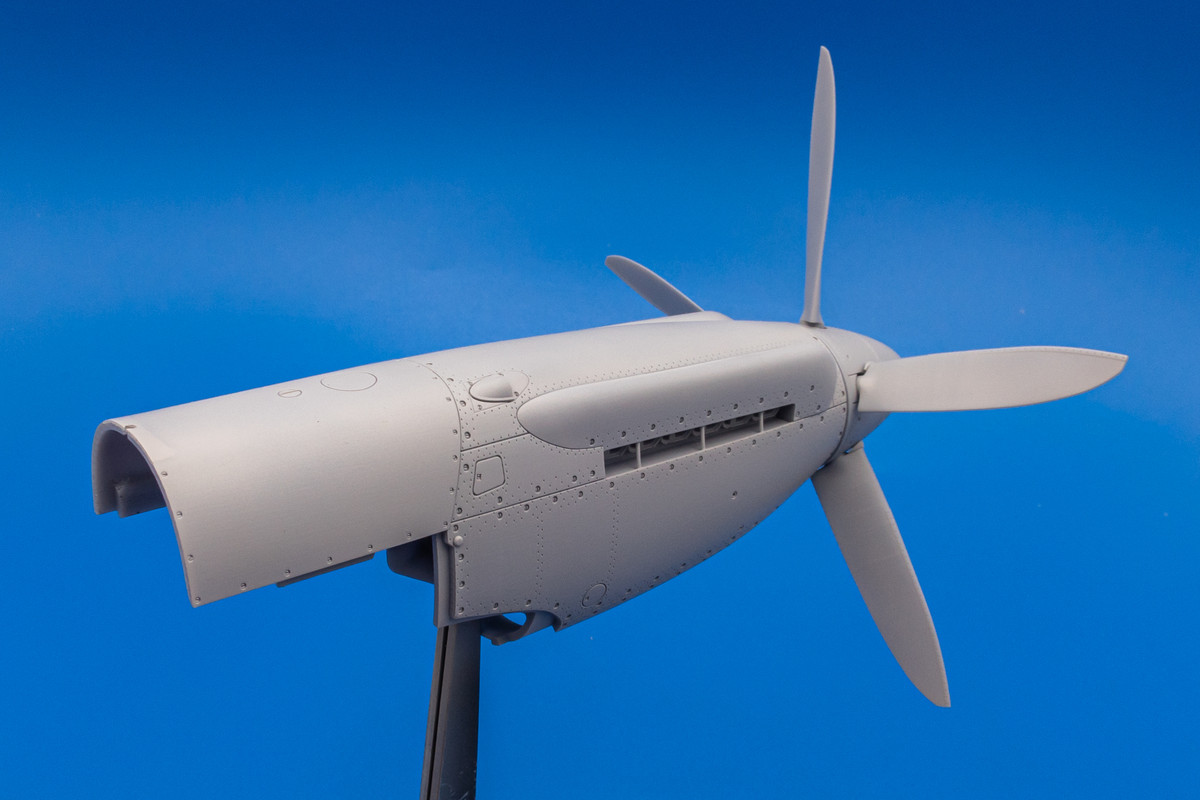
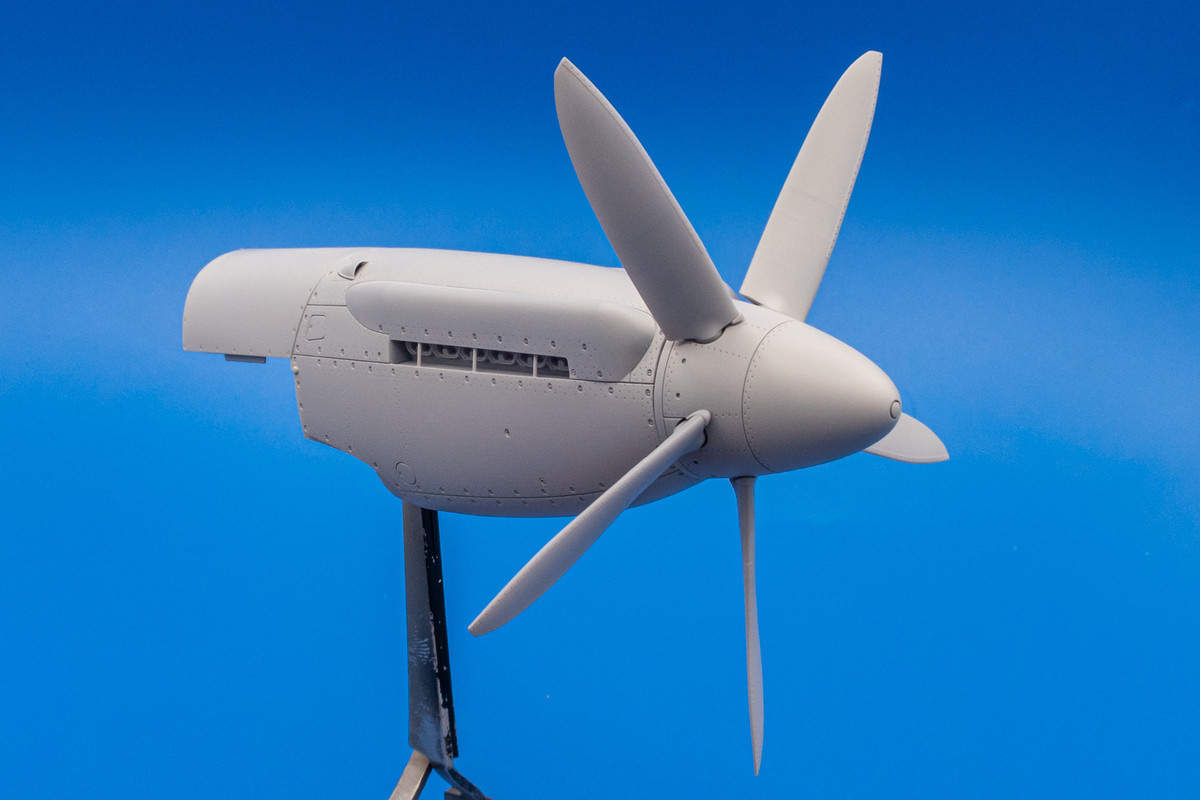
Mathieu added small inserts that attach to the base of the leading edge of prop blades. The translucence of the untreated resin makes it hard to discern the details of these parts.

After buffing the parts with fine sandpaper, I gave the engine cowling and prop parts a coat of primer (Mr Primer Surfacer 1000) to give viewers a proper look at these truly lovely conversion parts.


If my Amazon package arrives as scheduled tomorrow, I'll show you guys a neat trick for attaching the prop to the cowling.
I've come down with a bit of a cold. It's hard to concentrate with my nose dripping like a faucet so I've been just mucking around with minor details. Here's a look at the vinyl kit tires compared to the Barracuda resin replacements.

The landing gear legs are multi-part assemblies with a metal rod sandwiched between two halves, presumably to give strength to the legs.

The fit is Tamiya-good so it should be no problem getting rid of the glue seam.

Holes in the oleo scissors have been drilled out.

The landing gear covers are also 2-part affairs.

Interestingly, Tamiya supplies brake lines for landing gear in same black vinyl material as the tires. Commendable but they look overly thick to me so I"ll probably work up some replacements using wire.

Mathieu added small inserts that attach to the base of the leading edge of prop blades. The translucence of the untreated resin makes it hard to discern the details of these parts.

After buffing the parts with fine sandpaper, I gave the engine cowling and prop parts a coat of primer (Mr Primer Surfacer 1000) to give viewers a proper look at these truly lovely conversion parts.


If my Amazon package arrives as scheduled tomorrow, I'll show you guys a neat trick for attaching the prop to the cowling.
John aka JKim
-----------<><

-----------<><

- Stikpusher
- Moderator
- Posts: 21180
- Joined: Sat Apr 05, 2014 8:37 pm
- Location: Ceti Alpha 5
Re: Tamiya 1/32 Spitfire XIVe Conversion
Oh that cowling & prop look gorgeous! I can’t wait to see what comes next.
"Surely I have made my meaning plain? I intend to avenge myself upon you, Admiral. I have deprived your ship of power, and when I swing 'round, I intend to deprive you of your life."
FLSM
FLSM
Re: Tamiya 1/32 Spitfire XIVe Conversion
Thank you Carlos!
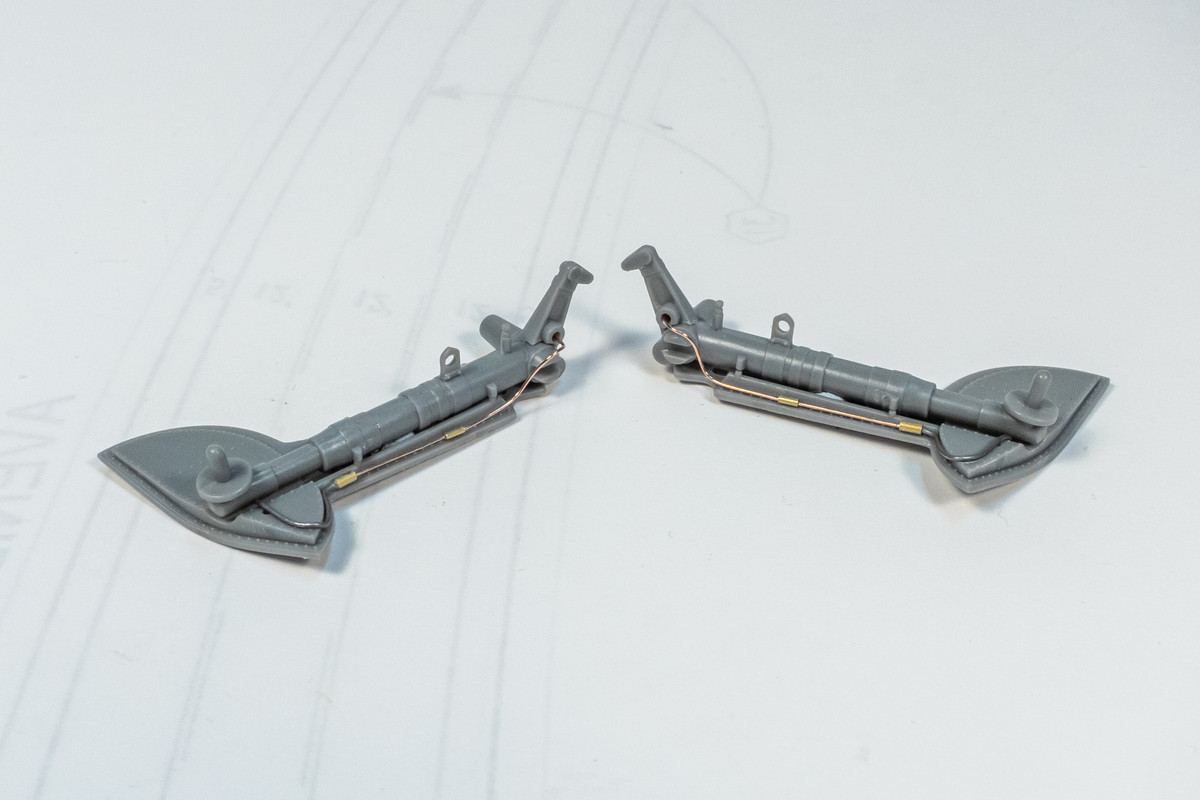
Jumping around and working on different parts of the aircraft. I've replaced the vinyl brake lines with finer versions made of lead and copper wire and attached using small sections of brass tubing.

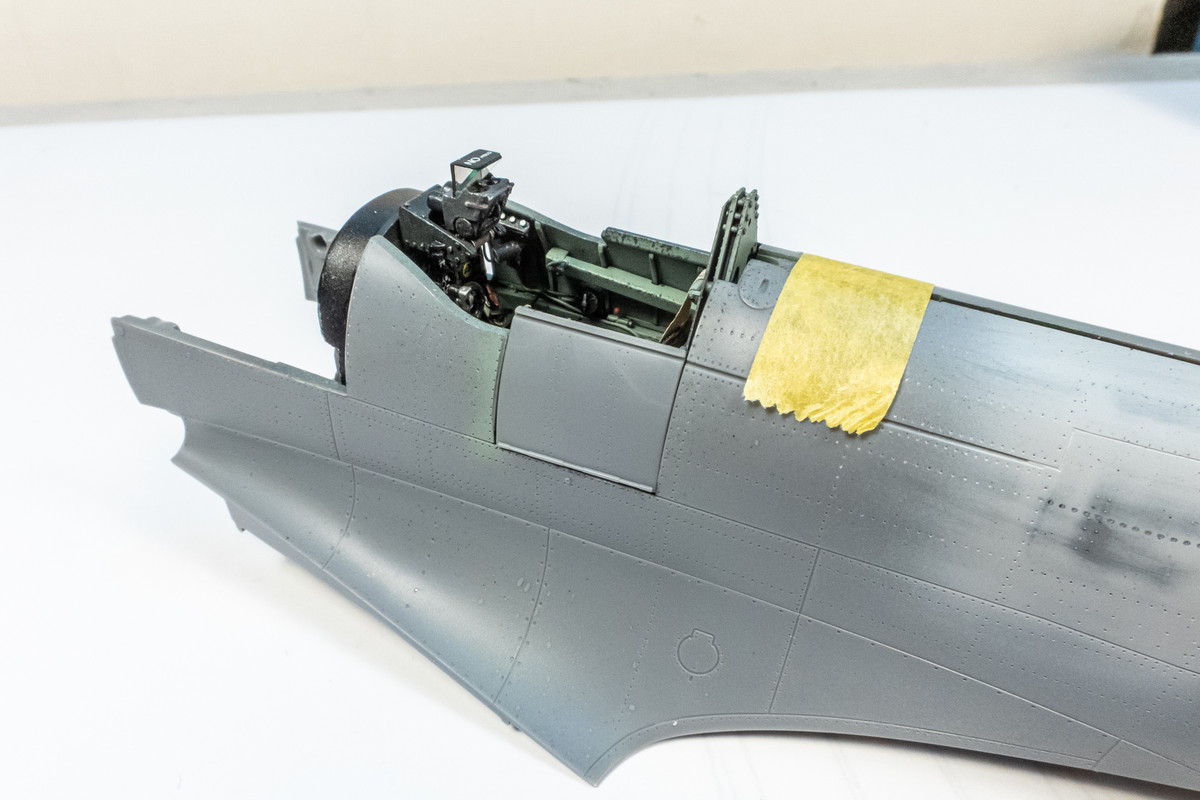
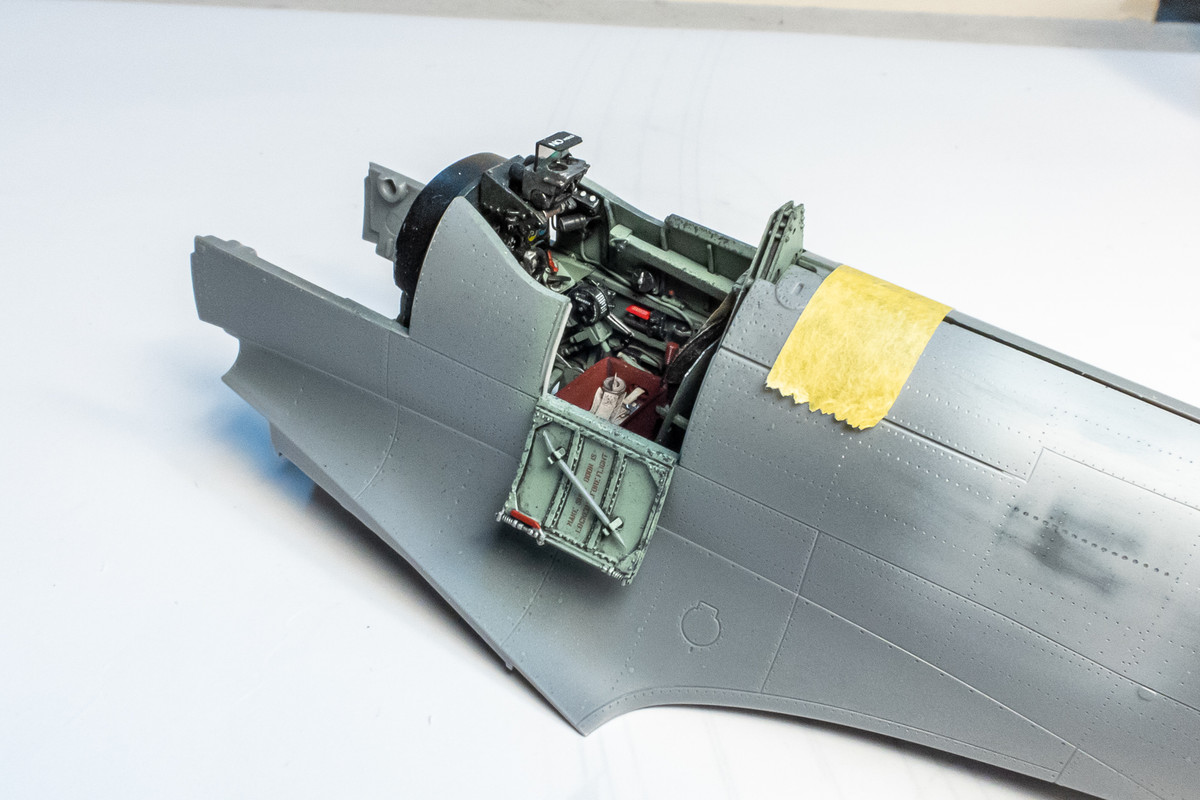
The XIVe is such a visually stunning airframe that I wanted to reserve the option of showing her completely buttoned up and ready to fly. The LFD door has gorgeous interior detail but won't not fit in the closed position without alteration. It also lacks rivets on the exterior side. The kit door fits in the closed position and has the proper exterior riveting to match the rest of the exterior but the interior detail is weak. So I am moving forward with two versions of the pilot door. One is the kit part to be posed closed. The other is the LFD door to be posed open.


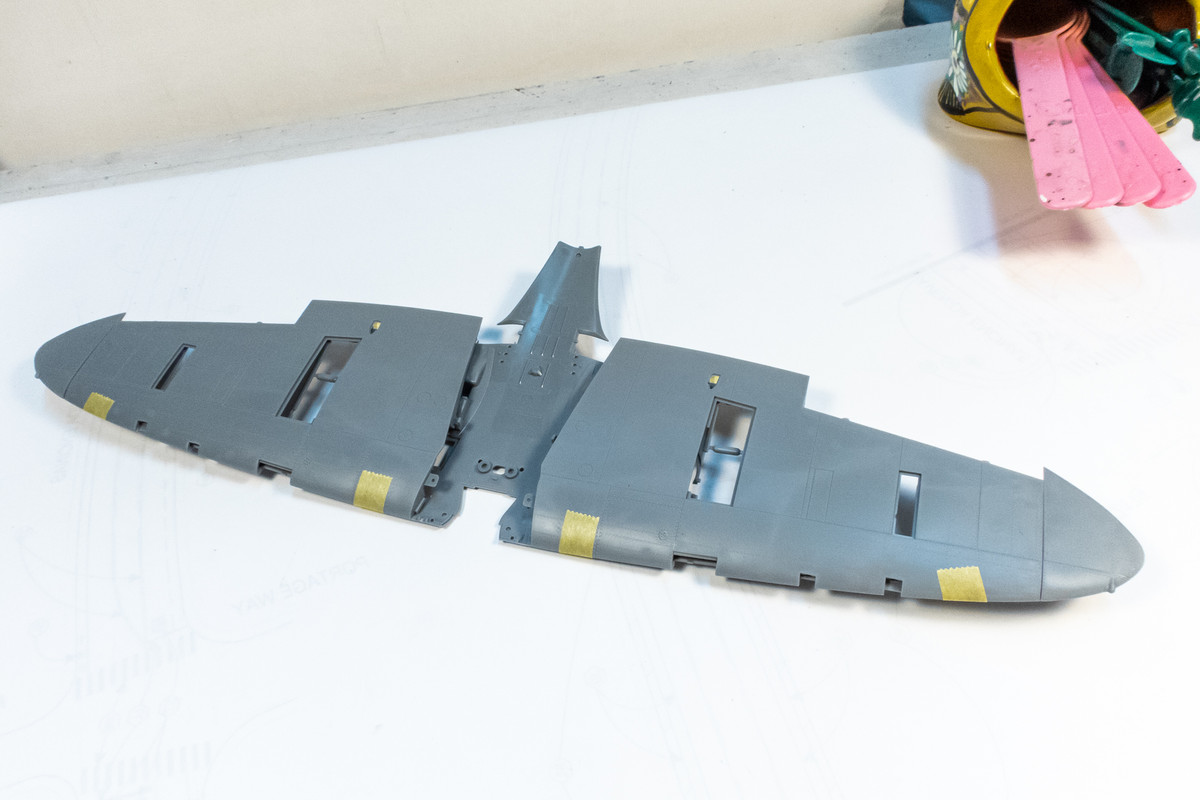
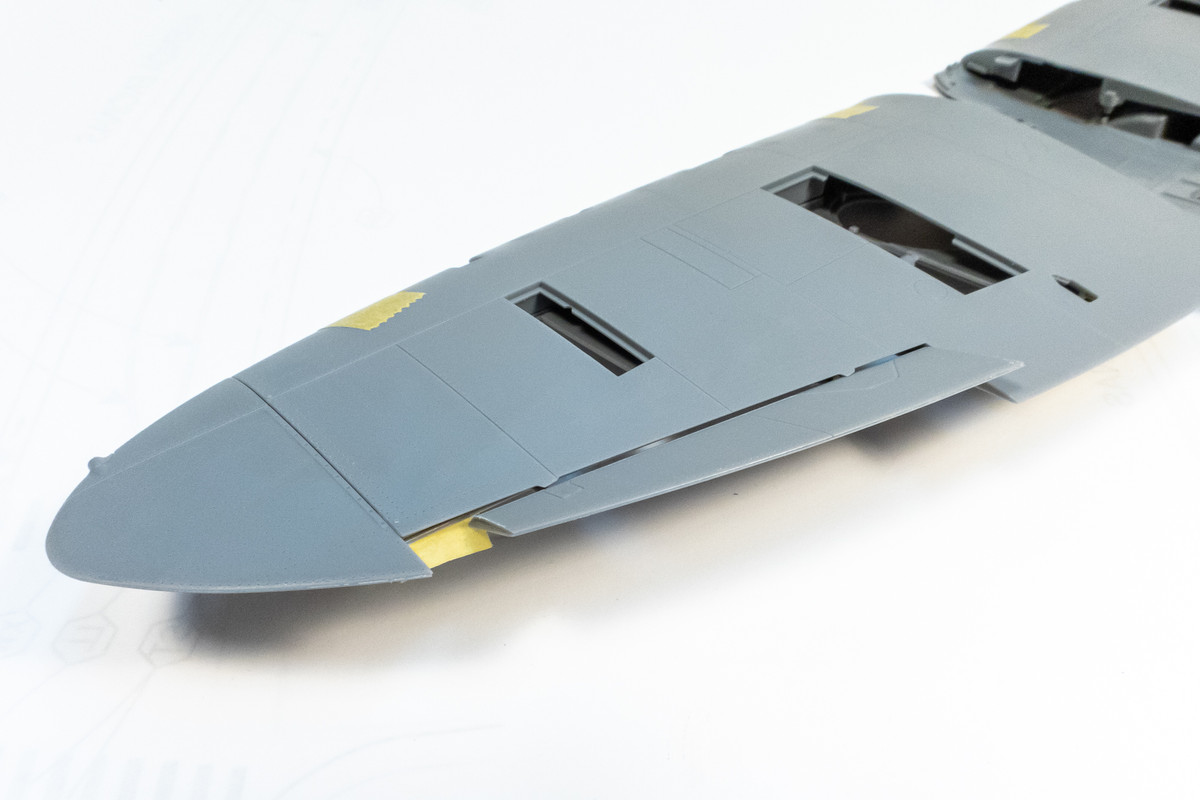
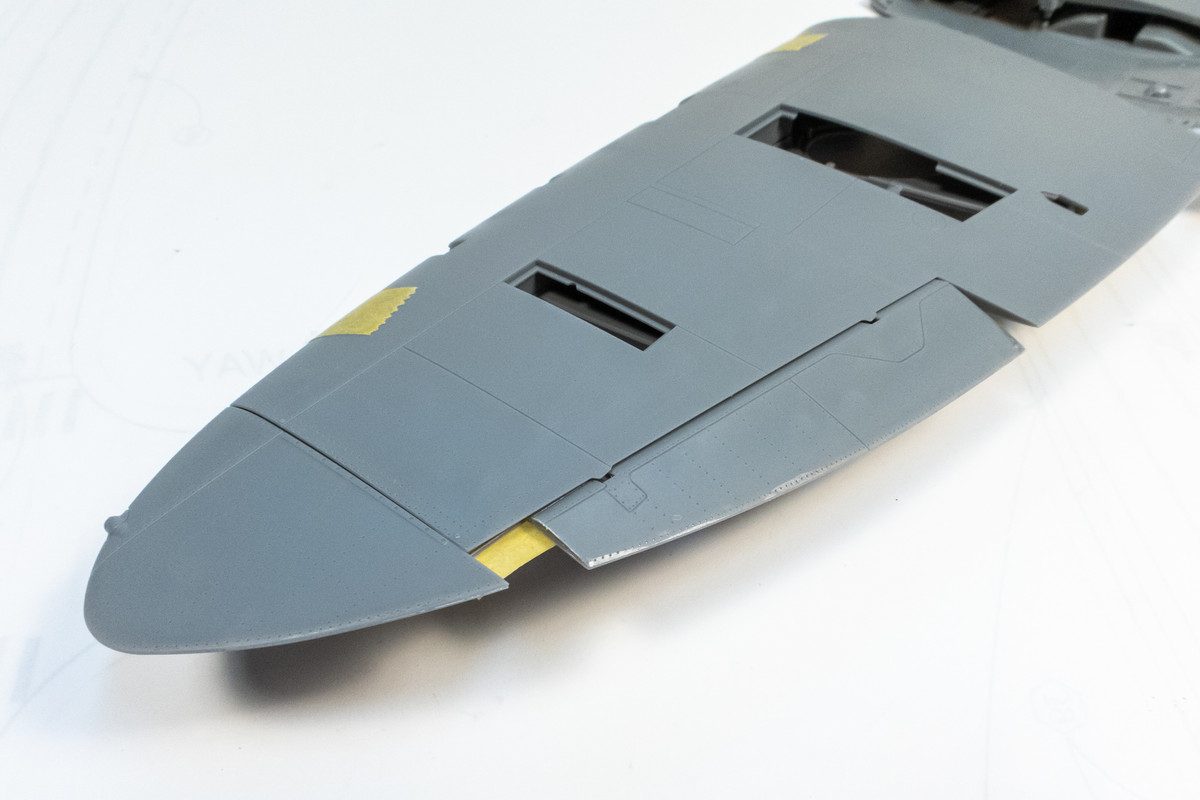
First look at the XIVe wing. These wing parts are from the Tamiya VIII kit and correctly feature the wing fuel tanks that the XIVe had but the XVIe kit lacks.

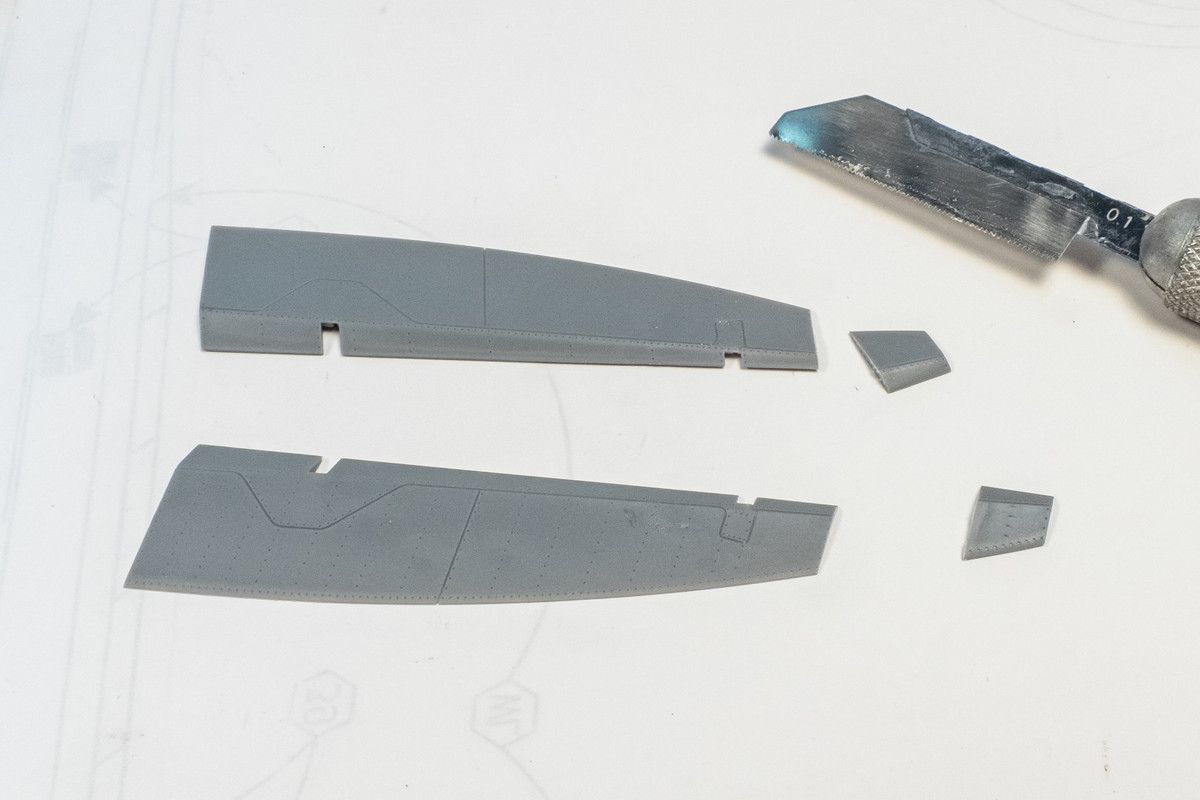
The XIVe had shortened ailerons and the kit parts need to be appropriately modified.


The removed sections should now be part of the wing structure but some mods will be necessary to make these fit.

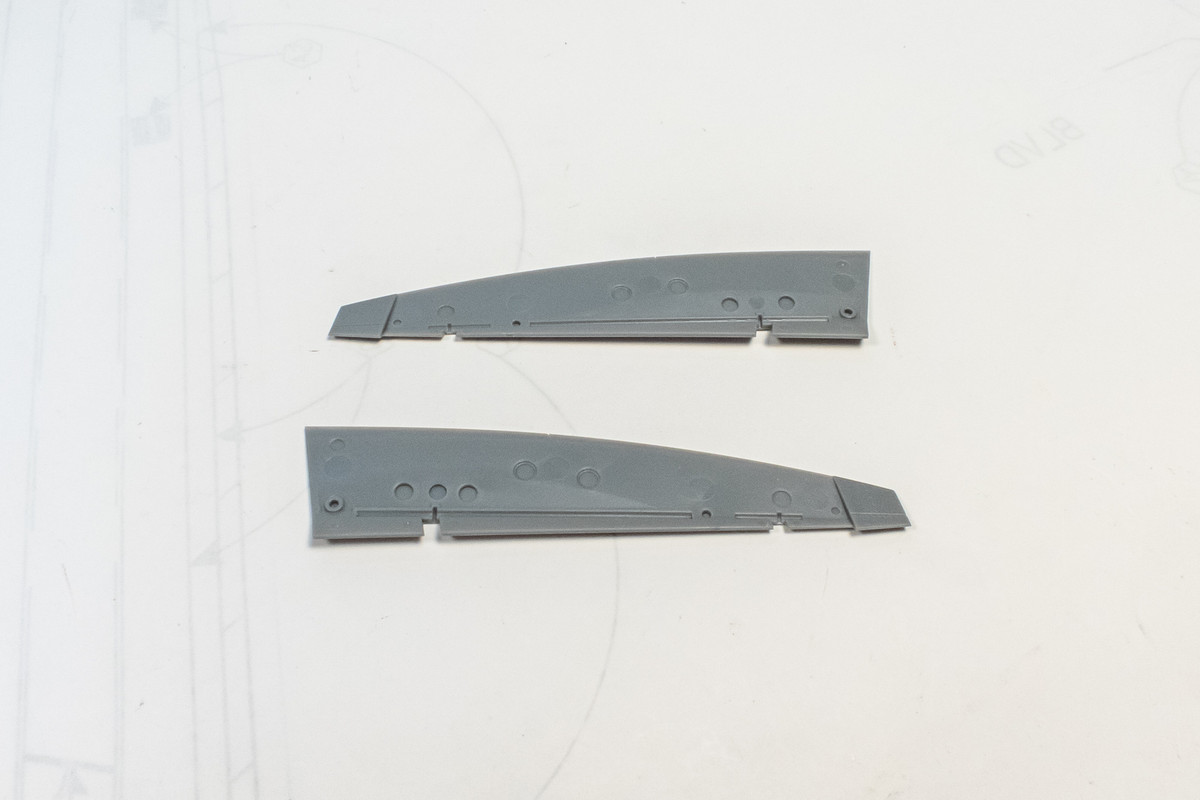
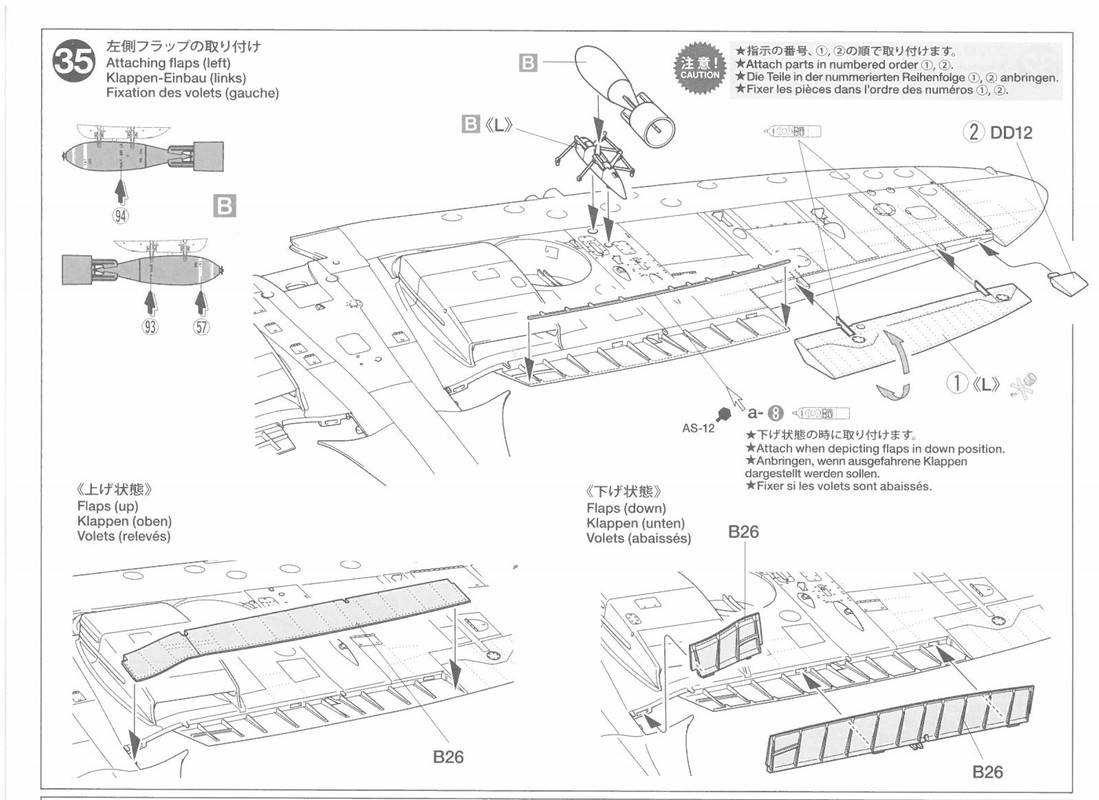
The VIII kit has the shortened ailerons so I ordered sprue DD when I called Tamiya customer service about the cracked bubble canopy. Hopefully, these parts will be a more seamless fit.

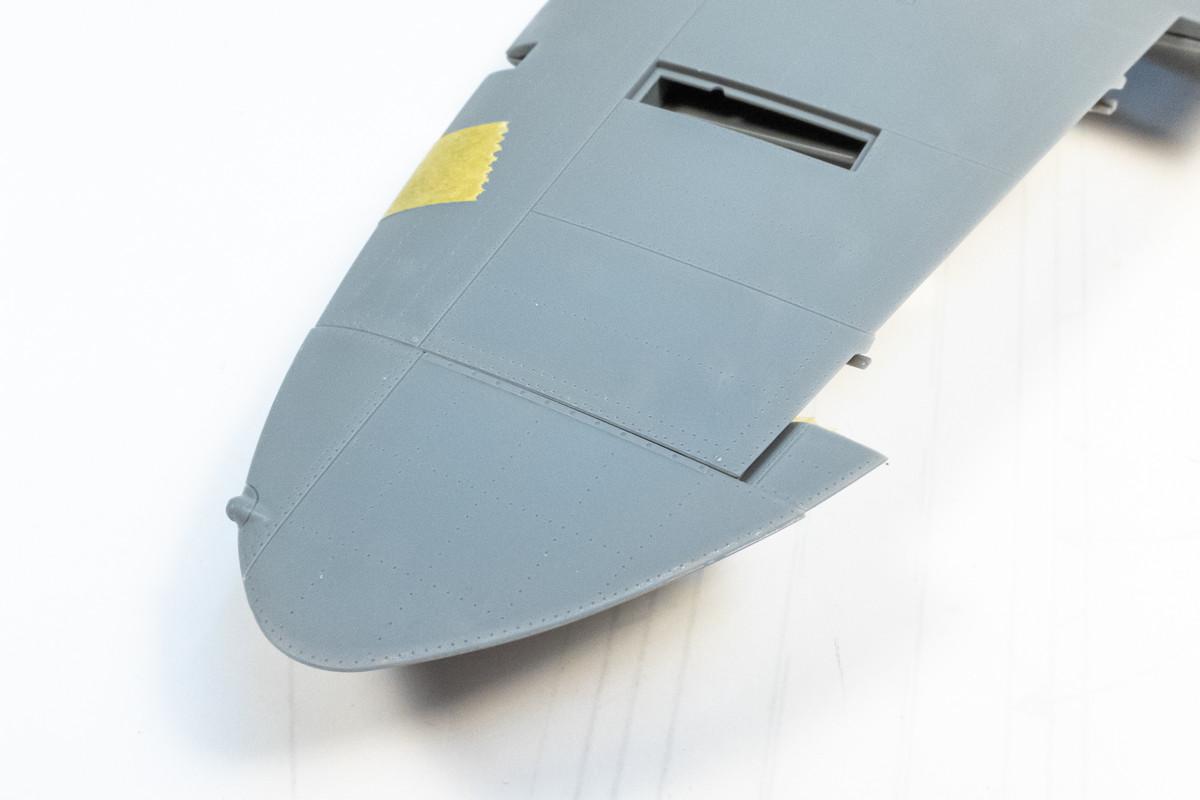
The ailerons are designed to be movable, which I am personally not a fan of. Preliminary fit shows very loose action, defaulting to a dropped position most of the time. Let's see how they work out. I may opt to glue them in the neutral position.


Jumping around and working on different parts of the aircraft. I've replaced the vinyl brake lines with finer versions made of lead and copper wire and attached using small sections of brass tubing.

The XIVe is such a visually stunning airframe that I wanted to reserve the option of showing her completely buttoned up and ready to fly. The LFD door has gorgeous interior detail but won't not fit in the closed position without alteration. It also lacks rivets on the exterior side. The kit door fits in the closed position and has the proper exterior riveting to match the rest of the exterior but the interior detail is weak. So I am moving forward with two versions of the pilot door. One is the kit part to be posed closed. The other is the LFD door to be posed open.


First look at the XIVe wing. These wing parts are from the Tamiya VIII kit and correctly feature the wing fuel tanks that the XIVe had but the XVIe kit lacks.

The XIVe had shortened ailerons and the kit parts need to be appropriately modified.


The removed sections should now be part of the wing structure but some mods will be necessary to make these fit.

The VIII kit has the shortened ailerons so I ordered sprue DD when I called Tamiya customer service about the cracked bubble canopy. Hopefully, these parts will be a more seamless fit.

The ailerons are designed to be movable, which I am personally not a fan of. Preliminary fit shows very loose action, defaulting to a dropped position most of the time. Let's see how they work out. I may opt to glue them in the neutral position.


John aka JKim
-----------<><

-----------<><