1/32 Hasegawa Bf109G-14 Hartmann

Re: 1/32 Hasegawa Bf109G-14 Hartmann
Cracking work John!
Stuart Templeton 'I may not be good but I'm slow...'

Re: 1/32 Hasegawa Bf109G-14 Hartmann
Doing some more fiddling with the MDC cockpit set, trying to get the three major pieces (two sidewalls and cockpit tub) to fit in the fuselage. The more I play with it, the more I am leaning towards having the three major pieces glued together and then attaching the whole cockpit assembly into the fuselage from the bottom. This will reduce the amount of fit/placement variables and make things simpler for me. To that end, I've removed portions of the yellow fuel line and re-positioned it (using lead wire) so that the rear edge of the sidewall can be pushed closer towards the seat.
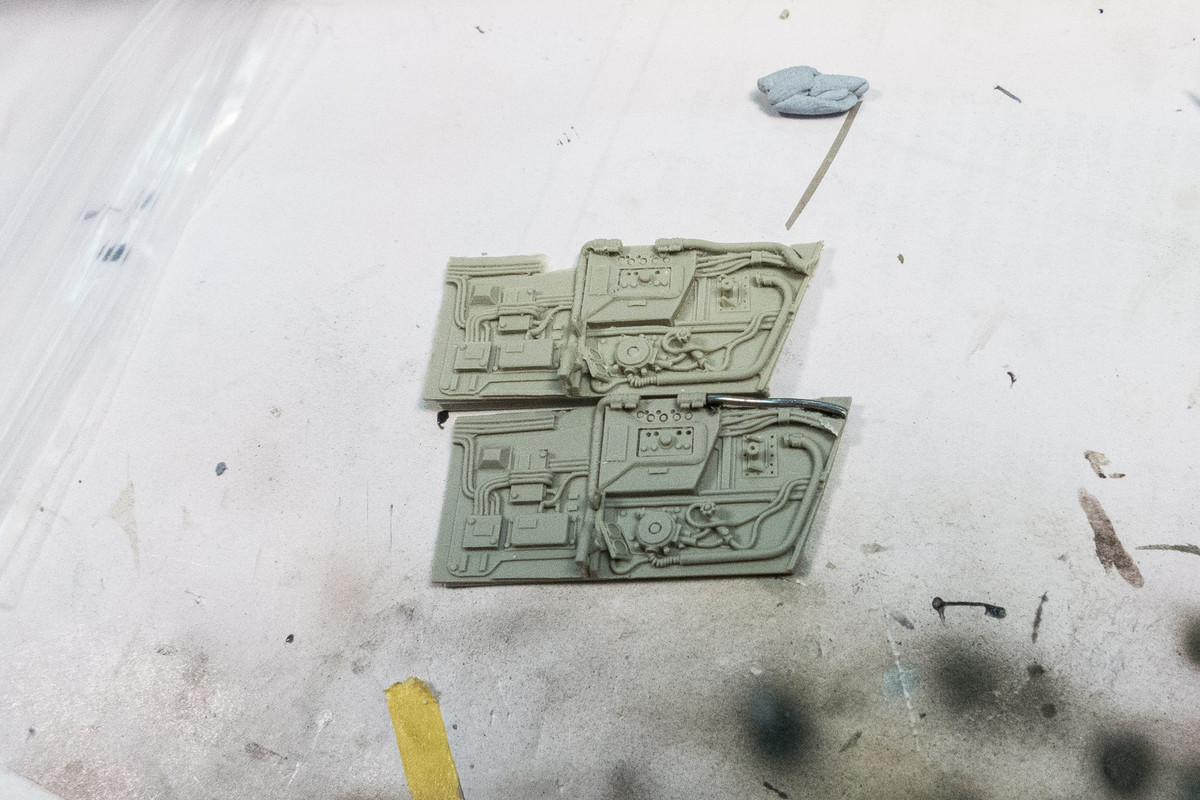
The top edge of this sidewall was repaired with black CA glue.
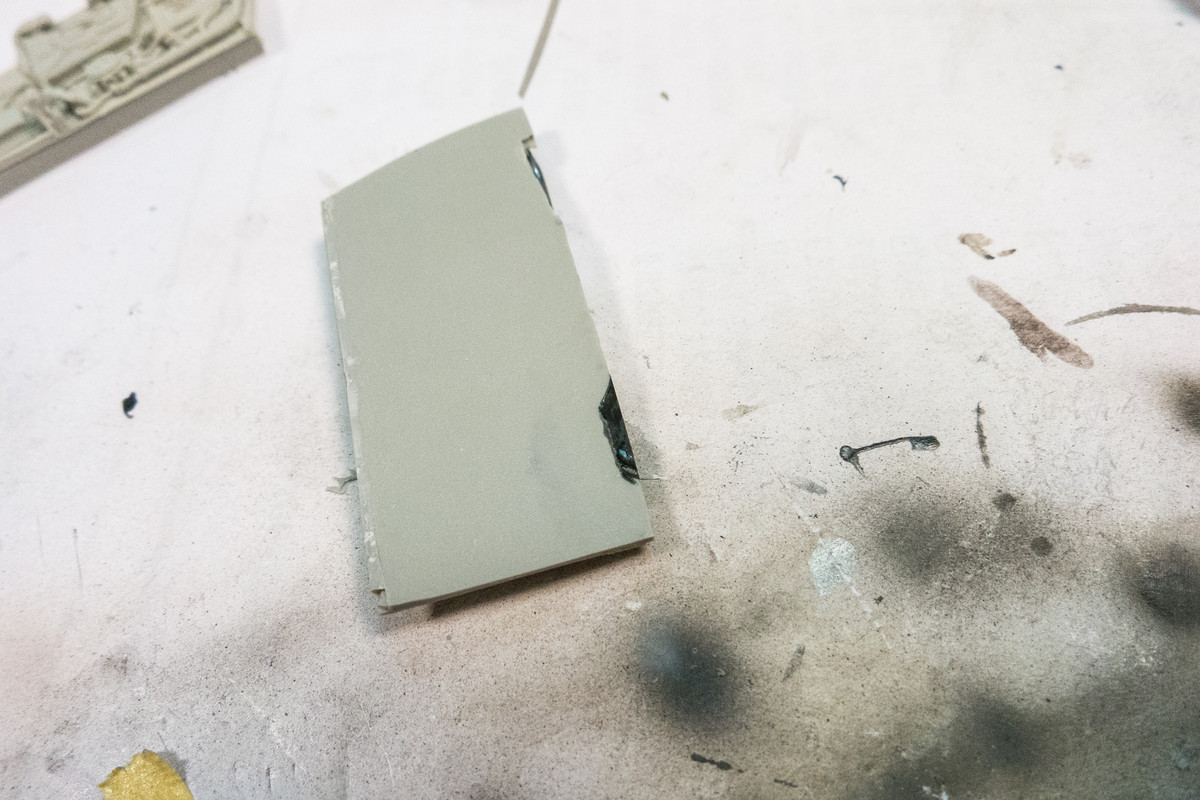
This is how the three major components are fitting together. All of the joints are not perfectly square but this should be fine in terms of the view from outside looking in.
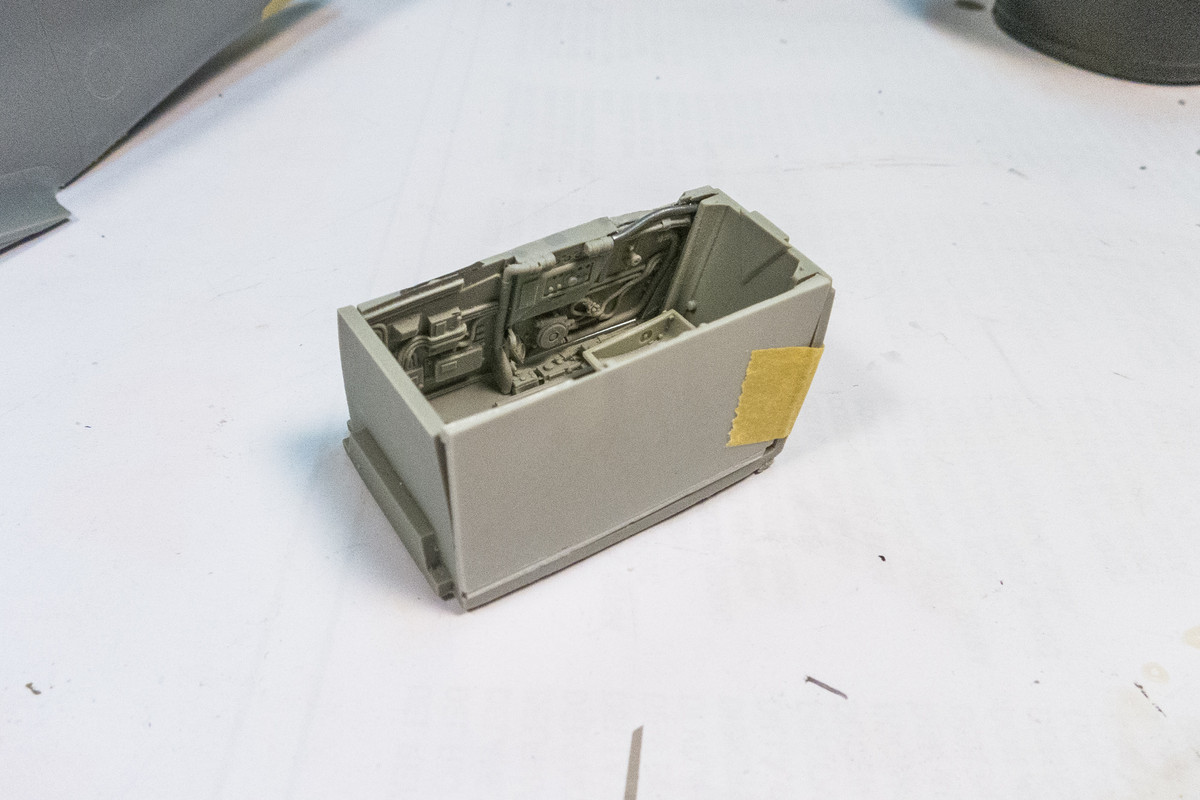
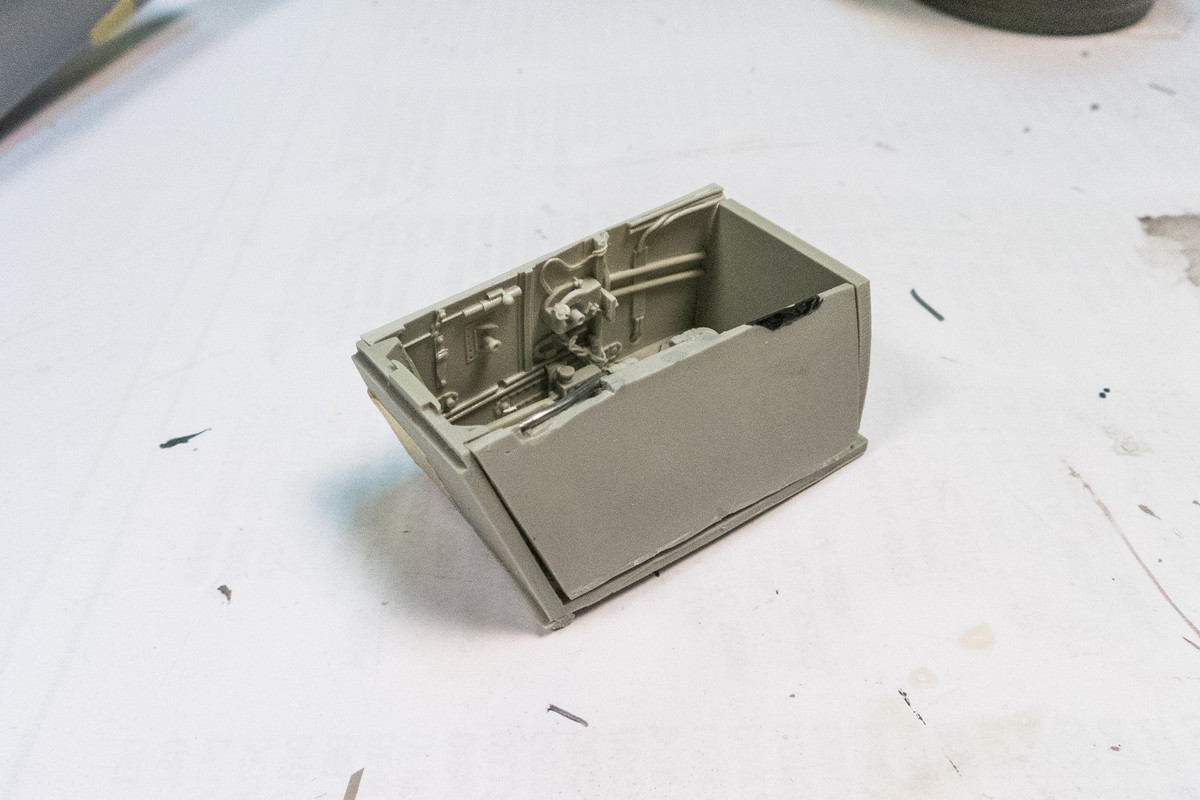
And this is how the MDC cockpit is fitting into the fuselage.
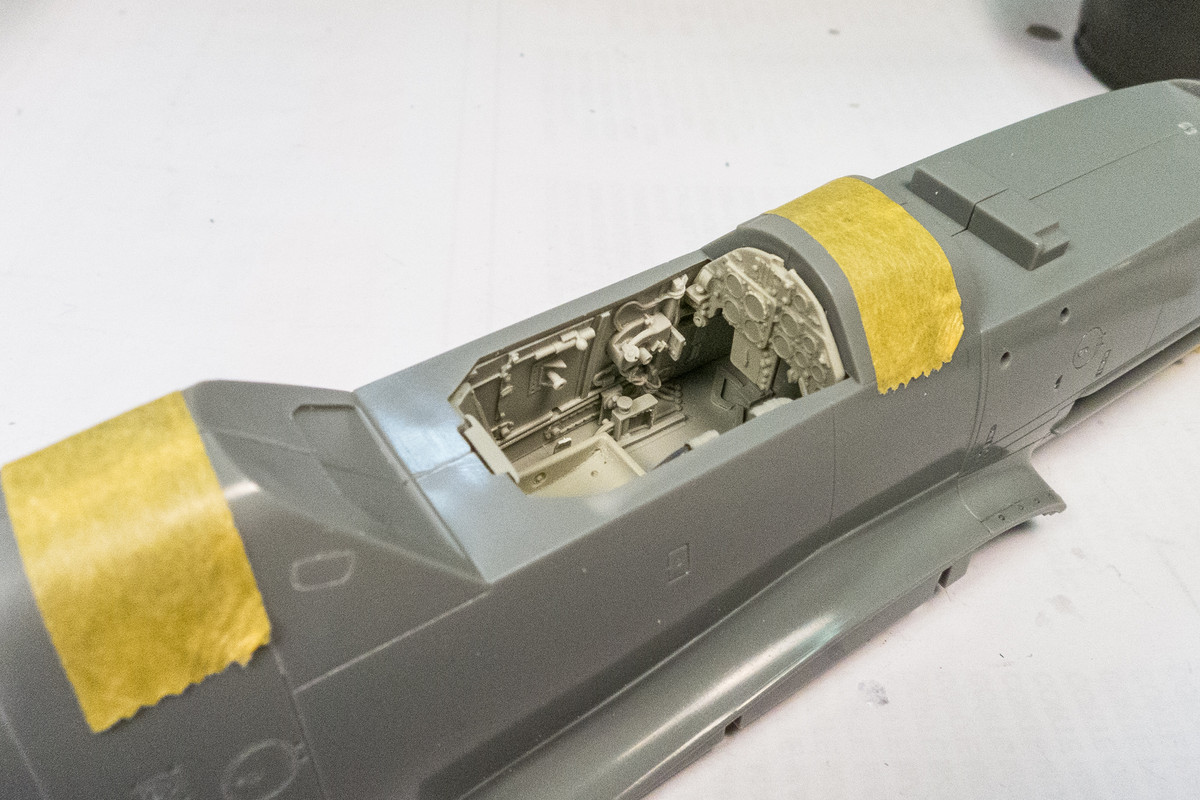
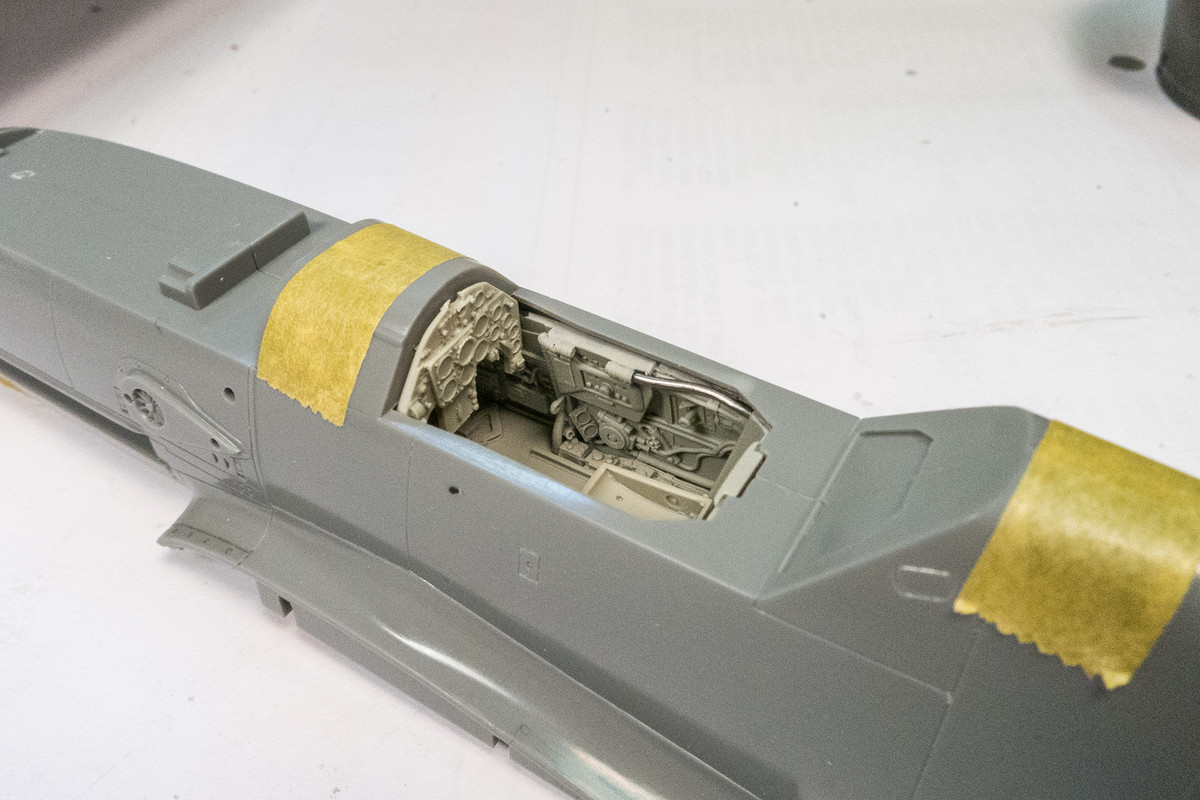
You can see how moving that fuel line created a better fit between the sidewall and the seat.
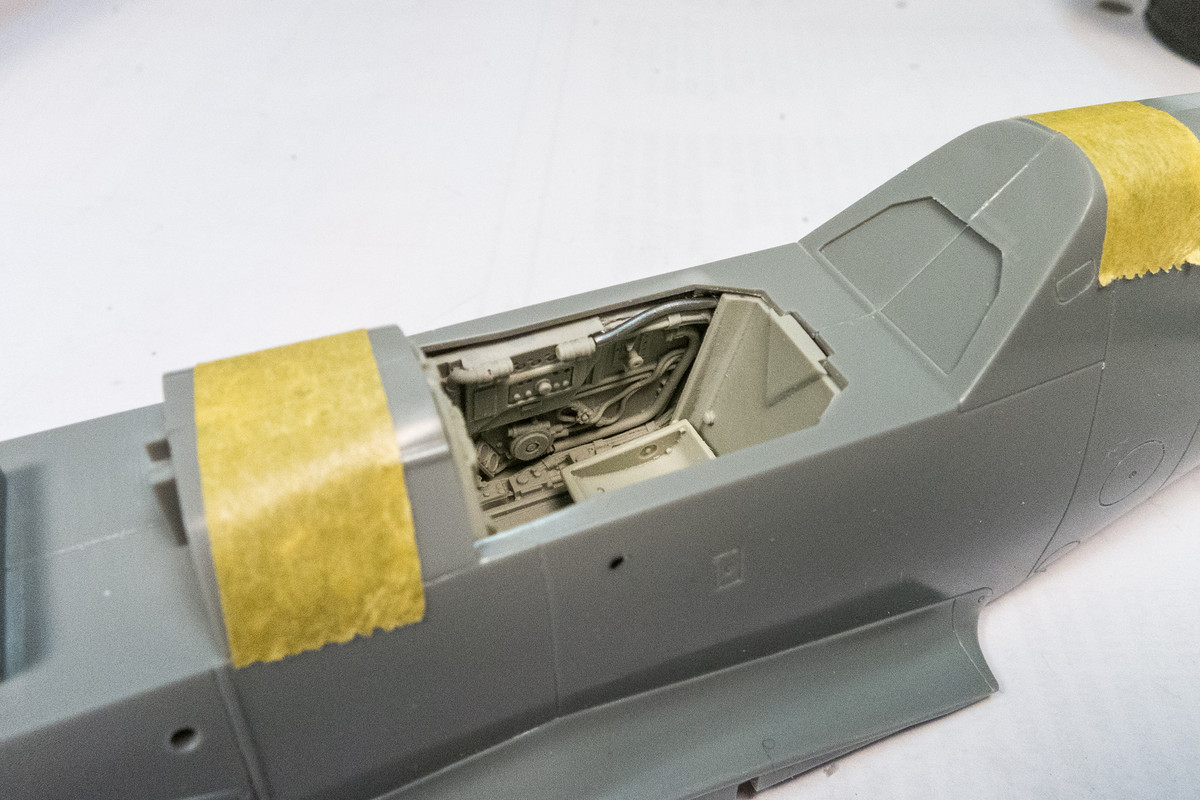
Now I can start thinking about painting the cockpit and which parts I want glued together and which parts I'll keep separate.
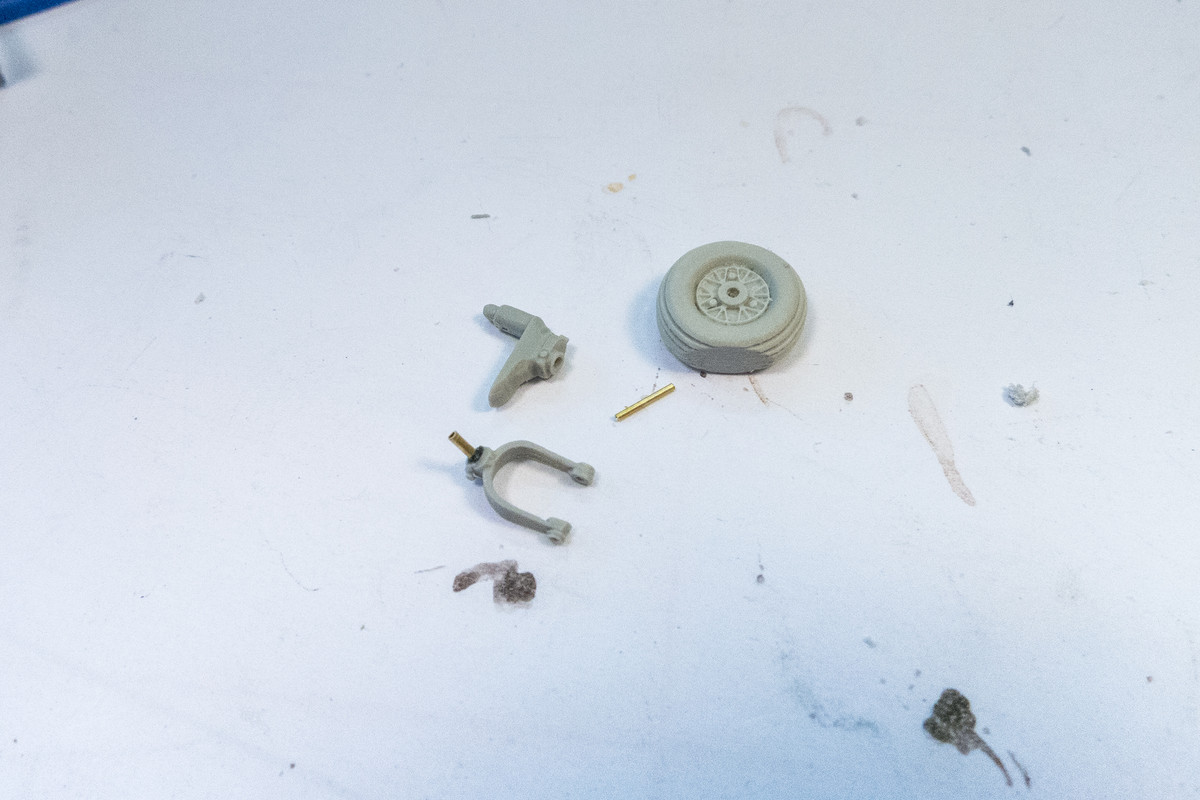
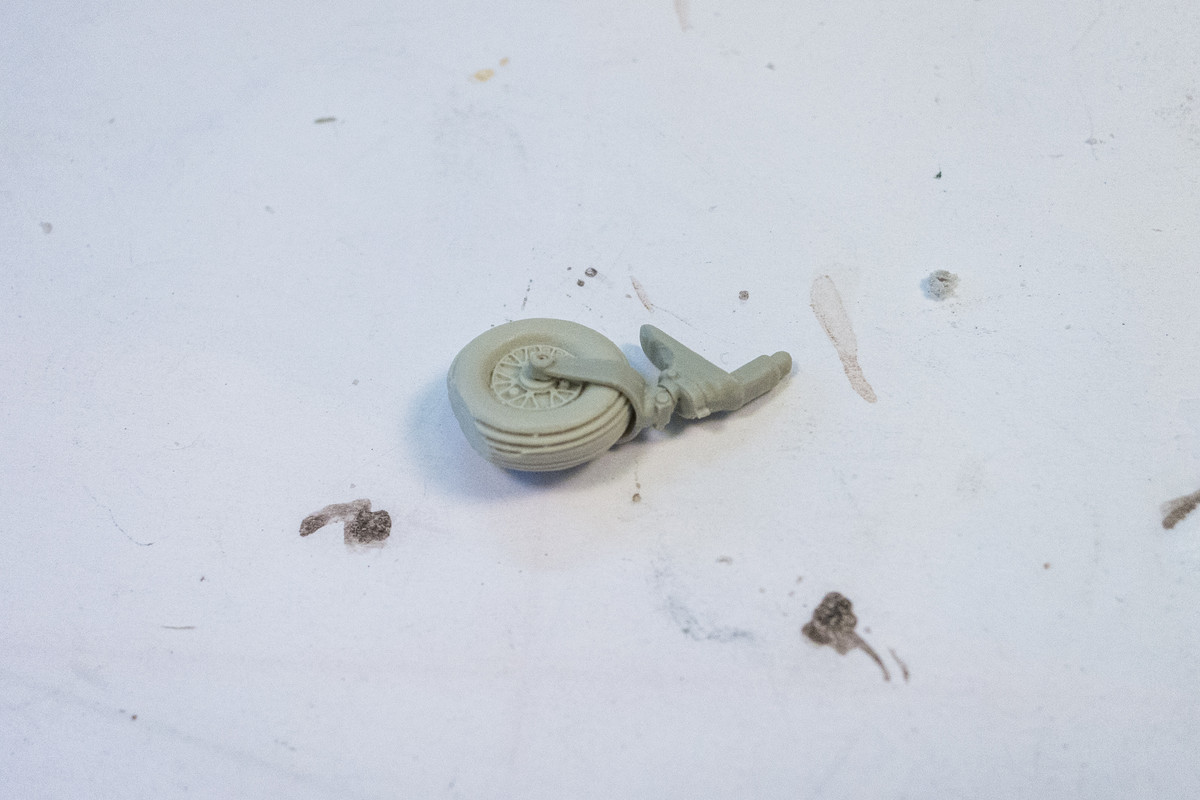
Moving on to some other details... the MDC tail wheel comes in three parts with no positive connection between the parts.
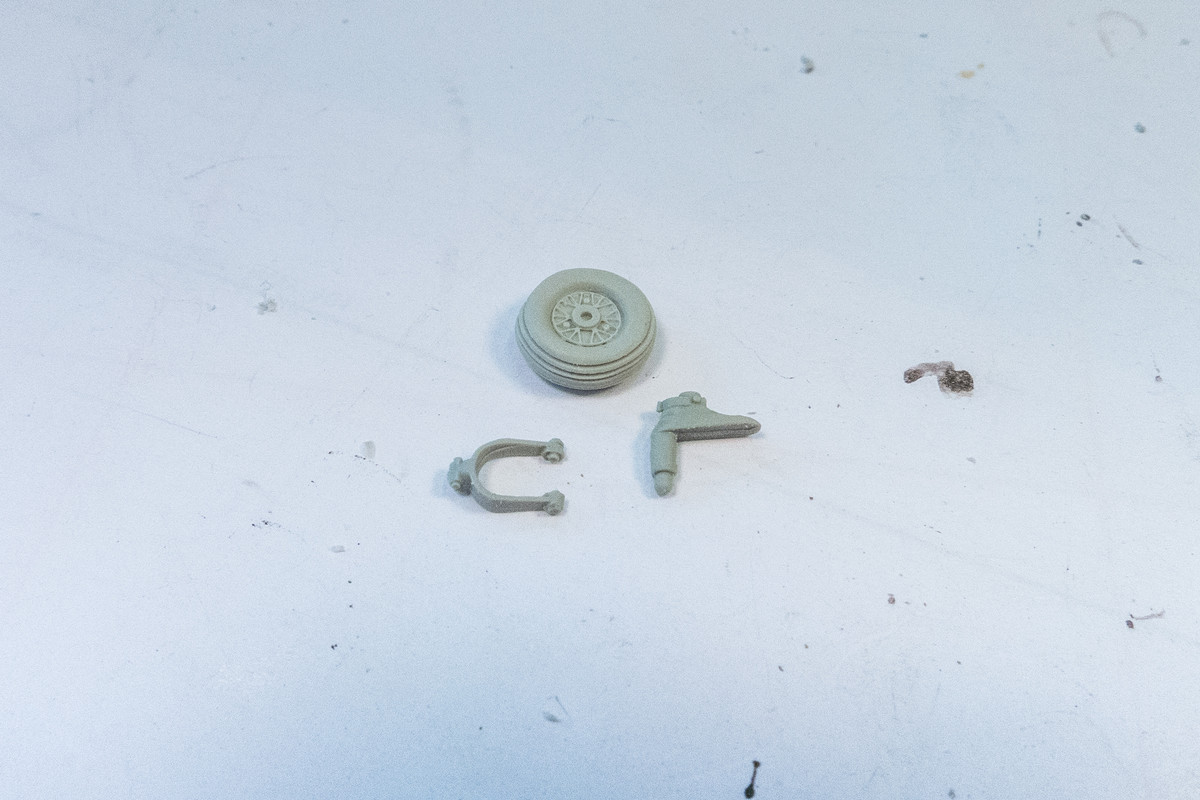
I beefed up the connections by drilling holes and using a piece of brass tubing to create a pin connection. I've also created an axle for the wheel.
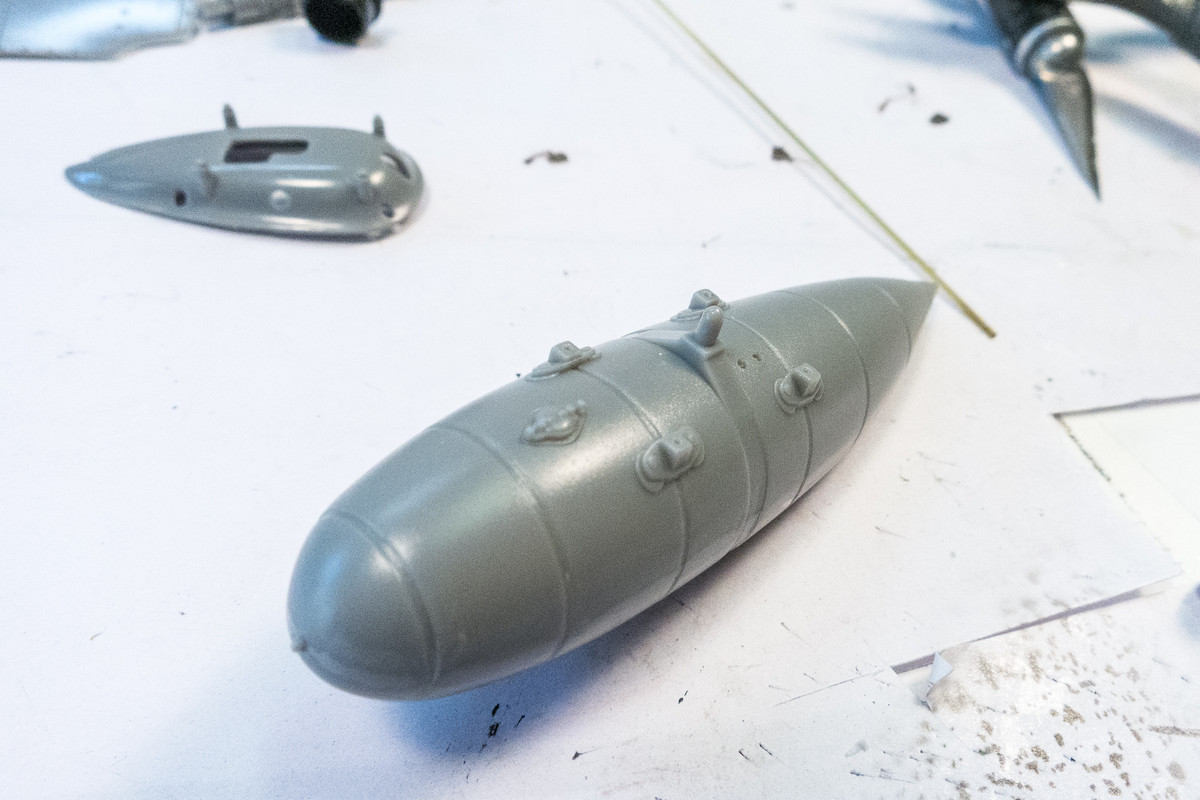
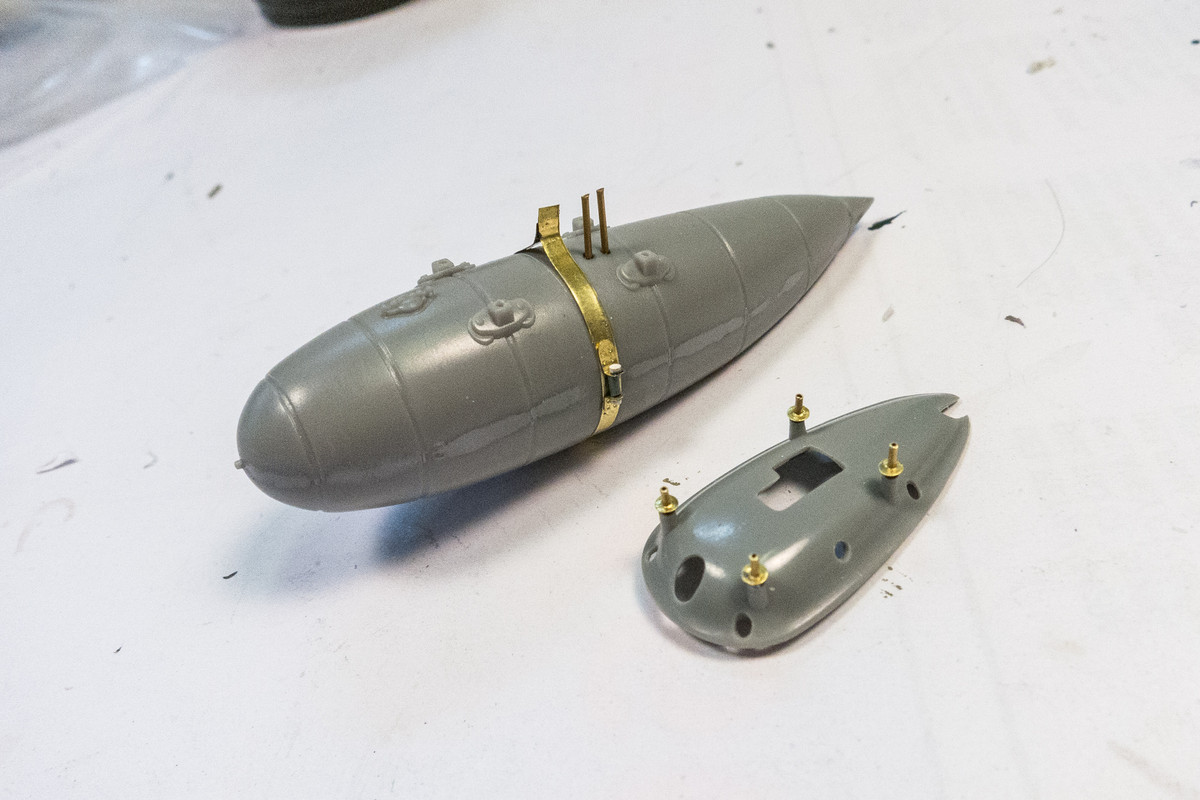
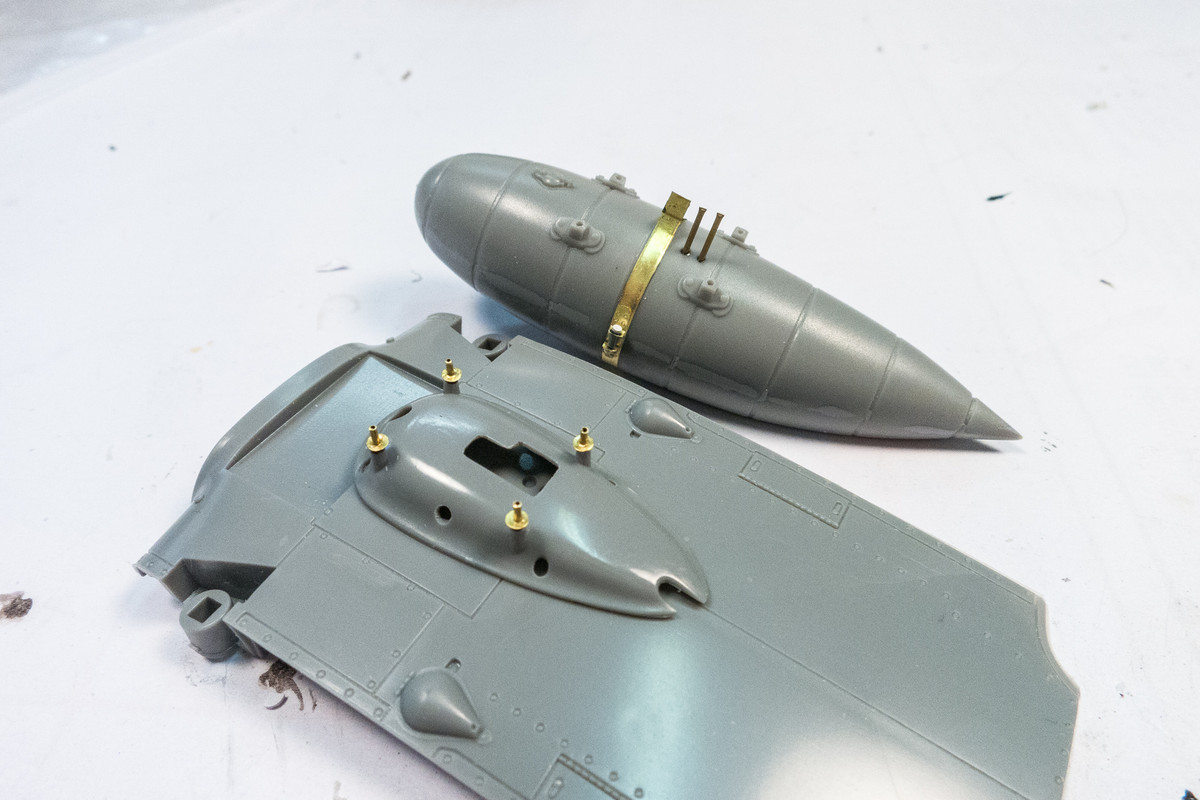
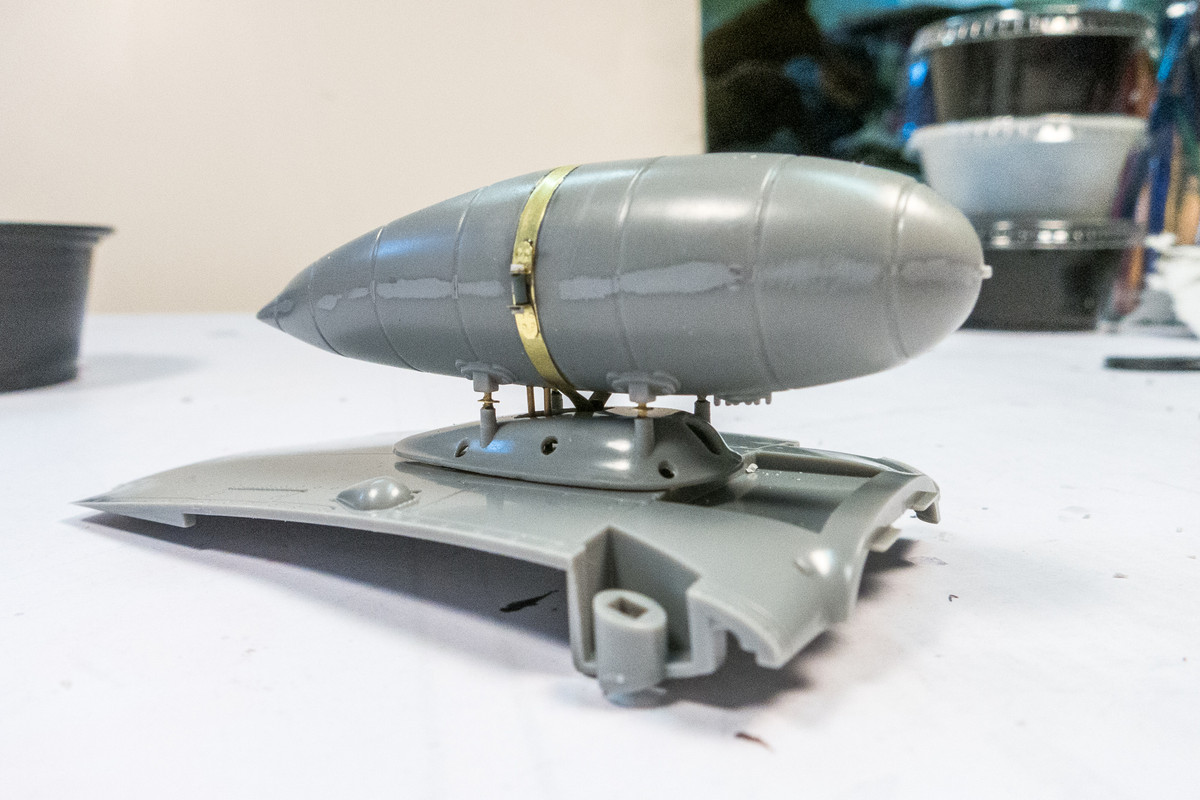
I've dressed up the drop tank and ETC rack. Lightening holes in the rack were drilled out and the rack was thinned from the inside. Connection points were drilled out to accept brass tubing, which will provide a more positive connection between the tank and rack. The strap and fuel connection lines were re-done in brass.
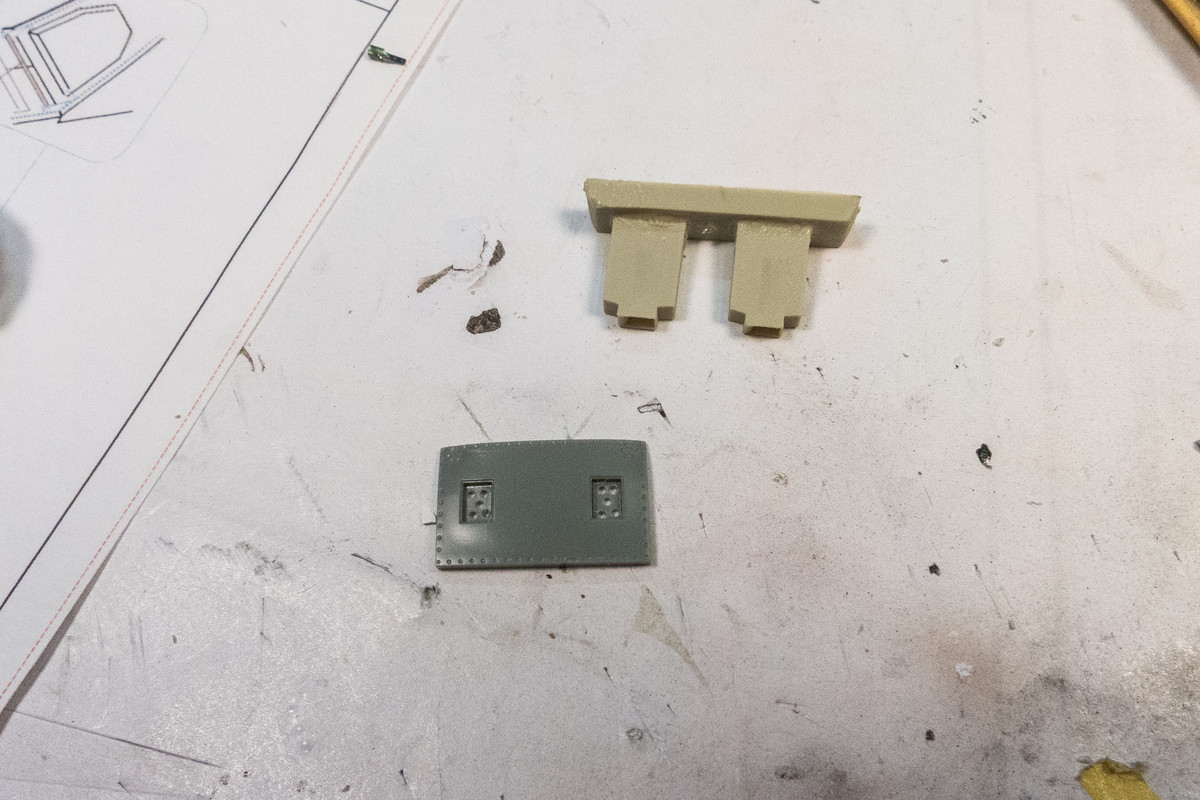
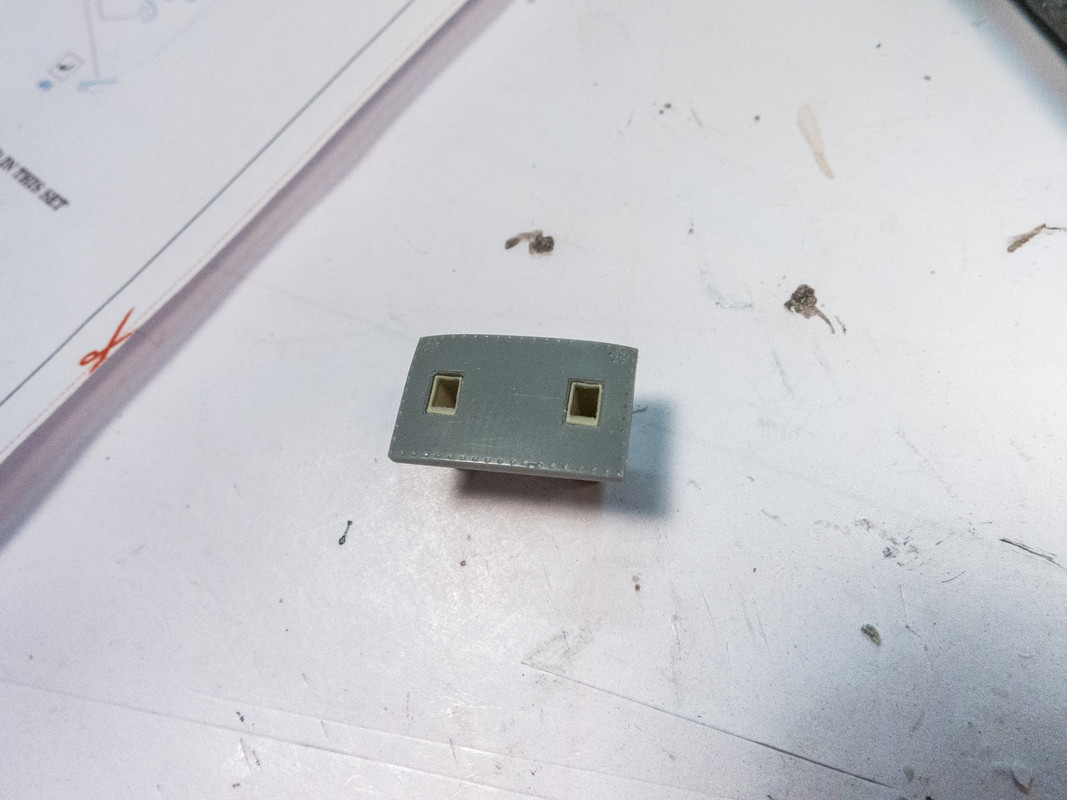
Finally, the ejection chutes openings were hollowed out to accept the MDC ammo chutes.
The top edge of this sidewall was repaired with black CA glue.
This is how the three major components are fitting together. All of the joints are not perfectly square but this should be fine in terms of the view from outside looking in.
And this is how the MDC cockpit is fitting into the fuselage.
You can see how moving that fuel line created a better fit between the sidewall and the seat.
Now I can start thinking about painting the cockpit and which parts I want glued together and which parts I'll keep separate.
Moving on to some other details... the MDC tail wheel comes in three parts with no positive connection between the parts.
I beefed up the connections by drilling holes and using a piece of brass tubing to create a pin connection. I've also created an axle for the wheel.
I've dressed up the drop tank and ETC rack. Lightening holes in the rack were drilled out and the rack was thinned from the inside. Connection points were drilled out to accept brass tubing, which will provide a more positive connection between the tank and rack. The strap and fuel connection lines were re-done in brass.
Finally, the ejection chutes openings were hollowed out to accept the MDC ammo chutes.
John aka JKim
-----------<><

-----------<><

Re: 1/32 Hasegawa Bf109G-14 Hartmann
Outstanding! What meticulous work.
To make each build less crappy than the last one. Or, put another way, "Better than the last one, not as good as the next one!"..
-
Stikpusher

- Moderator
- Posts: 21386
- Joined: Sat Apr 05, 2014 8:37 pm
- Location: Ceti Alpha 5
Re: 1/32 Hasegawa Bf109G-14 Hartmann
LyleW wrote:Outstanding! What meticulous work.

"Surely I have made my meaning plain? I intend to avenge myself upon you, Admiral. I have deprived your ship of power, and when I swing 'round, I intend to deprive you of your life."
FLSM
FLSM
Re: 1/32 Hasegawa Bf109G-14 Hartmann
Awesome detailing work John it's always a please to see your builds!
The cockpit is beautiful - I love the detail in there!
The cockpit is beautiful - I love the detail in there!
Stuart Templeton 'I may not be good but I'm slow...'
-
BlackSheep214

- Elite Member
- Posts: 13596
- Joined: Sun Apr 06, 2014 8:47 pm
Re: 1/32 Hasegawa Bf109G-14 Hartmann
Holy cow! 

“Who controls the skies, controls the fate of this Earth”
Author unknown- 352nd Fighter Group, Blue-Nosed Bastards of Bodney
“Send one plane it’s a sortie; send two planes it’s a flight; send four planes it’s a test of airpower. - Richard Kohn
Author unknown- 352nd Fighter Group, Blue-Nosed Bastards of Bodney
“Send one plane it’s a sortie; send two planes it’s a flight; send four planes it’s a test of airpower. - Richard Kohn
Re: 1/32 Hasegawa Bf109G-14 Hartmann
Thanks everyone! I hope everyone is doing ok out there.
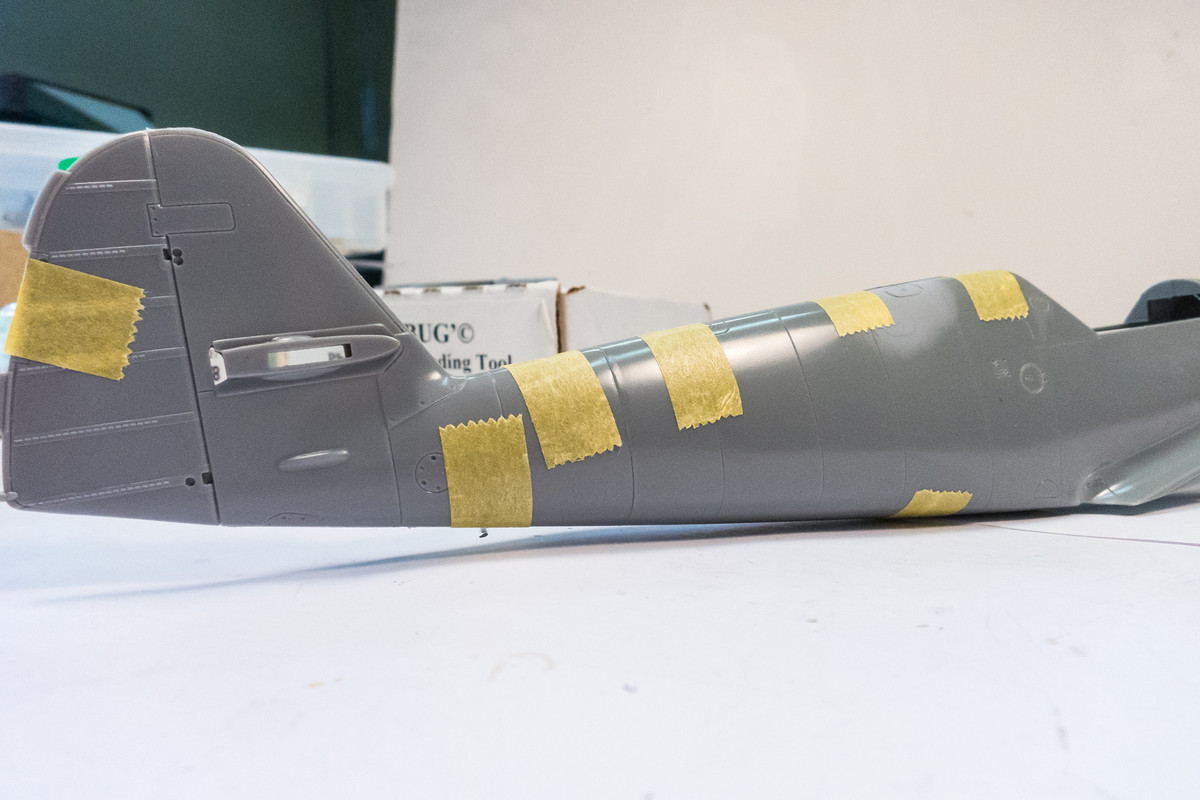
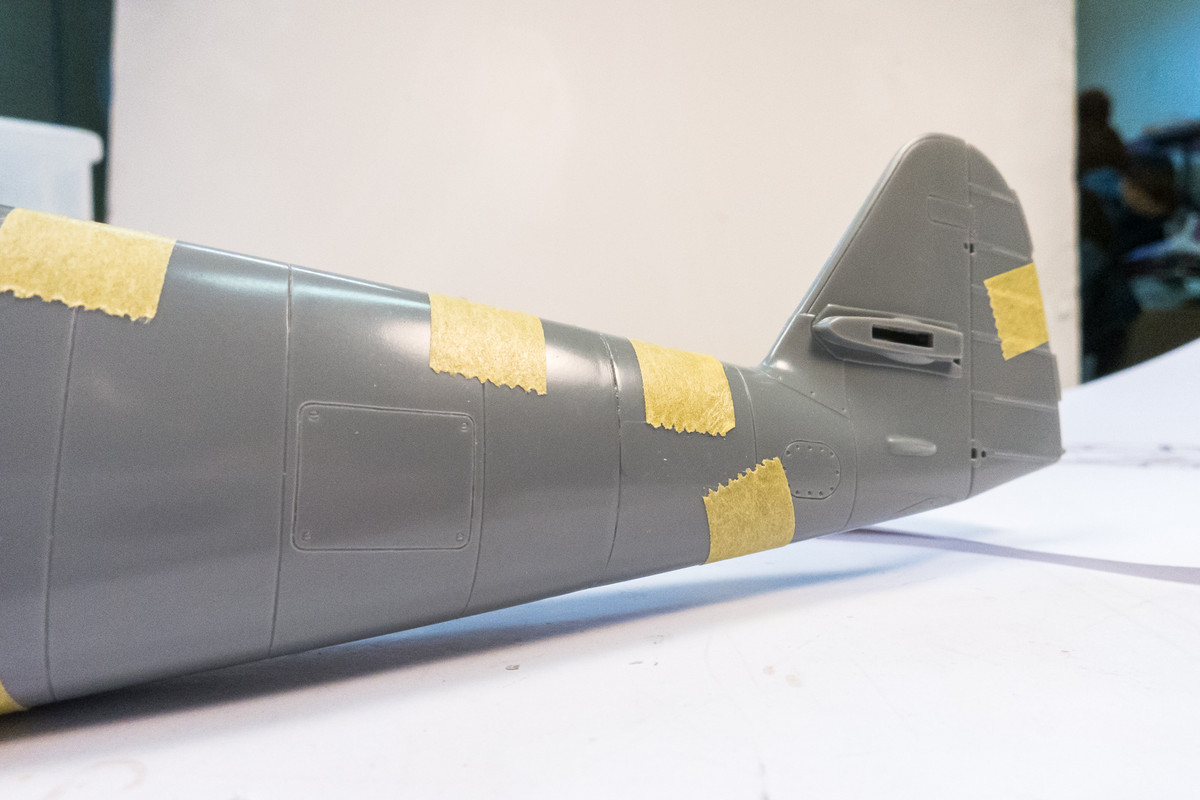
Work continues on the G-14. I'm looking forward a few steps and know that before I close up the fuselage, I want to apply the rivets. And since the Hasegawa kit has a separate tail unit, I want to make sure this seam is addressed prior to the rivet work. This is a slight departure from the kit instructions where they would have you attach the tail as a unit after the fuselage halves are glued together. In addition to making riveting a whole lot more manageable, doing it out of order will actually strengthen the tail/fuselage bond as I can access all contact surfaces of the join this way.
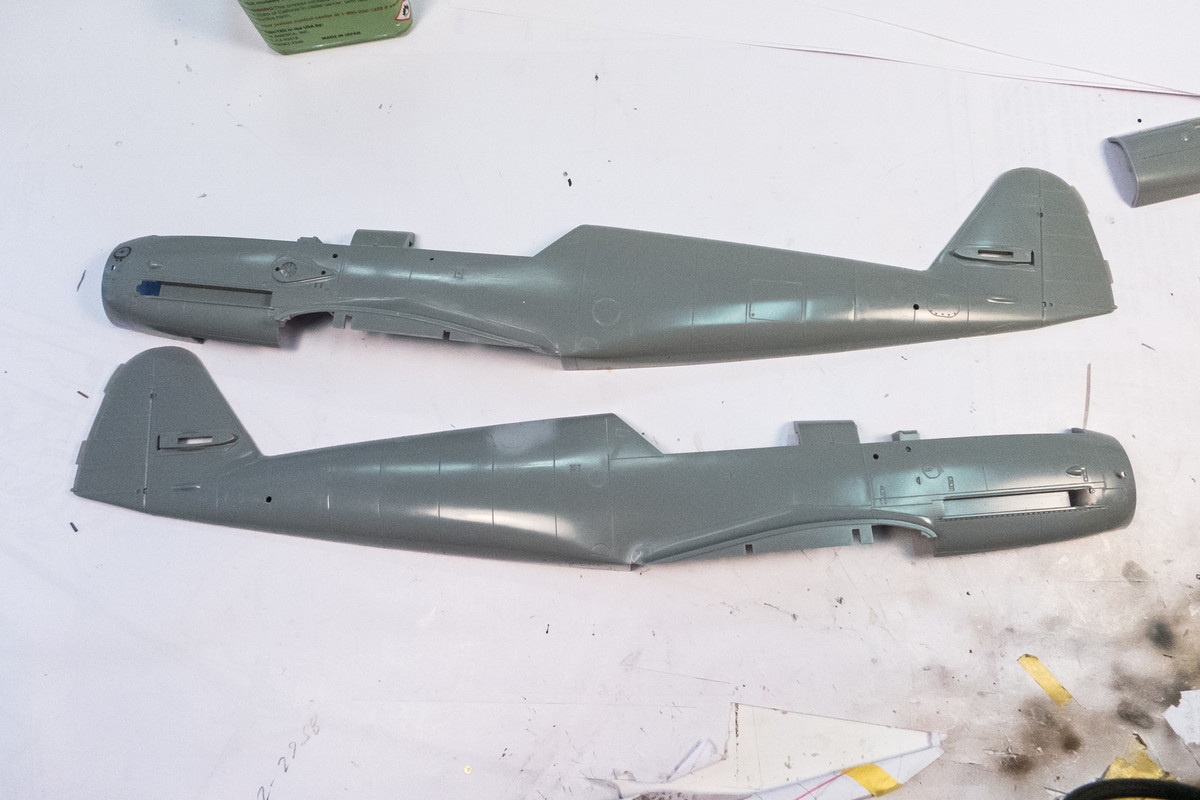
While the glue is still soft, I've attached the fuselage halves together with tape to ensure proper alignment of all of the parts. I'll separate the halves once the glue is dry.
We've already seen how good the Eduard pre-painted instrument panels looks. I wanted to do a comparison with the MDC resin IP just for kicks so I've taken the time to paint up the resin IP. After the painting stage, the MDC panel looks a little messy but a lot of that is due to the different sheens of the paint used. It should smooth out after a shot of flat clear.
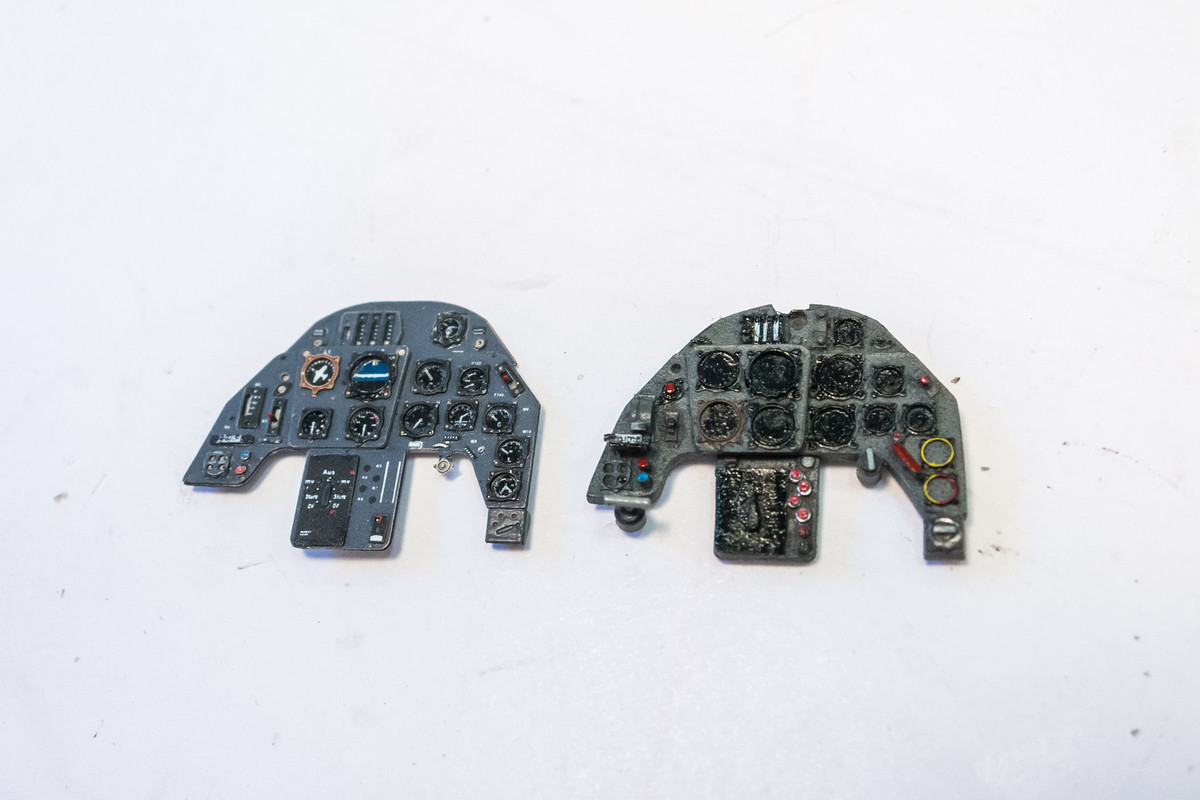
I've elected to use Airscale decals for the instrument dials because of they had much finer detail than the MDC decals. Each individual instrument was punched out and inserted into the appropriate bezel. After all of the instrument dials were completed, I shot the panel with a flat clear and then I took the extra step of punching out discs of clear overhead transparency film (remember that technology?) for the glass bezels.
Here's how they look under the work table lights.
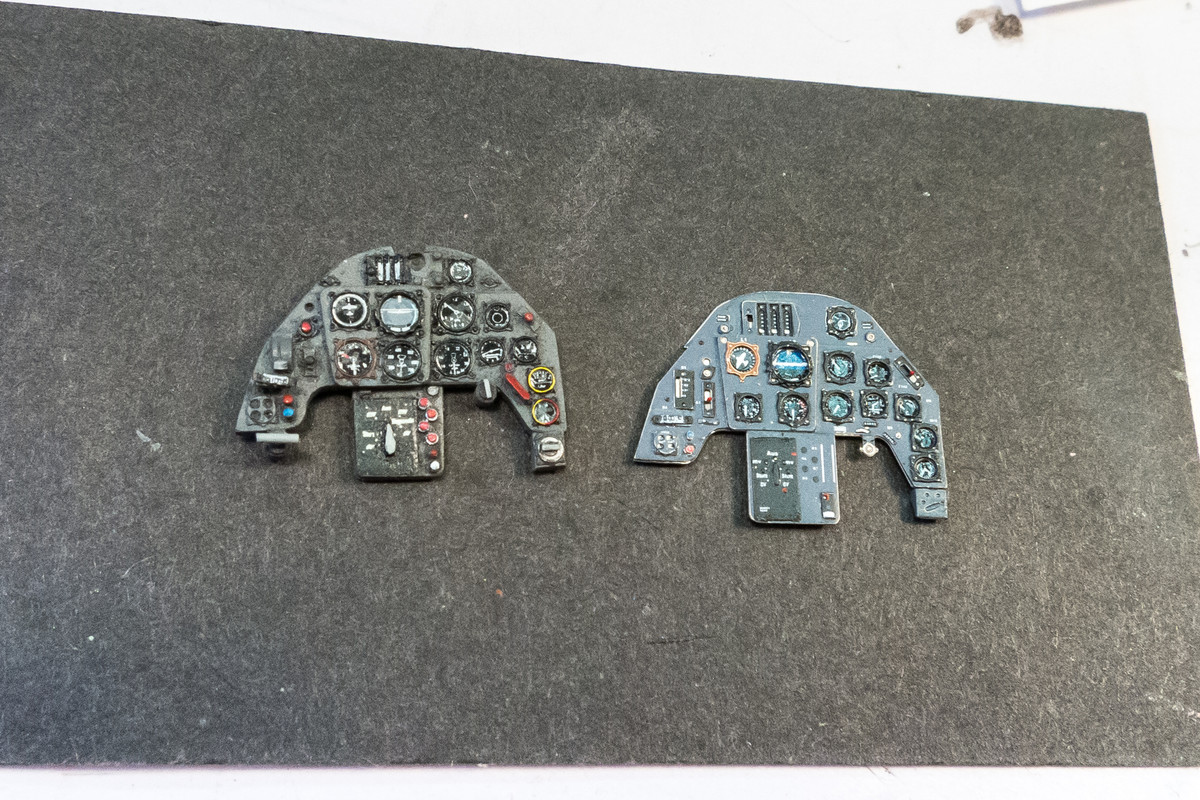
For a further comparison, I've taken some pics in the light box. I took a few different angles since the clear discs in the MDC panel tends to give off glare (which is a cool effect in itself).
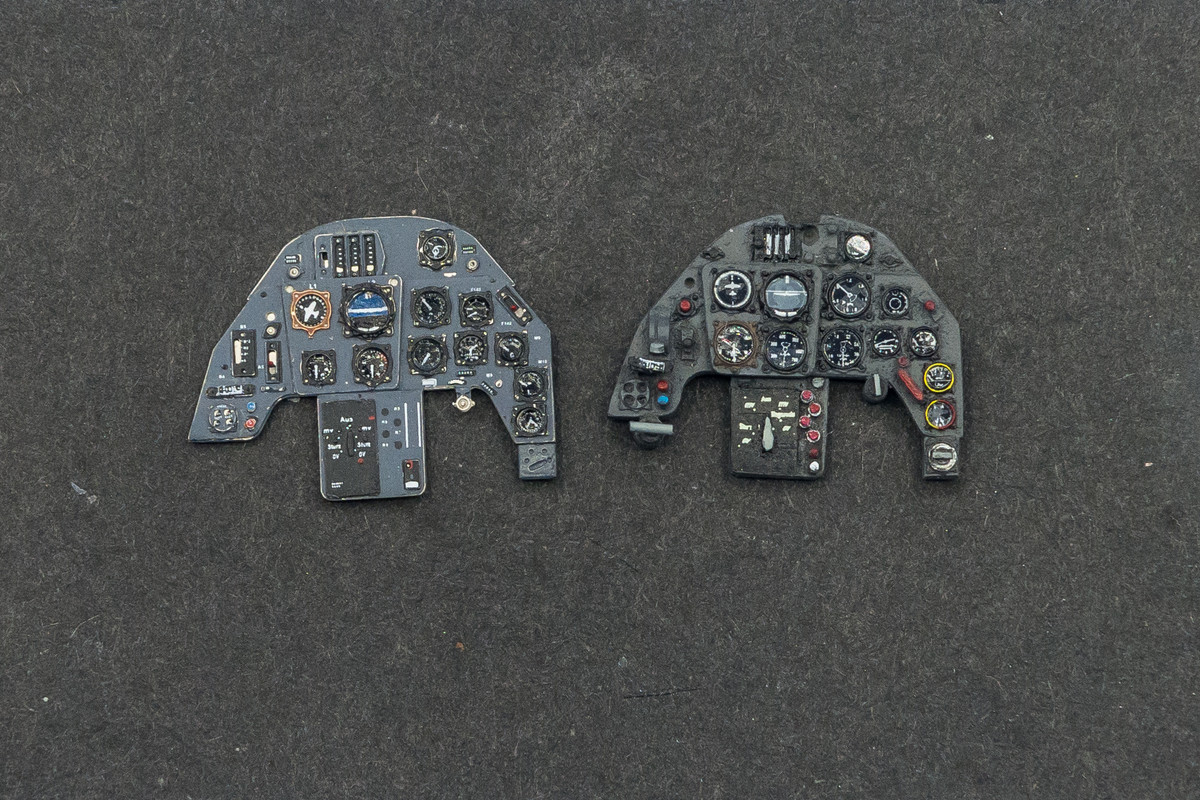
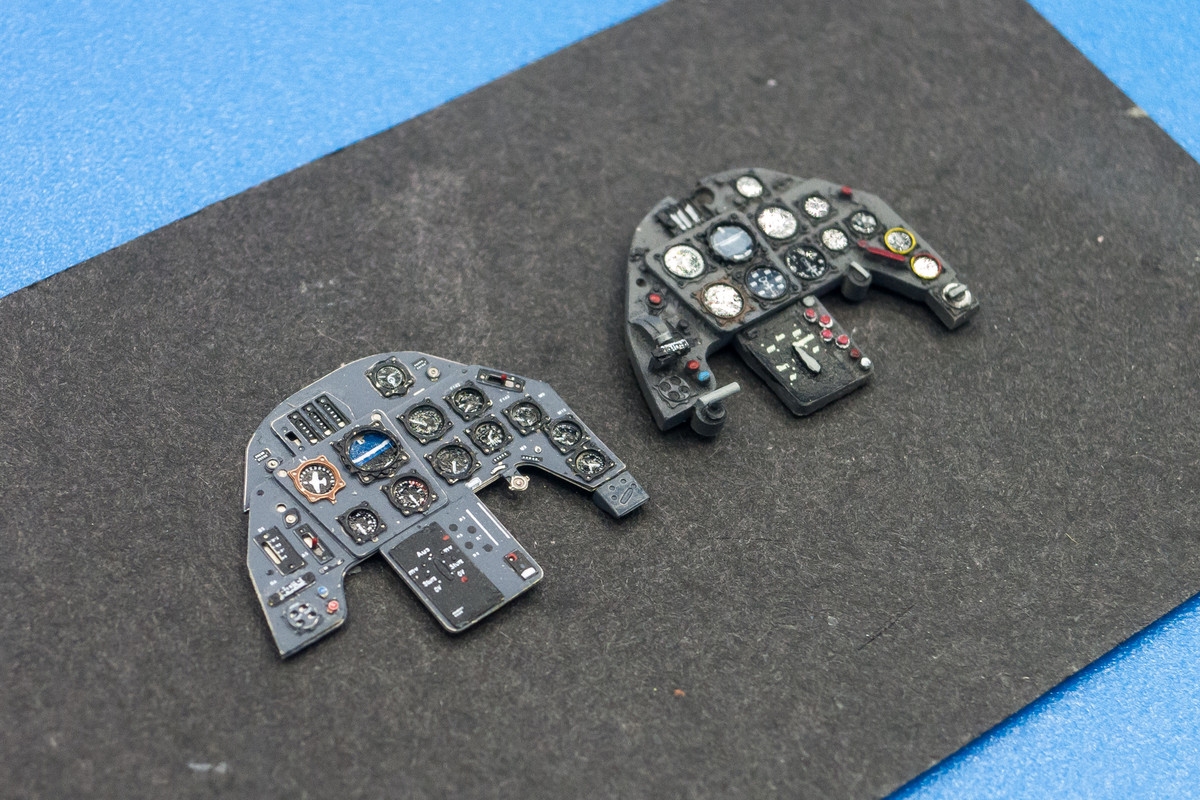
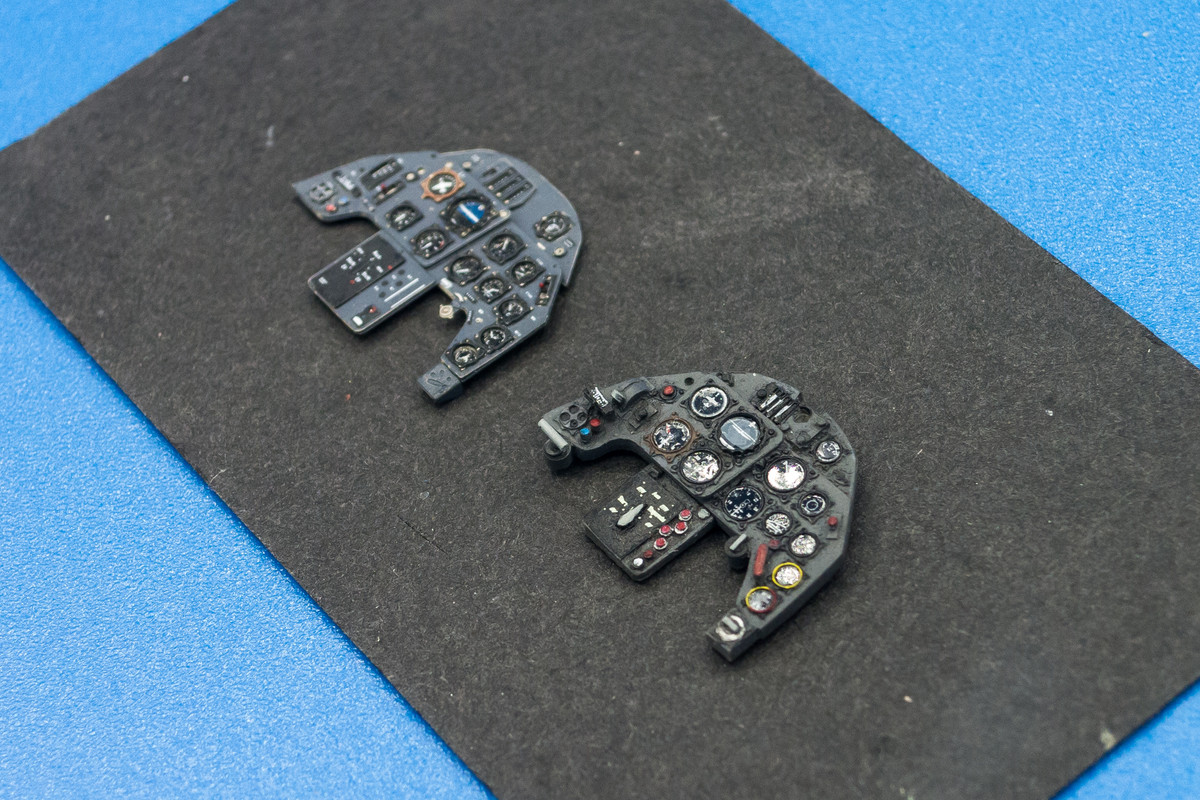
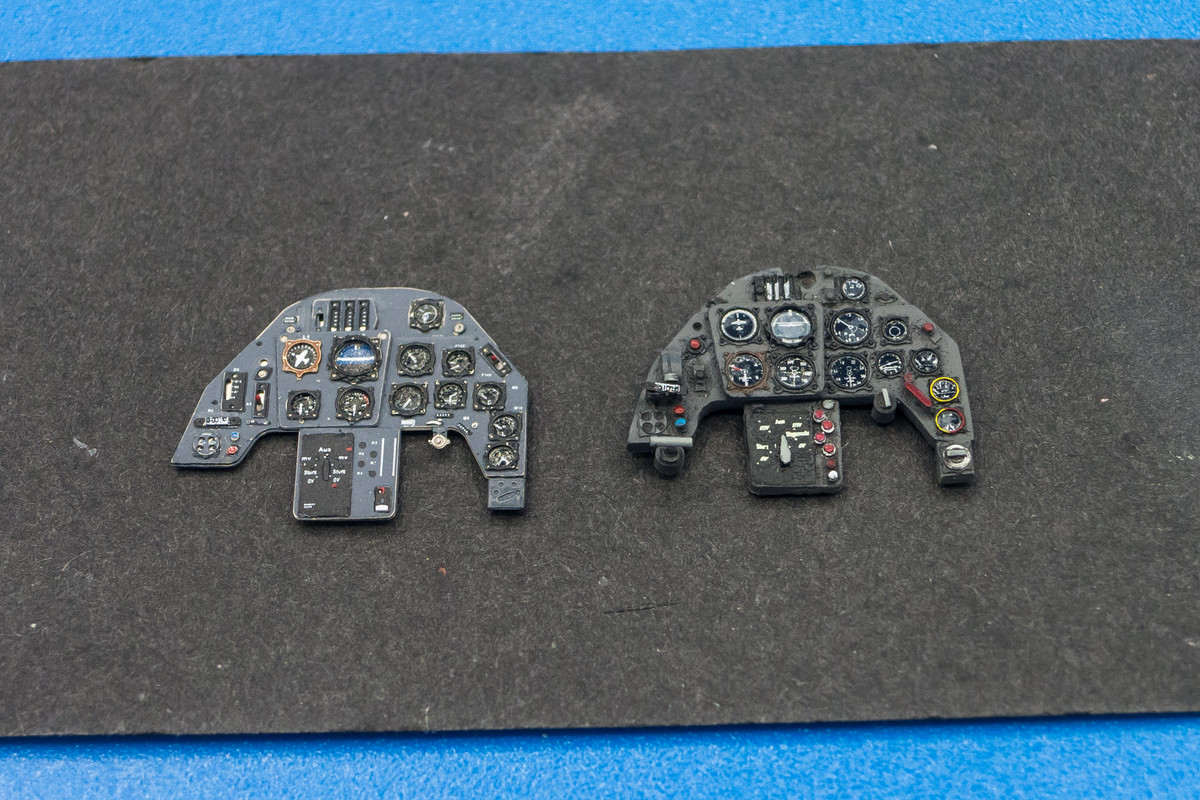
The Eduard panel is definitely neater since I can't match the printed details with my shaky paint brush. But the Airscale instrument faces in the MDC panel have more detail than the Eduard instruments. I'm not very happy with my paint job of the ammo counter on top of the MDC panel but I could possibly tidy that up. The MDC panel definitely gives off more 3D relief than the relatively flat Eduard panel but I can't say that one is a clear winner over the other. They both have their positives and negatives.
Work continues on the G-14. I'm looking forward a few steps and know that before I close up the fuselage, I want to apply the rivets. And since the Hasegawa kit has a separate tail unit, I want to make sure this seam is addressed prior to the rivet work. This is a slight departure from the kit instructions where they would have you attach the tail as a unit after the fuselage halves are glued together. In addition to making riveting a whole lot more manageable, doing it out of order will actually strengthen the tail/fuselage bond as I can access all contact surfaces of the join this way.
While the glue is still soft, I've attached the fuselage halves together with tape to ensure proper alignment of all of the parts. I'll separate the halves once the glue is dry.
We've already seen how good the Eduard pre-painted instrument panels looks. I wanted to do a comparison with the MDC resin IP just for kicks so I've taken the time to paint up the resin IP. After the painting stage, the MDC panel looks a little messy but a lot of that is due to the different sheens of the paint used. It should smooth out after a shot of flat clear.
I've elected to use Airscale decals for the instrument dials because of they had much finer detail than the MDC decals. Each individual instrument was punched out and inserted into the appropriate bezel. After all of the instrument dials were completed, I shot the panel with a flat clear and then I took the extra step of punching out discs of clear overhead transparency film (remember that technology?) for the glass bezels.
Here's how they look under the work table lights.
For a further comparison, I've taken some pics in the light box. I took a few different angles since the clear discs in the MDC panel tends to give off glare (which is a cool effect in itself).
The Eduard panel is definitely neater since I can't match the printed details with my shaky paint brush. But the Airscale instrument faces in the MDC panel have more detail than the Eduard instruments. I'm not very happy with my paint job of the ammo counter on top of the MDC panel but I could possibly tidy that up. The MDC panel definitely gives off more 3D relief than the relatively flat Eduard panel but I can't say that one is a clear winner over the other. They both have their positives and negatives.
John aka JKim
-----------<><
-----------<><

Re: 1/32 Hasegawa Bf109G-14 Hartmann
Looking great John!. The extra detail on the drop tank is amazing. Also I can't tell exactly where the tail join is great job there. My pick would be for the resin IP you can't get that 3D effect with the PE in this scale.
March as one, Don't look back
Odin's sons... Attack!
Unleash hell! Do not repent! Warfare grants us no lament
Let your weapons slash and tear This is no place for fear
Hold the lines! Move as one! In unity our victory's won
Our shields will form a mighty wall
United we shall never fall
Odin's sons... Attack!
Unleash hell! Do not repent! Warfare grants us no lament
Let your weapons slash and tear This is no place for fear
Hold the lines! Move as one! In unity our victory's won
Our shields will form a mighty wall
United we shall never fall
-
Stikpusher
- Moderator
- Posts: 21386
- Joined: Sat Apr 05, 2014 8:37 pm
- Location: Ceti Alpha 5
Re: 1/32 Hasegawa Bf109G-14 Hartmann
Suggestion- recently I came across some Sharpie oil based paint pens, which they make in various colors and different tip sizes down to ultra fine. One of those might be just what you need for tidying up those ammo counters.
And I agree with Clint on the 3-D relief of the resin panel being superior in look. That is always the drawback of PE Too bad you can’t easily combine both panels for an end results product.
And I agree with Clint on the 3-D relief of the resin panel being superior in look. That is always the drawback of PE Too bad you can’t easily combine both panels for an end results product.
"Surely I have made my meaning plain? I intend to avenge myself upon you, Admiral. I have deprived your ship of power, and when I swing 'round, I intend to deprive you of your life."
FLSM
FLSM
Re: 1/32 Hasegawa Bf109G-14 Hartmann
I'd be happy with both but in 1/32... Yeah I'd go with the resin.
Great work attaching that rail John! You'd never know a join was there.
Great work attaching that rail John! You'd never know a join was there.
Stuart Templeton 'I may not be good but I'm slow...'