Tamiya 1/32 Spitfire XIVe Conversion
-
BlackSheep214

- Elite Member
- Posts: 13596
- Joined: Sun Apr 06, 2014 8:47 pm
Re: Tamiya 1/32 Spitfire XIVe Conversion
jkim…. I ordered it directly from Taiwan. Came by slow boat and arrived at my mailbox 2 1/2 weeks later - a day before Christmas Eve.
“Who controls the skies, controls the fate of this Earth”
Author unknown- 352nd Fighter Group, Blue-Nosed Bastards of Bodney
“Send one plane it’s a sortie; send two planes it’s a flight; send four planes it’s a test of airpower. - Richard Kohn
Author unknown- 352nd Fighter Group, Blue-Nosed Bastards of Bodney
“Send one plane it’s a sortie; send two planes it’s a flight; send four planes it’s a test of airpower. - Richard Kohn

Re: Tamiya 1/32 Spitfire XIVe Conversion
I see! Troy was/is the US distributor for David Union when I bought my D400 sander and D300 rotary tool four years ago.
Plugging along on the XIVe conversion considering I have a couple of items I'm still waiting for. One is the bubble canopy that I ordered from Tamiya. The other is a new rudder from LFD to replace the one with the print marks on it.
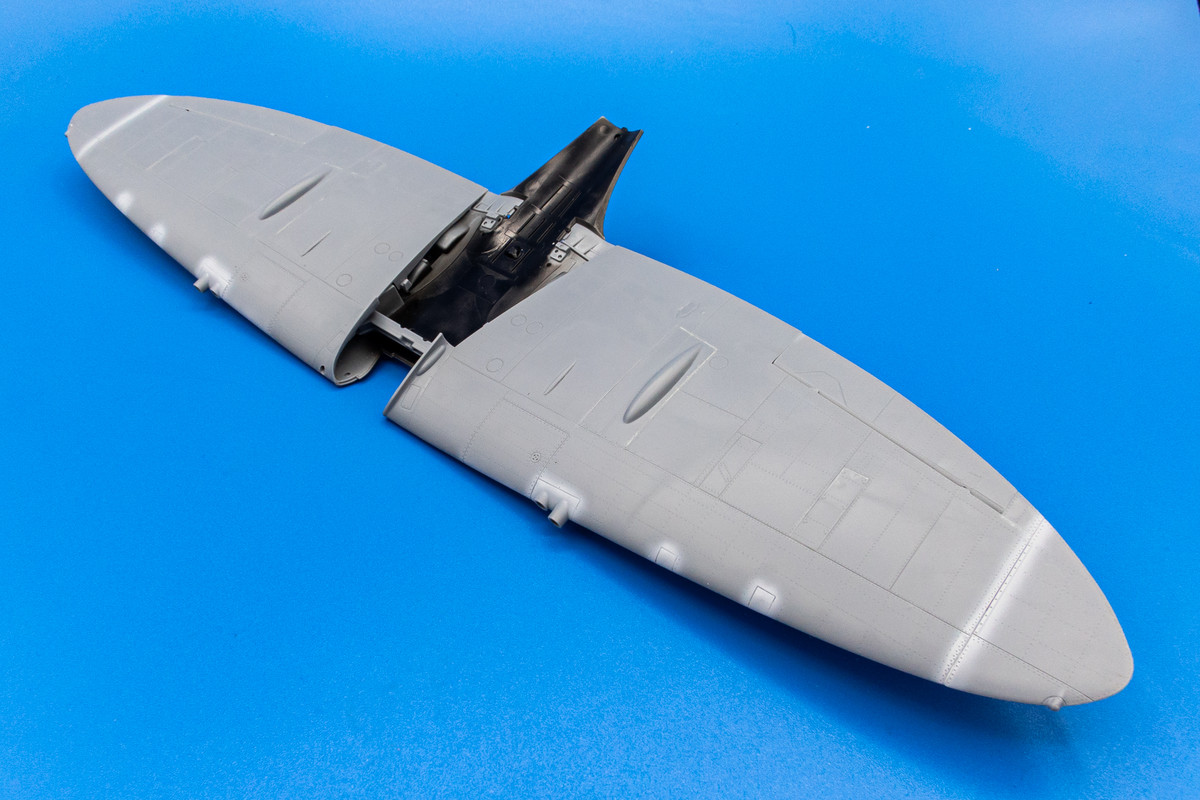
Since the wing assembly has so many parts to it, I thought I'd try to complete as much of it as possible before joining to the fuselage. The painted wheel wells are glued into place as well that structural brace in front of the wells. Don't forget the little scoops at the base of the flap openings.
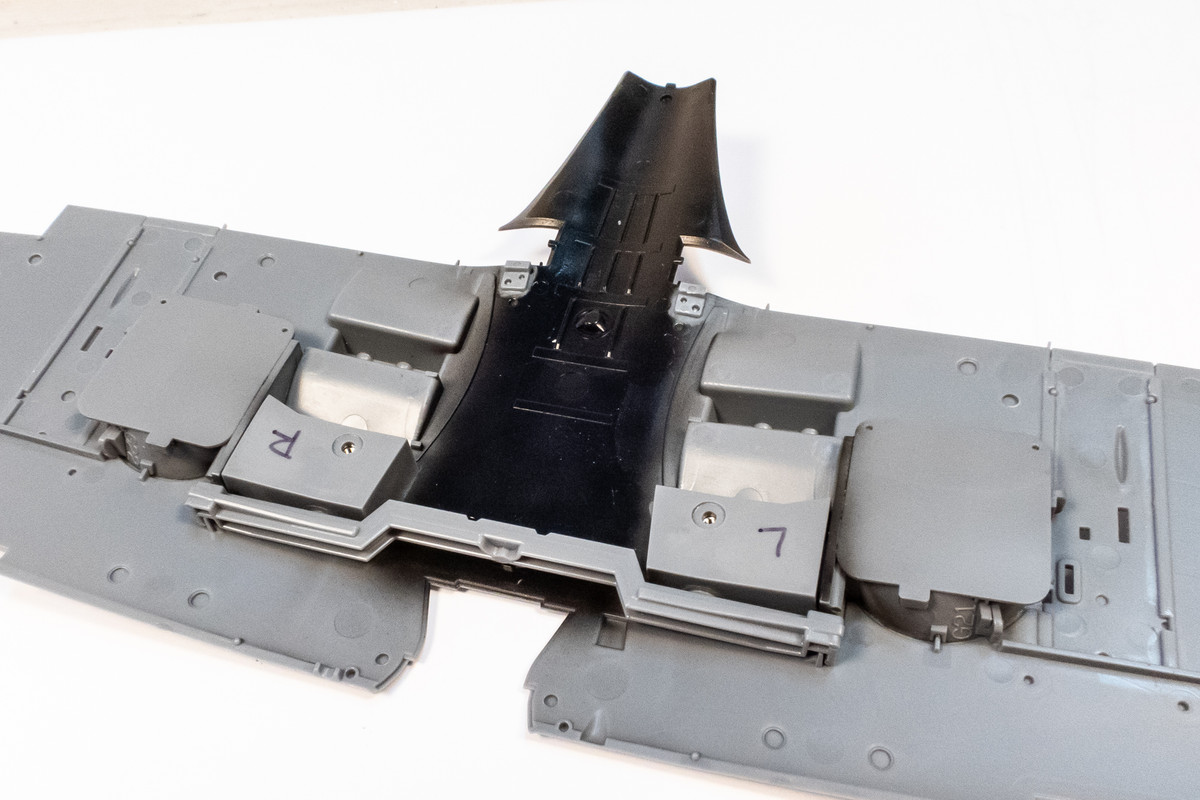
The wing halves are then glued together.
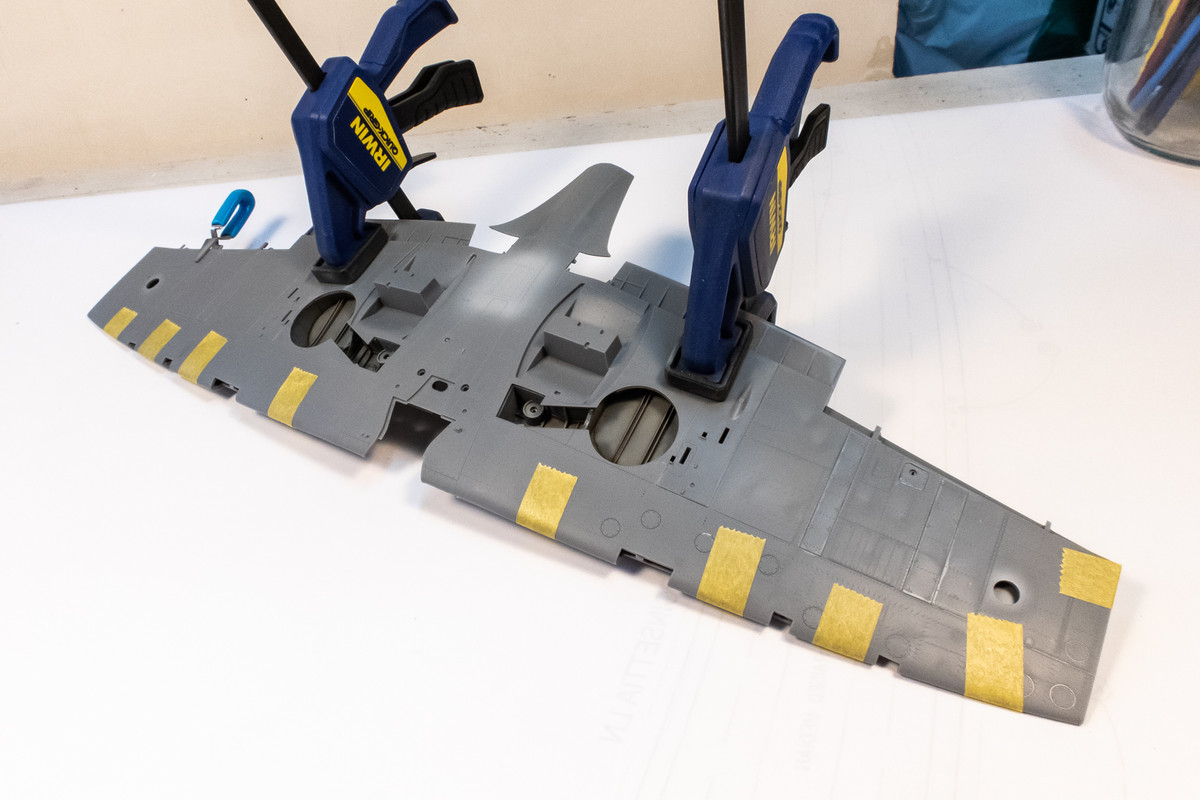
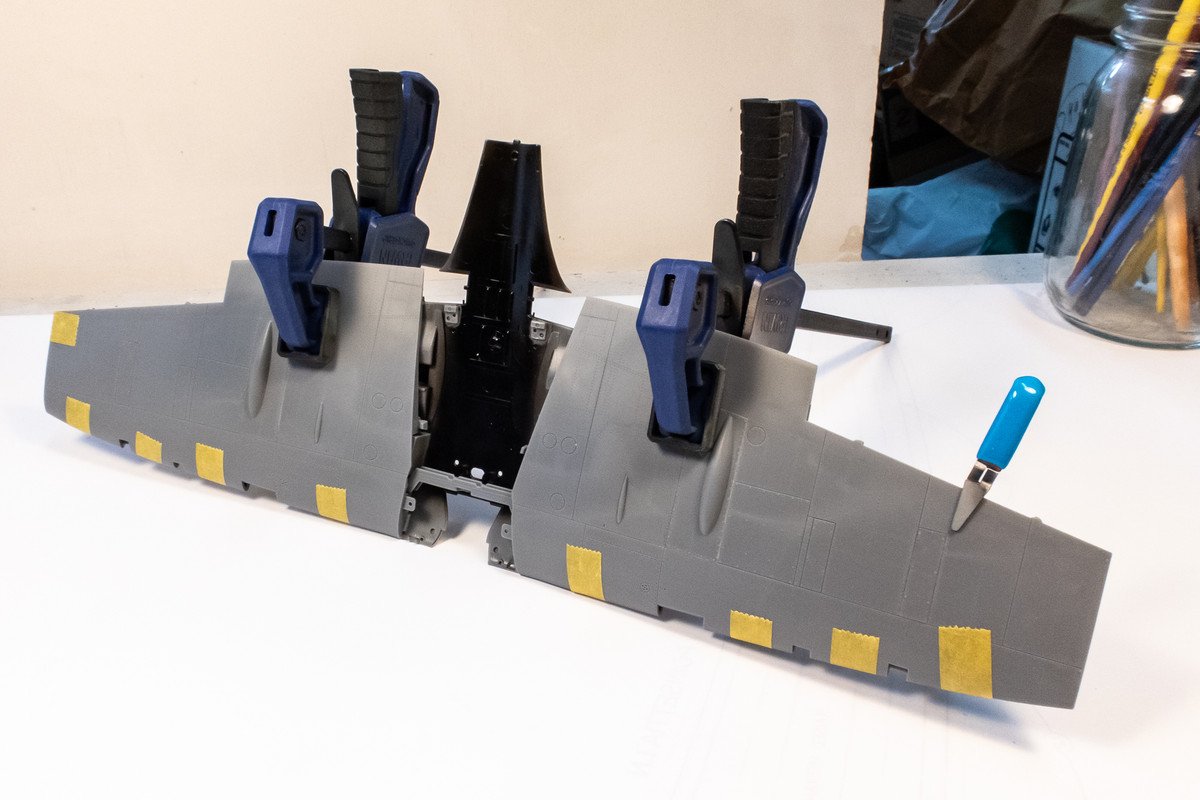
The inserts for the active and unused gun stations are glued into place next. They fit well but will need some minor filling.
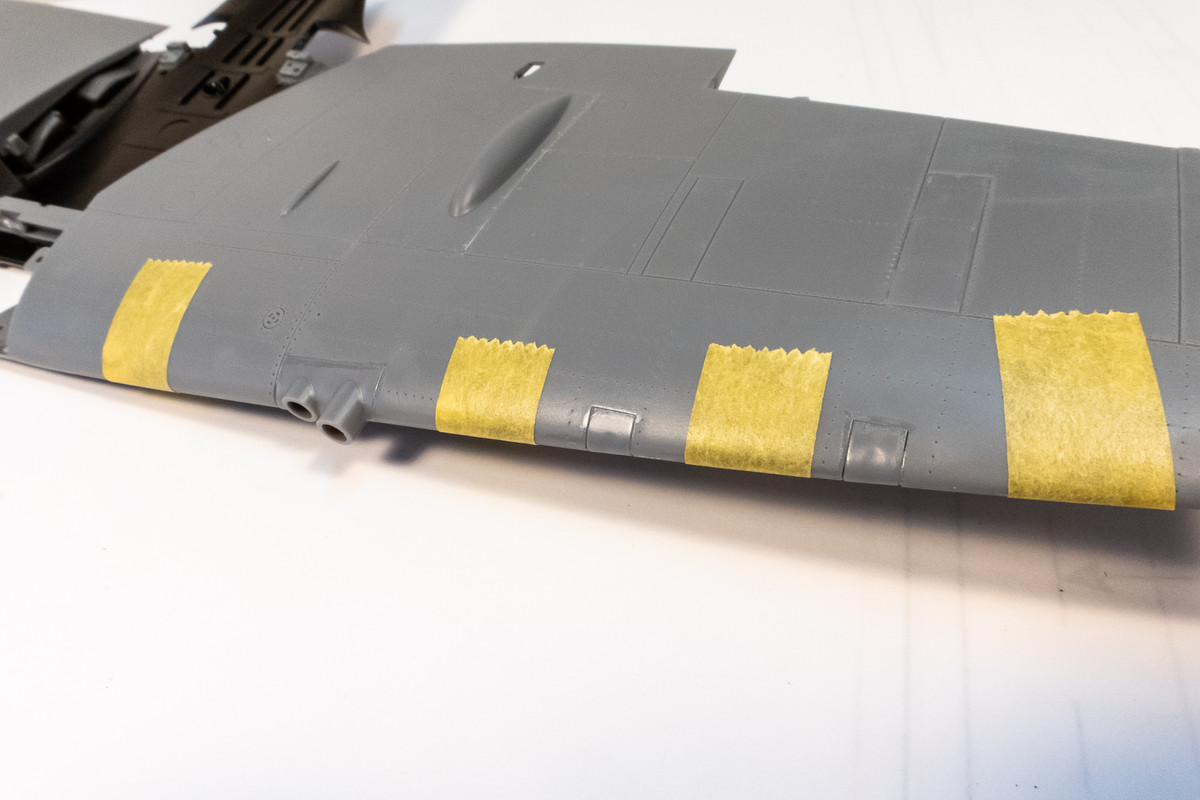
The wing tips are glued into place next along with the little piece that used to be occupied by the long aileron. I bought the sprue from the VIII kit that had these small parts that fit perfectly so I didn't have to deal with shimming the cut pieces from the aileron.
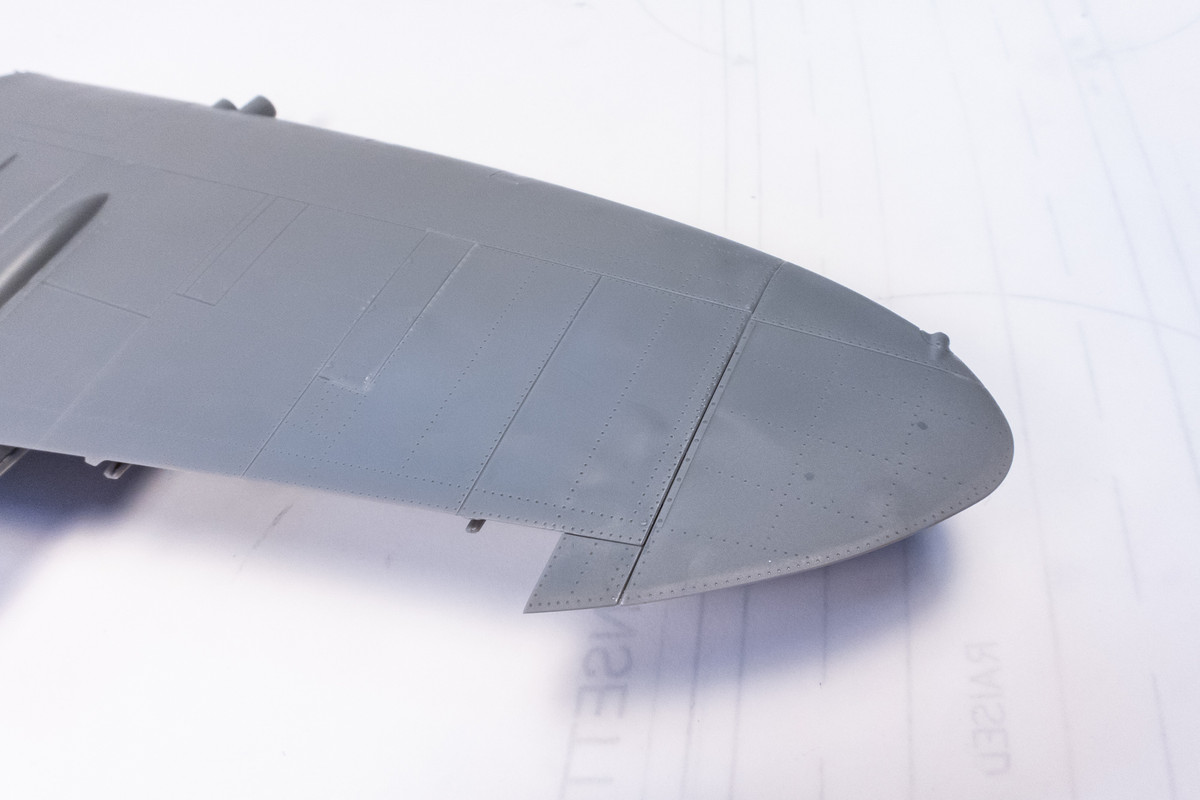
With all of the inserts and panels that need to be glued onto the wings, it was inevitable that some filling needs to be done. Most of the gaps are small and they can be filled with either CA glue or Apoxie Sculpt. If the joint is on a panel line, either method can be used to fill gaps without sanding. For this joint at the wing tip, I am using Apoxie Sculpt.
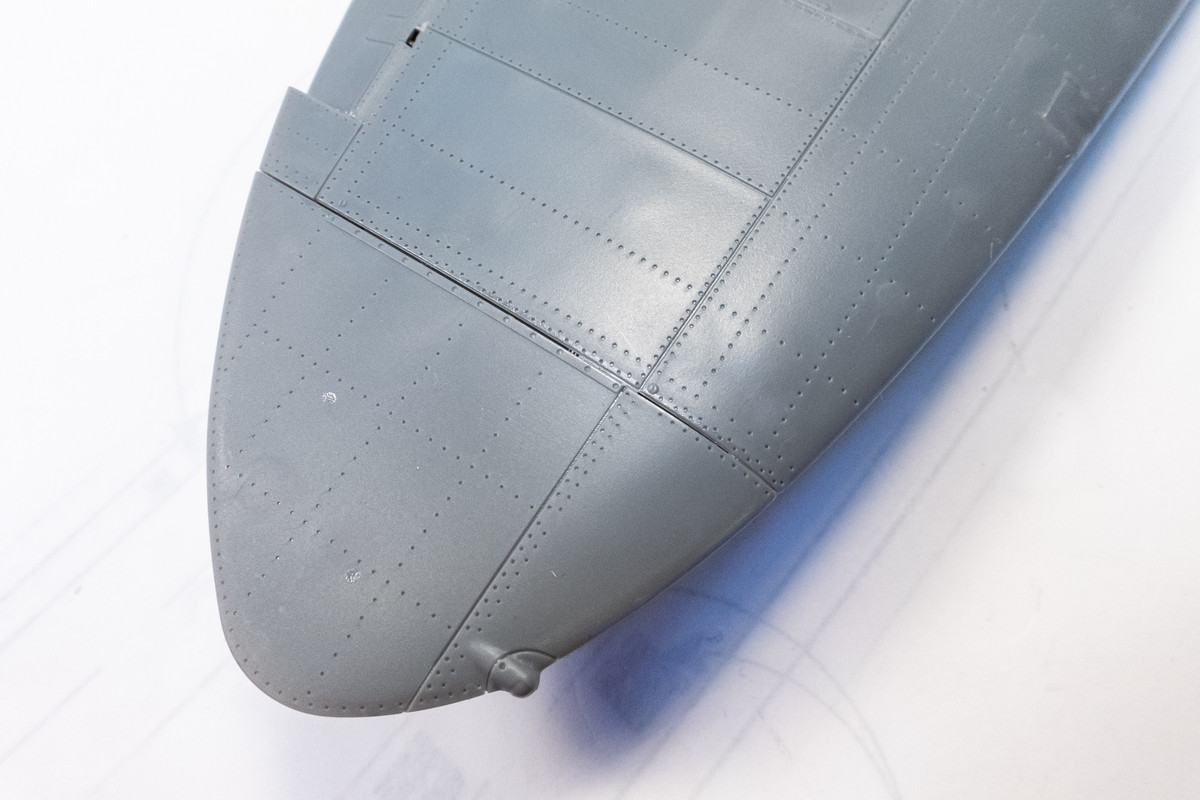
The putty is forced into the length of the gap using a toothpick.
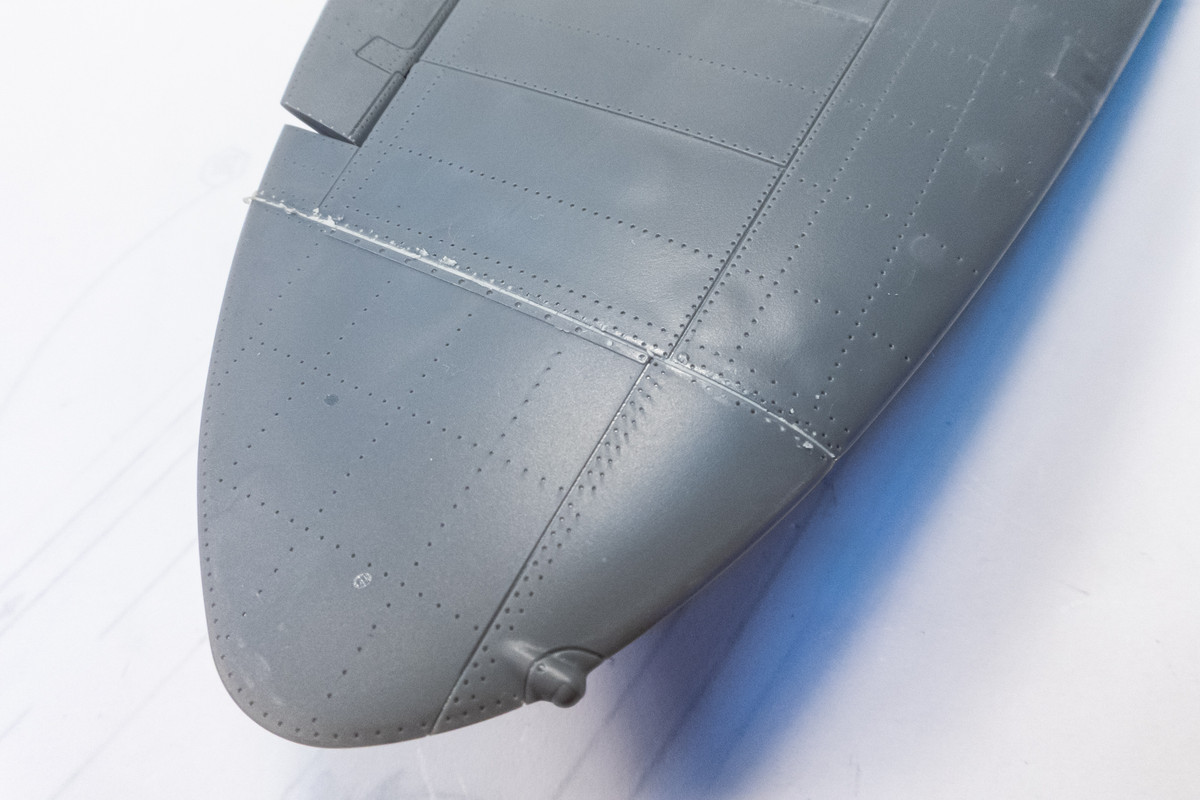
After application, use a damp piece of paper towel to remove excess putty and smooth the joint. This fills the joint but leaves a nice uniform panel line. I use a needle to remove the putty that gets stuck in the rivets. This should be all of the work that this joint requires. No sanding! You can do something similar with CA glue and debonder.
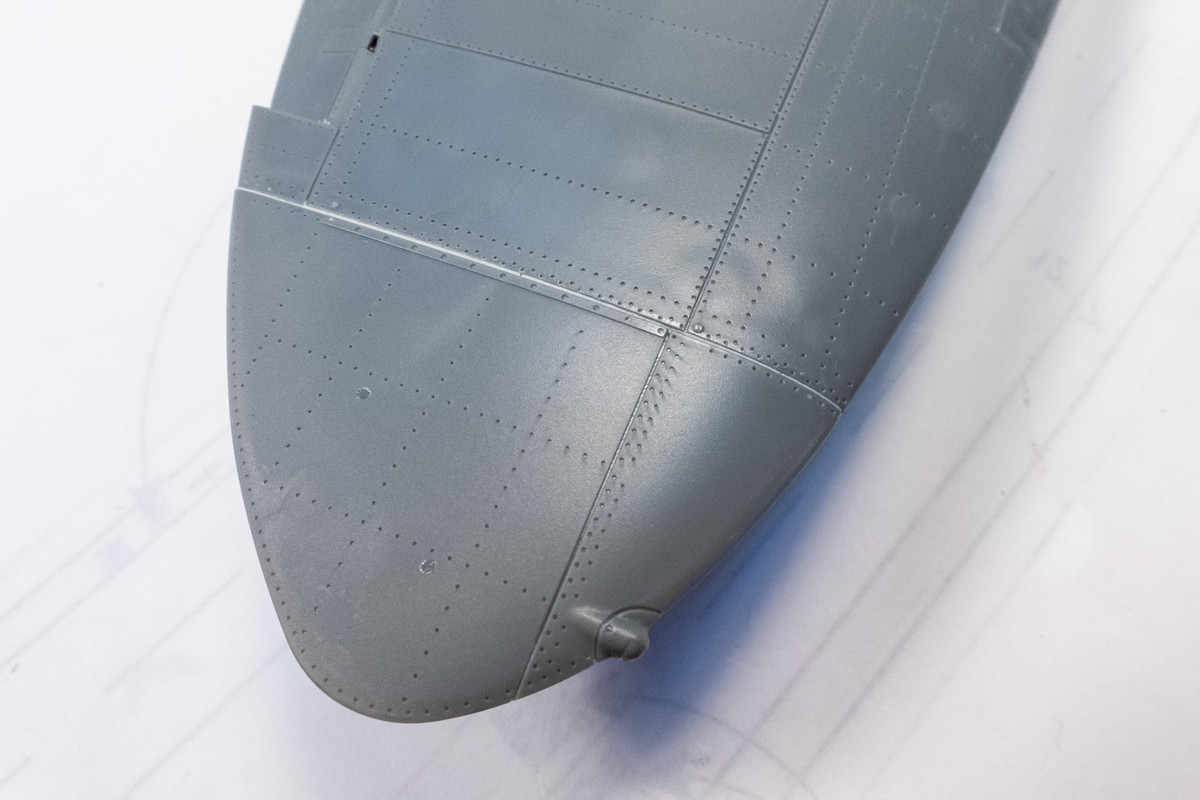
The flaps will be shut for this build so the attachment tabs need to be cut off. But once that's done, fit is good.
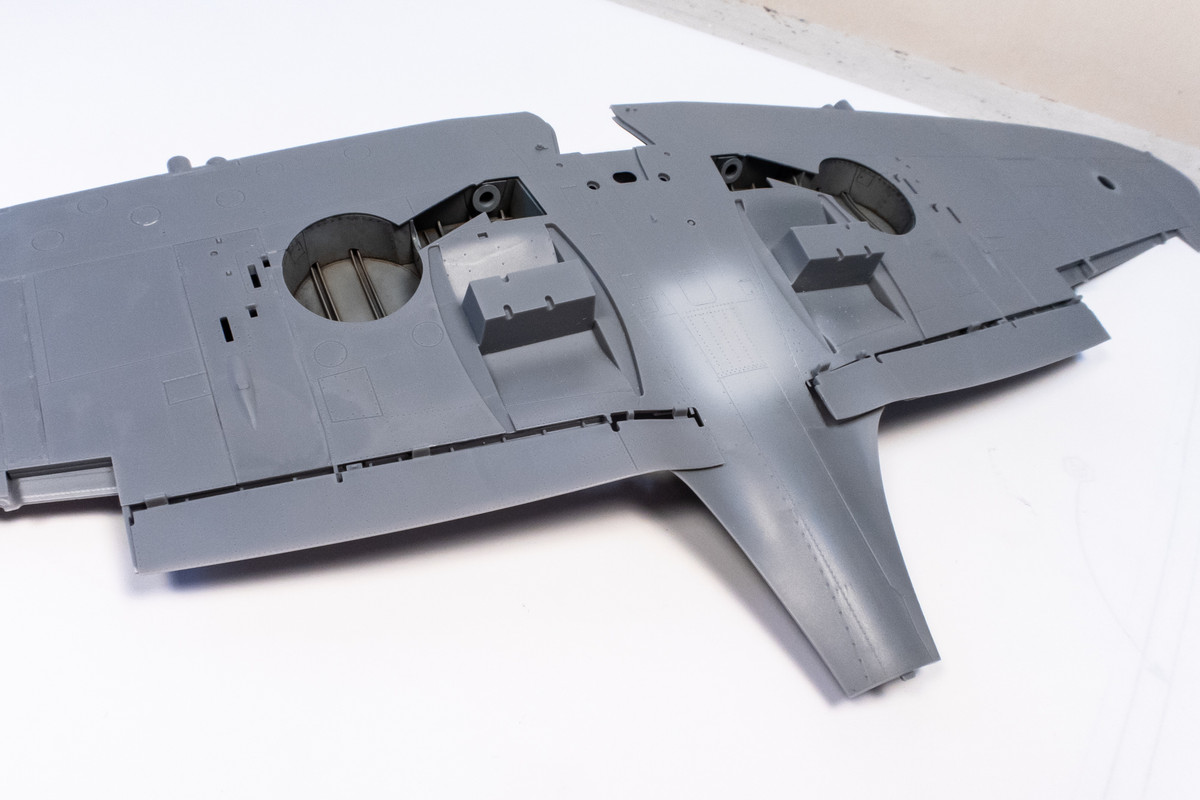
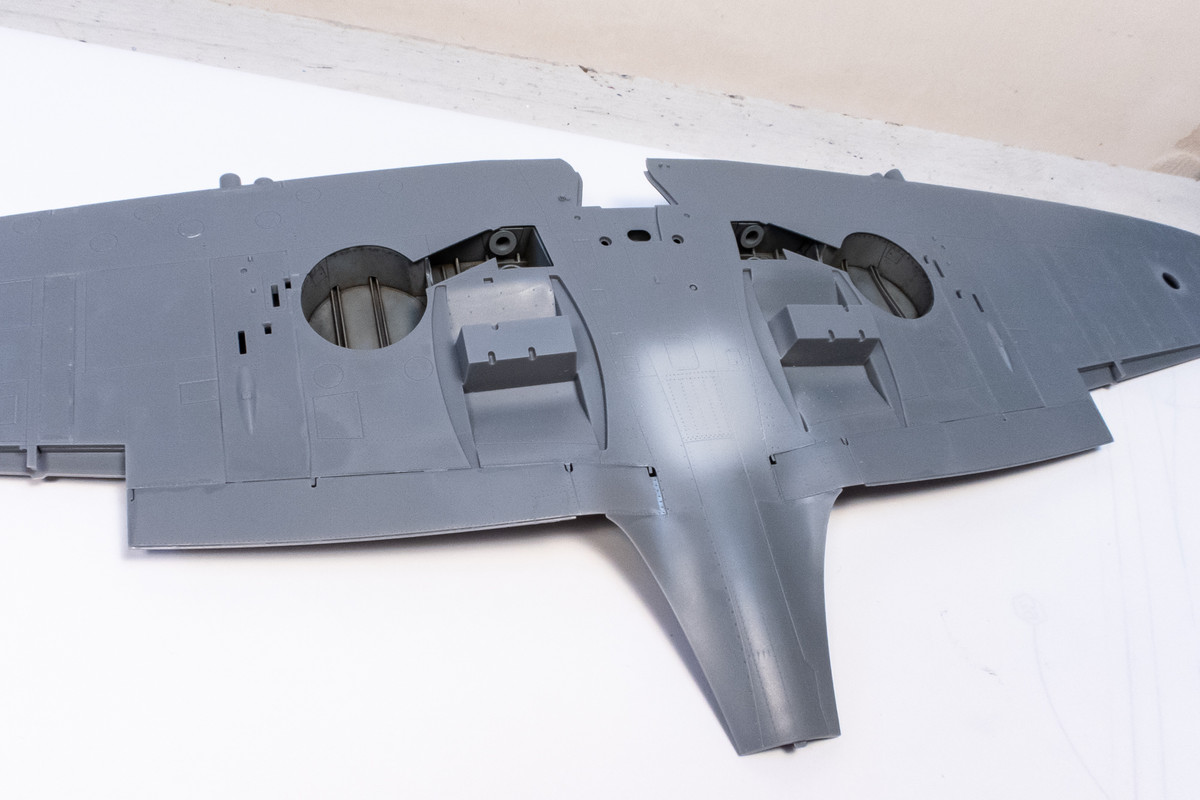
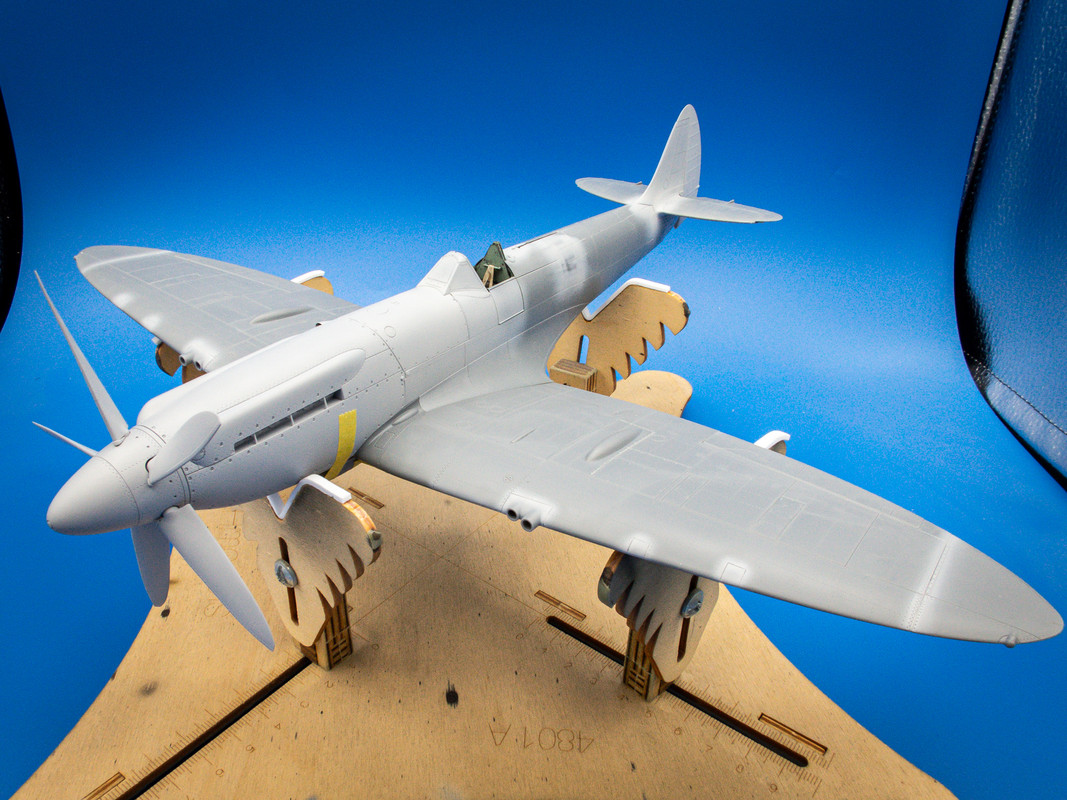
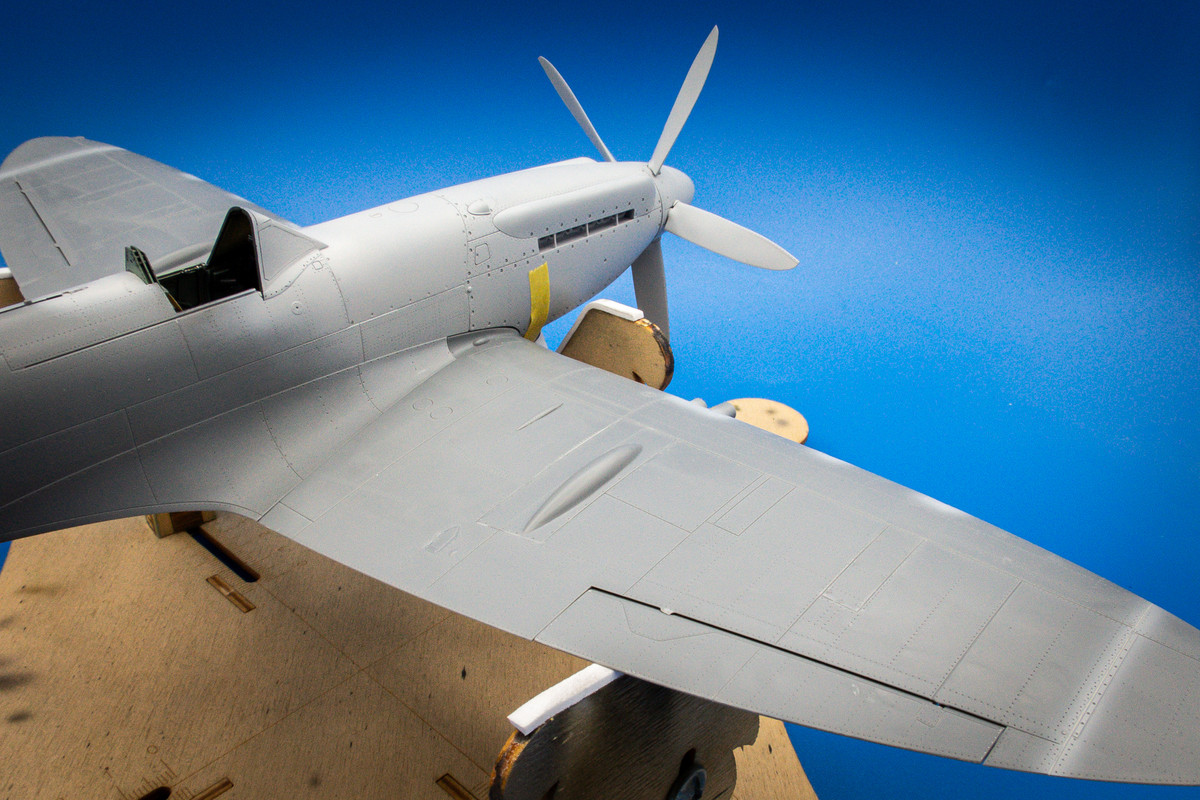
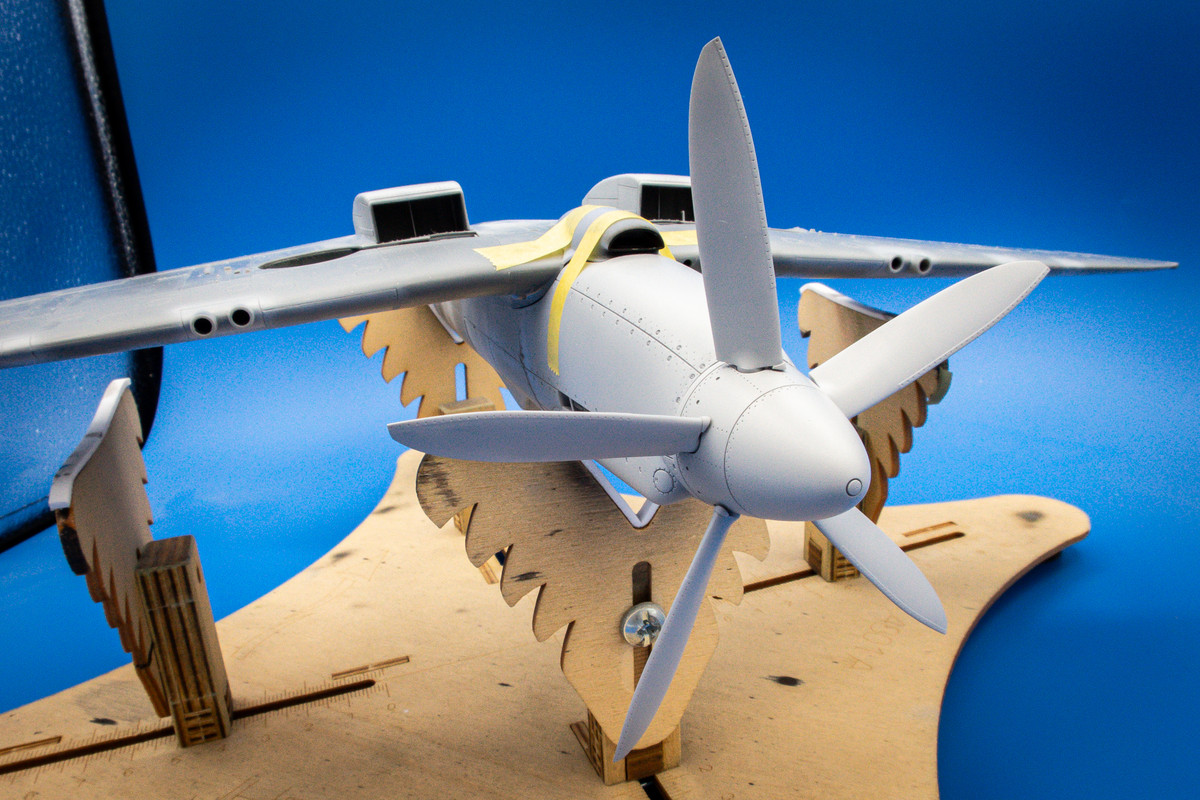
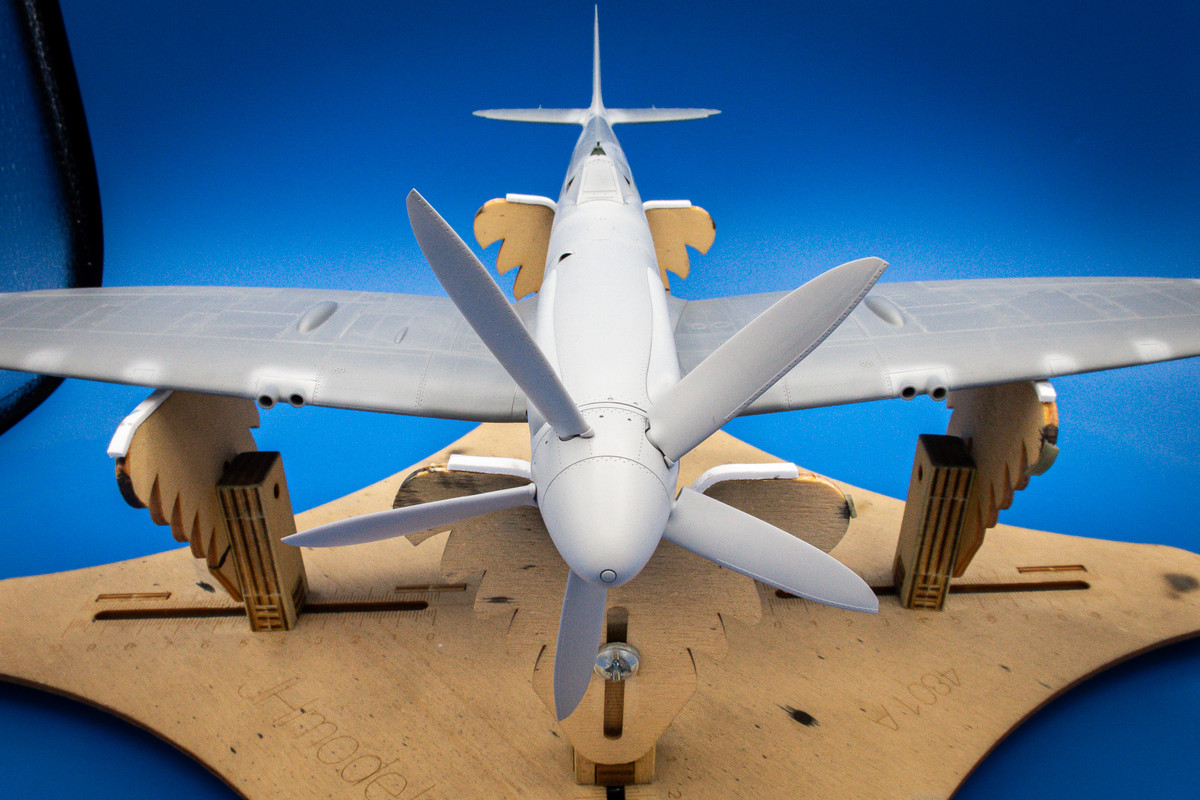
The wing is now recognizable as a Spitfire!
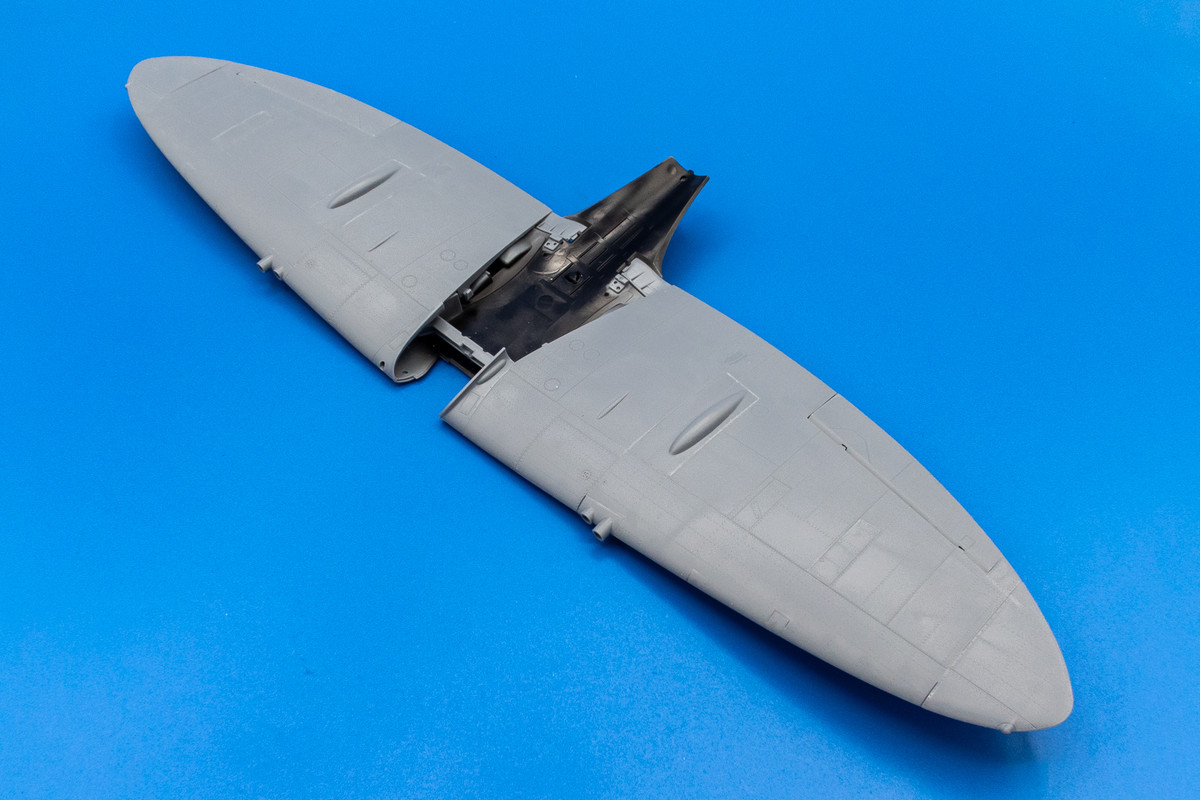
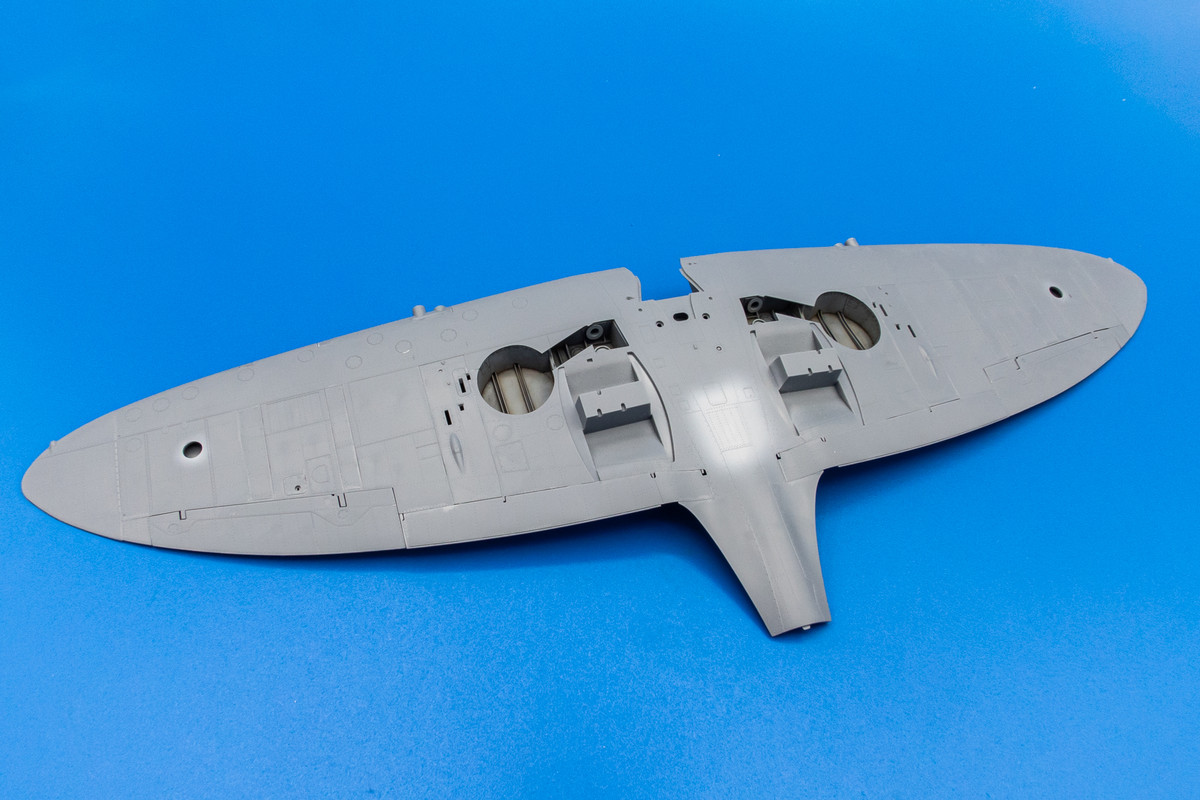
All of the joints will be inspected and cleaned as required.
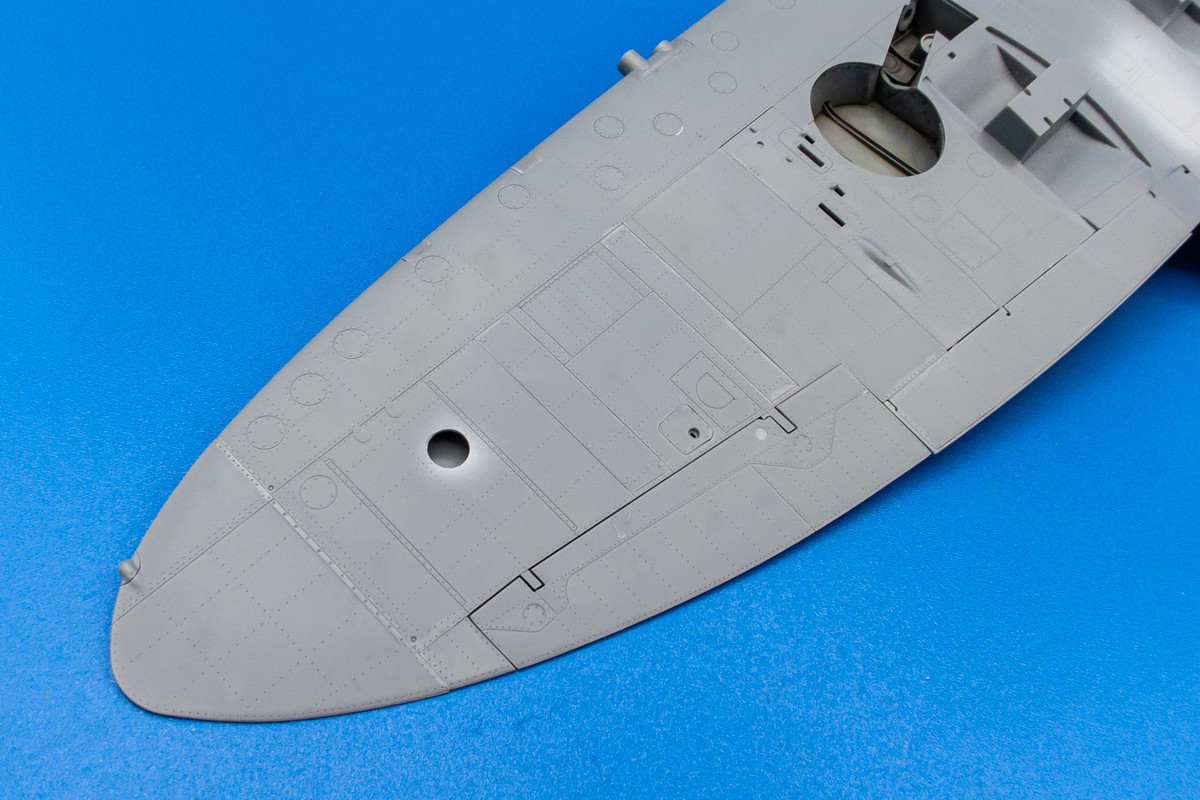
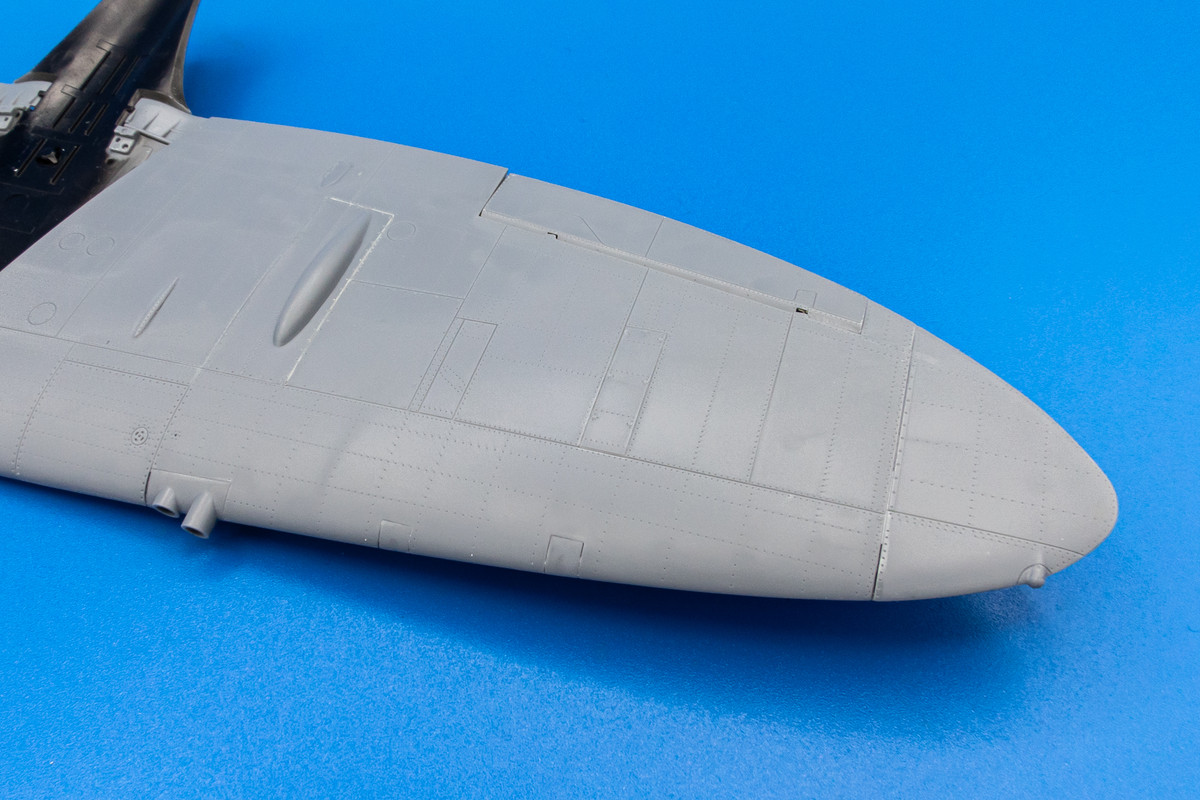
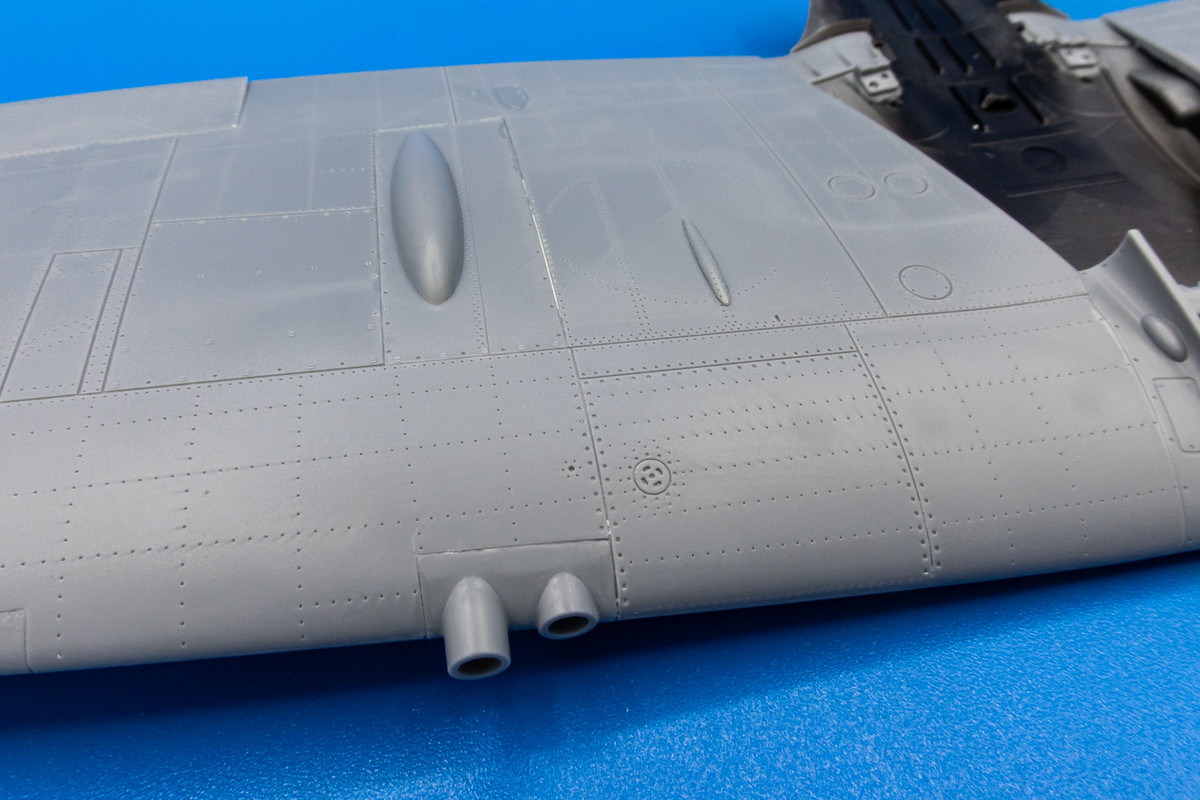
Did I mention that this wing is from the VIII kit? It features the wing fuel tanks that would need to be added to the XVIe wing.
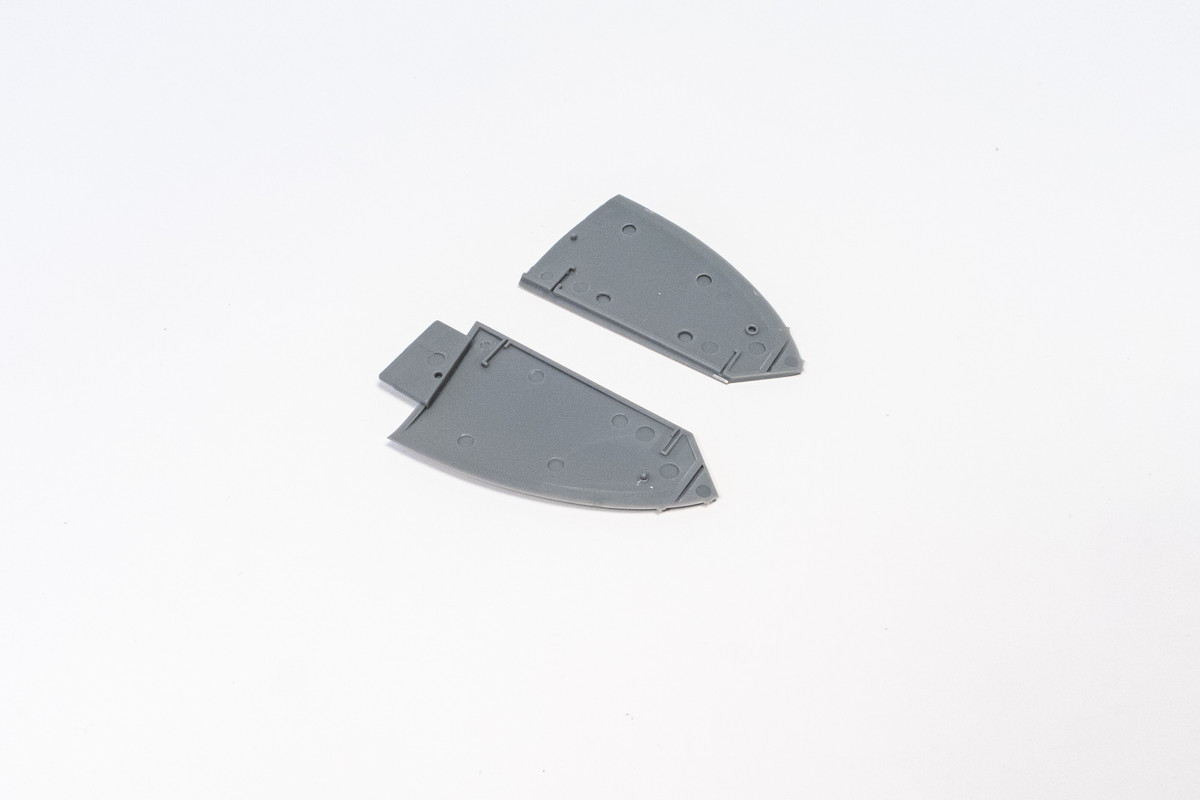
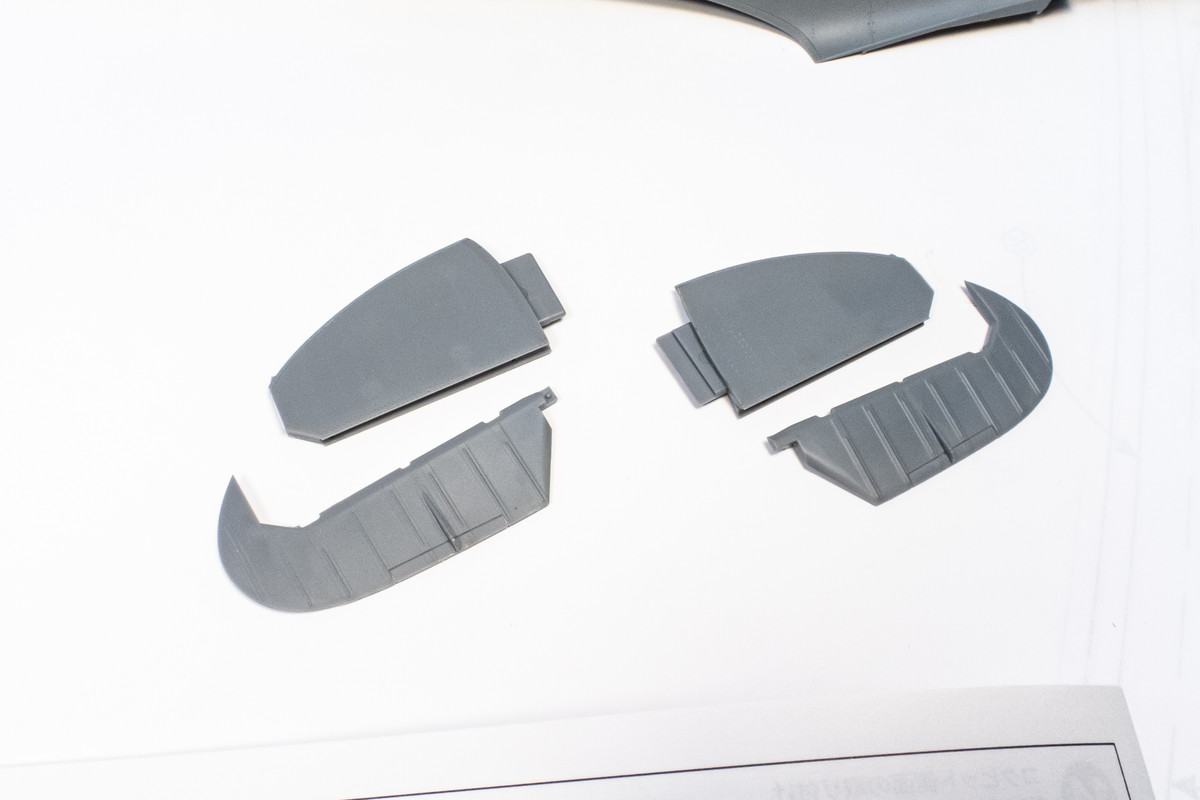
The horizontal stabilizers need a little bit of surgery off the tips to accommodate the larger balance horns of a bubble-top Spitfire. I will forgo the metal bits and glue them together into the neutral position.
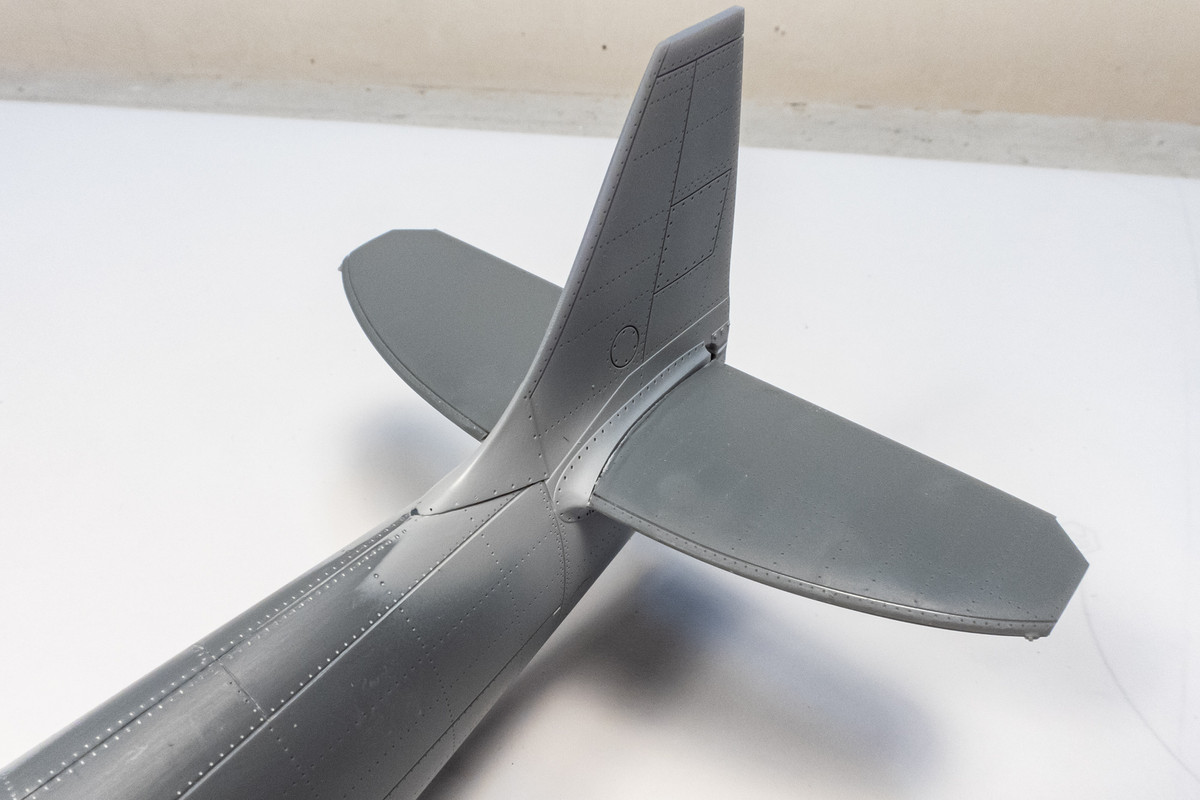
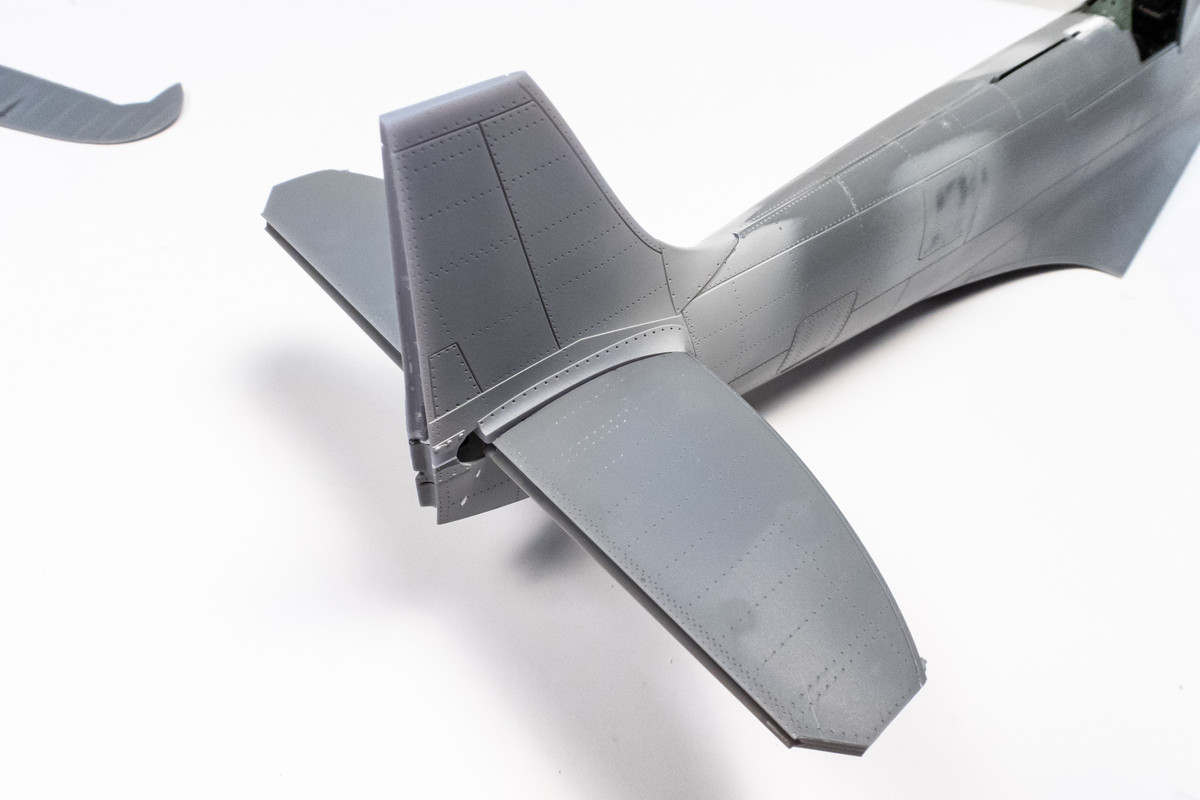
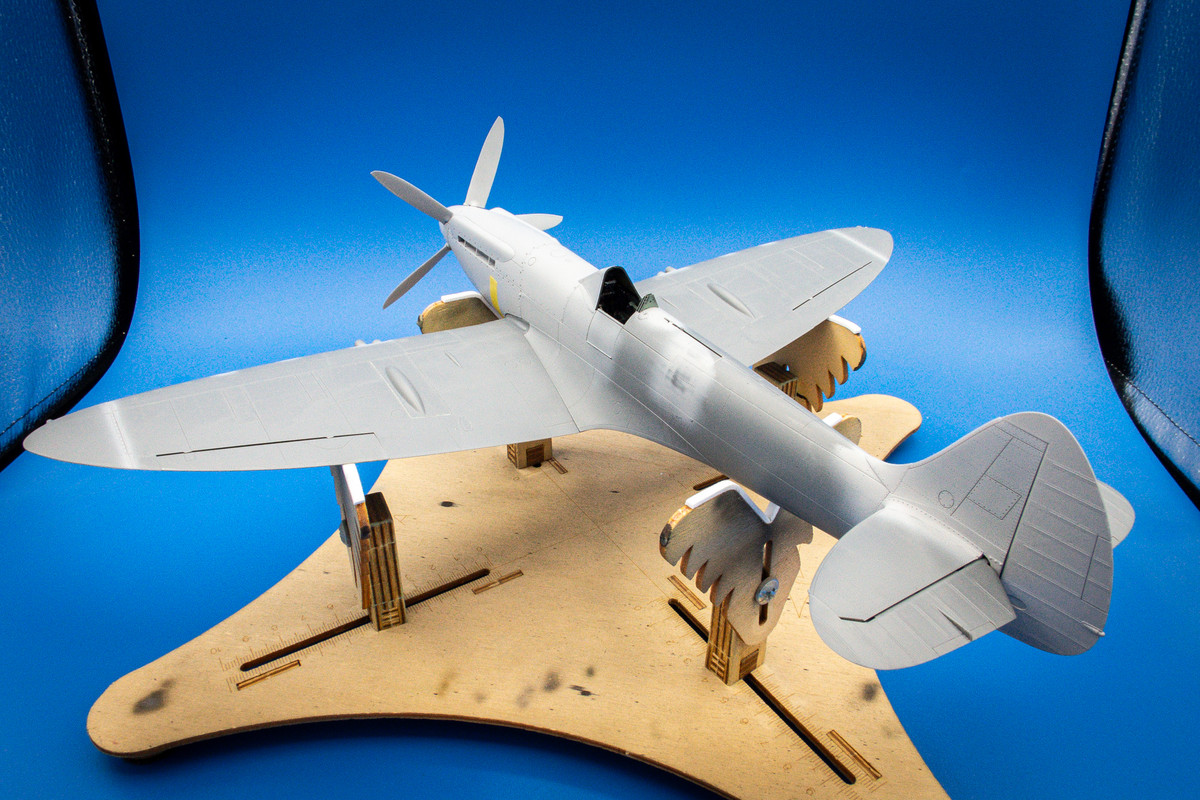
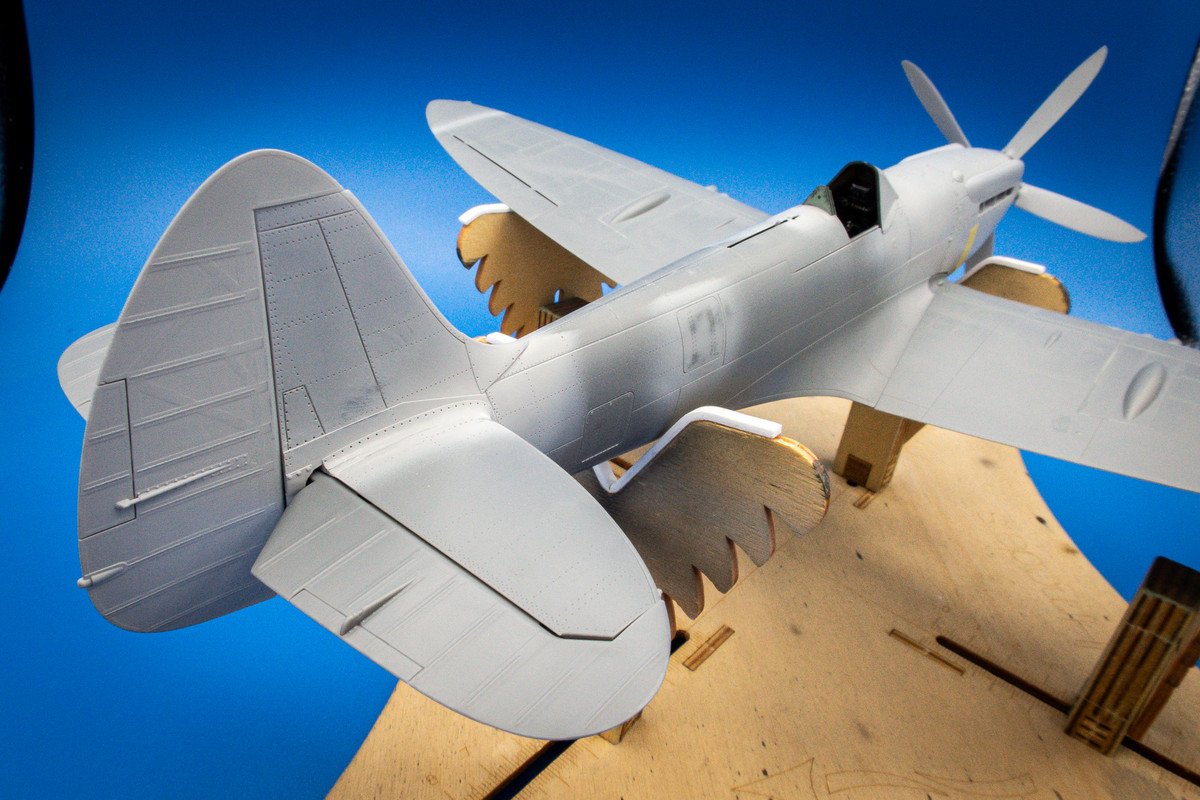
The horizontal stabs are glued onto the fuselage. Due to the extra width of the XIVe tail and my ham-fisted attempts to trim the joints to accomomodate this width, I have significant gaps on the top side. The priority is for the stabs to be perpendicular to the vertical tail fin... I'll deal with the gaps later!
Plugging along on the XIVe conversion considering I have a couple of items I'm still waiting for. One is the bubble canopy that I ordered from Tamiya. The other is a new rudder from LFD to replace the one with the print marks on it.
Since the wing assembly has so many parts to it, I thought I'd try to complete as much of it as possible before joining to the fuselage. The painted wheel wells are glued into place as well that structural brace in front of the wells. Don't forget the little scoops at the base of the flap openings.
The wing halves are then glued together.
The inserts for the active and unused gun stations are glued into place next. They fit well but will need some minor filling.
The wing tips are glued into place next along with the little piece that used to be occupied by the long aileron. I bought the sprue from the VIII kit that had these small parts that fit perfectly so I didn't have to deal with shimming the cut pieces from the aileron.
With all of the inserts and panels that need to be glued onto the wings, it was inevitable that some filling needs to be done. Most of the gaps are small and they can be filled with either CA glue or Apoxie Sculpt. If the joint is on a panel line, either method can be used to fill gaps without sanding. For this joint at the wing tip, I am using Apoxie Sculpt.
The putty is forced into the length of the gap using a toothpick.
After application, use a damp piece of paper towel to remove excess putty and smooth the joint. This fills the joint but leaves a nice uniform panel line. I use a needle to remove the putty that gets stuck in the rivets. This should be all of the work that this joint requires. No sanding! You can do something similar with CA glue and debonder.
The flaps will be shut for this build so the attachment tabs need to be cut off. But once that's done, fit is good.
The wing is now recognizable as a Spitfire!
All of the joints will be inspected and cleaned as required.
Did I mention that this wing is from the VIII kit? It features the wing fuel tanks that would need to be added to the XVIe wing.
The horizontal stabilizers need a little bit of surgery off the tips to accommodate the larger balance horns of a bubble-top Spitfire. I will forgo the metal bits and glue them together into the neutral position.
The horizontal stabs are glued onto the fuselage. Due to the extra width of the XIVe tail and my ham-fisted attempts to trim the joints to accomomodate this width, I have significant gaps on the top side. The priority is for the stabs to be perpendicular to the vertical tail fin... I'll deal with the gaps later!
John aka JKim
-----------<><

-----------<><
-
tempestjohnny

- Elite Member
- Posts: 3825
- Joined: Sat Oct 15, 2016 4:51 am
- Location: Naples. FL
Re: Tamiya 1/32 Spitfire XIVe Conversion
Really beginning to take shape. All those add ons are really making a difference
-
BlackSheep214
- Elite Member
- Posts: 13596
- Joined: Sun Apr 06, 2014 8:47 pm
Re: Tamiya 1/32 Spitfire XIVe Conversion
Wow… incredible work. 
“Who controls the skies, controls the fate of this Earth”
Author unknown- 352nd Fighter Group, Blue-Nosed Bastards of Bodney
“Send one plane it’s a sortie; send two planes it’s a flight; send four planes it’s a test of airpower. - Richard Kohn
Author unknown- 352nd Fighter Group, Blue-Nosed Bastards of Bodney
“Send one plane it’s a sortie; send two planes it’s a flight; send four planes it’s a test of airpower. - Richard Kohn
Re: Tamiya 1/32 Spitfire XIVe Conversion
Thanks guys!
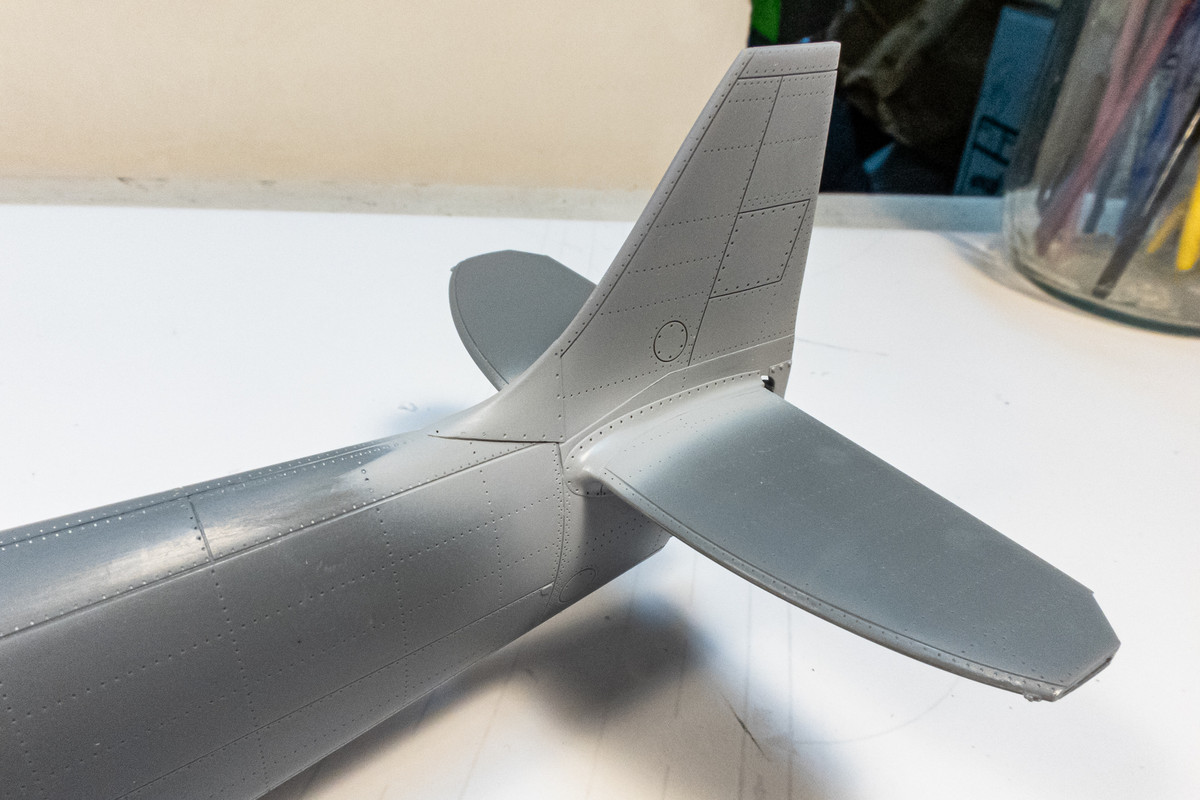
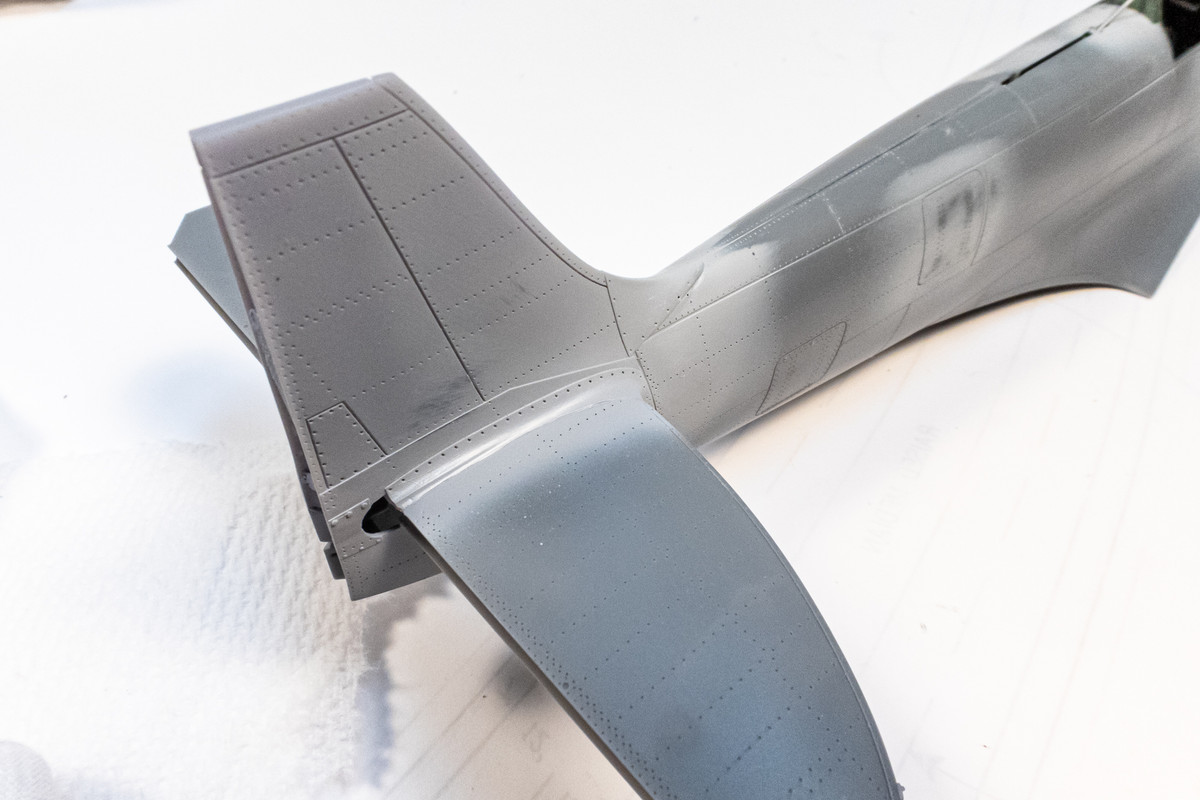
Corrective joint work on the horizontal tail planes is ongoing. Some re-shaping is needed so I used Apoxie Sculpt to fill the gap and to build up the area in need.
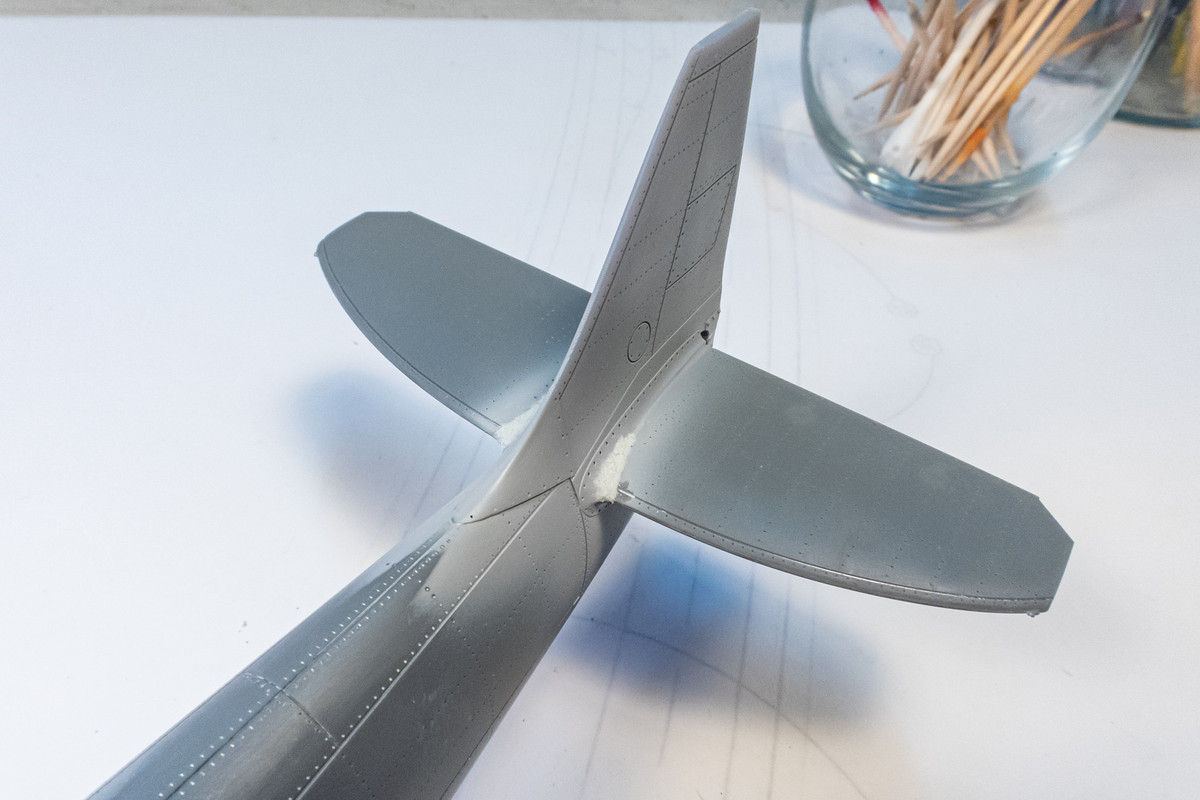
After that is re-shaped, some Mr Surfacer 1000 is used to refine the feathered edges and smooth everything out. The joint is re-scribed by hand a primer coat is sprayed to check the work. Can't see it really well but panel line needs to be re-shaped on the starboard side but the work is progressing well.
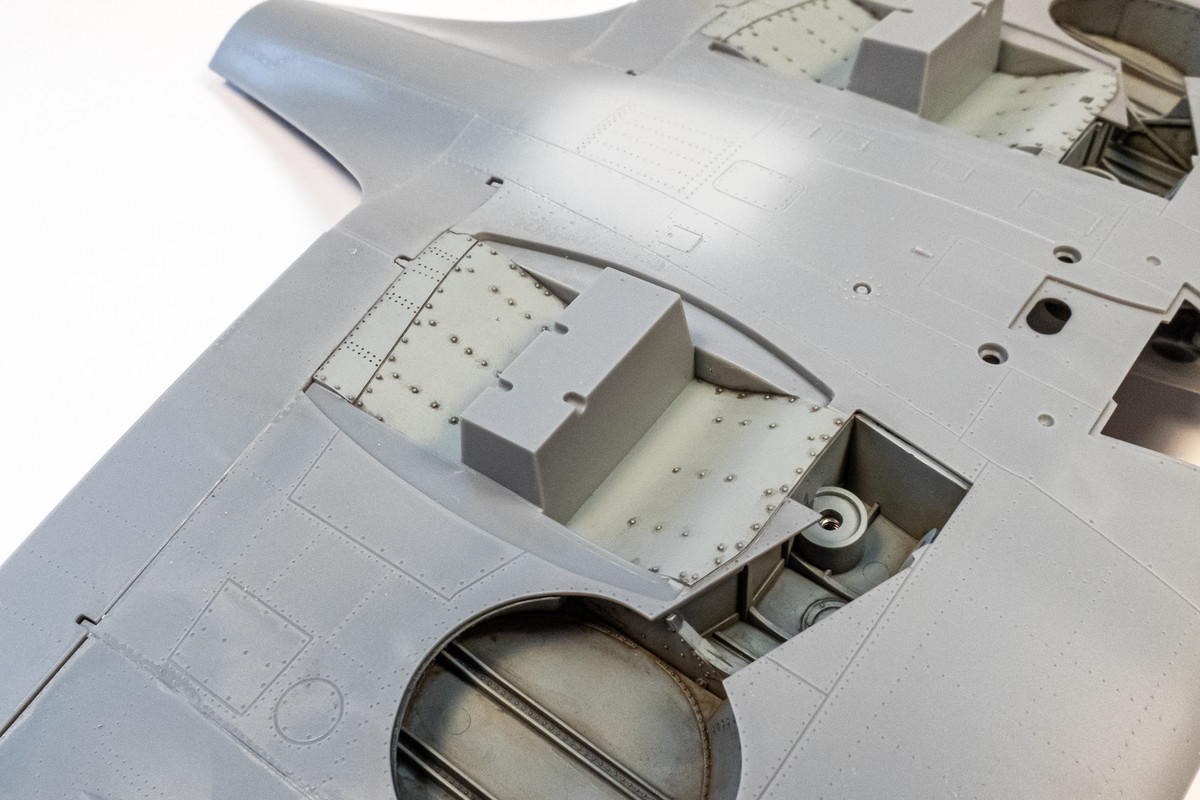
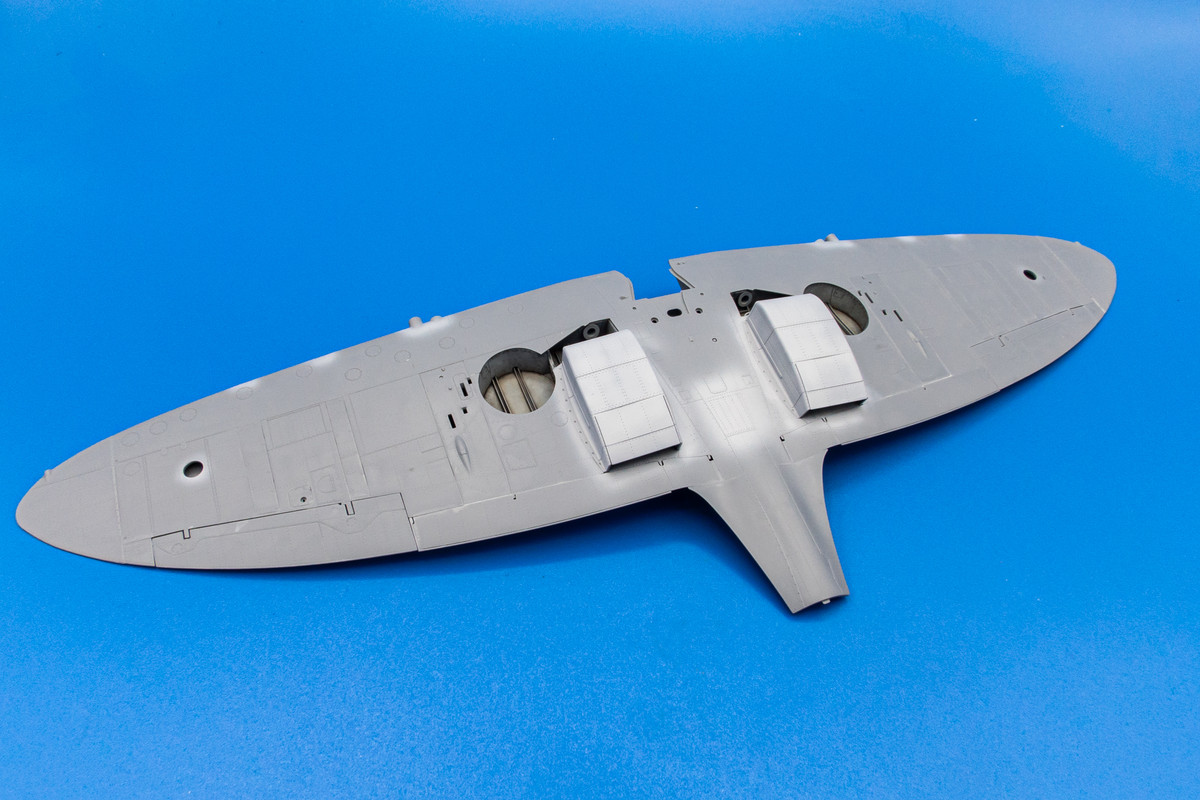
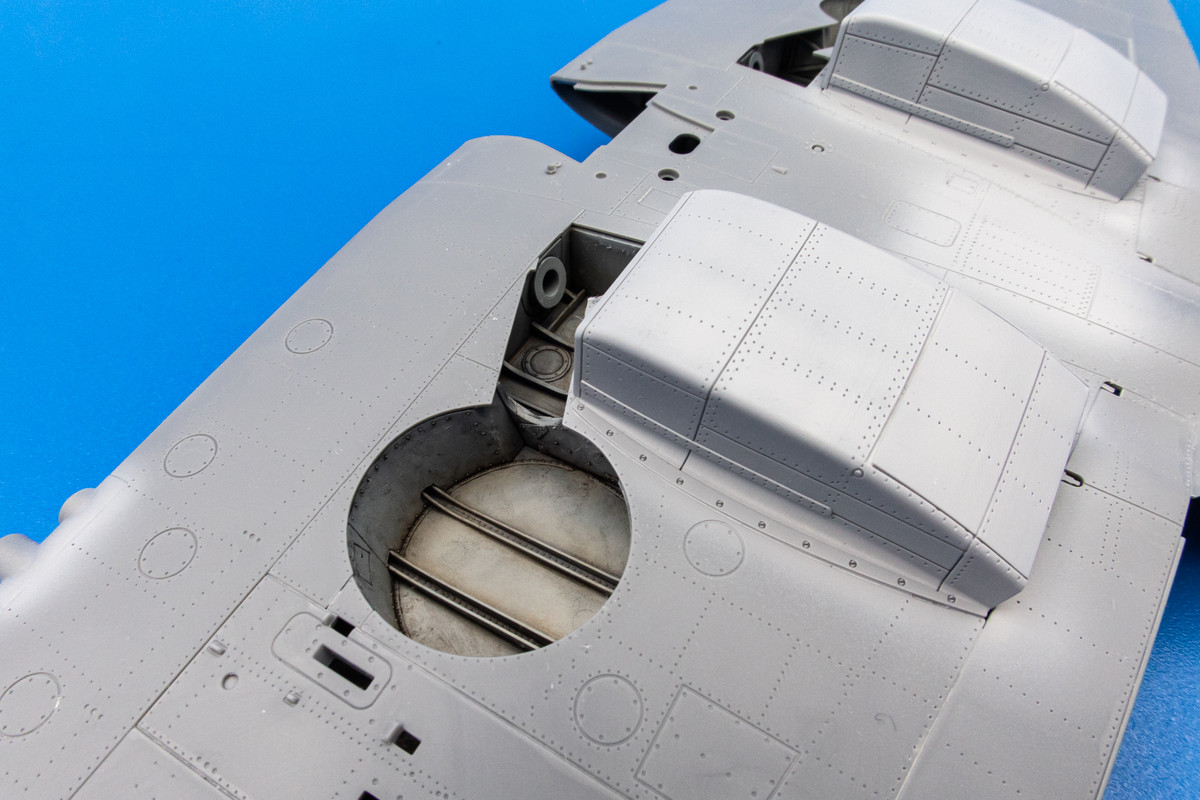
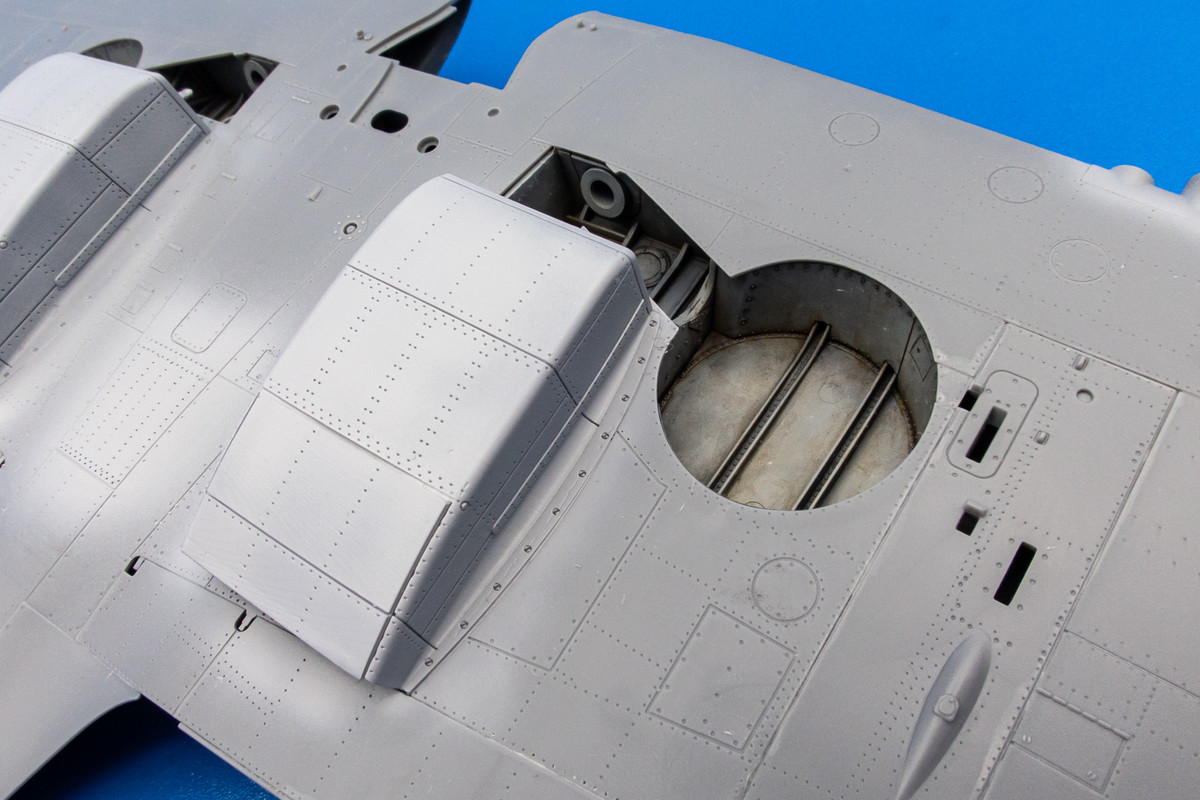
The area underneath the radiator boxes are painted and weathered. View will be limited into this area but it would be impossible to access after the radiator boxes are installed.
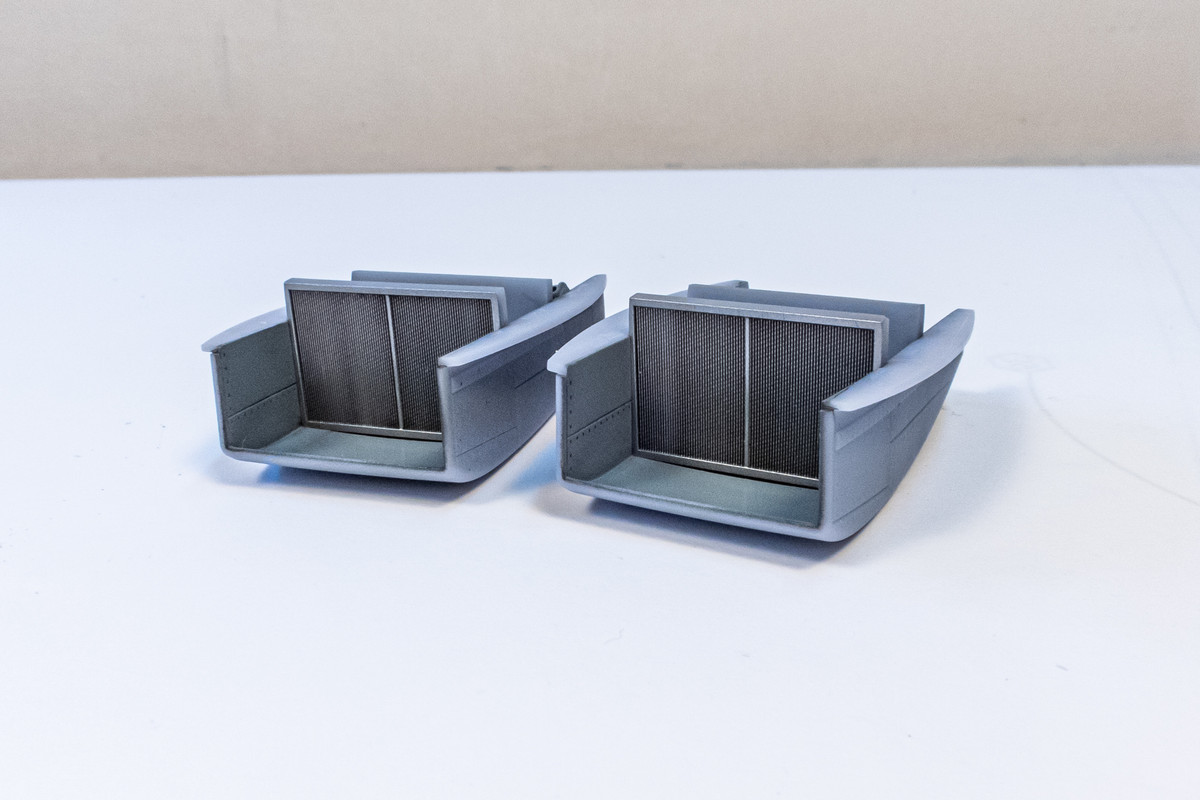
The grills are installed into the radiator boxes. The vertical grating is very fine and I was doubtful that it would be able to hold a pastel wash but I was wrong.
The radiator boxes are then snapped into place and then secured by seeping thin CA glue into the joints and then wiping off the excess glue with a cotton bud moistened with CA debonder. The gaps are then filled in with Apoxie Sculpt.
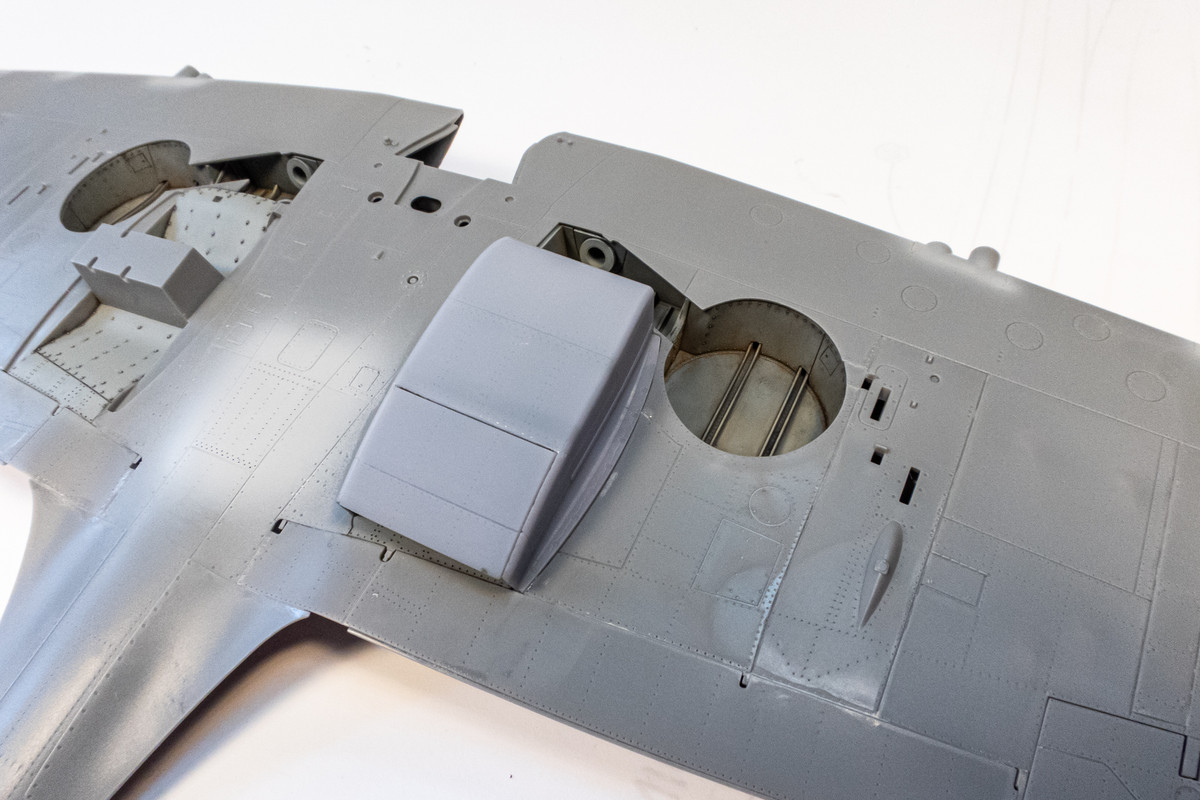
The radiator boxes are then given a coat of primer. The wings are just about done now.
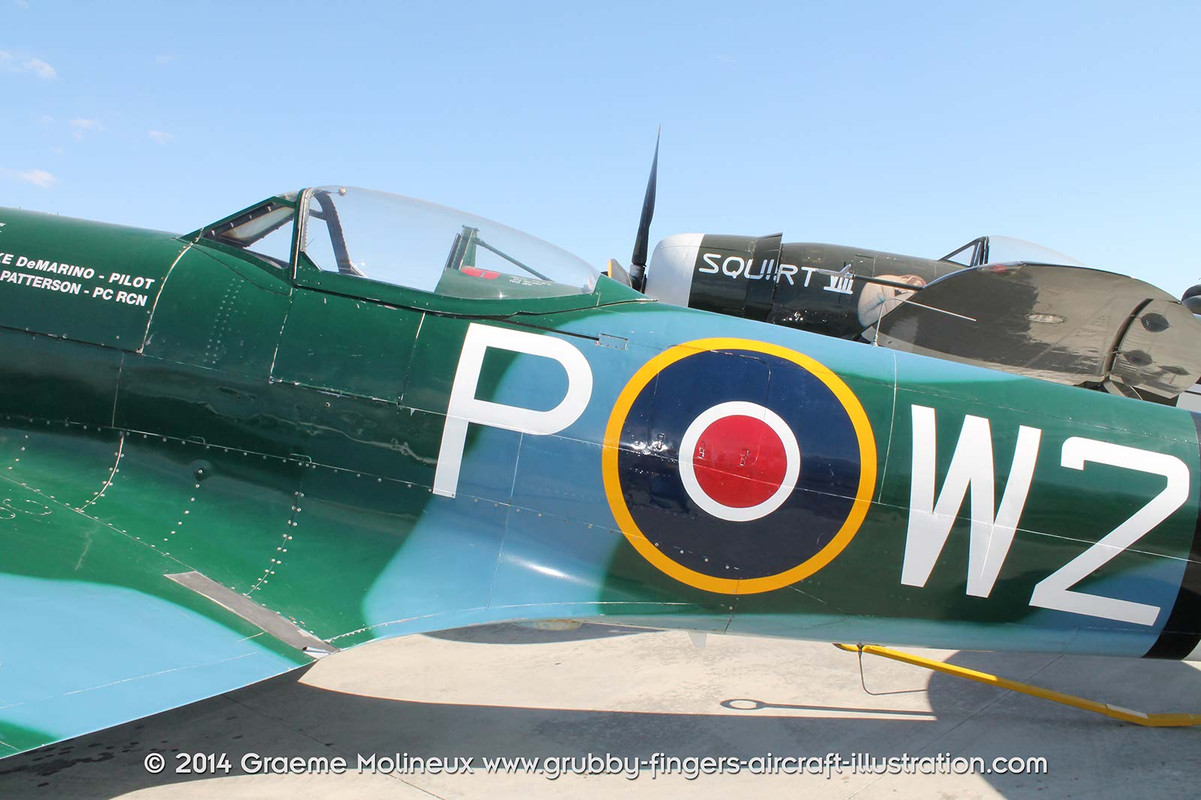
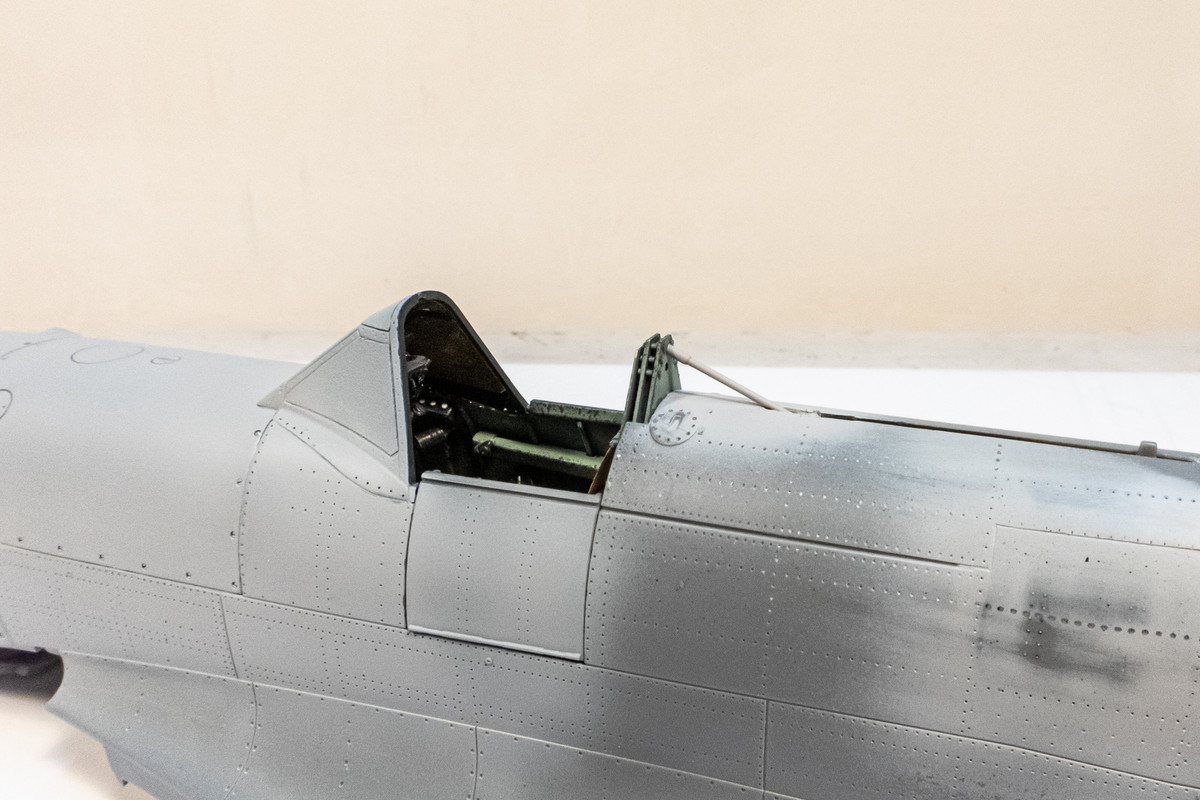
After a little online research, I concluded that the kit-supplied armor plate behind the pilot headrest is not appropriate for an early XIVe.
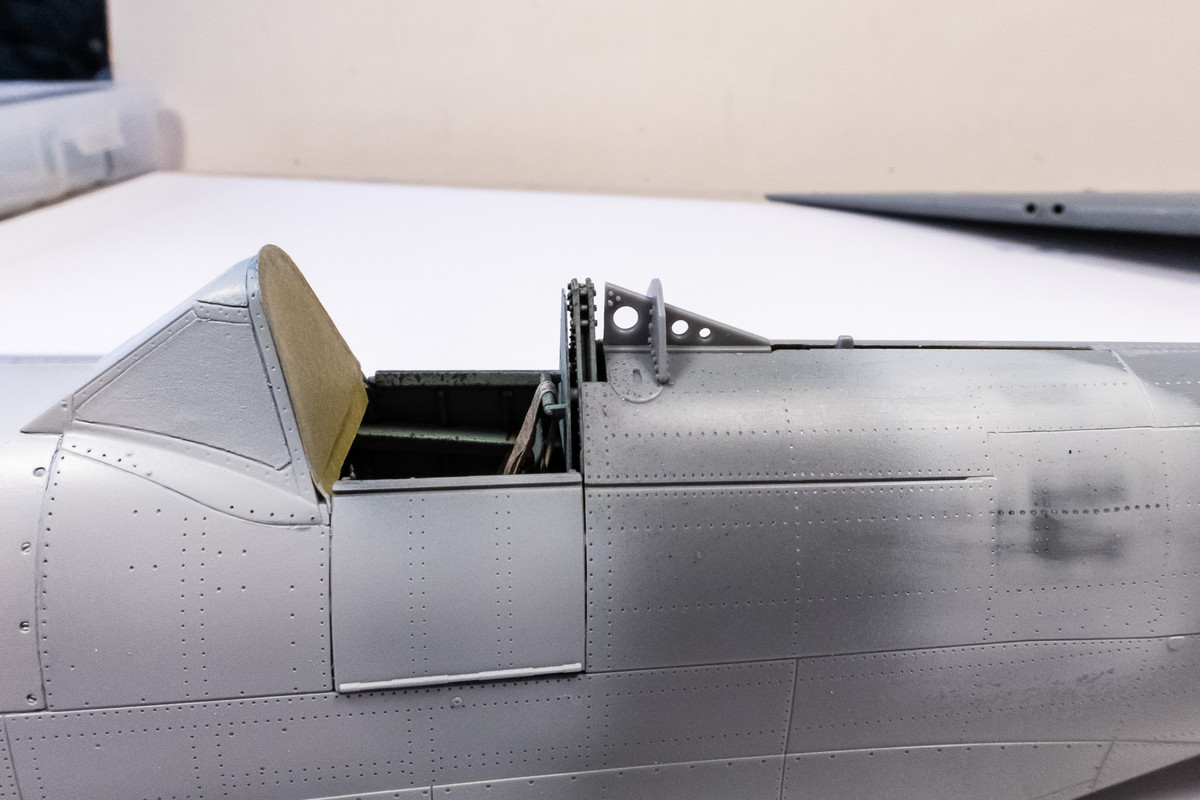
So I opted for a simple tubular brace after filling in the recess.
The wheels have been painted.
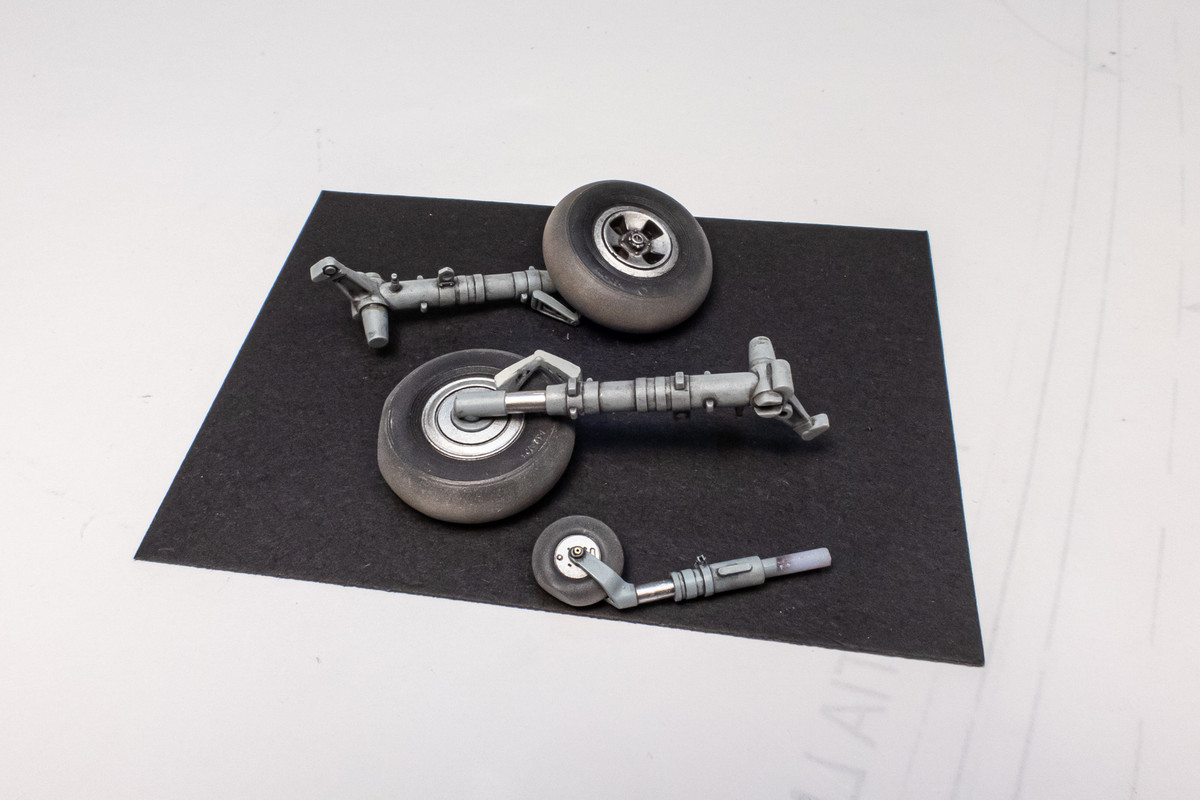
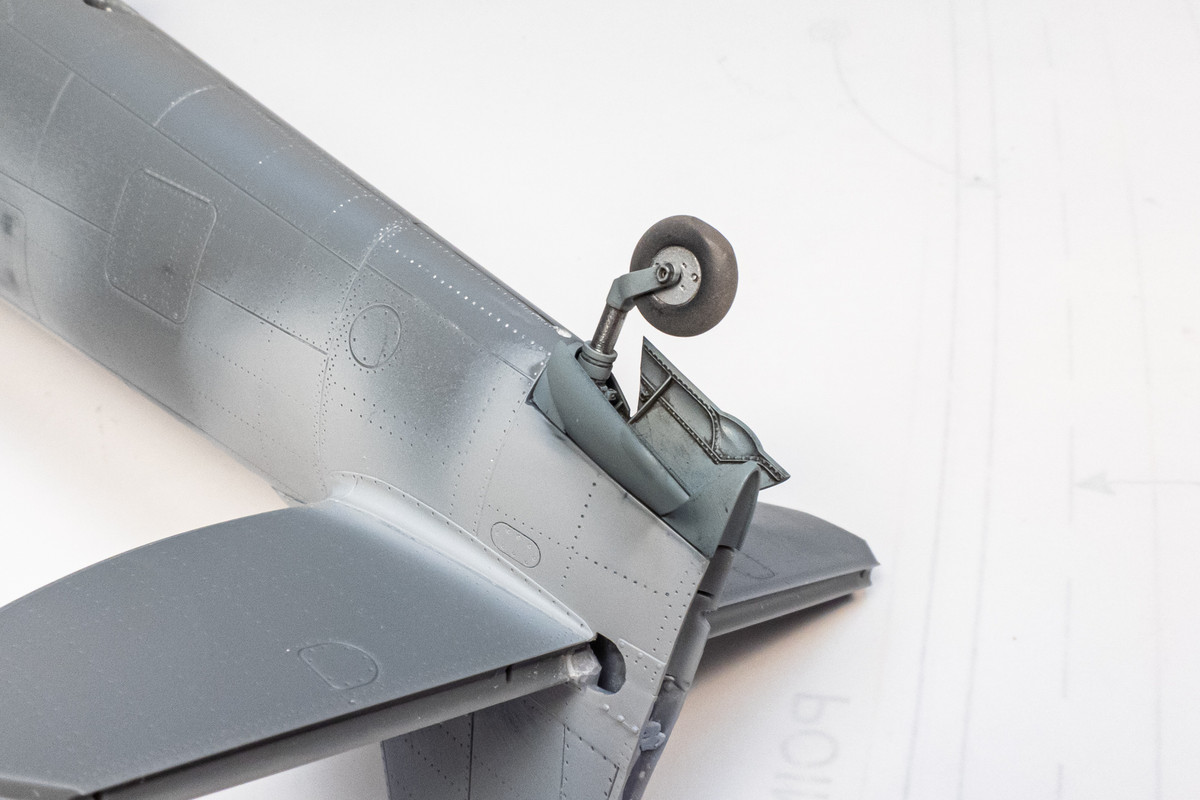
The tail wheel well has been painted but I'm not going to glue it in until all of the seam work on the horizontal stabilizers is done.
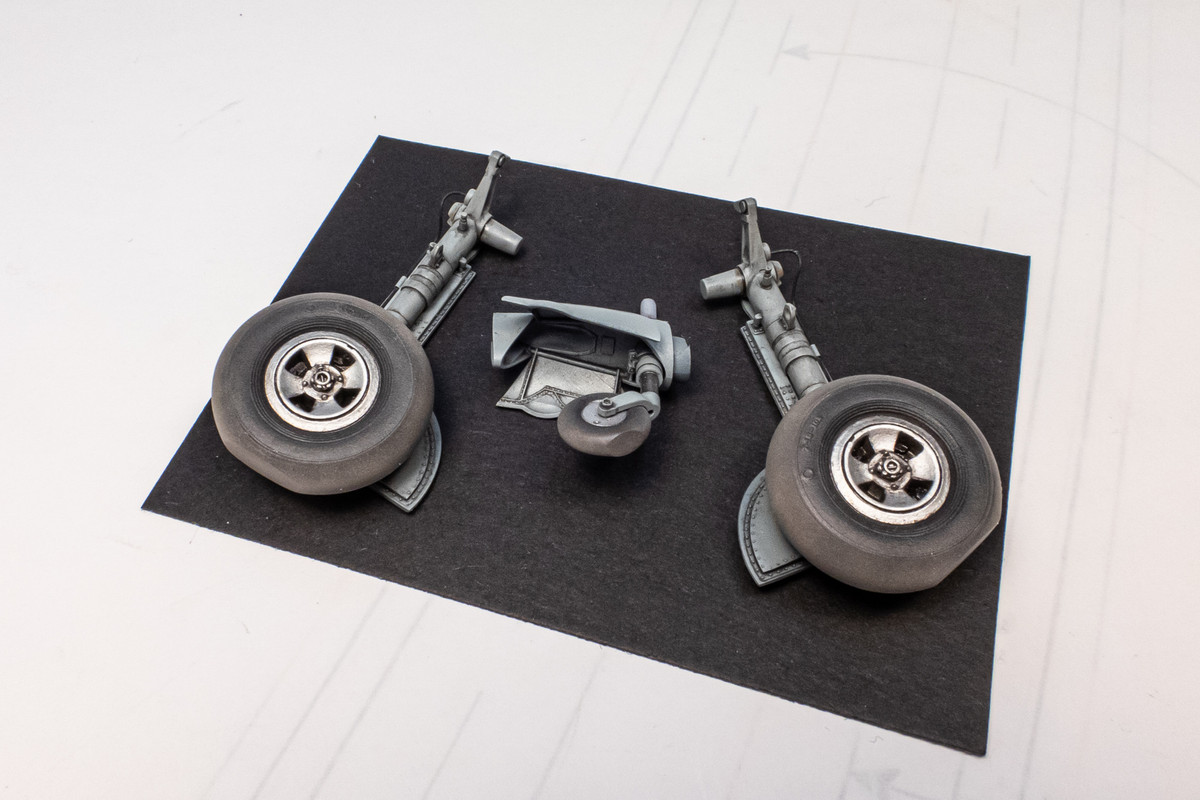
And I still need to figure out which paints I'm going to use for the camo scheme so the outer sides of the landing gear covers have yet to be painted.
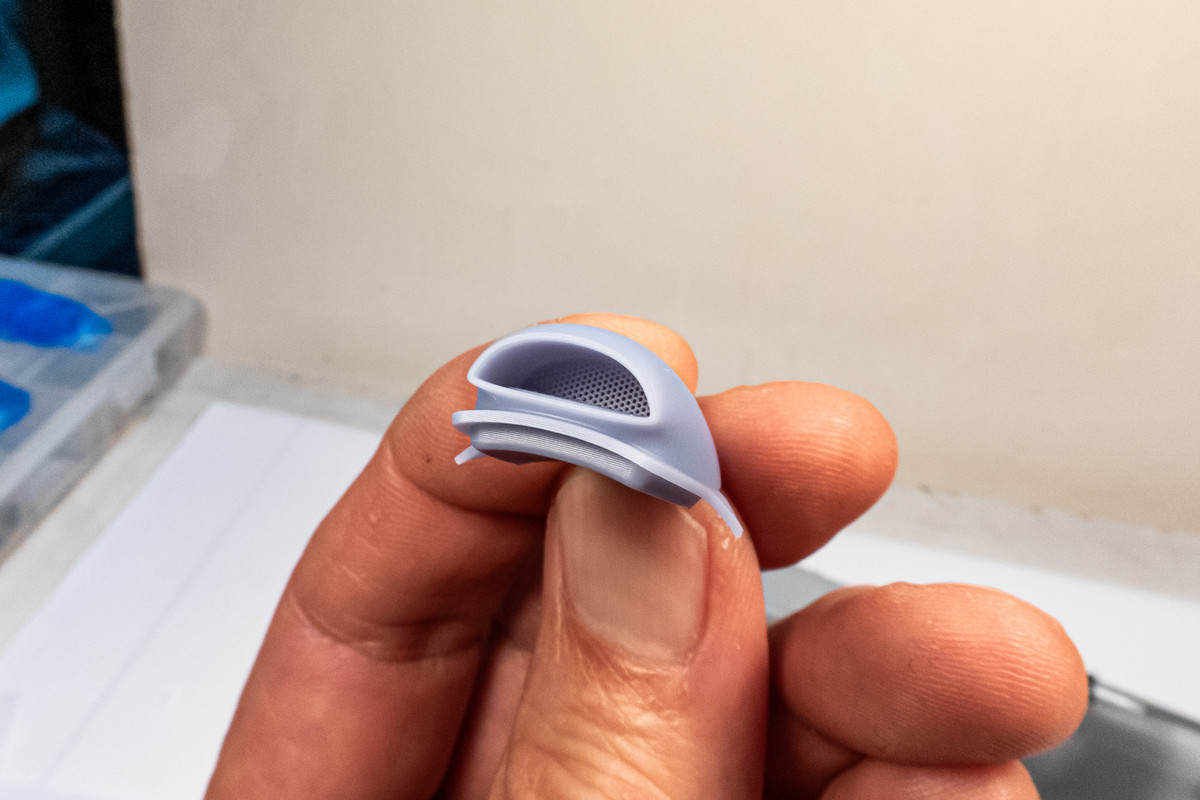
Interesting find... deep inside the LFD chin intake is very fine grate. Just enough room for a paint brush to dry-brush the grate!
Corrective joint work on the horizontal tail planes is ongoing. Some re-shaping is needed so I used Apoxie Sculpt to fill the gap and to build up the area in need.
After that is re-shaped, some Mr Surfacer 1000 is used to refine the feathered edges and smooth everything out. The joint is re-scribed by hand a primer coat is sprayed to check the work. Can't see it really well but panel line needs to be re-shaped on the starboard side but the work is progressing well.
The area underneath the radiator boxes are painted and weathered. View will be limited into this area but it would be impossible to access after the radiator boxes are installed.
The grills are installed into the radiator boxes. The vertical grating is very fine and I was doubtful that it would be able to hold a pastel wash but I was wrong.
The radiator boxes are then snapped into place and then secured by seeping thin CA glue into the joints and then wiping off the excess glue with a cotton bud moistened with CA debonder. The gaps are then filled in with Apoxie Sculpt.
The radiator boxes are then given a coat of primer. The wings are just about done now.
After a little online research, I concluded that the kit-supplied armor plate behind the pilot headrest is not appropriate for an early XIVe.
So I opted for a simple tubular brace after filling in the recess.
The wheels have been painted.
The tail wheel well has been painted but I'm not going to glue it in until all of the seam work on the horizontal stabilizers is done.
And I still need to figure out which paints I'm going to use for the camo scheme so the outer sides of the landing gear covers have yet to be painted.
Interesting find... deep inside the LFD chin intake is very fine grate. Just enough room for a paint brush to dry-brush the grate!
John aka JKim
-----------<><
-----------<><

Re: Tamiya 1/32 Spitfire XIVe Conversion
Very lovely aircraft! Looking great.
To make each build less crappy than the last one. Or, put another way, "Better than the last one, not as good as the next one!"..
-
Gary Brantley

- Elite Member
- Posts: 2771
- Joined: Tue Apr 08, 2014 9:40 pm
- Location: Cameron, Texas
Re: Tamiya 1/32 Spitfire XIVe Conversion
He does some good work, doesn't he, Lyle? 

Re: Tamiya 1/32 Spitfire XIVe Conversion
Not bad at all!
To make each build less crappy than the last one. Or, put another way, "Better than the last one, not as good as the next one!"..
-
BlackSheep214
- Elite Member
- Posts: 13596
- Joined: Sun Apr 06, 2014 8:47 pm
Re: Tamiya 1/32 Spitfire XIVe Conversion
Incredible to see the fine things added - radiator grates, chin cowl screens, etc... Love it!
“Who controls the skies, controls the fate of this Earth”
Author unknown- 352nd Fighter Group, Blue-Nosed Bastards of Bodney
“Send one plane it’s a sortie; send two planes it’s a flight; send four planes it’s a test of airpower. - Richard Kohn
Author unknown- 352nd Fighter Group, Blue-Nosed Bastards of Bodney
“Send one plane it’s a sortie; send two planes it’s a flight; send four planes it’s a test of airpower. - Richard Kohn