Tamiya 1/32 Spitfire XIVe Conversion


Re: Tamiya 1/32 Spitfire XIVe Conversion
Repair work continues...
The complete set of interior mask components are placed within the outline mask after the yellow and white have dried overnight. You can see that I have drawn reference marks on the mask to help line everything up. I've found that custom-printed masks from my Silhouette Portrait cutter are not 100% perfect nor perfectly identical so it helps to orient the interior portions in the original position.
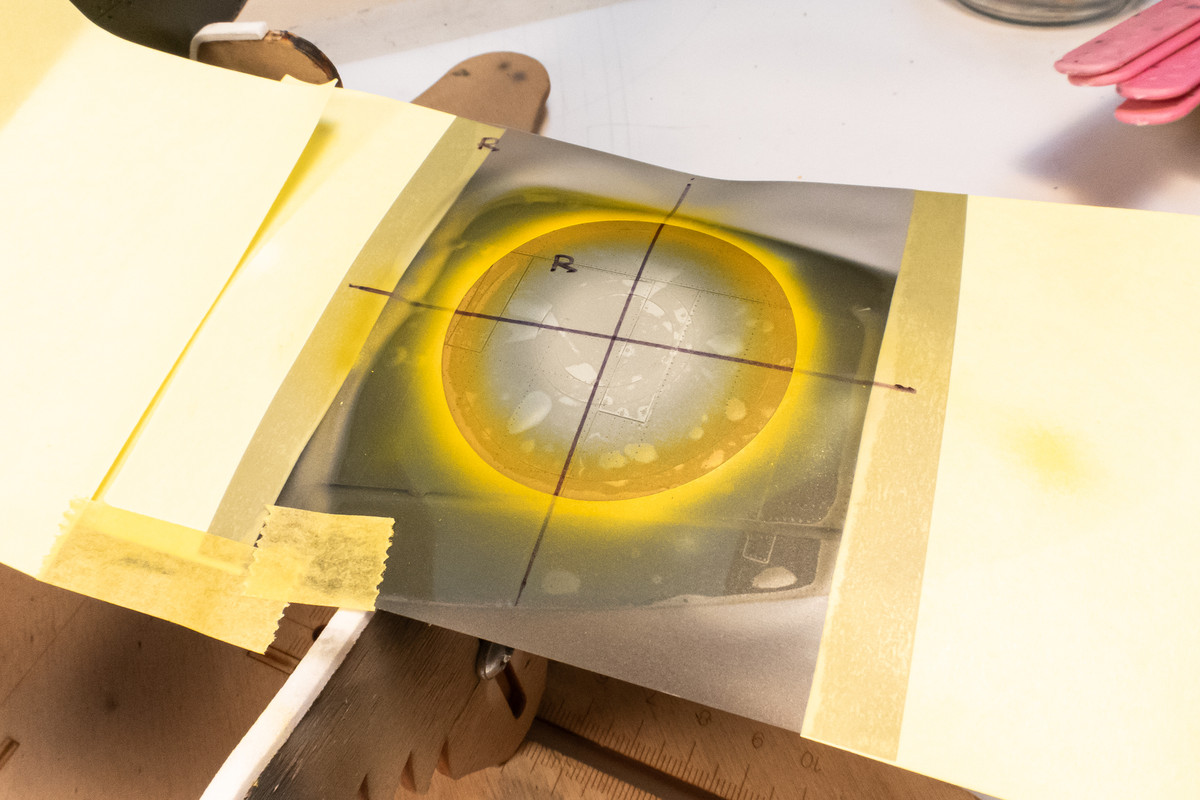
I'm going to paint the blue next so off comes the mask piece covering the blue area leaving the other mask components in place. Leaving the thin piece covering the yellow border is much easier than trying to place it into the mask outline by itself.
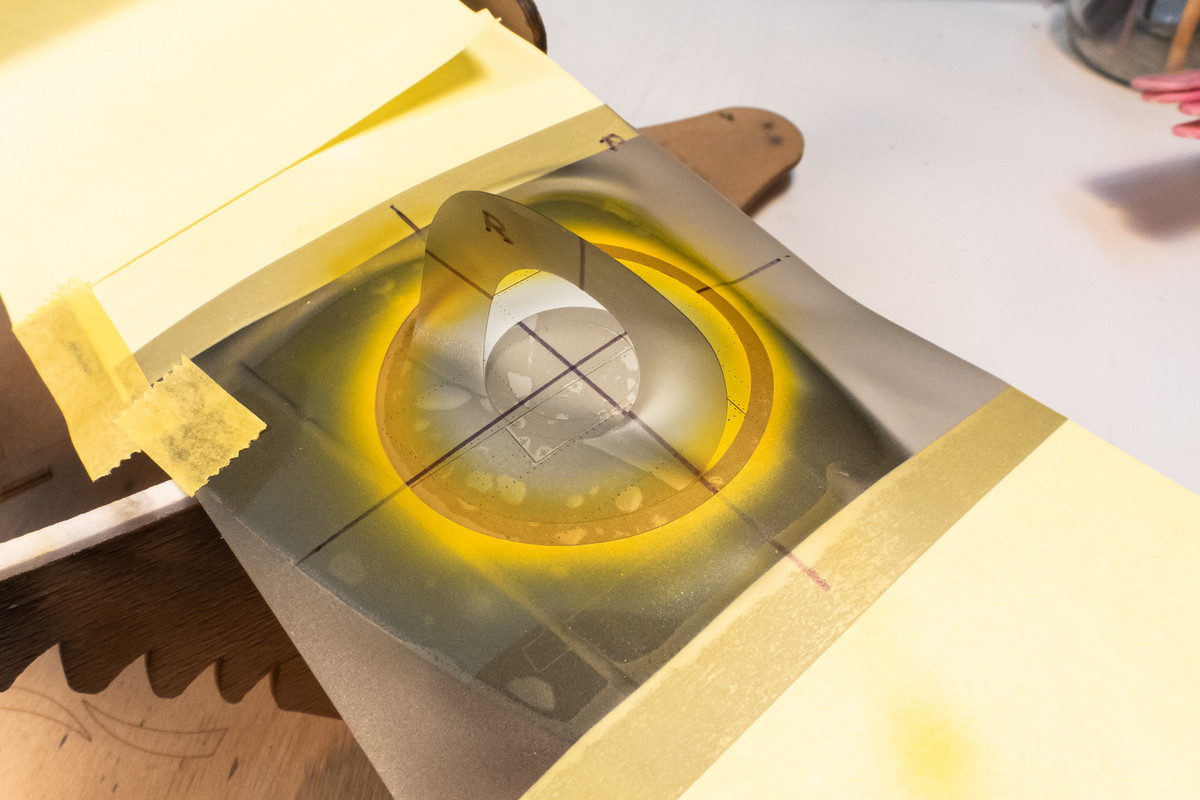
To account for any tiny gaps between yellow border and the outside of the circle, I've placed an overlapping mask to cover this joint. Previously, I've used liquid mask but this is easier and cleaner. The blue can now be sprayed.
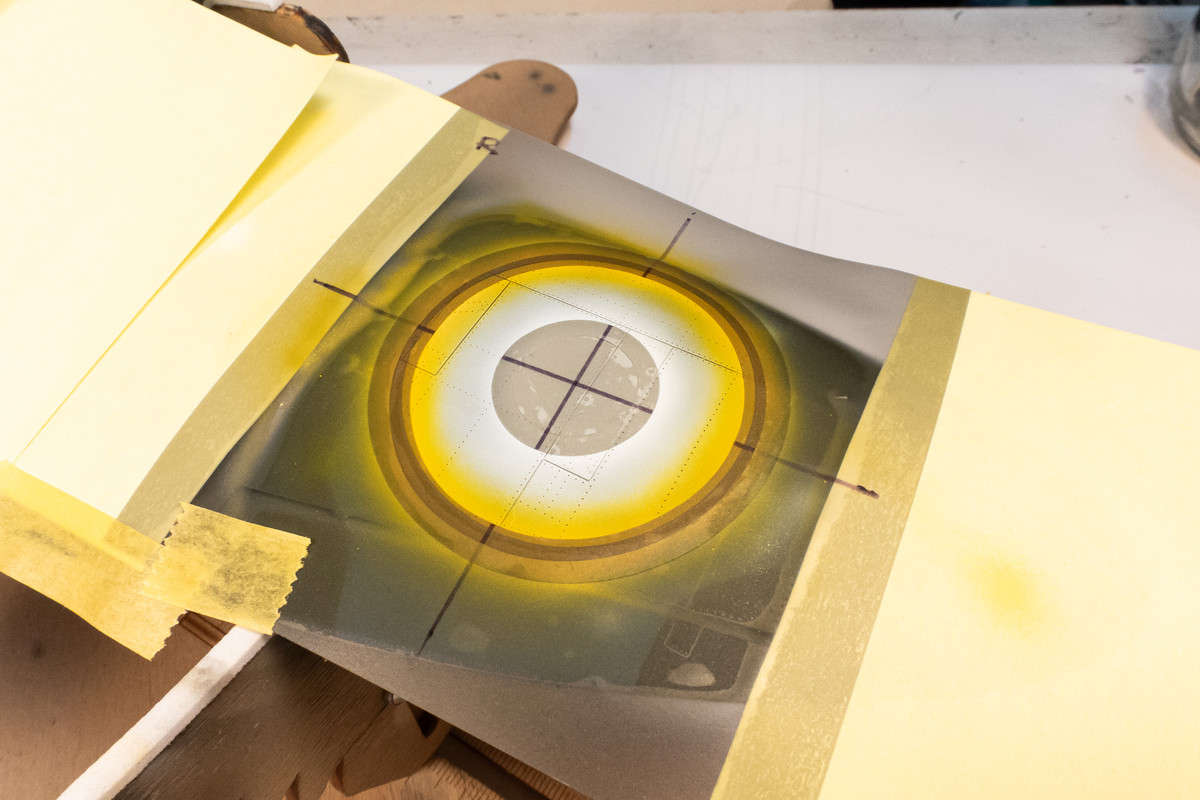
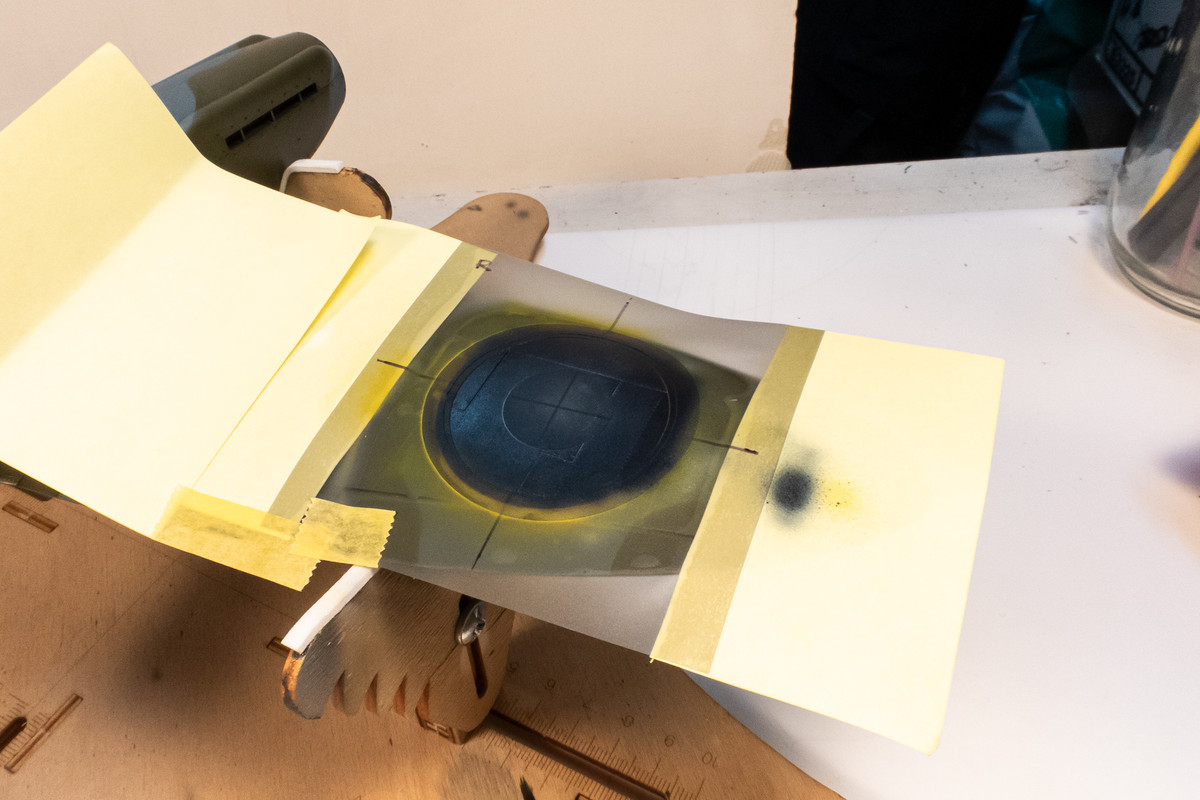
The last color is red for the center circle. Again, an overlapping mask is used to cover the blue area instead of trying to fit the original blue area mask exactly and having to seal the gaps.
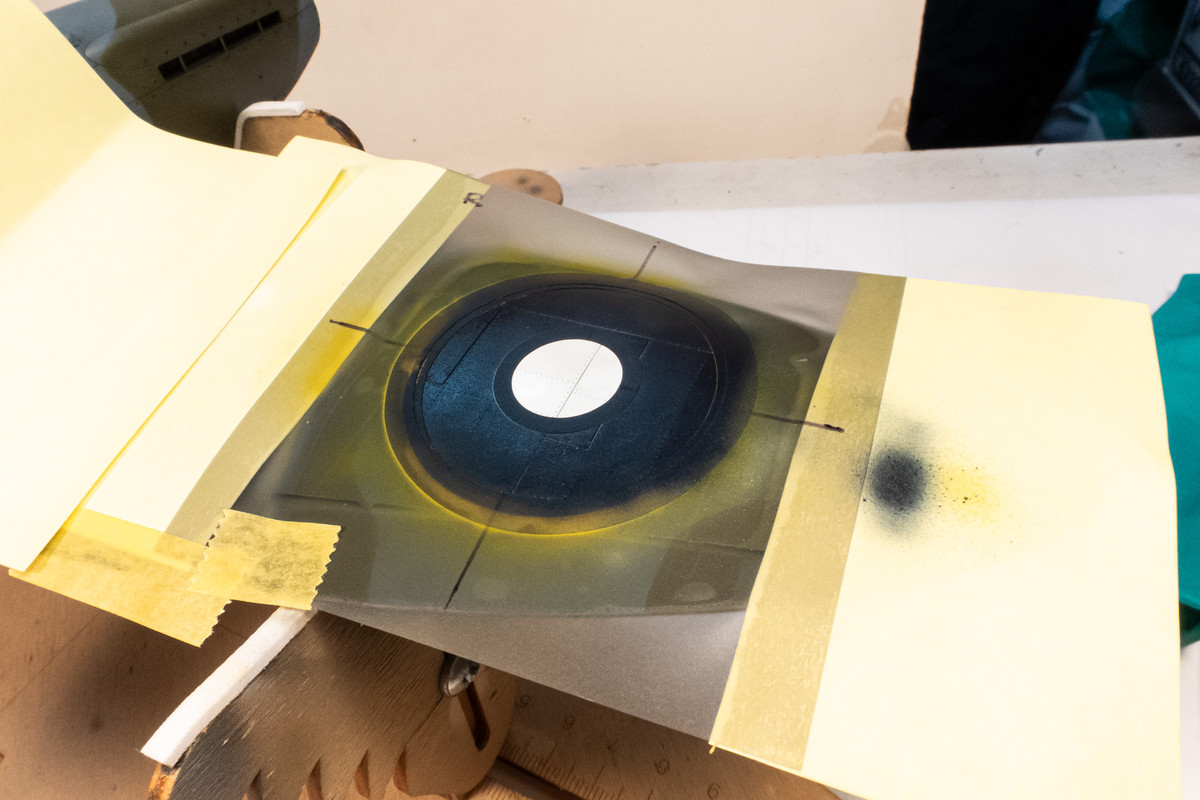
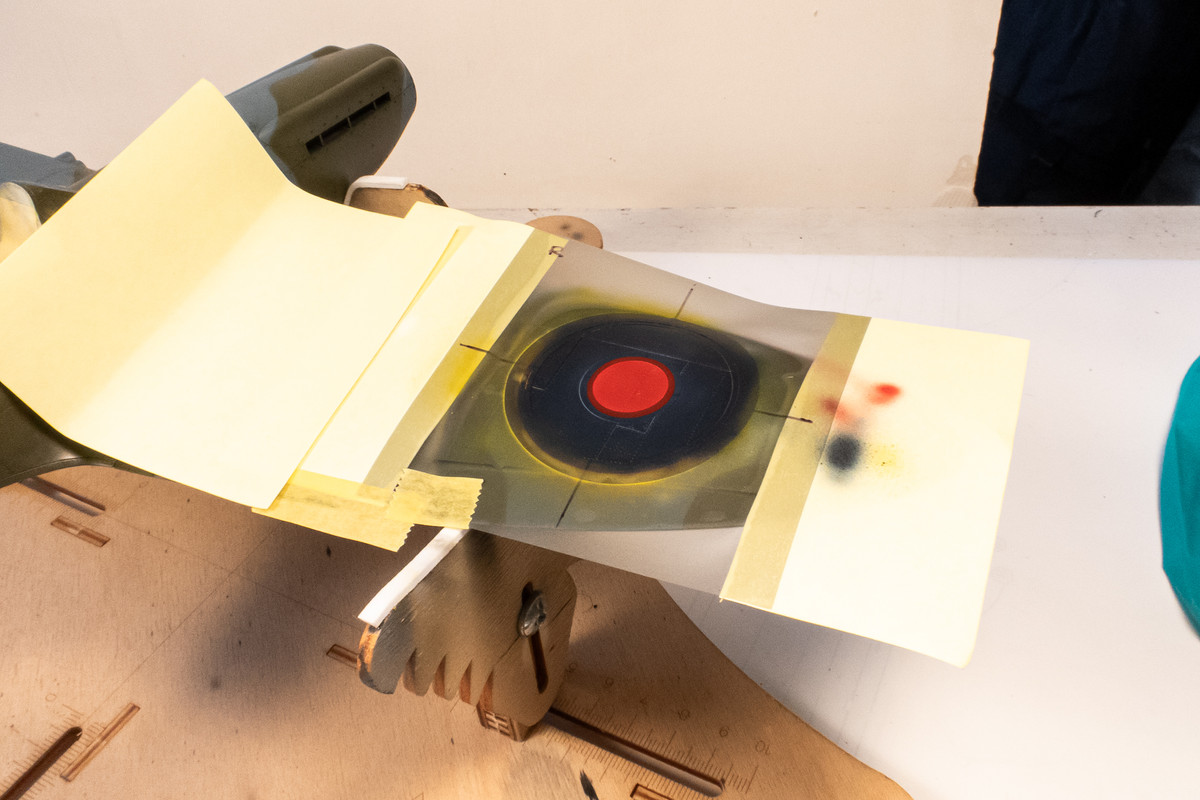
The result? I'm happy to report that the roundel masks were removed without any paint lift.
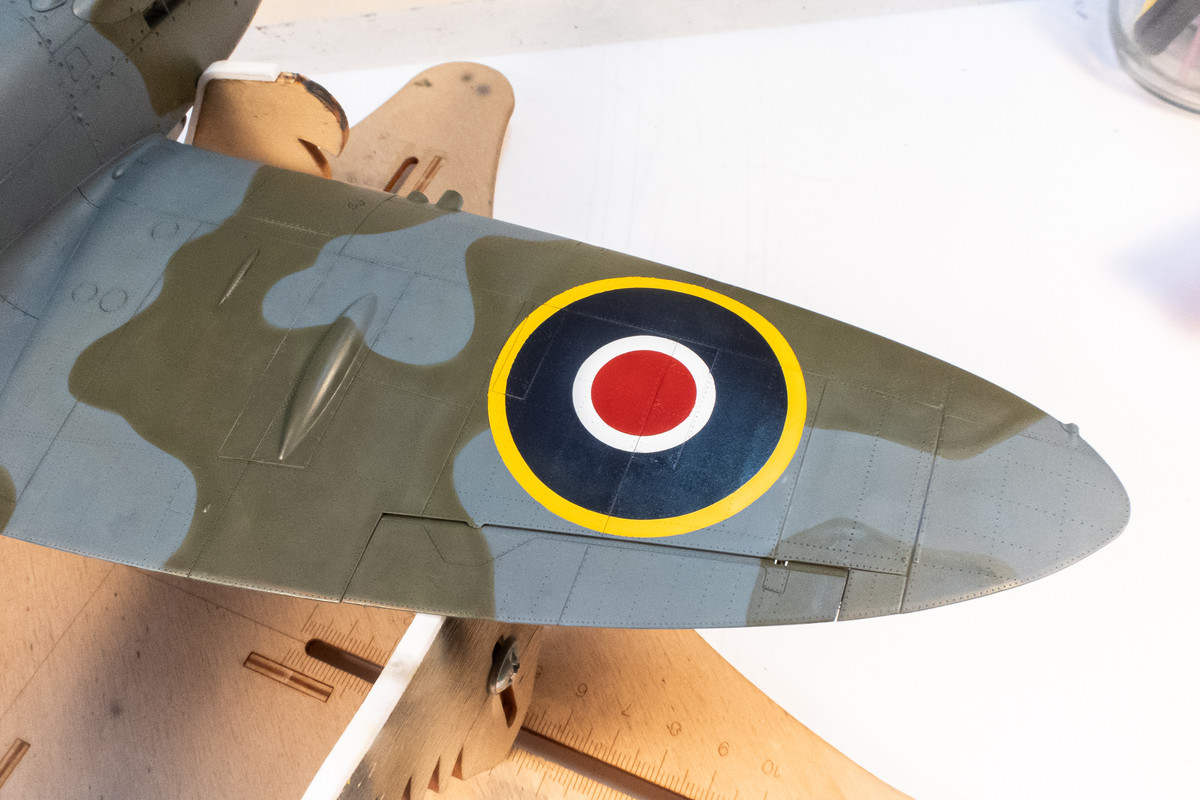
I'll take a pause here and document the mask work on the upper wings.
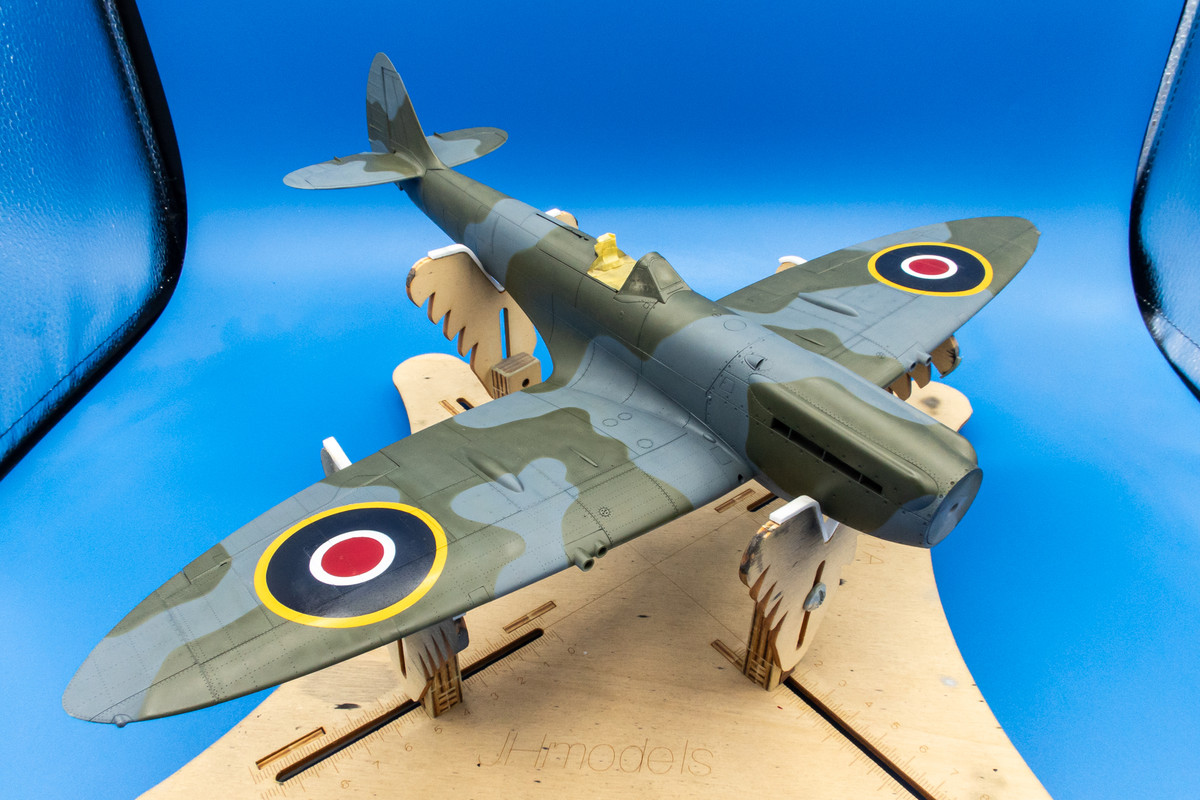
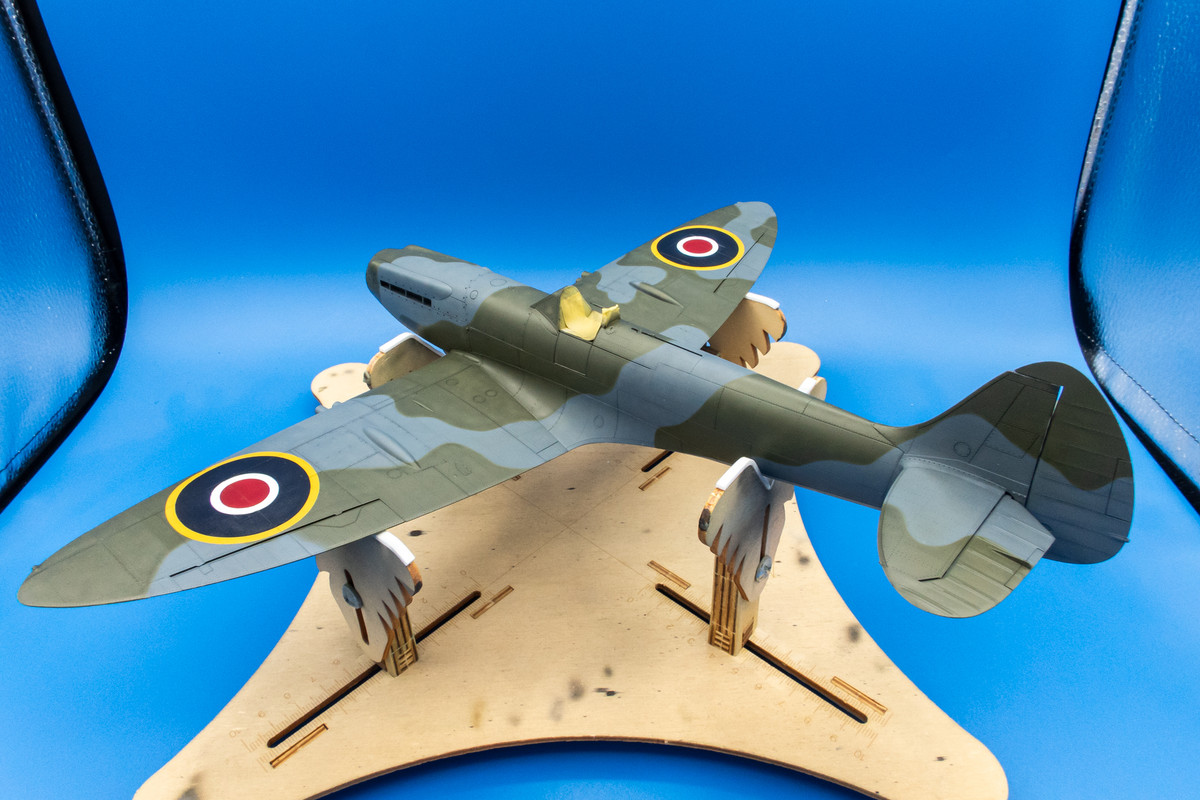
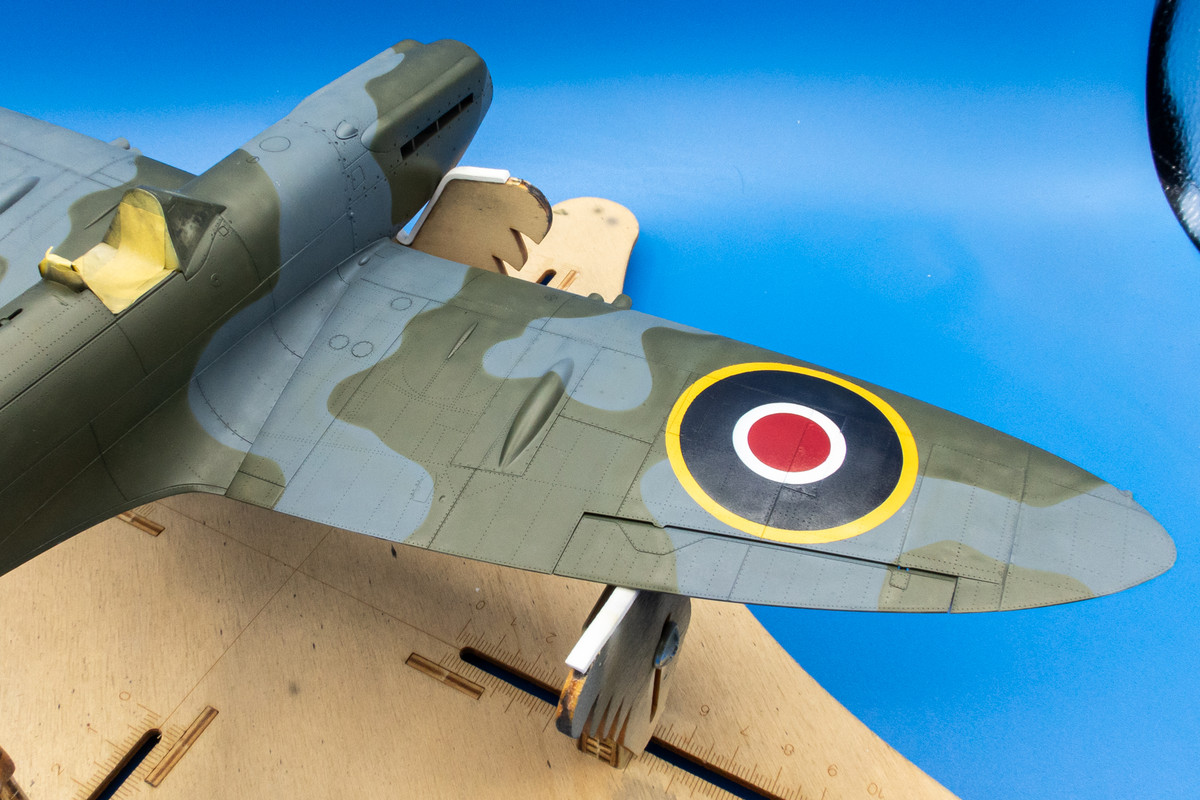
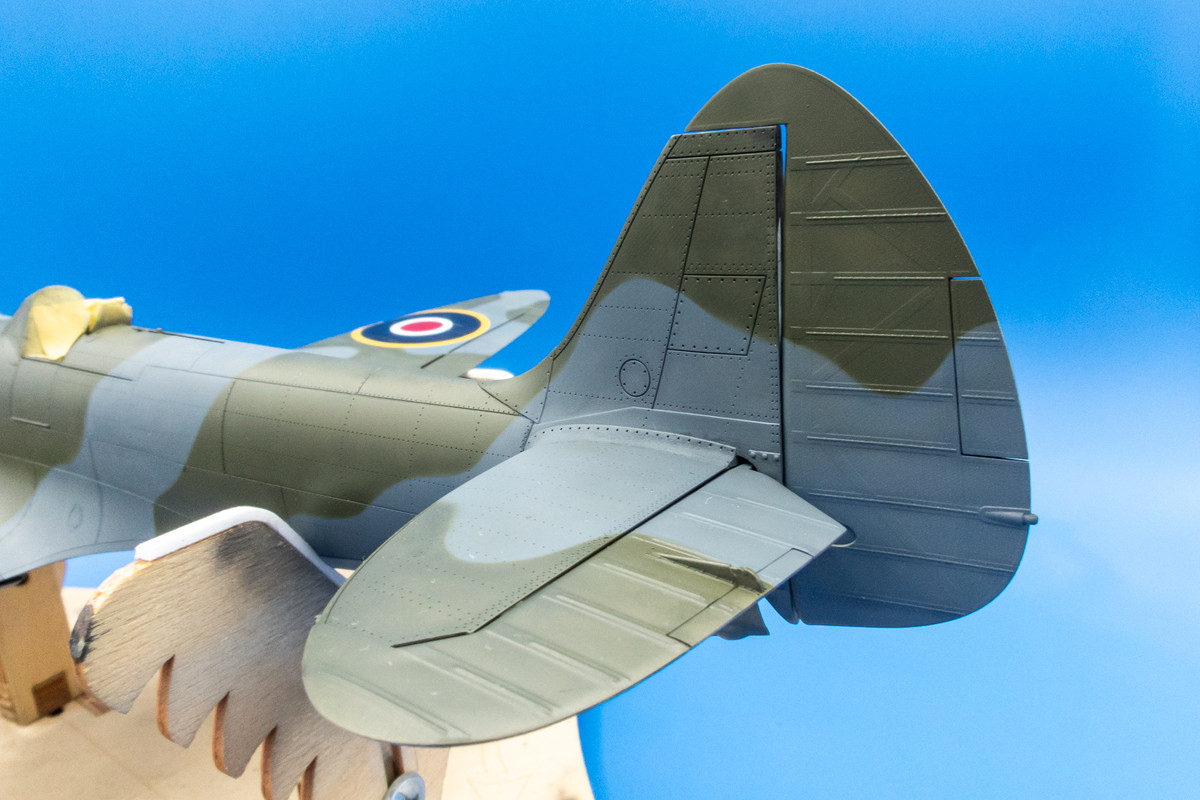
The new LFD rudder has been primed and painted as well but not yet glued into place.
The complete set of interior mask components are placed within the outline mask after the yellow and white have dried overnight. You can see that I have drawn reference marks on the mask to help line everything up. I've found that custom-printed masks from my Silhouette Portrait cutter are not 100% perfect nor perfectly identical so it helps to orient the interior portions in the original position.
I'm going to paint the blue next so off comes the mask piece covering the blue area leaving the other mask components in place. Leaving the thin piece covering the yellow border is much easier than trying to place it into the mask outline by itself.
To account for any tiny gaps between yellow border and the outside of the circle, I've placed an overlapping mask to cover this joint. Previously, I've used liquid mask but this is easier and cleaner. The blue can now be sprayed.
The last color is red for the center circle. Again, an overlapping mask is used to cover the blue area instead of trying to fit the original blue area mask exactly and having to seal the gaps.
The result? I'm happy to report that the roundel masks were removed without any paint lift.
I'll take a pause here and document the mask work on the upper wings.
The new LFD rudder has been primed and painted as well but not yet glued into place.
John aka JKim
-----------<><

-----------<><
Re: Tamiya 1/32 Spitfire XIVe Conversion
I wish I had good news but more paint lift issues have arisen. A few days ago, I did a test without issues but I was being careful (=gentle). So I elected to move on and add the painted out sky band around the rear fuselage using slightly different shades of Dark Green and Ocean Gray. During that process a big chunk of the Medium Sea Gray came off the bottom and I knew I had to do something drastic.
So... using masking tape again, I attacked the fuselage. Aggressively. The masked markings are restricted to the fuselage between the tail and cockpit so that is where I concentrated my efforts. I really went at it, ripping off the tape with gusto. Once a little chunk of paint came up, I attacked the spot over and over.
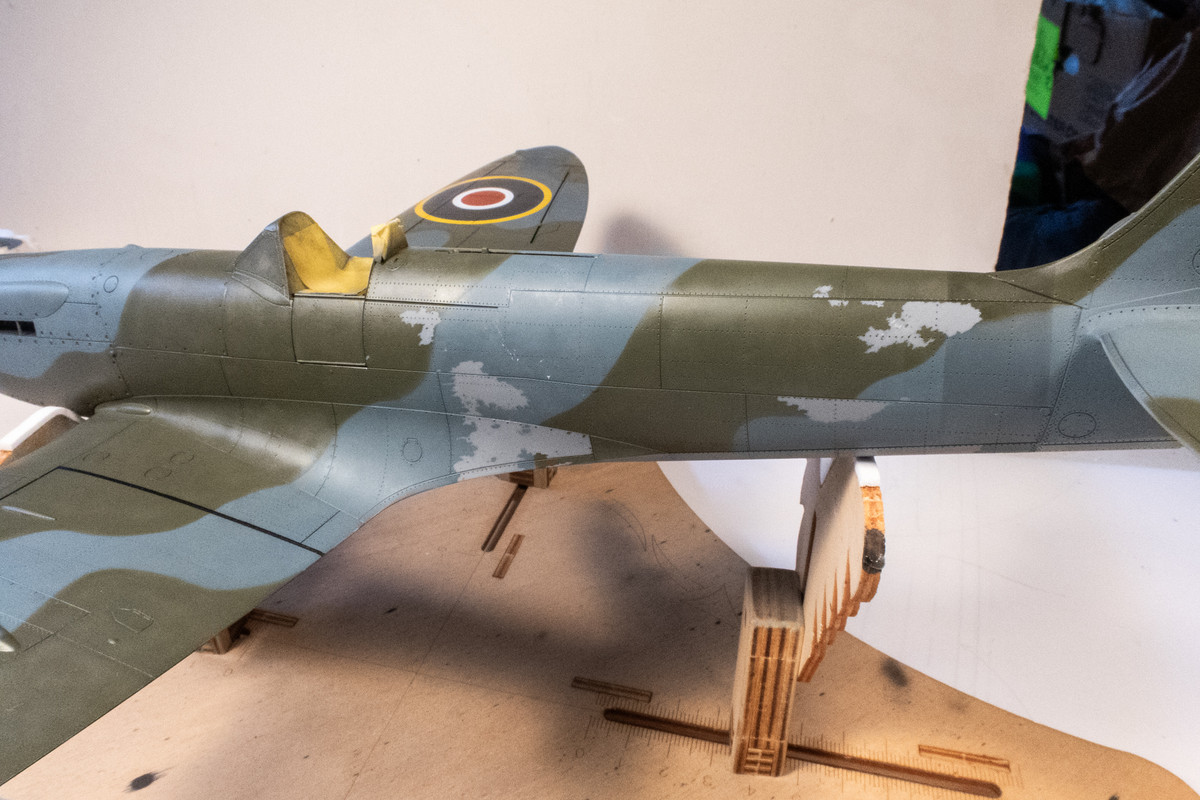
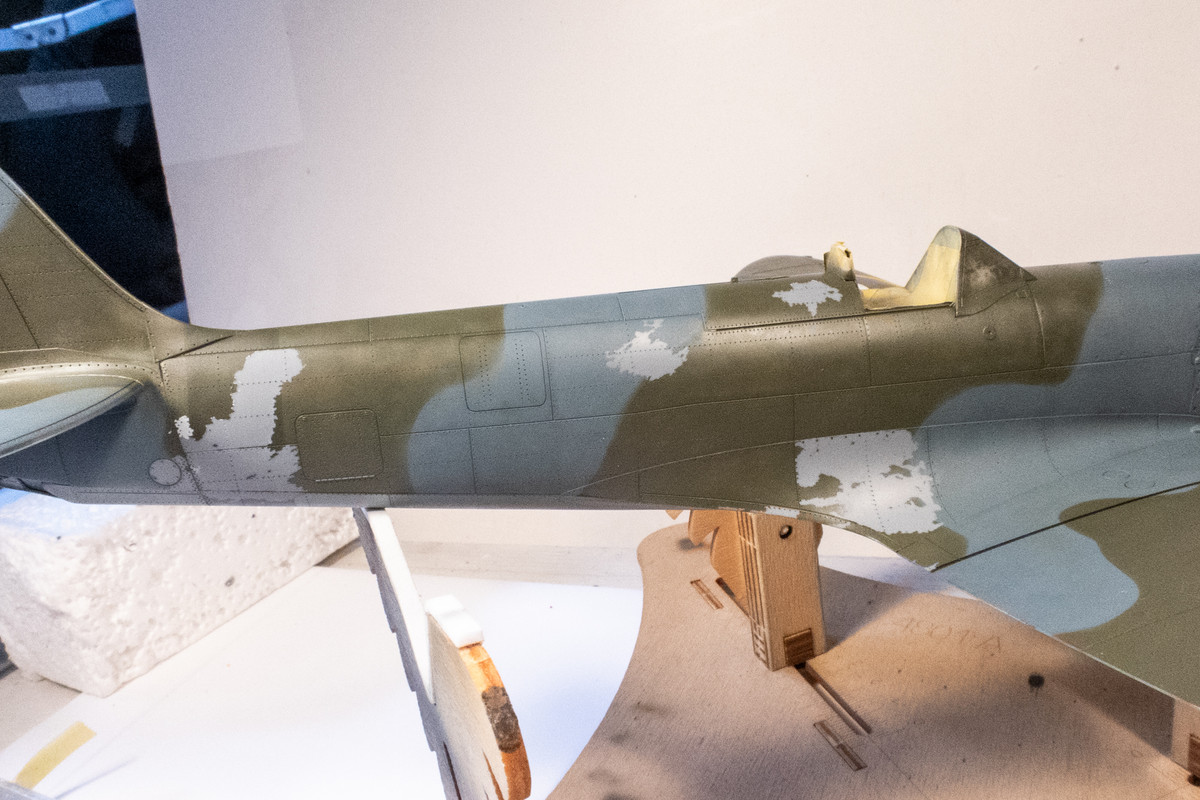
Once I was satisfied that the remaining paint was stable, I used Micromesh to try and feather the edges down. I find this almost impossible to do with paint only but luckily I have a primer coat under the paint and that is helping.
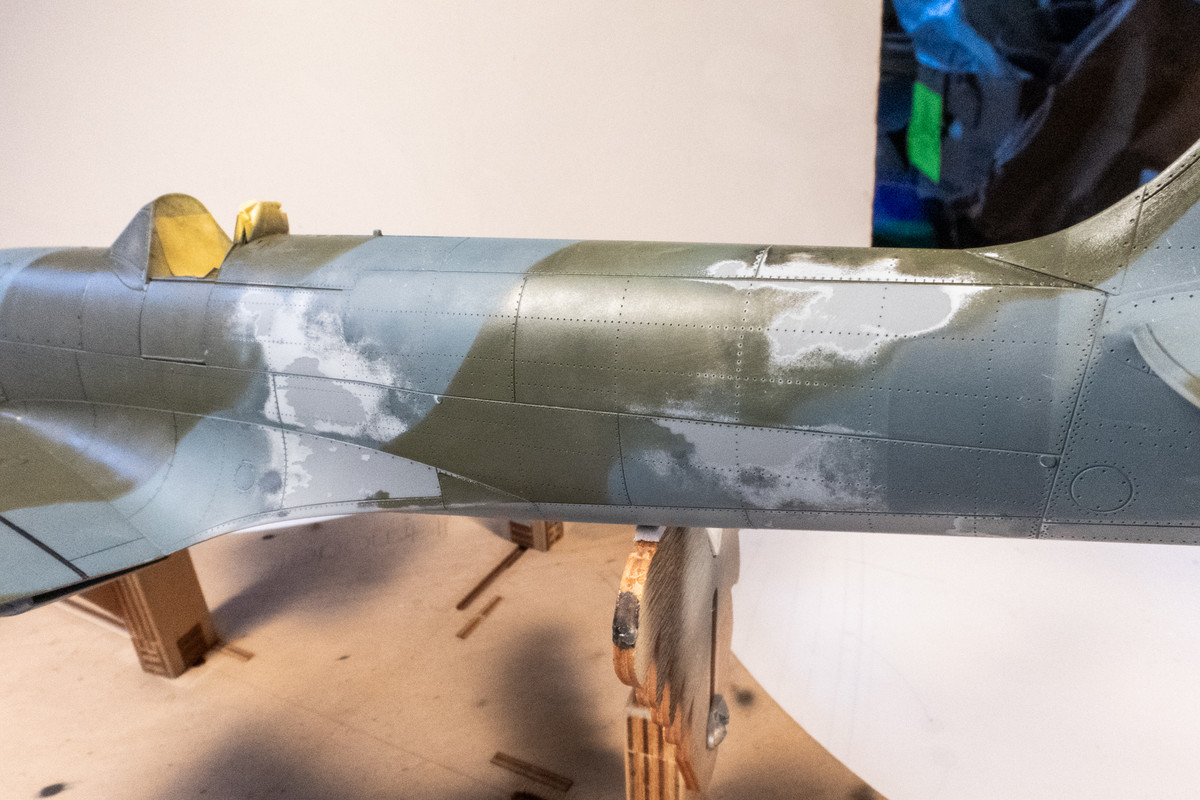

My main concerns with this type of repair are (a) losing surface detail, especially the rivets, (b) visible edges from the old paint layers (c) matching the paint color-wise. (c) doesn't have to be exact but it cannot be distracting or look like a modeling mistake.
Once the offending areas are smoothed down as much as possible, the re-painting process begins. I will start with the bottom Medium Sea Gray.
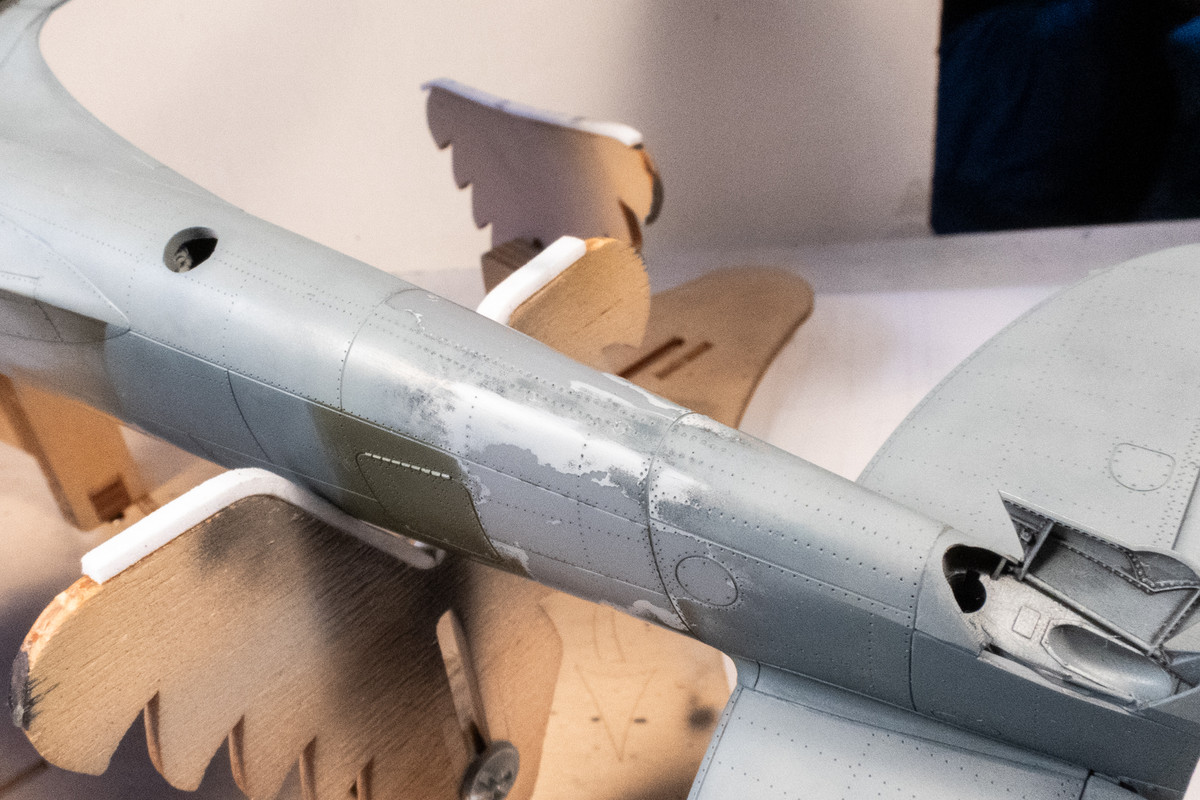
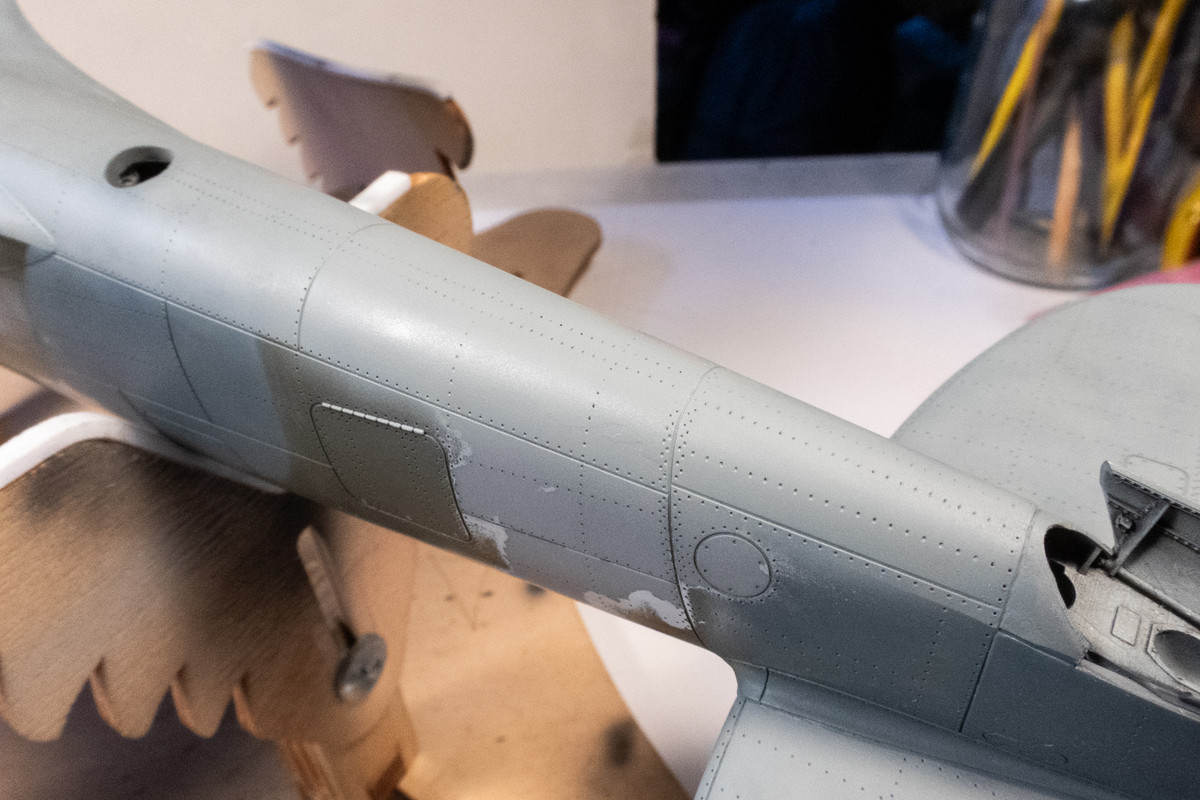
I think I'm satisfied with (a) and (c) but there are slight edge artifacts that I may need to address. I'll take a closer look after the paint dries.
So... using masking tape again, I attacked the fuselage. Aggressively. The masked markings are restricted to the fuselage between the tail and cockpit so that is where I concentrated my efforts. I really went at it, ripping off the tape with gusto. Once a little chunk of paint came up, I attacked the spot over and over.
Once I was satisfied that the remaining paint was stable, I used Micromesh to try and feather the edges down. I find this almost impossible to do with paint only but luckily I have a primer coat under the paint and that is helping.
My main concerns with this type of repair are (a) losing surface detail, especially the rivets, (b) visible edges from the old paint layers (c) matching the paint color-wise. (c) doesn't have to be exact but it cannot be distracting or look like a modeling mistake.
Once the offending areas are smoothed down as much as possible, the re-painting process begins. I will start with the bottom Medium Sea Gray.
I think I'm satisfied with (a) and (c) but there are slight edge artifacts that I may need to address. I'll take a closer look after the paint dries.
John aka JKim
-----------<><
-----------<><
Re: Tamiya 1/32 Spitfire XIVe Conversion
Your combination of patience and skill is unmatched!
Thanks,
John
John
Re: Tamiya 1/32 Spitfire XIVe Conversion
Thanks John!
It's a bummer but there is no one to blame but myself. This issue is the result of what I've done or not done and I need to figure out how to prevent this in the future. I think my practice of using Windex to wipe off my model prior to painting is at the root of the problem and is compounded by the thin paint mixes that I prefer, which are weaker than thicker mixes. Fixing this is not overly difficult but it is taxing on the patience as each paint layer needs adequate time to cure before masking and I'm chomping at the bit to get to the next stage instead of repeating the past stage over and over again.
Even though it was barely noticeable, I used Micromesh to feather the artifact edges and re-sprayed the Medium Sea Gray on the bottom. Basically a confirmation to know that I can physically get rid of these edges if I take the time to do so.
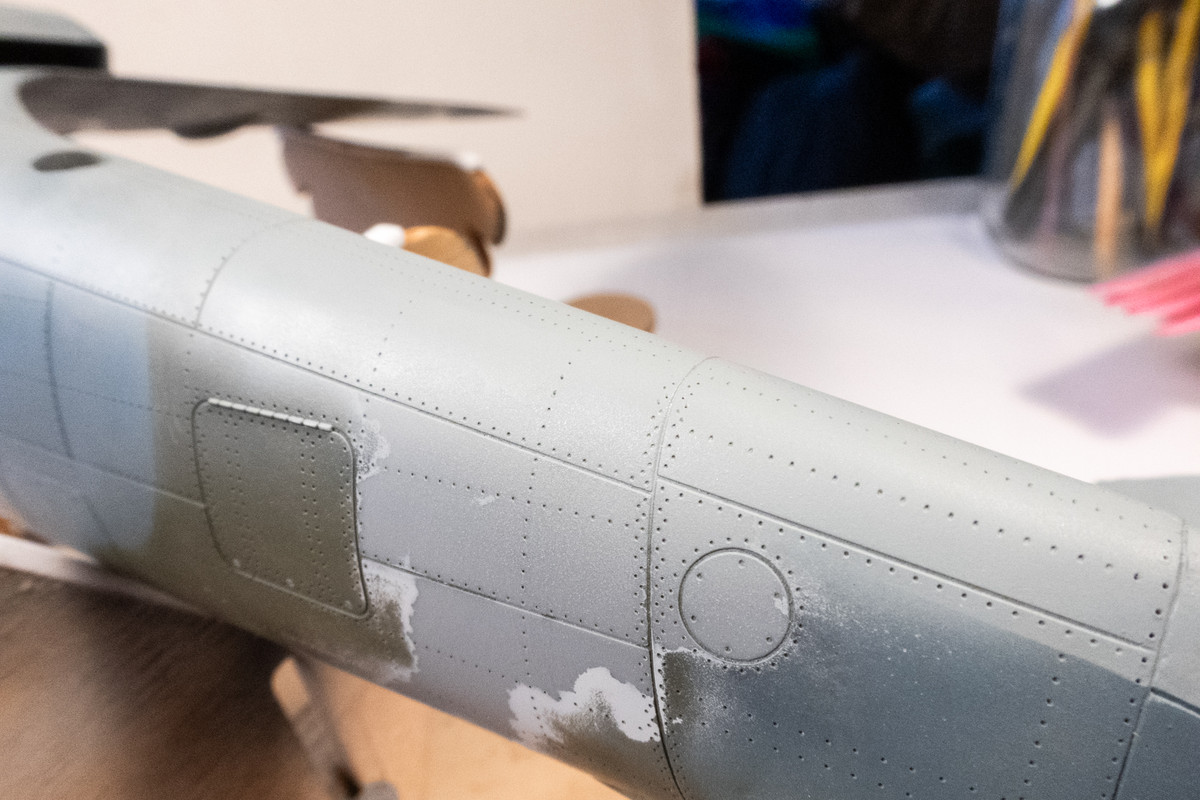
On the big areas not adjacent to the bottom demarcation line, I have started the repainting process by putting down a layer of Ocean Gray. I will inspect these areas once they are dry to make sure the rivet holes and panel lines are not plugged.
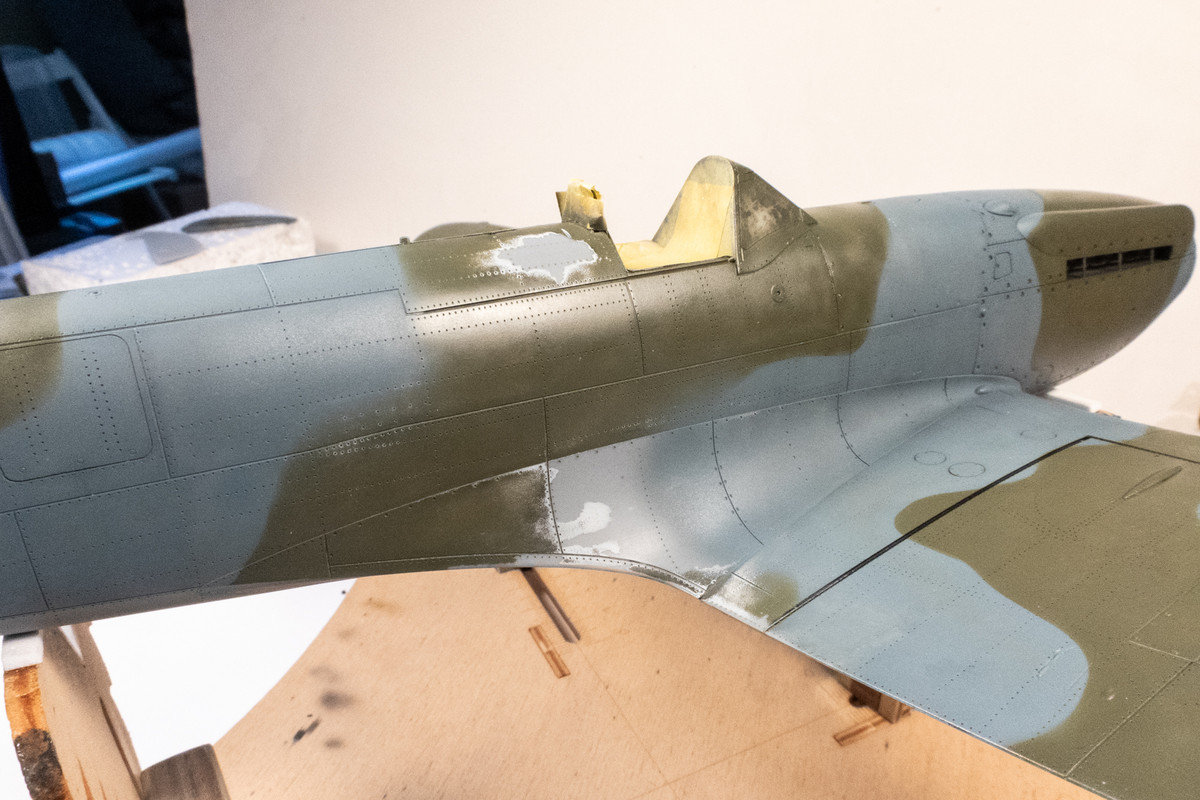
I have not bothered to re-do the pre-shade effects. This area of the fuselage will be covered with big markings (roundel + codes + serial number) and typically the high contrast of markings distract and visually crush these effects anyway.
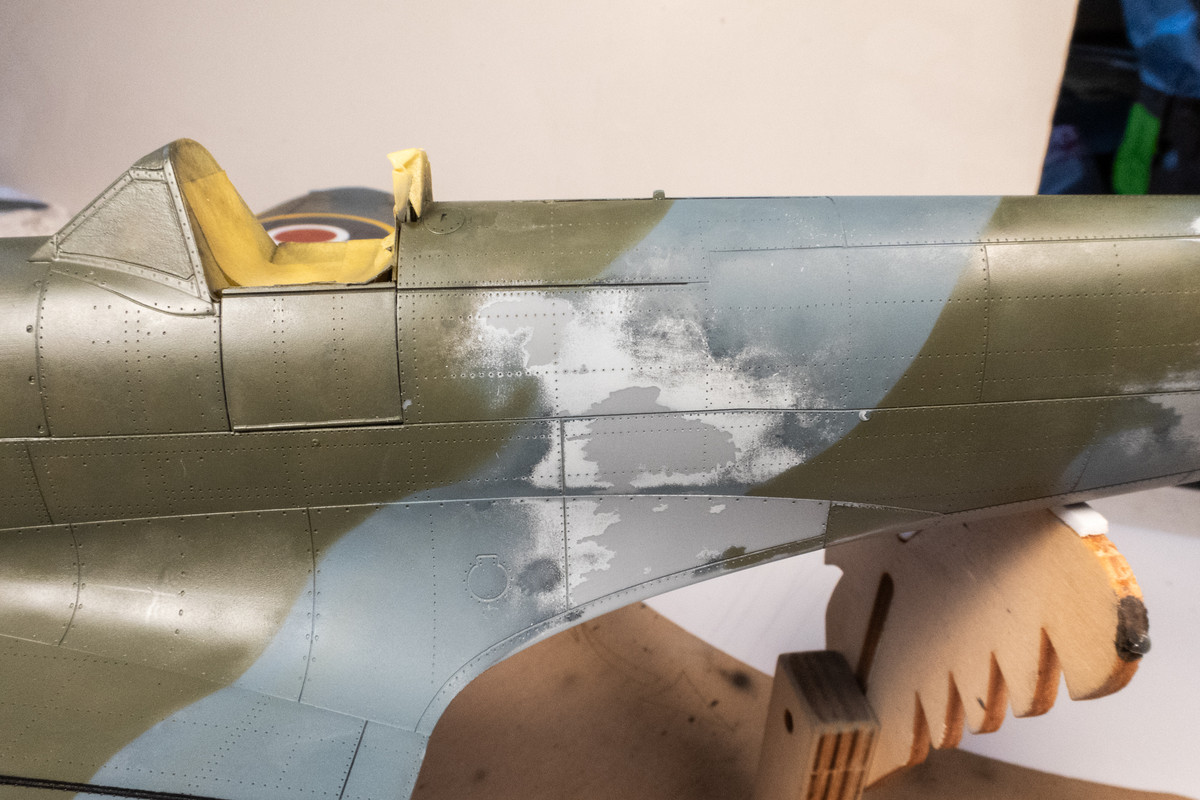

It's a bummer but there is no one to blame but myself. This issue is the result of what I've done or not done and I need to figure out how to prevent this in the future. I think my practice of using Windex to wipe off my model prior to painting is at the root of the problem and is compounded by the thin paint mixes that I prefer, which are weaker than thicker mixes. Fixing this is not overly difficult but it is taxing on the patience as each paint layer needs adequate time to cure before masking and I'm chomping at the bit to get to the next stage instead of repeating the past stage over and over again.
Even though it was barely noticeable, I used Micromesh to feather the artifact edges and re-sprayed the Medium Sea Gray on the bottom. Basically a confirmation to know that I can physically get rid of these edges if I take the time to do so.
On the big areas not adjacent to the bottom demarcation line, I have started the repainting process by putting down a layer of Ocean Gray. I will inspect these areas once they are dry to make sure the rivet holes and panel lines are not plugged.
I have not bothered to re-do the pre-shade effects. This area of the fuselage will be covered with big markings (roundel + codes + serial number) and typically the high contrast of markings distract and visually crush these effects anyway.
John aka JKim
-----------<><
-----------<><
Re: Tamiya 1/32 Spitfire XIVe Conversion
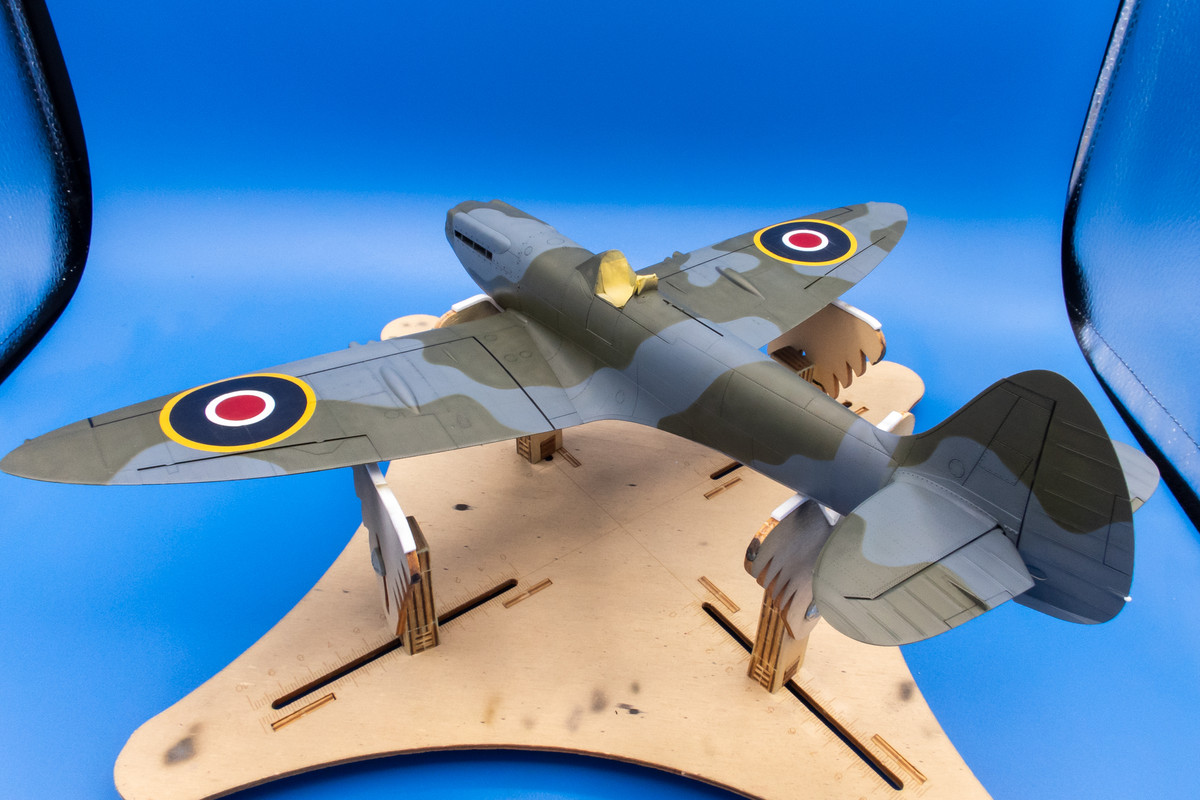
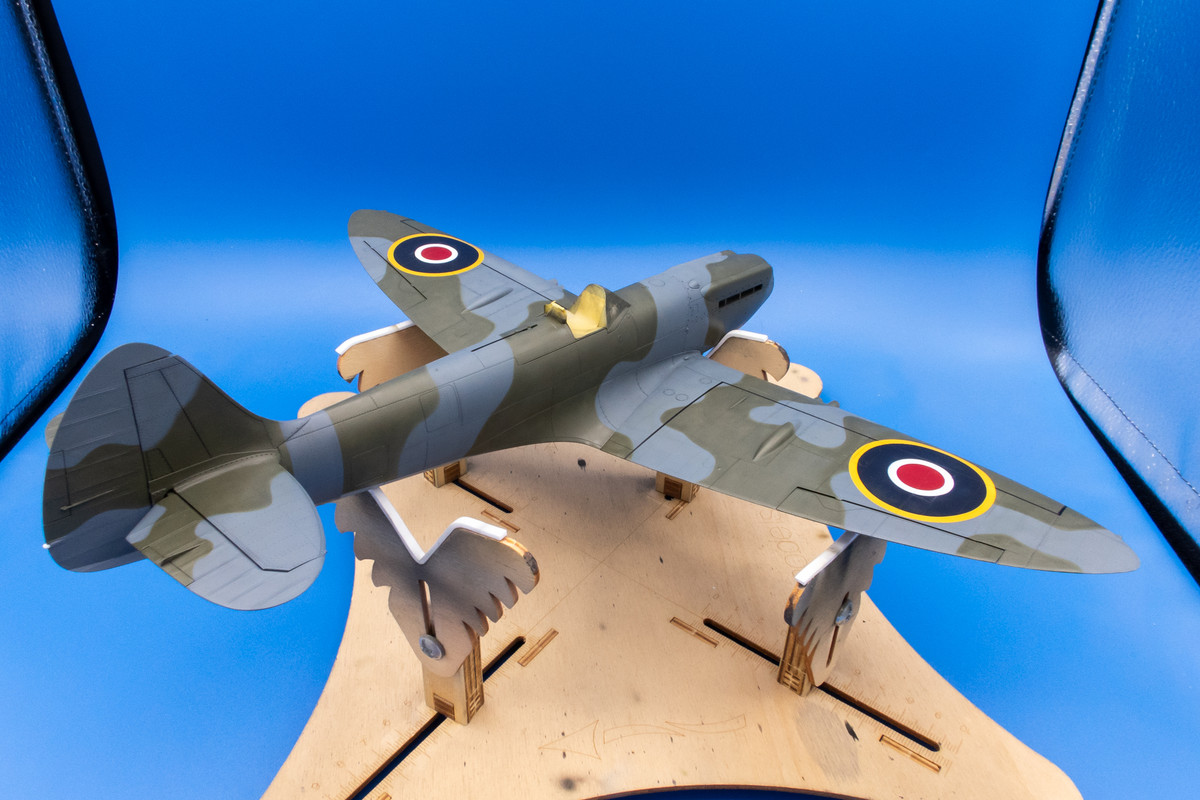
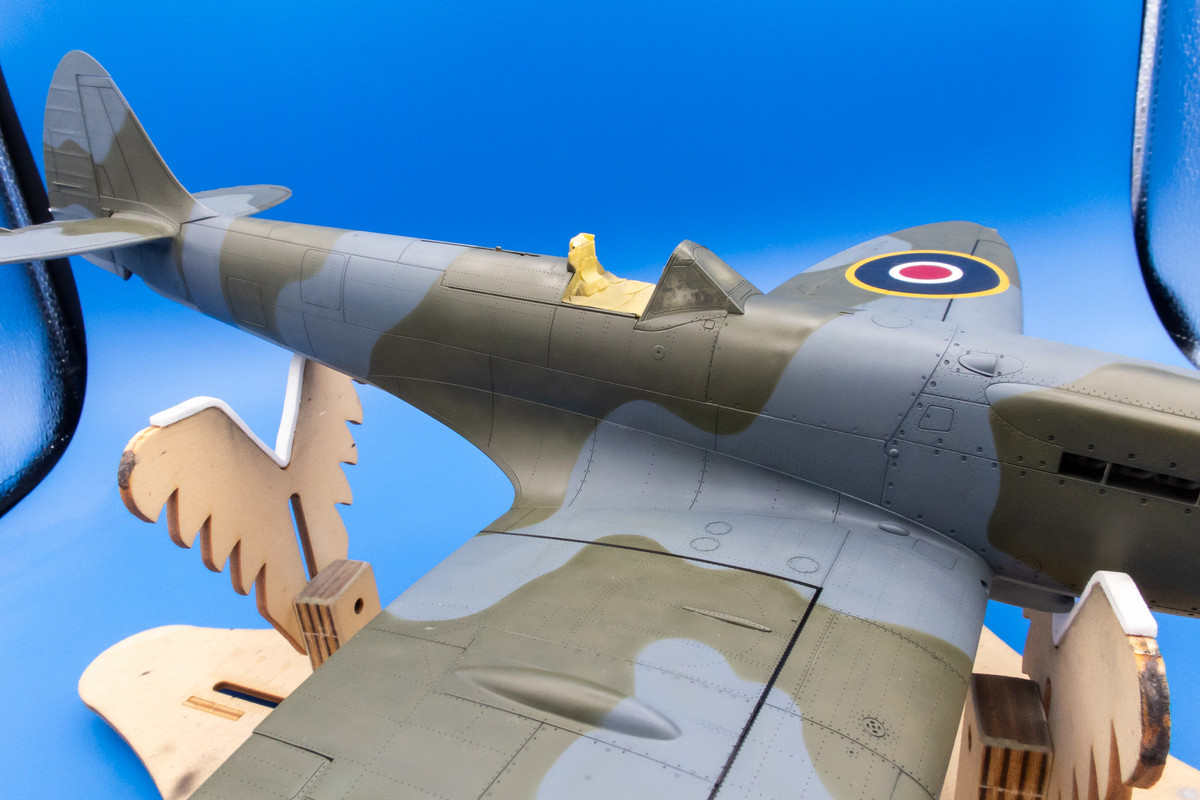
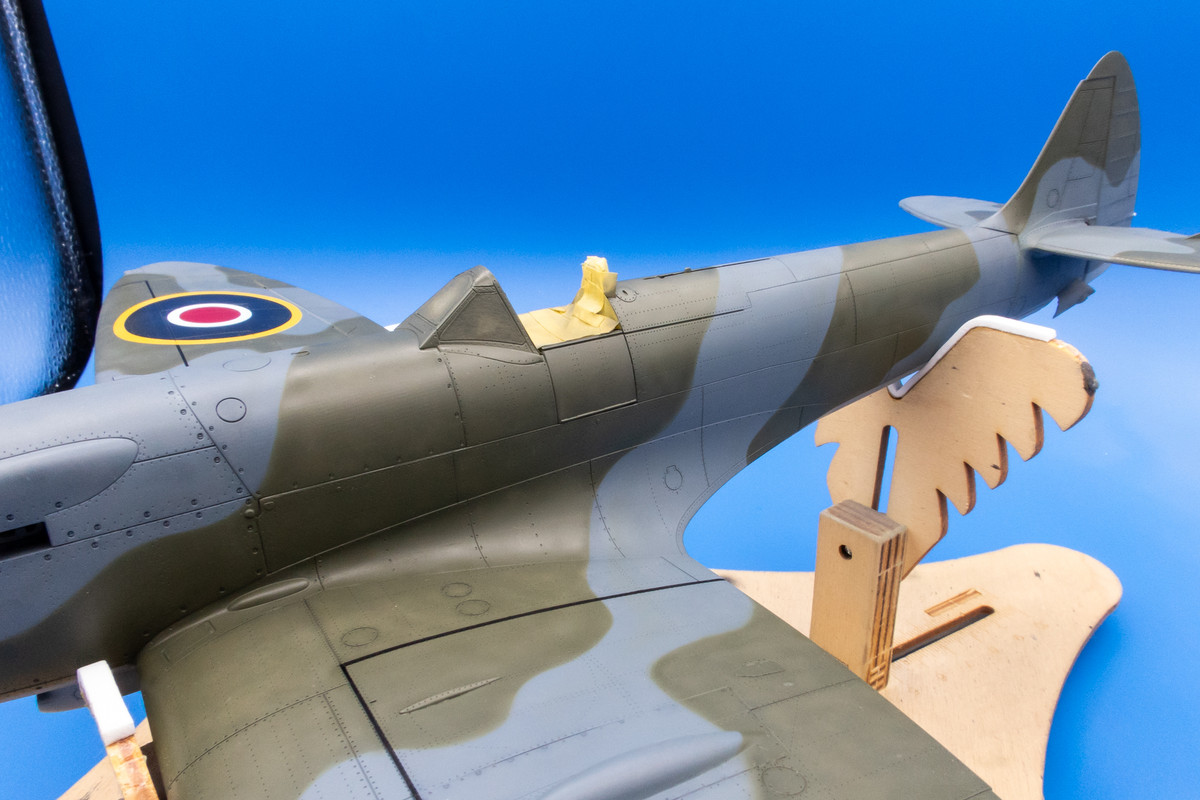
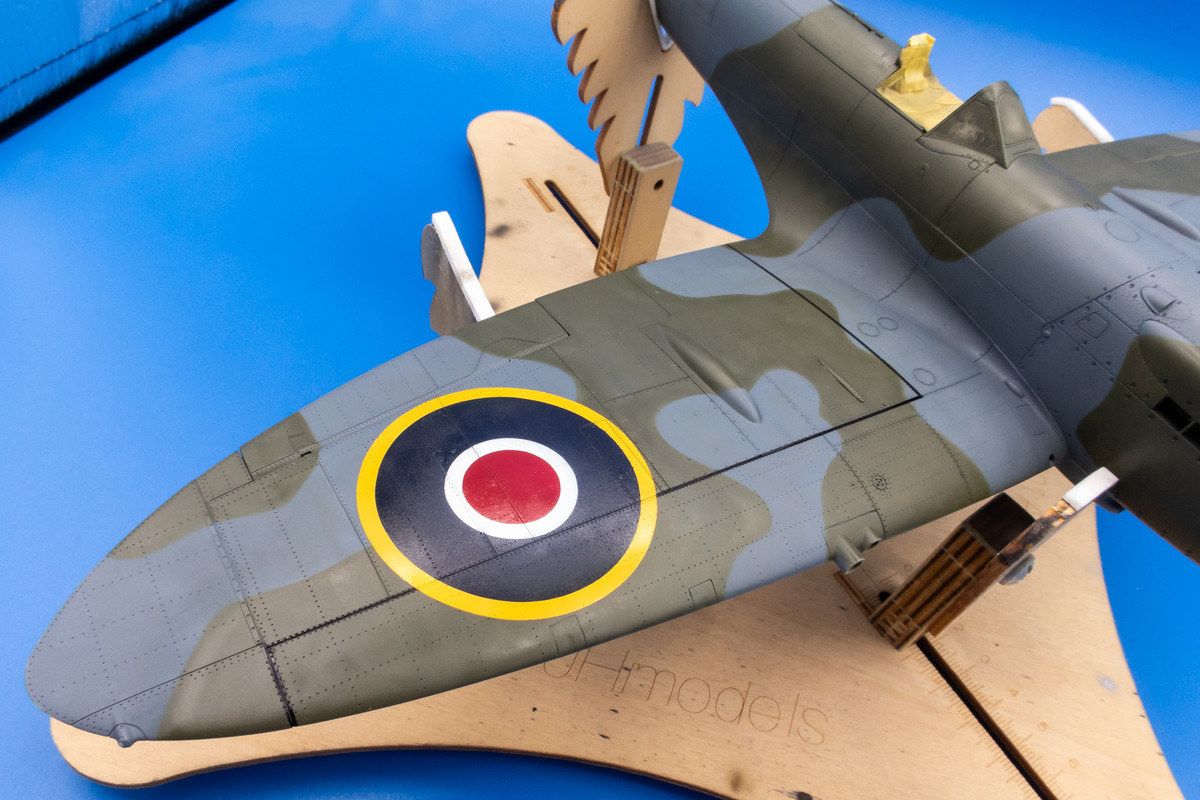
Trying to move this build forward. The Dark Green has been restored on the fuselage. I've also added the wing walkway lines and painted out the Sky fuselage band using a darker Ocean Gray.
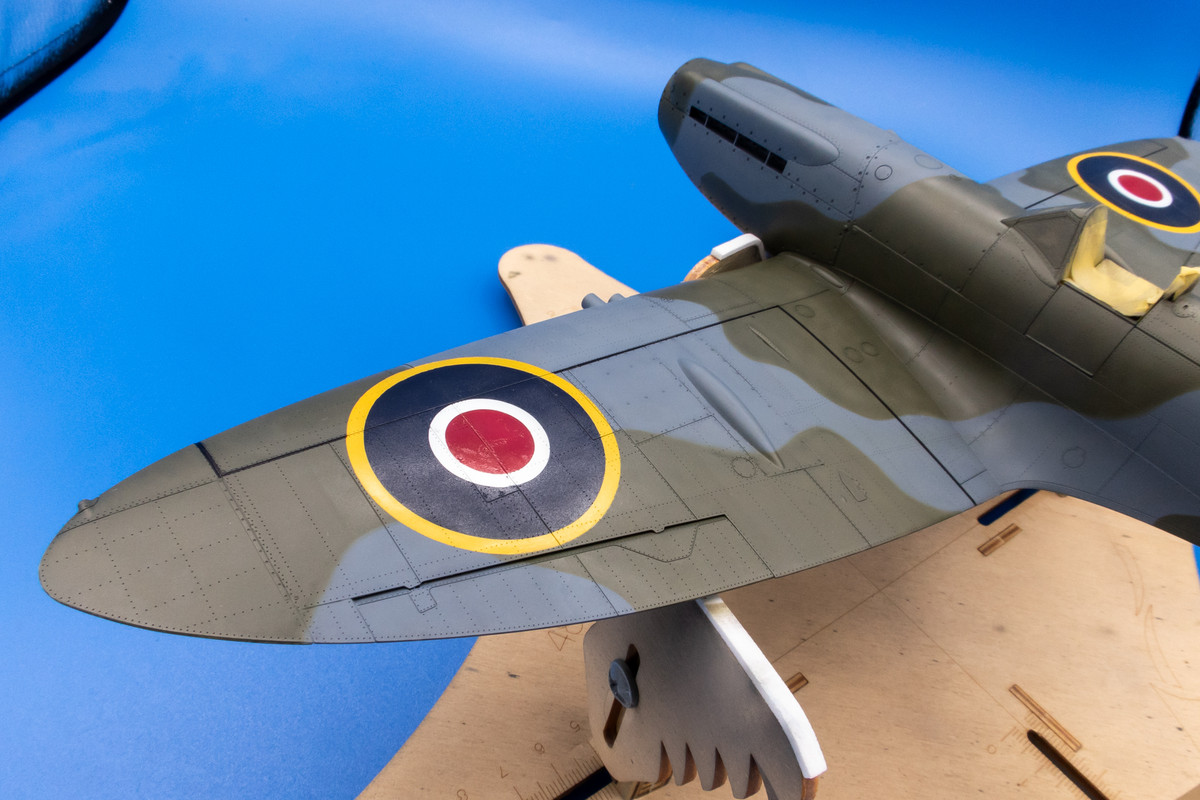
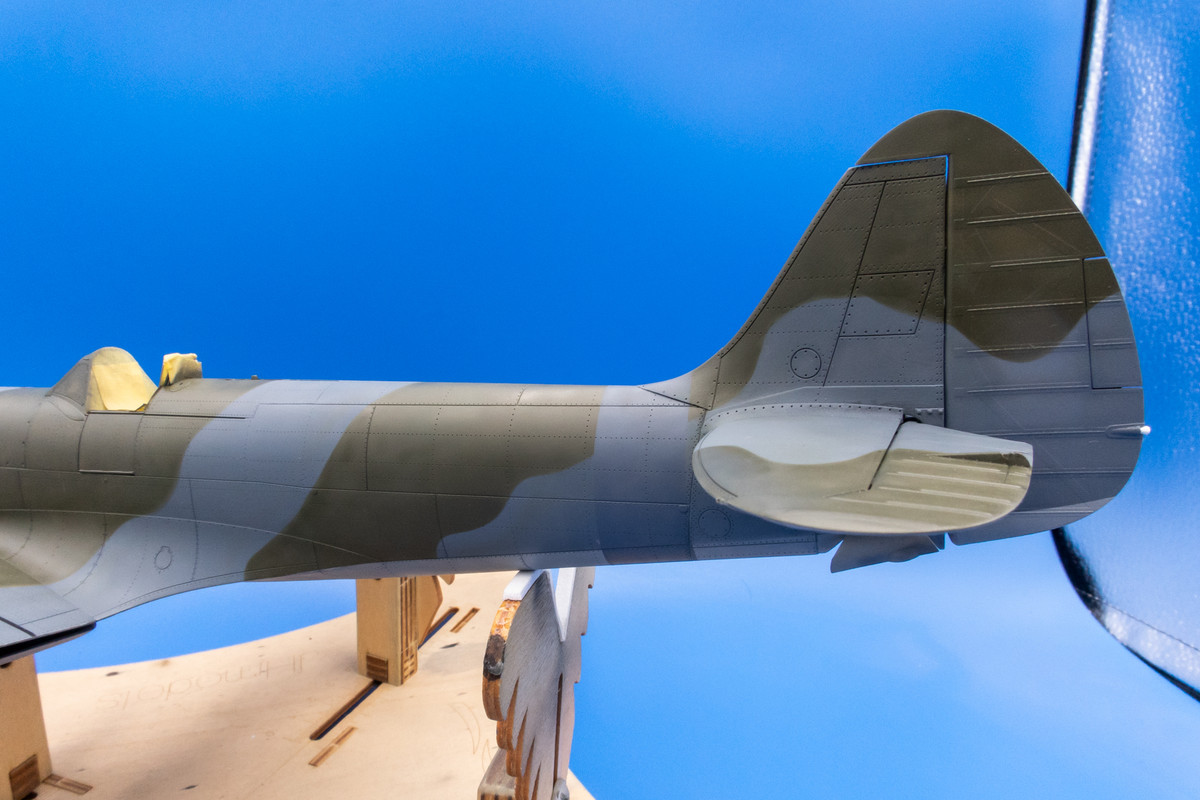
John aka JKim
-----------<><
-----------<><
Re: Tamiya 1/32 Spitfire XIVe Conversion
Here we go... time to paint the fuselage markings. Instead doing each element individually, I'm using a single mask on the port side containing the codes, roundel and serial number so that I get the relative spacing and orientation correct.
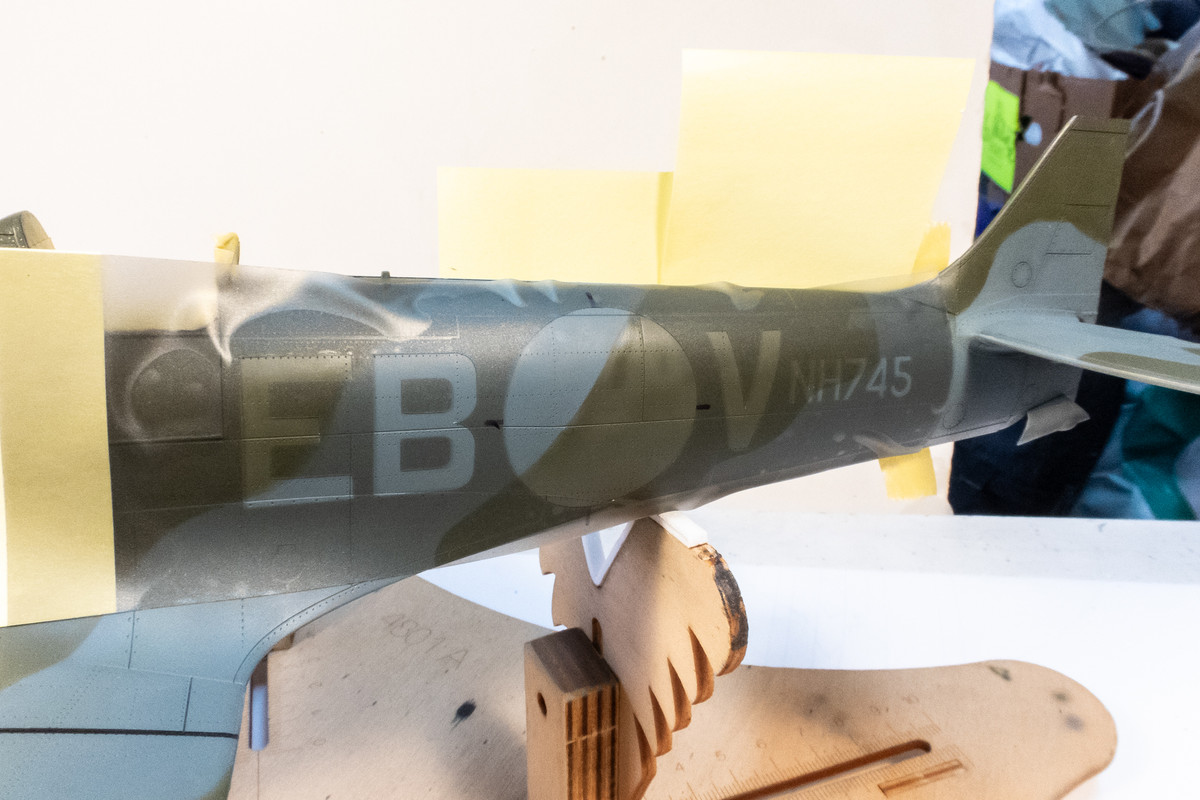
I'm going to start with the black serial number.
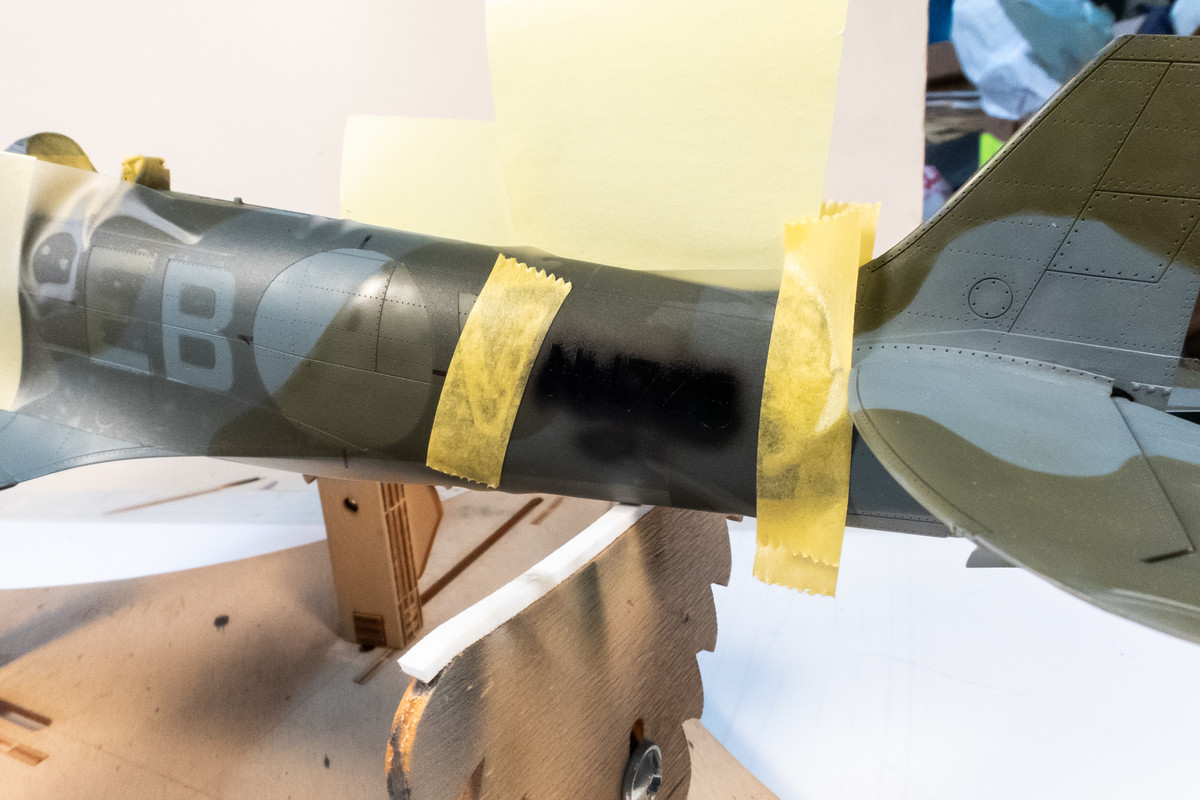
The serial number on the starboard side is painted separately due to the overlap with the code letters. I'll place the mask holding the codes and roundel after the black paint dries.
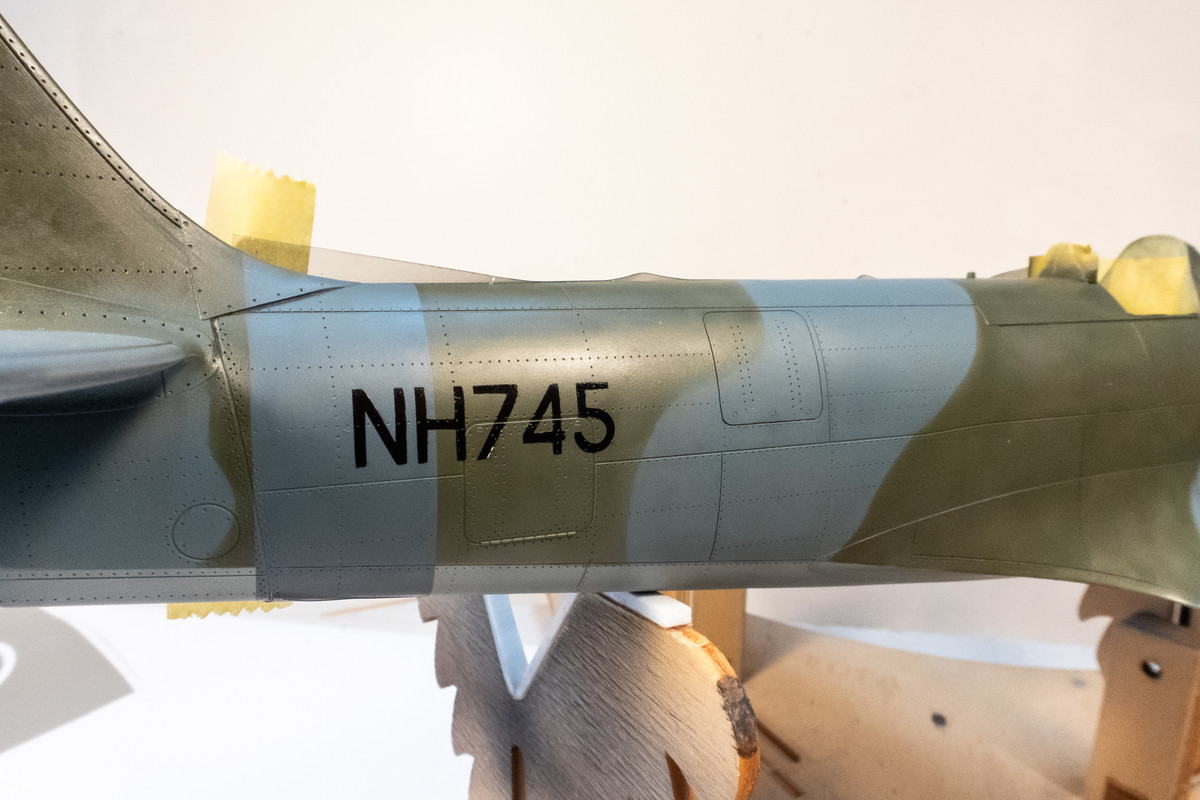
Roundels are next... white and yellow are sprayed first.
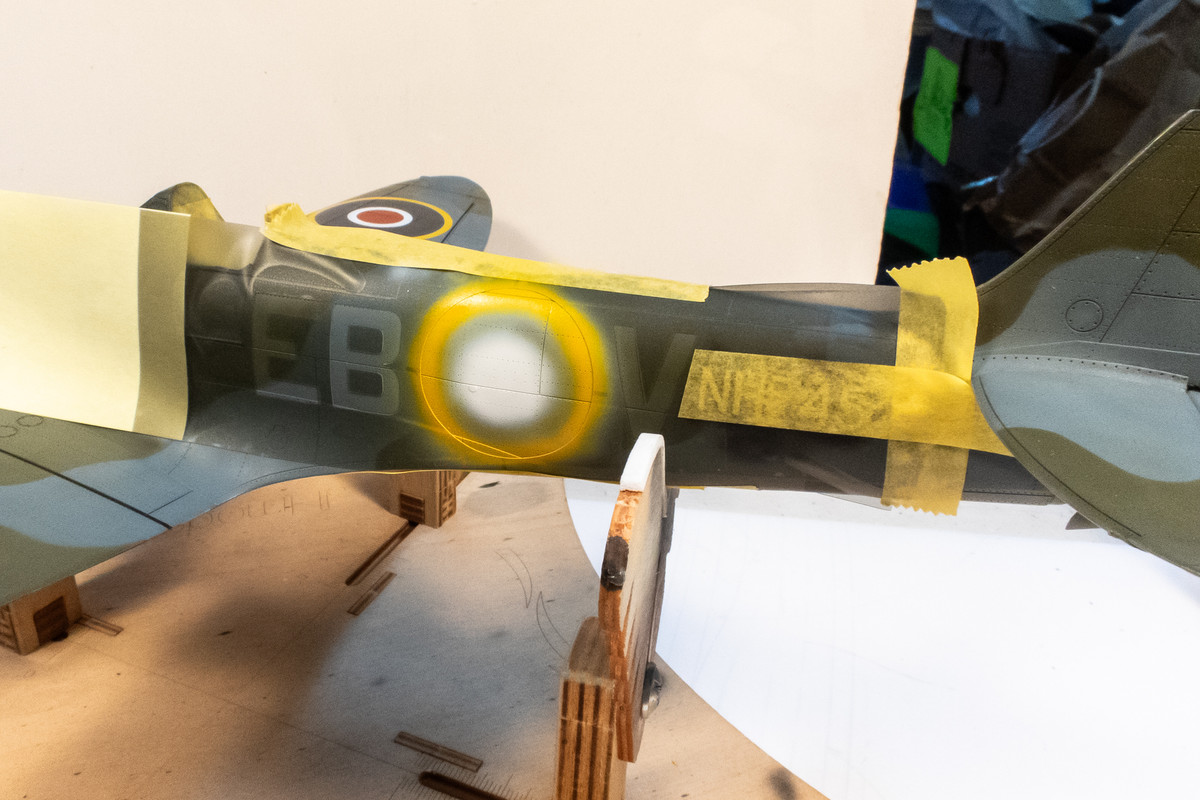
And then the blue and finally the red.
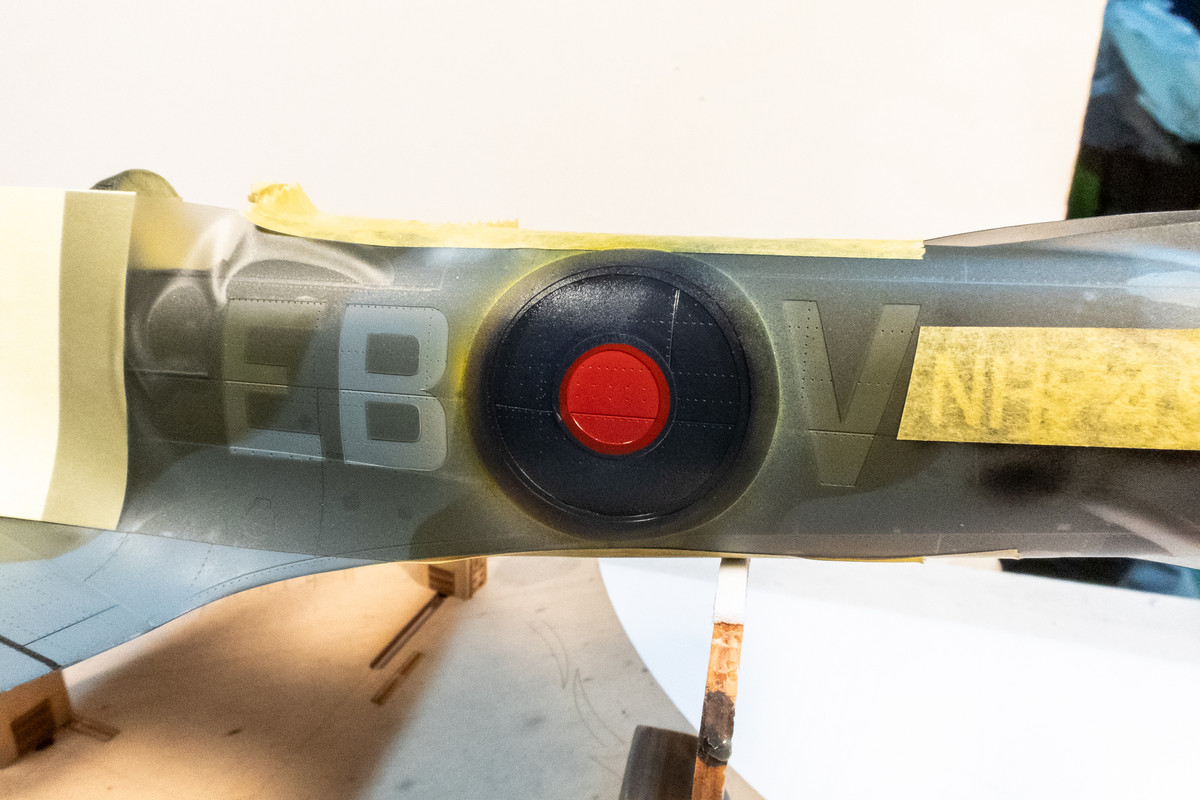
After the roundels are done, the code letters are painted in Sky (Mr Hobby Aqueous H-74).
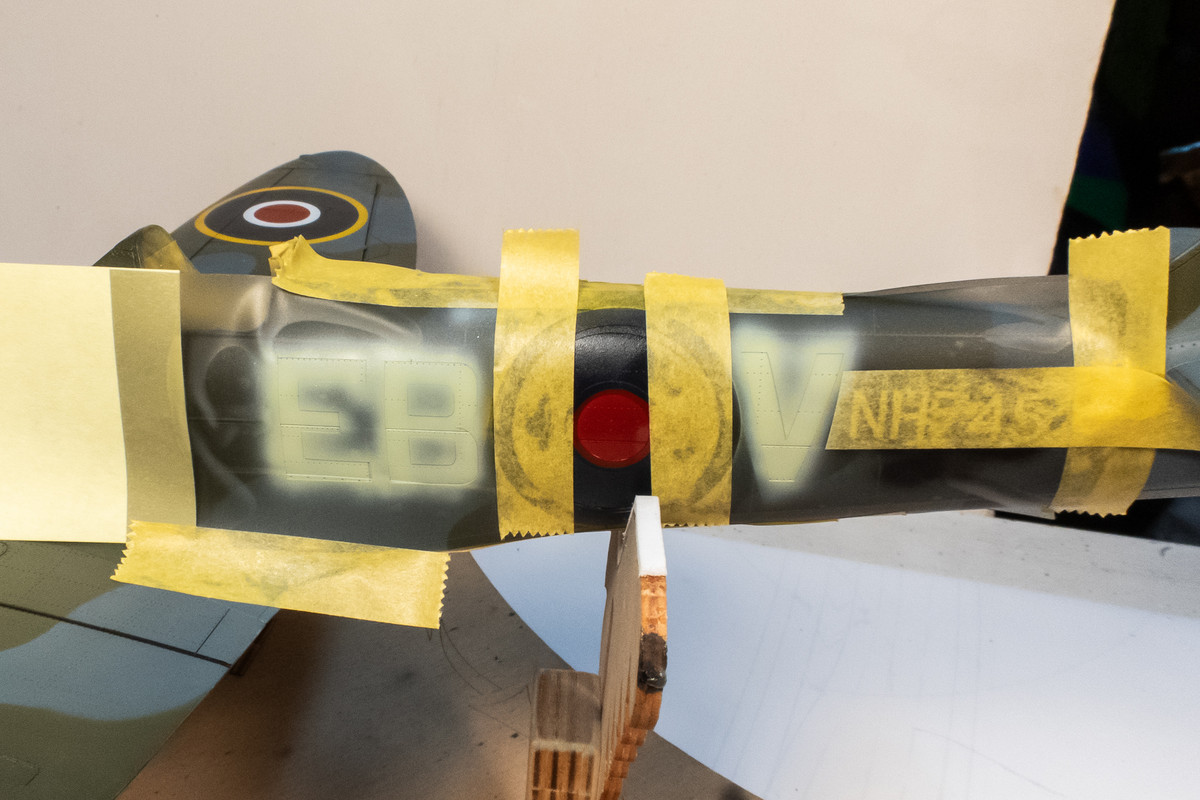
The masks are CAREFULLY removed...
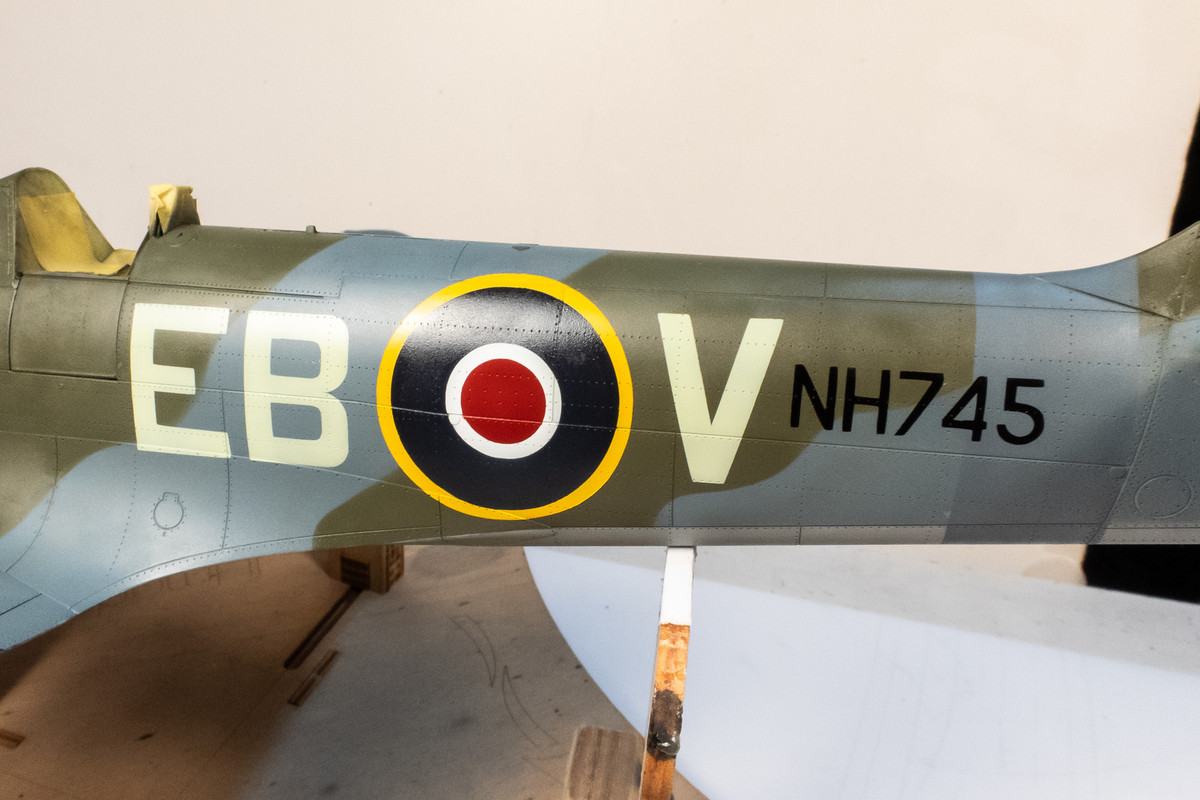
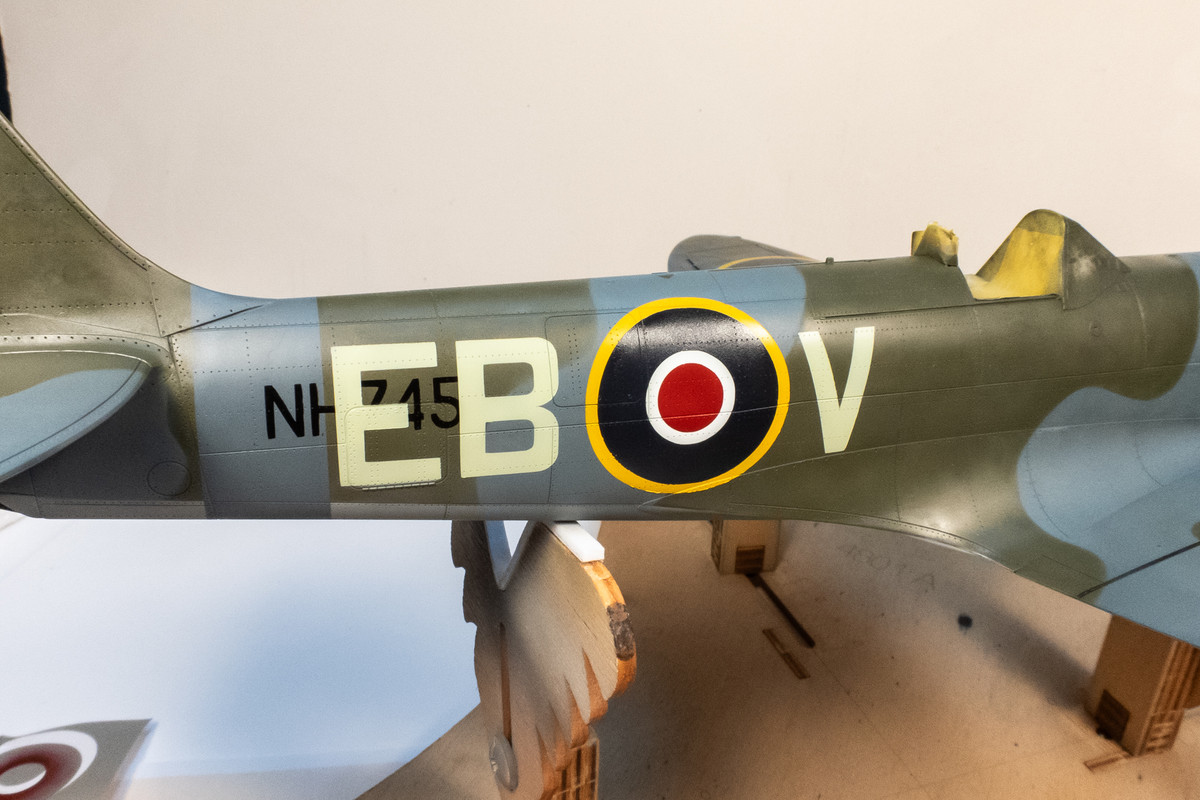
Very happy to report that NO paint lift occurred. Not even a little one. I'll buff the few rough paint edges out tomorrow after the paint is fully cured. And there may be a tiny paint bleed on the port roundel but otherwise, the markings look good to go!
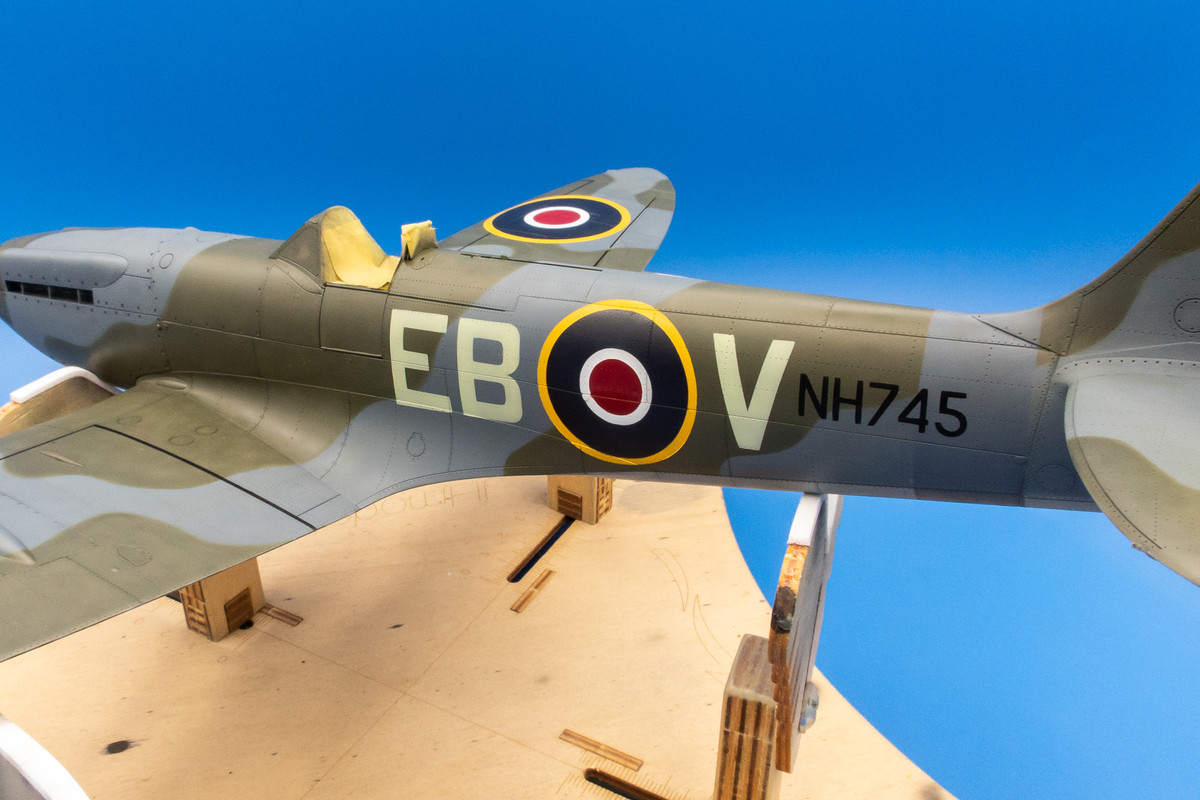
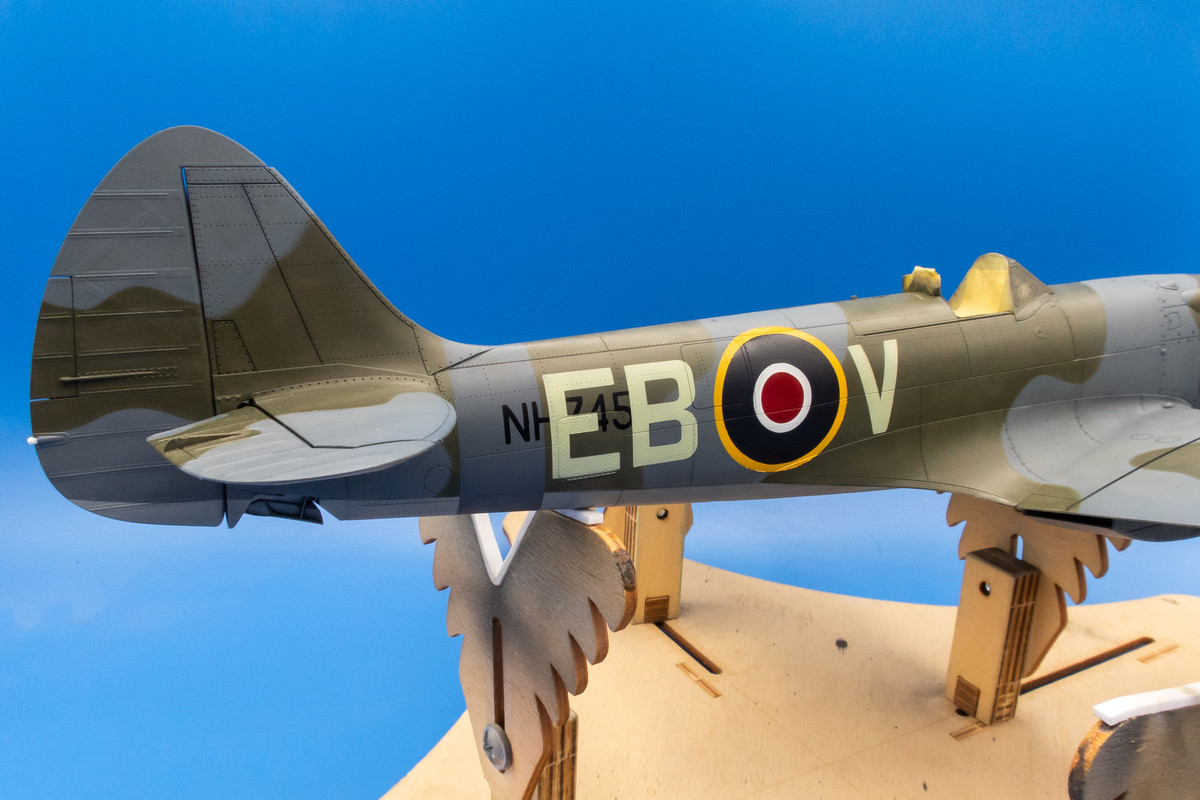
I'm going to start with the black serial number.
The serial number on the starboard side is painted separately due to the overlap with the code letters. I'll place the mask holding the codes and roundel after the black paint dries.
Roundels are next... white and yellow are sprayed first.
And then the blue and finally the red.
After the roundels are done, the code letters are painted in Sky (Mr Hobby Aqueous H-74).
The masks are CAREFULLY removed...
Very happy to report that NO paint lift occurred. Not even a little one. I'll buff the few rough paint edges out tomorrow after the paint is fully cured. And there may be a tiny paint bleed on the port roundel but otherwise, the markings look good to go!
John aka JKim
-----------<><
-----------<><
-
tempestjohnny

- Elite Member
- Posts: 3825
- Joined: Sat Oct 15, 2016 4:51 am
- Location: Naples. FL
Re: Tamiya 1/32 Spitfire XIVe Conversion
That looks fantastic.
-
BlackSheep214

- Elite Member
- Posts: 13596
- Joined: Sun Apr 06, 2014 8:47 pm
Re: Tamiya 1/32 Spitfire XIVe Conversion
Incredible work! 
“Who controls the skies, controls the fate of this Earth”
Author unknown- 352nd Fighter Group, Blue-Nosed Bastards of Bodney
“Send one plane it’s a sortie; send two planes it’s a flight; send four planes it’s a test of airpower. - Richard Kohn
Author unknown- 352nd Fighter Group, Blue-Nosed Bastards of Bodney
“Send one plane it’s a sortie; send two planes it’s a flight; send four planes it’s a test of airpower. - Richard Kohn
Re: Tamiya 1/32 Spitfire XIVe Conversion
Thanks guys! Just putting on the finishing touches on the paint job before moving on to decals.
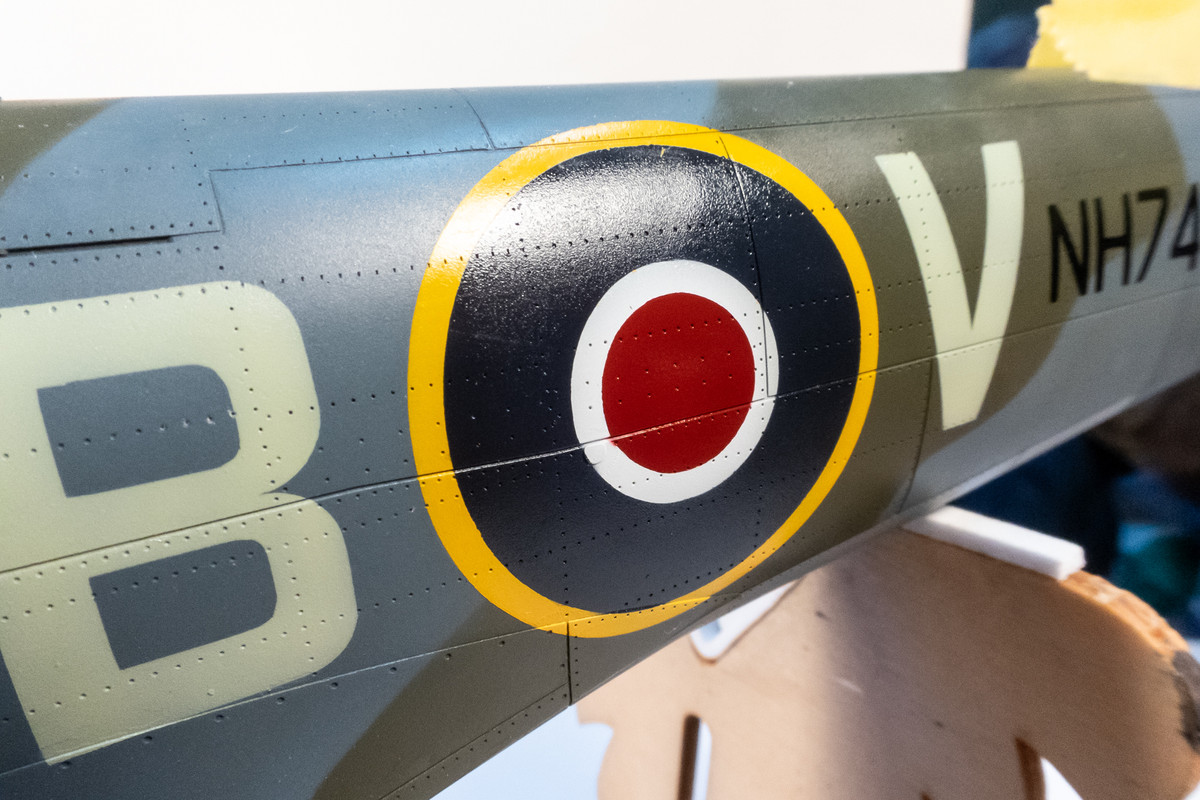
Here is a tiny bit of red seeping under the mask on the roundel that I want to fix.
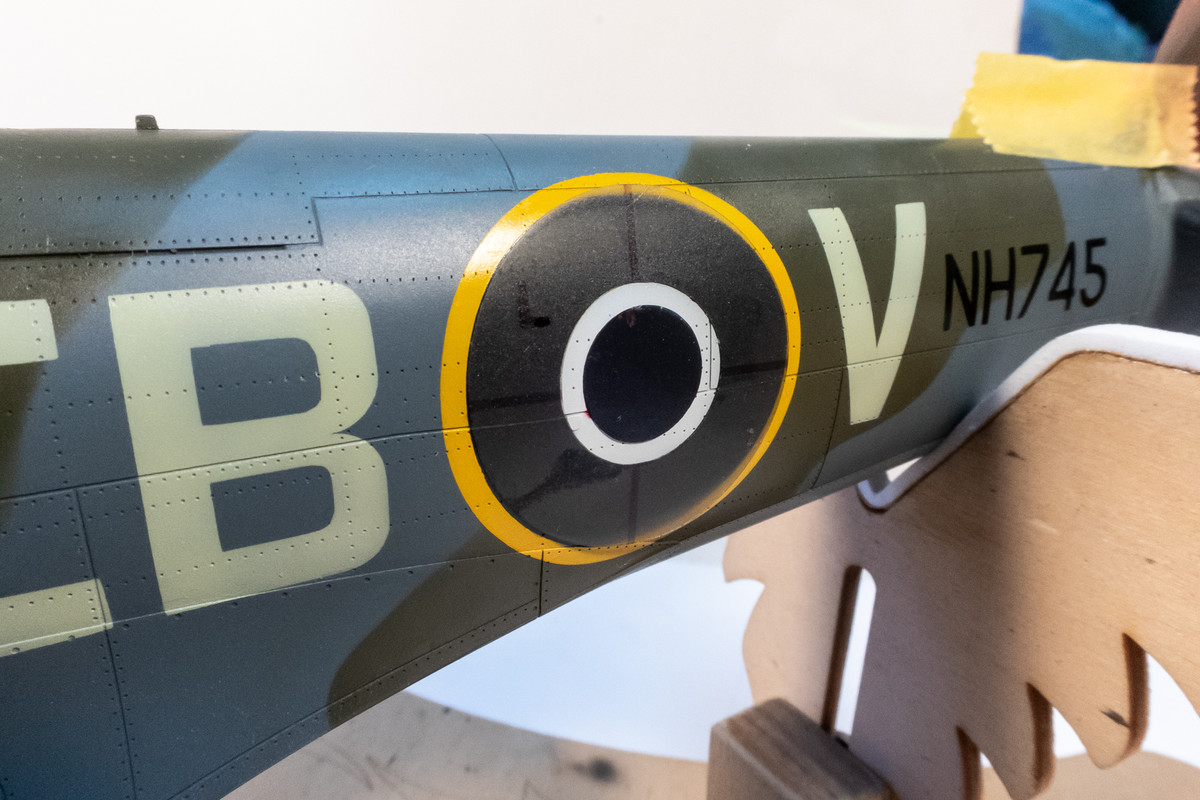
I've saved the used masks so a couple of these are put back into place.
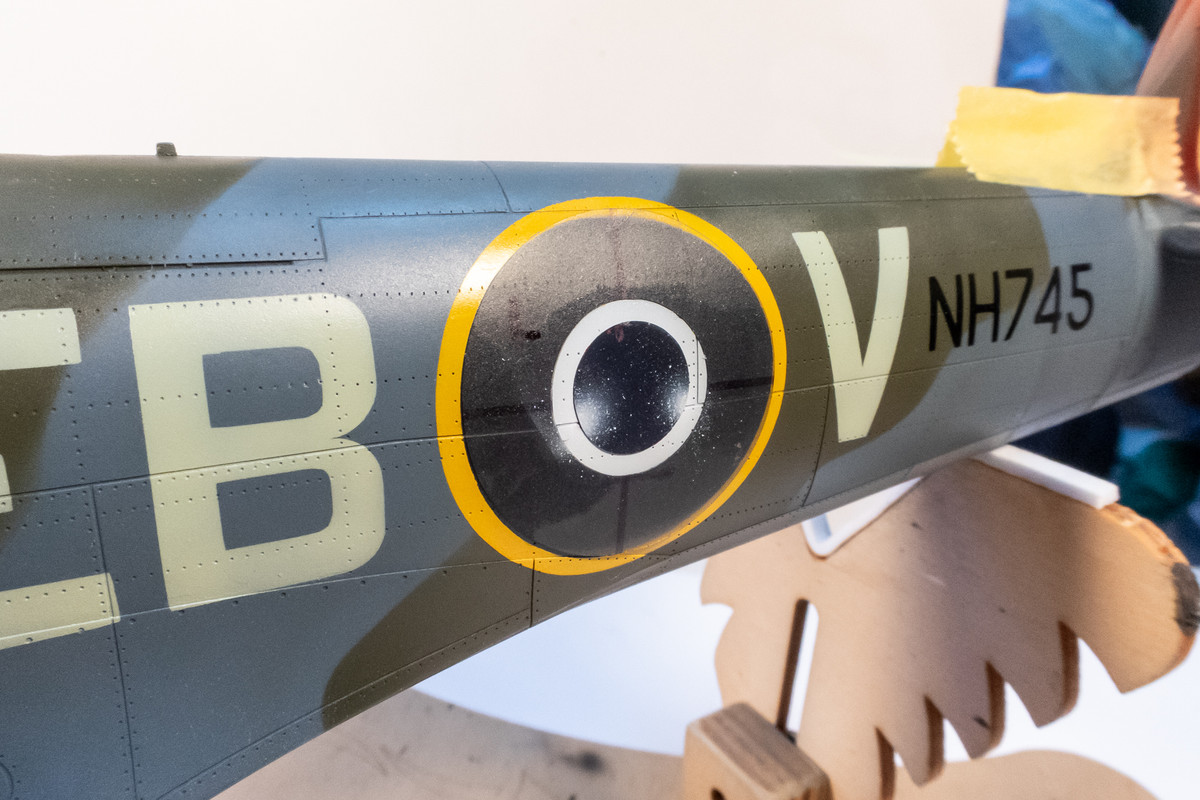
Two little shots of white with the airbrush should suffice.
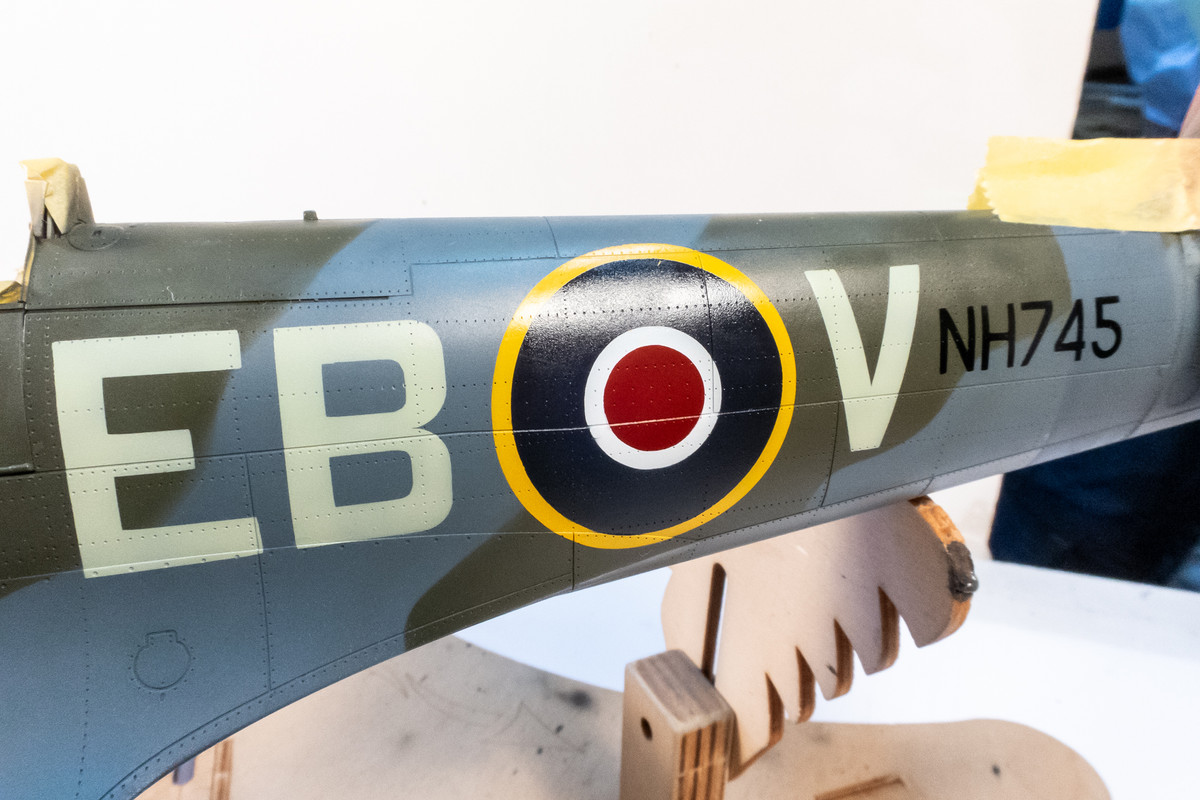
The fixed roundel.
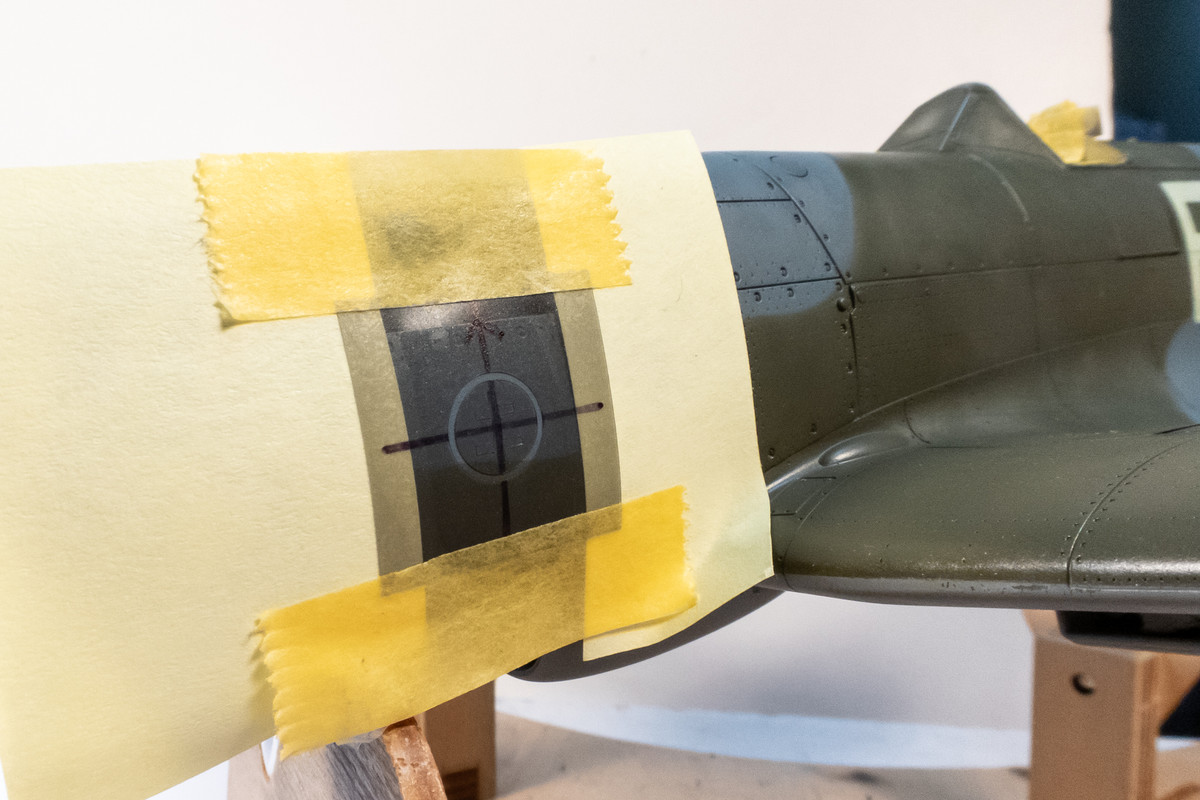
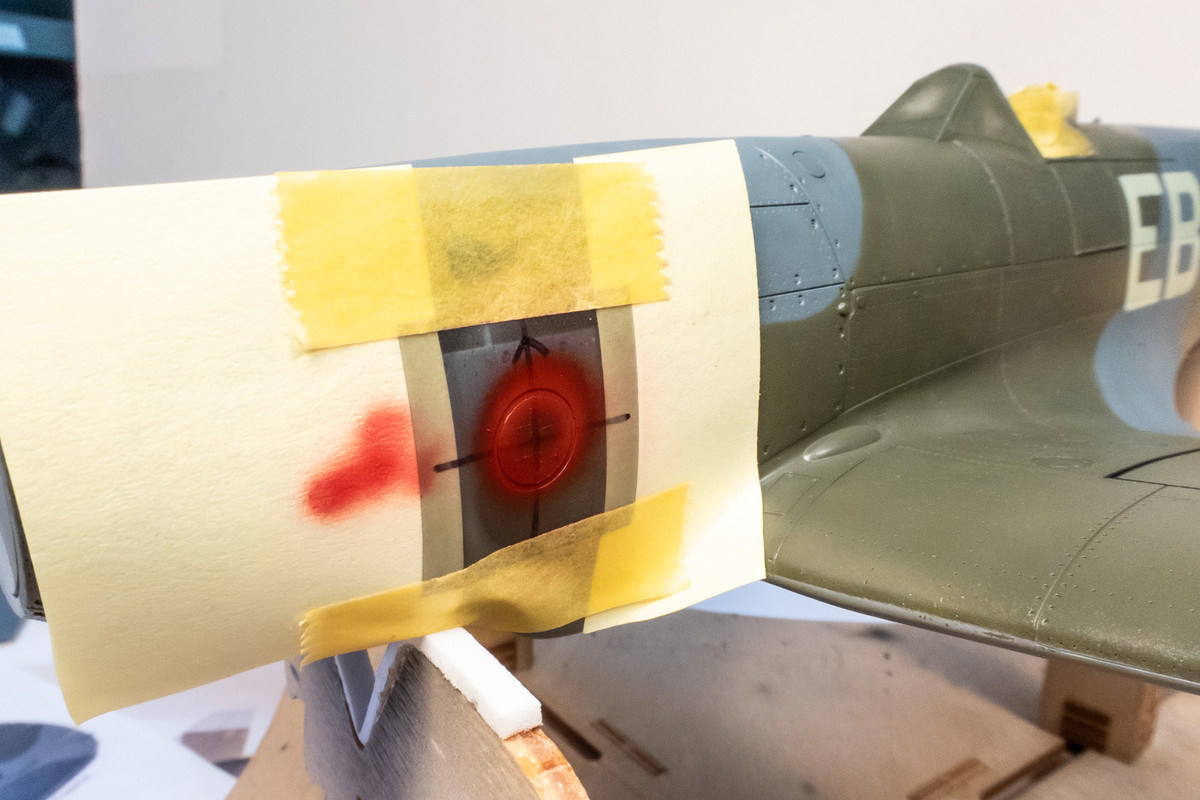
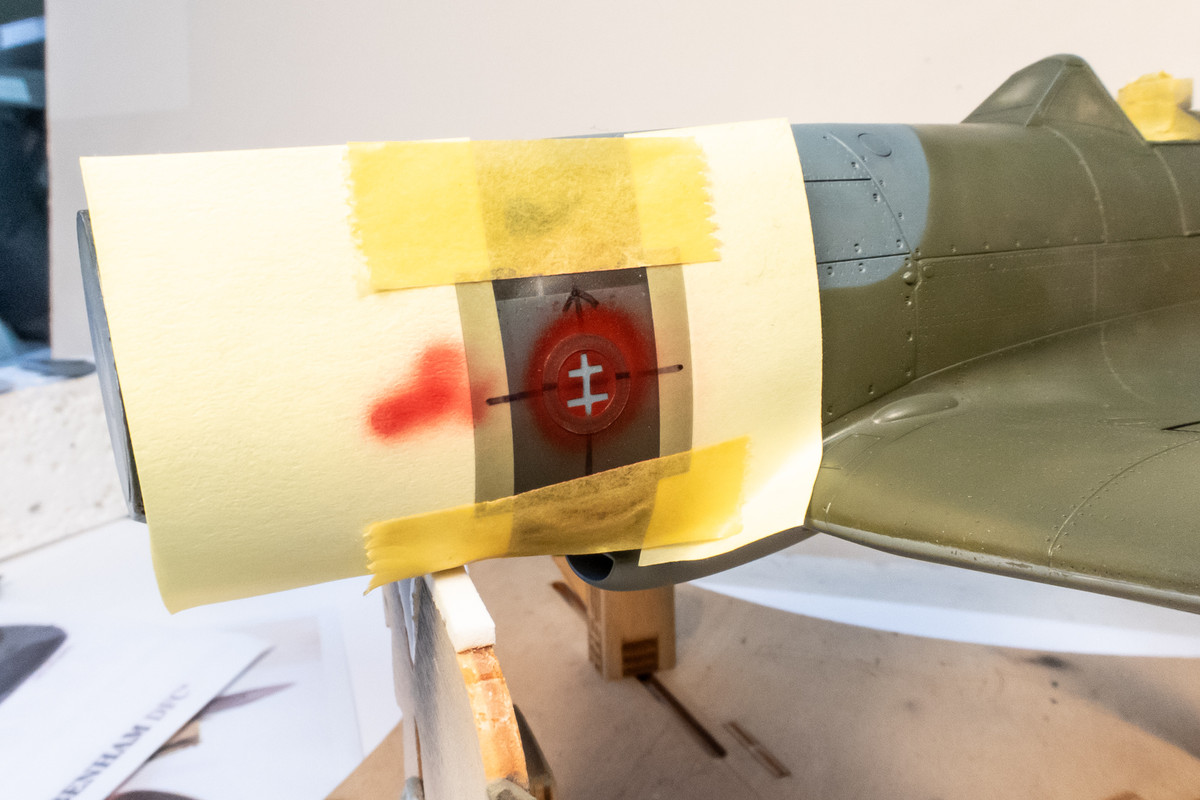
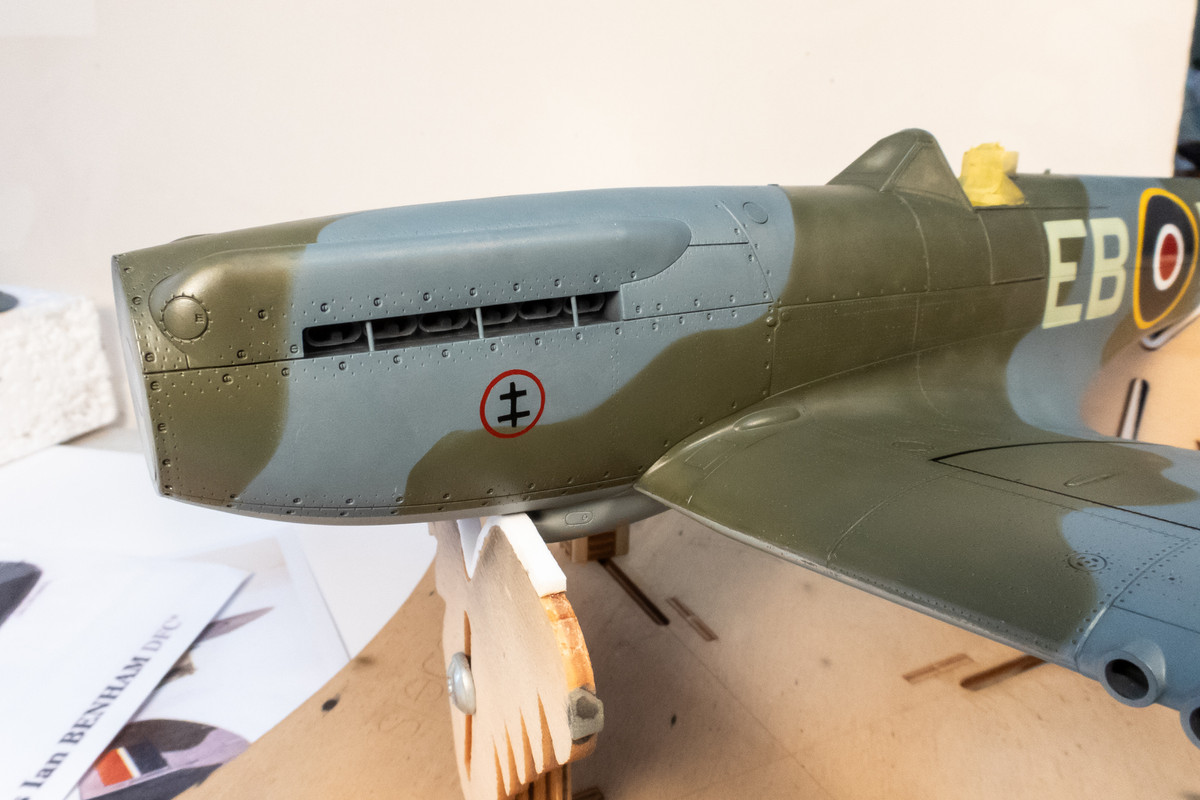
The squadron badge of No. 41 Squadron is sprayed onto the nose. I had a custom decal printed but due to the transparency, I thought it would turn out better painted.
The fin flashes were painted as well. I didn't do the tape routine on the tail so I wasn't surprised when I got a bit of paint lift.

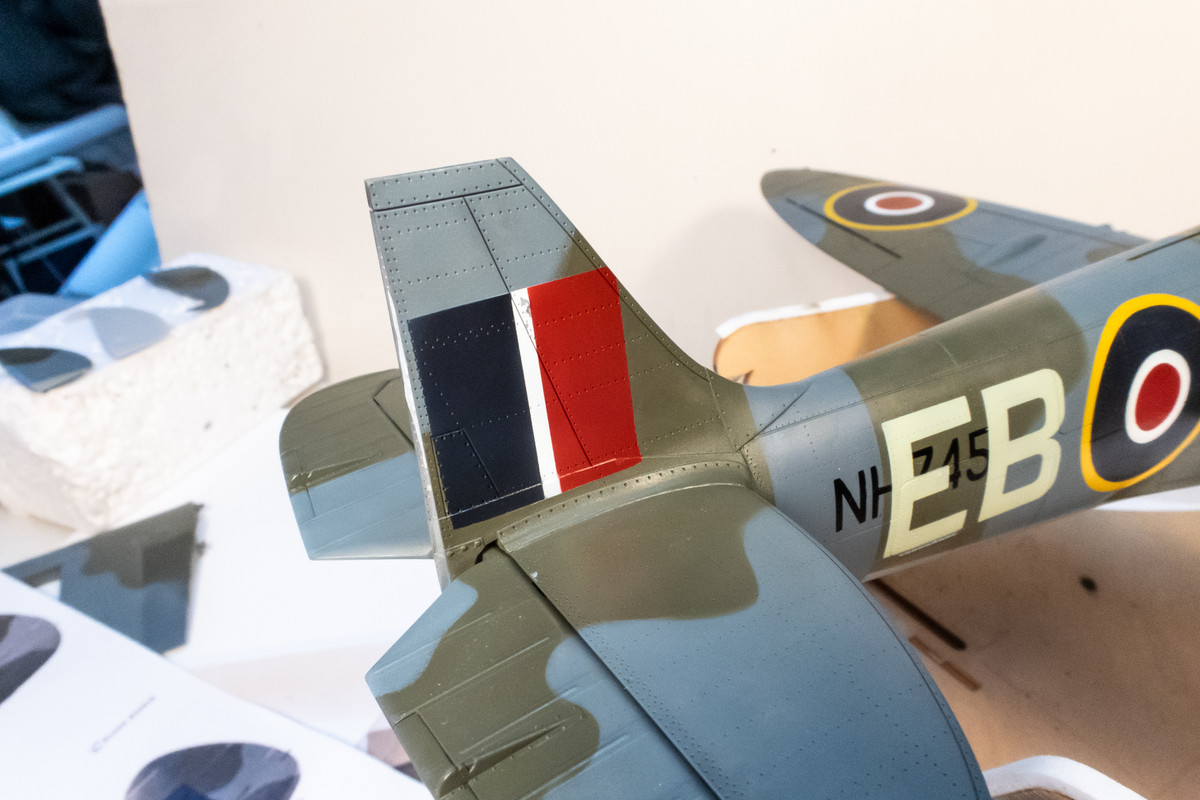
The big paint lift area was treated with Micromesh to feather the edges down. Again, the primer layer helps alot.

The Ocean Gray is sprayed back on. For these open area repairs, I use a little thicker mix of paint to help hide the edges.
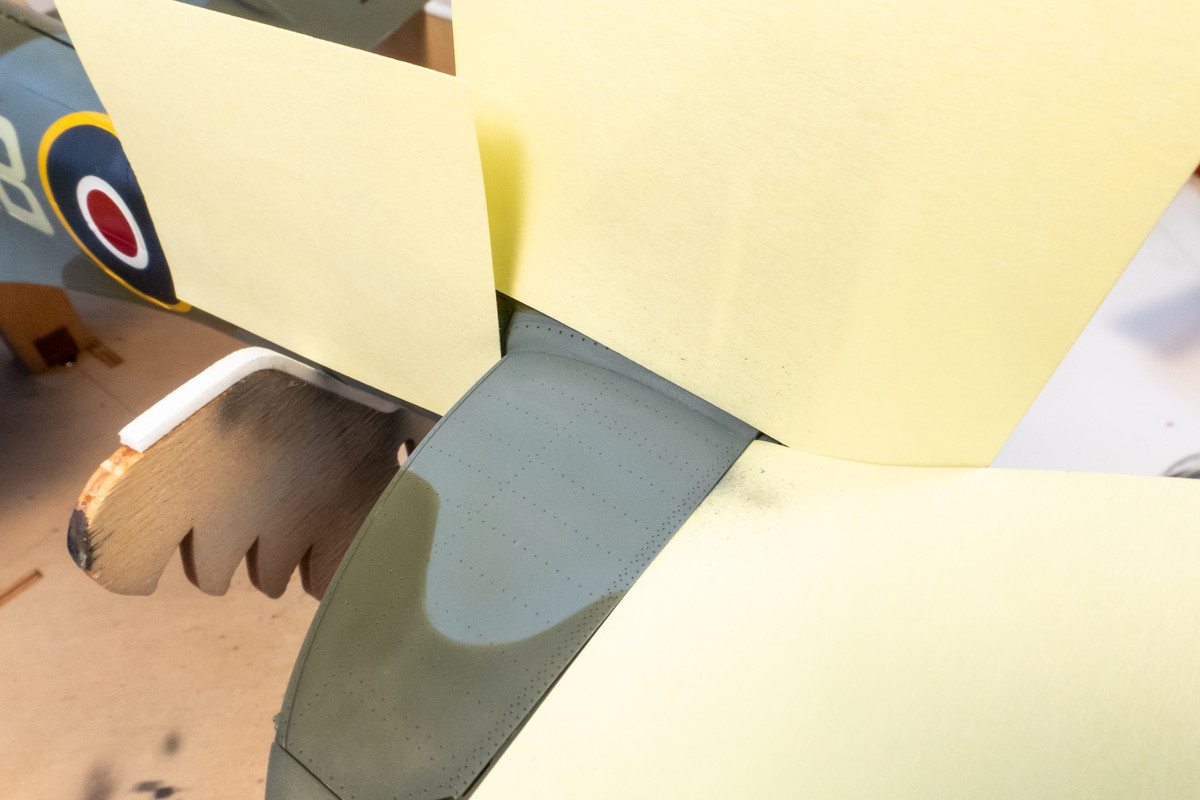
Repair is complete.
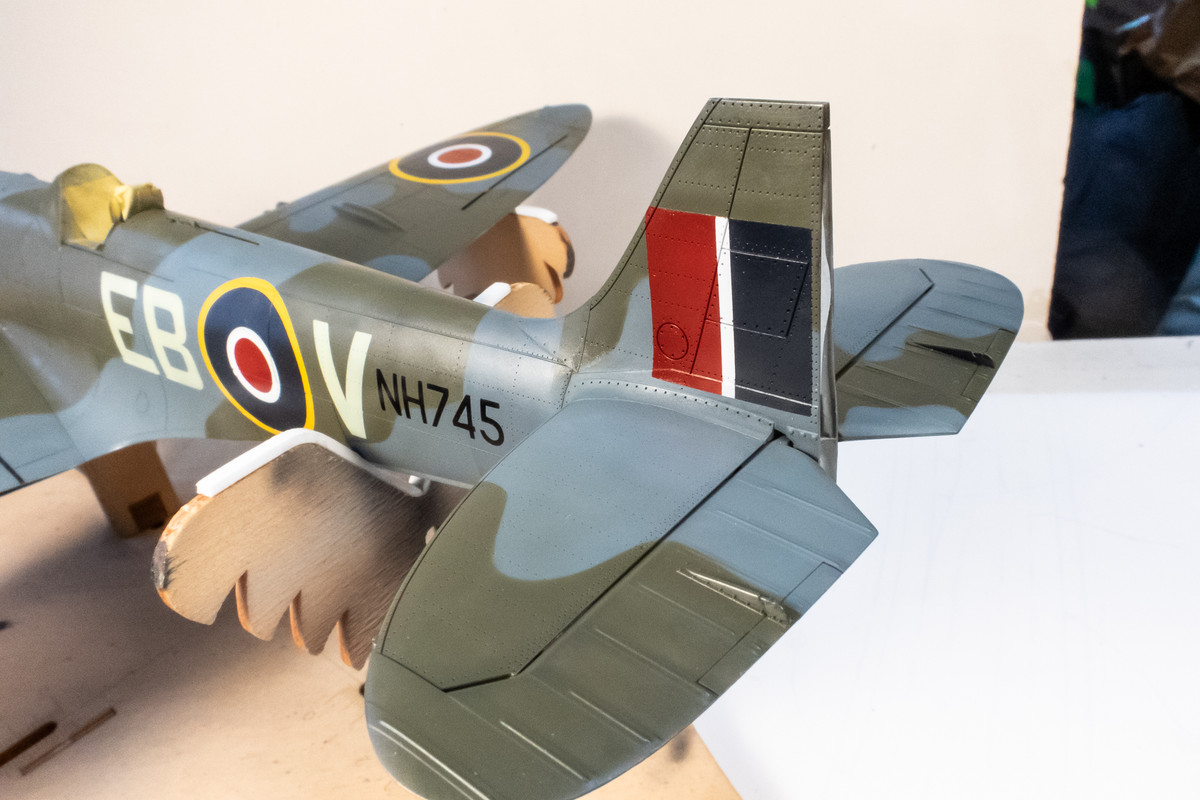
The painting stage is finally complete. I didn't document it but the yellow ID strips on the leading edge were painted.
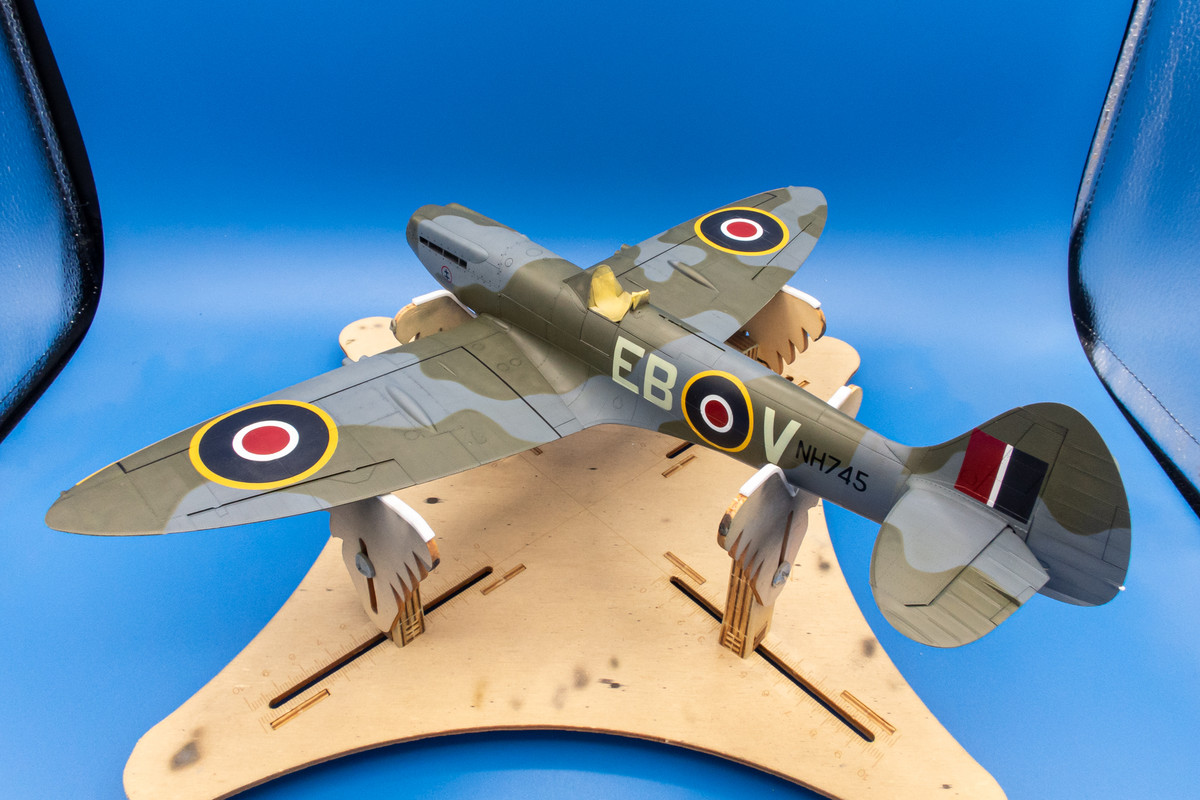
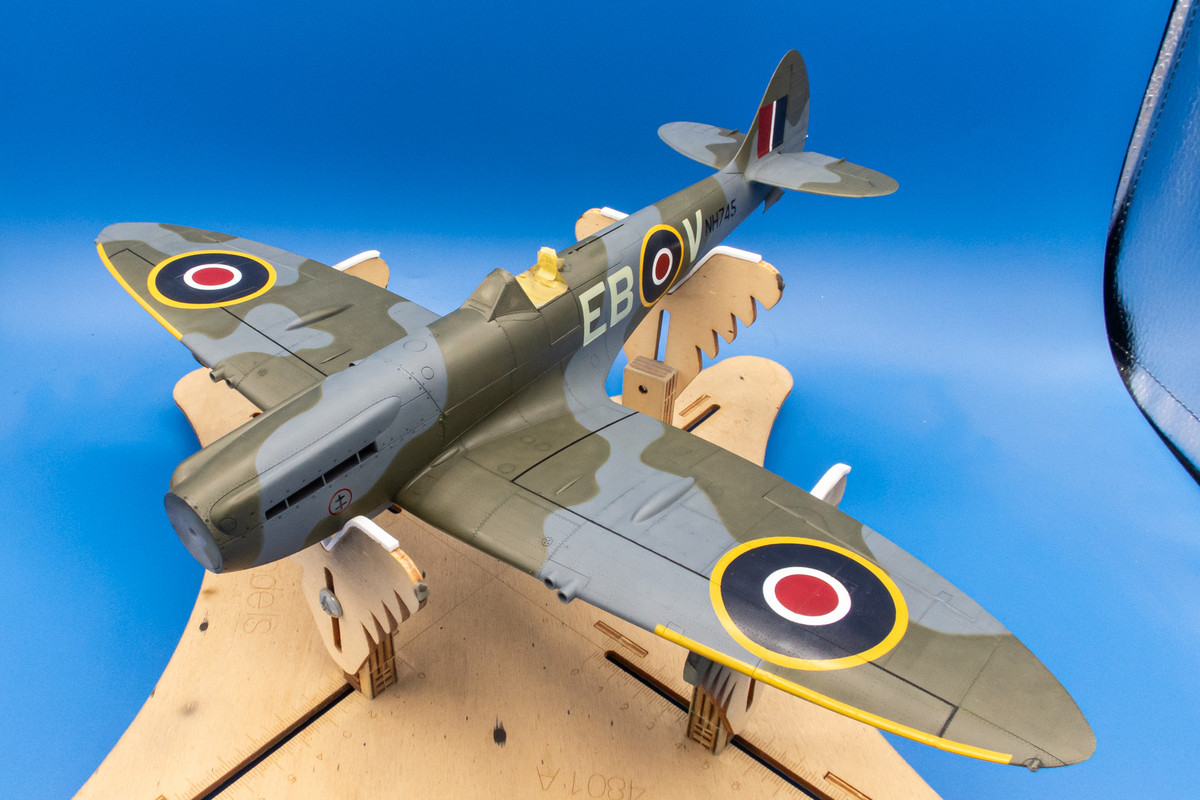
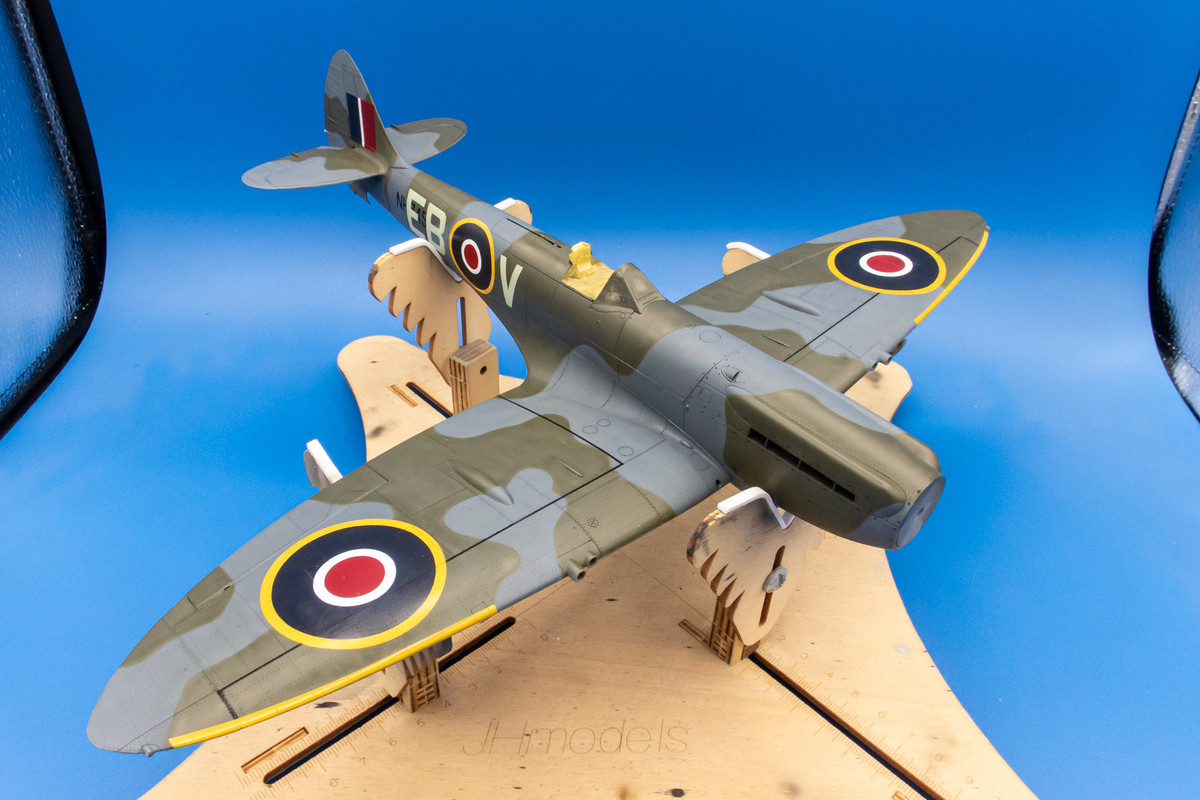
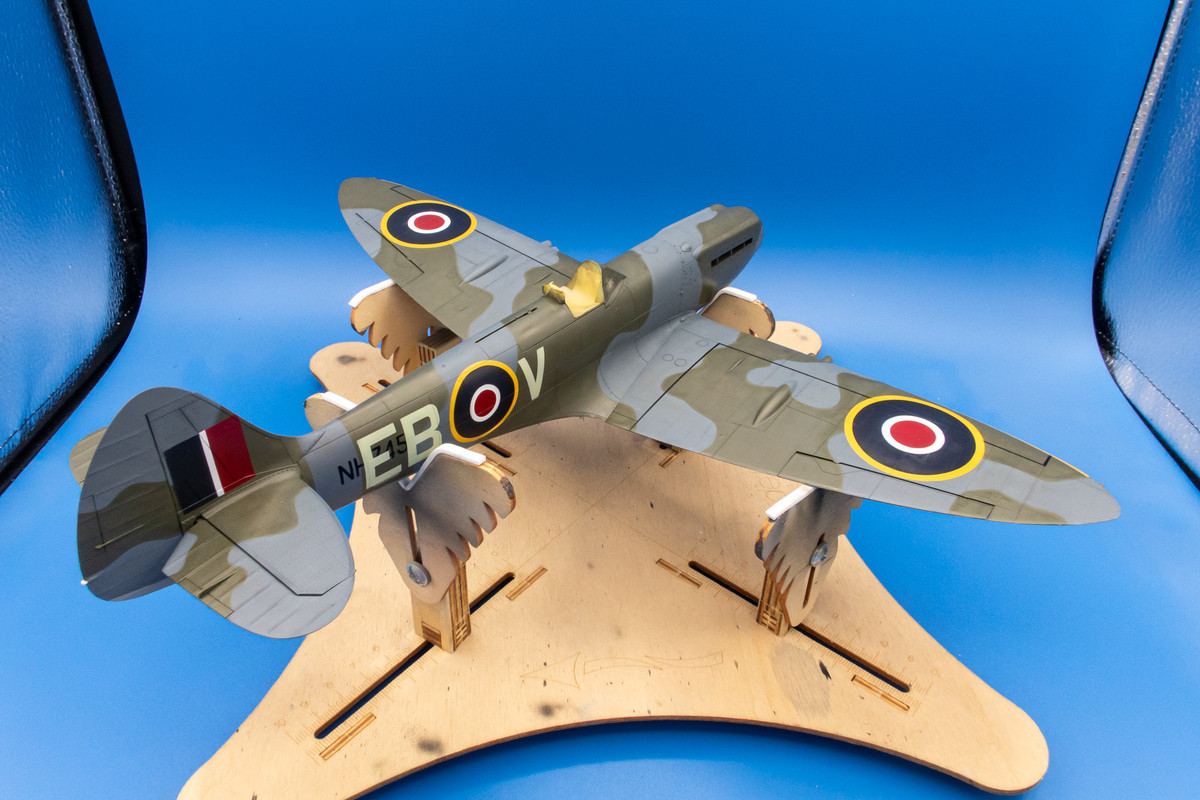
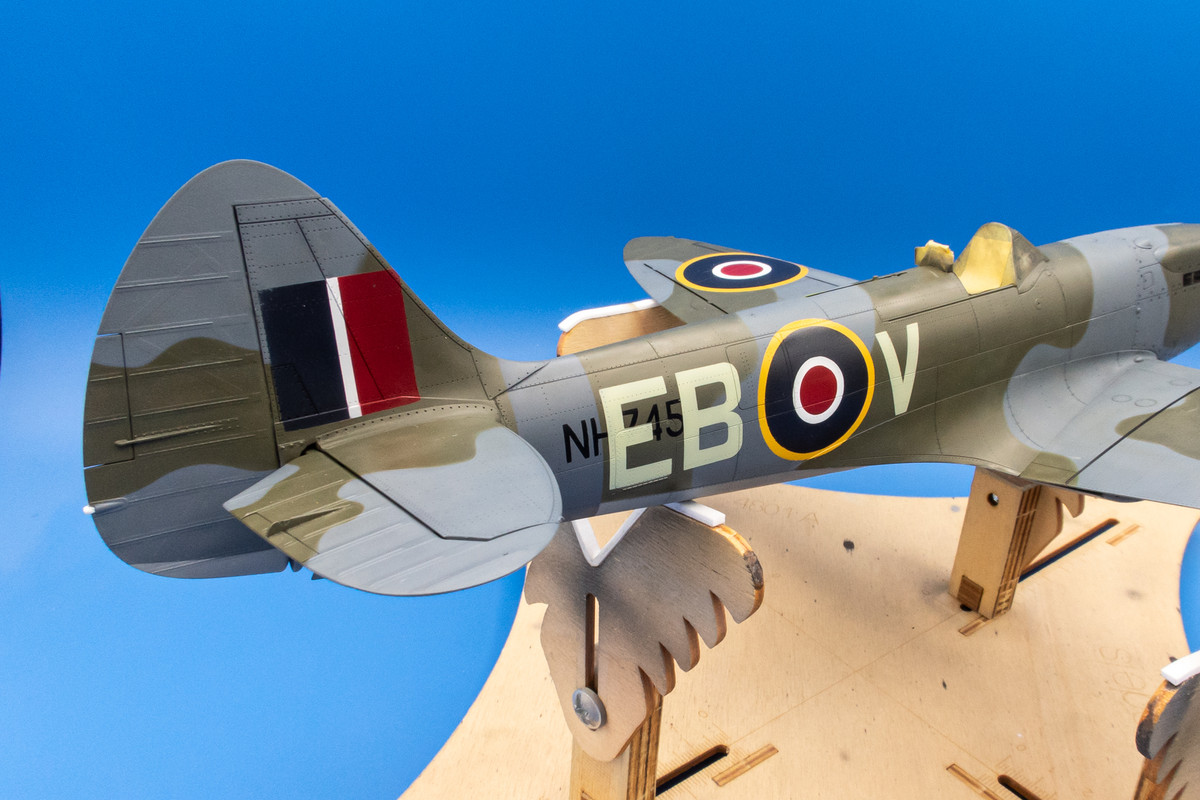
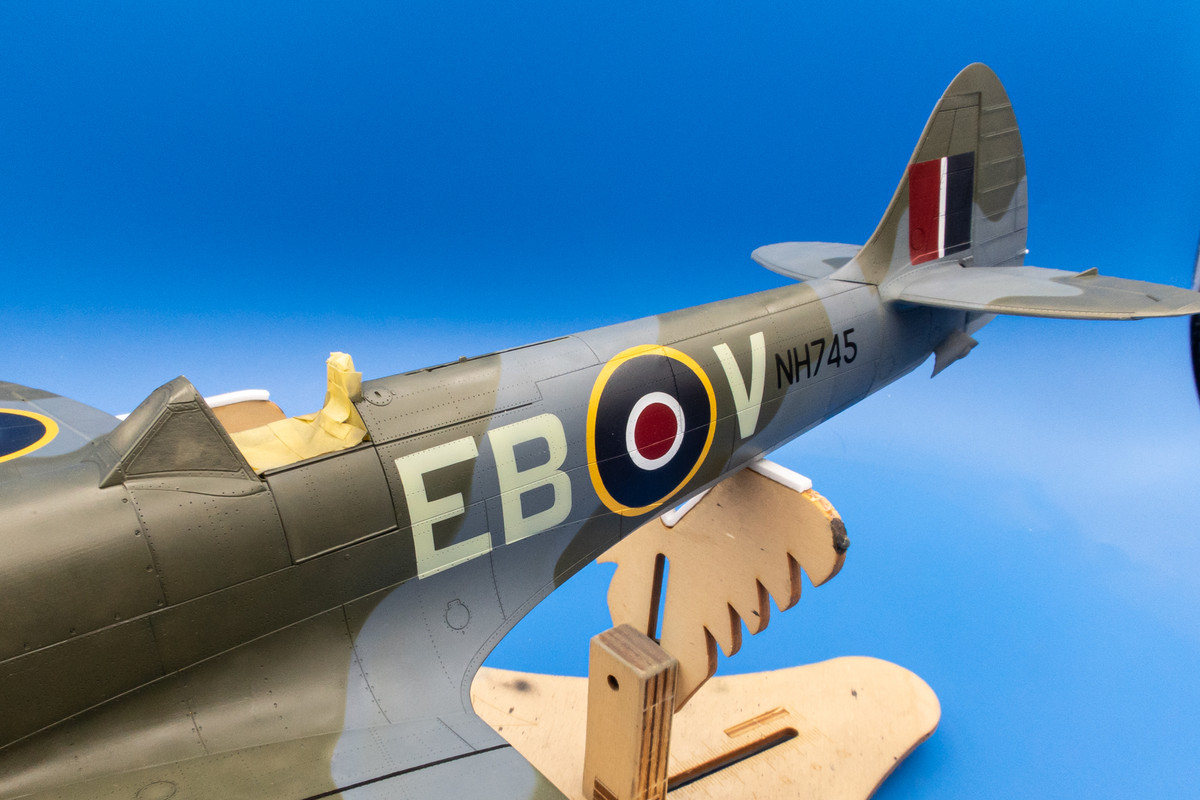
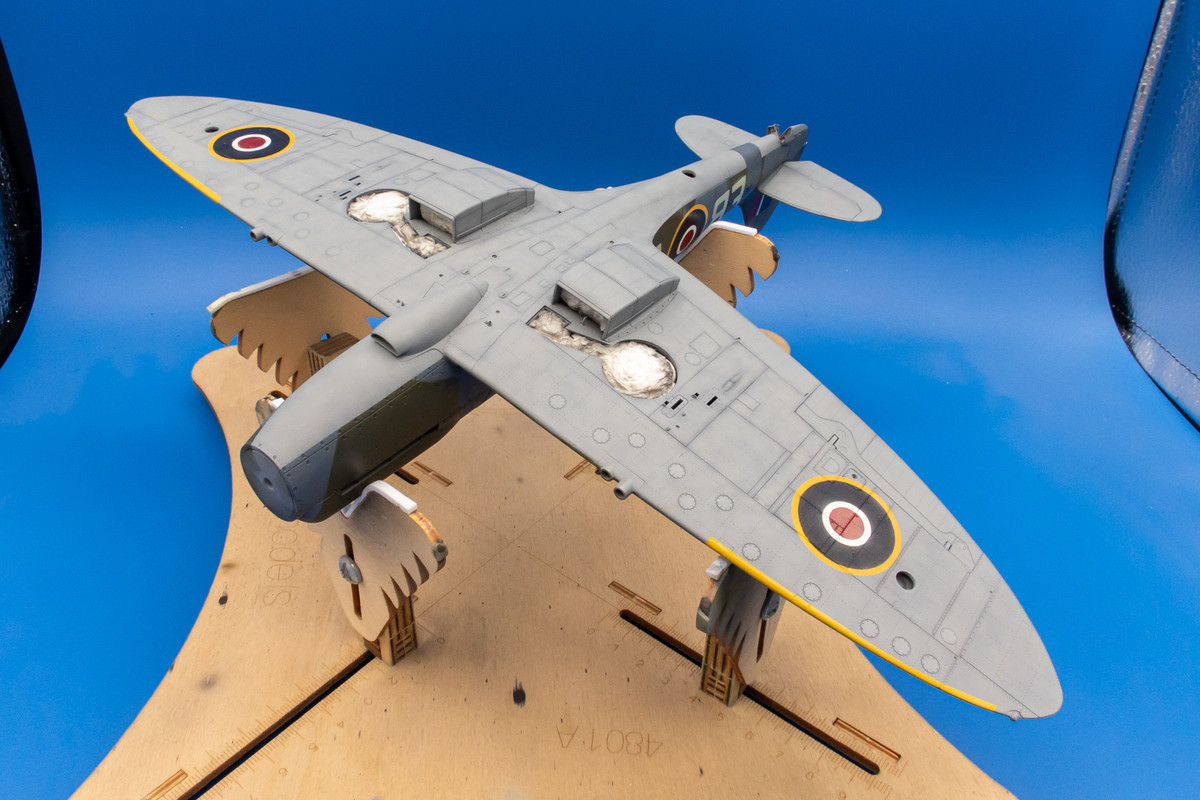
After I make a last inspection of the paint, I'll give her a gloss coat and we can move on to the decals.
Here is a tiny bit of red seeping under the mask on the roundel that I want to fix.
I've saved the used masks so a couple of these are put back into place.
Two little shots of white with the airbrush should suffice.
The fixed roundel.
The squadron badge of No. 41 Squadron is sprayed onto the nose. I had a custom decal printed but due to the transparency, I thought it would turn out better painted.
The fin flashes were painted as well. I didn't do the tape routine on the tail so I wasn't surprised when I got a bit of paint lift.
The big paint lift area was treated with Micromesh to feather the edges down. Again, the primer layer helps alot.
The Ocean Gray is sprayed back on. For these open area repairs, I use a little thicker mix of paint to help hide the edges.
Repair is complete.
The painting stage is finally complete. I didn't document it but the yellow ID strips on the leading edge were painted.
After I make a last inspection of the paint, I'll give her a gloss coat and we can move on to the decals.
John aka JKim
-----------<><
-----------<><