
Border 1/35 Focke Wulf Fw190A-5 Nowotny Double Chevron
-
mustang1989

- Moderator
- Posts: 5044
- Joined: Tue Mar 18, 2014 8:35 pm
Re: Border 1/35 Focke Wulf Fw190A-5 Nowotny Double Chevron
Some amazing attention to detail being put into this build as per your usual good standards John. I've heard alot of good things about these kits and you're sure making some good use of the good attributes of it. Maybe I'm a bit biased because of my love for the whole Kurt Tank line up from the A's all the way to the TA's. Beautiful work going on with this one so far bud.

Re: Border 1/35 Focke Wulf Fw190A-5 Nowotny Double Chevron
Thanks for the comments guys! This build has hit a little pothole. Not knowing much about the Fw190A, I was assuming that the Border A-6 kit provided the inner landing gear doors. The photos of Nowotny's Double Chevron clearly shows these...
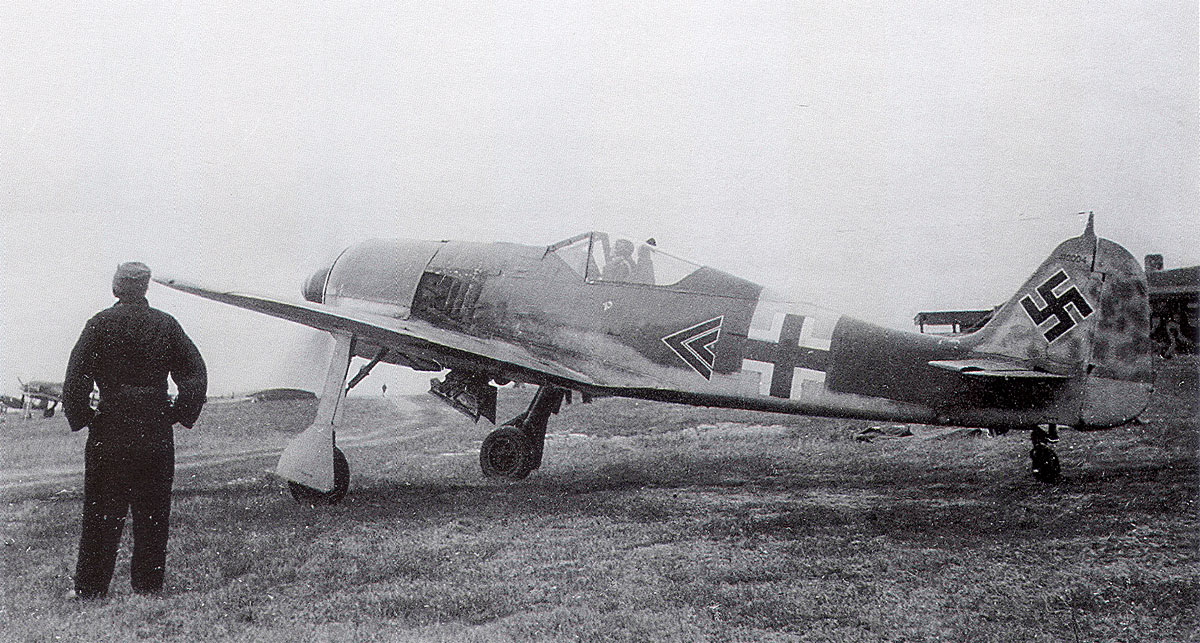
Hmmm... cannot find the doors on the sprues or in the instructions. More digging and I realize that the inner door configuration was being phased out somewhere in the A-6 production run. And it appears that the wheel wells and landing gear covers were modified when the inner doors were deleted. If I want to show the inner doors, I've got some work to do. In addition to scratching up the doors themselves, I'll have to do some cutting up of the wheel well openings and modify the outer landing gear covers as well.
A part of me wants to ignore the photo and just leave it as is but I can't. I'm going to try and represent the inner gear doors as best as I can. It's not going to be 100% accurate so please bear with some of the practical concessions I'm going to make on this little exercise.
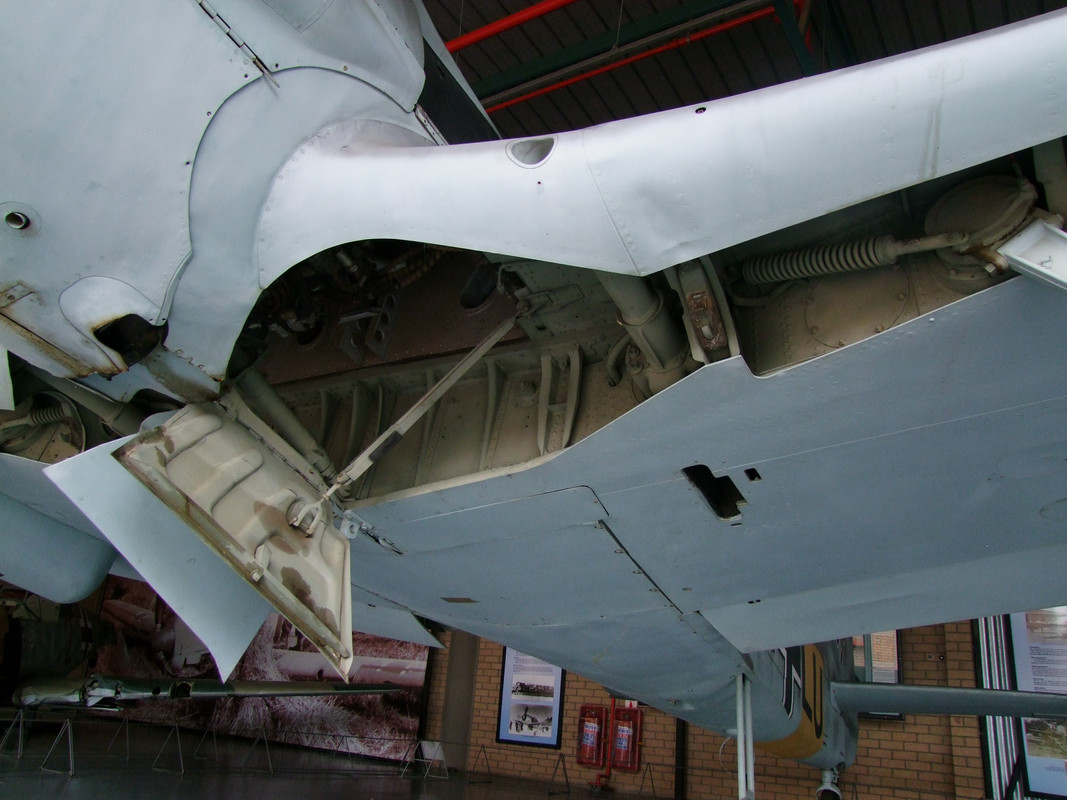
Here's a photo of a restored A-6 that has the inner doors in place. The intended target, if you will.
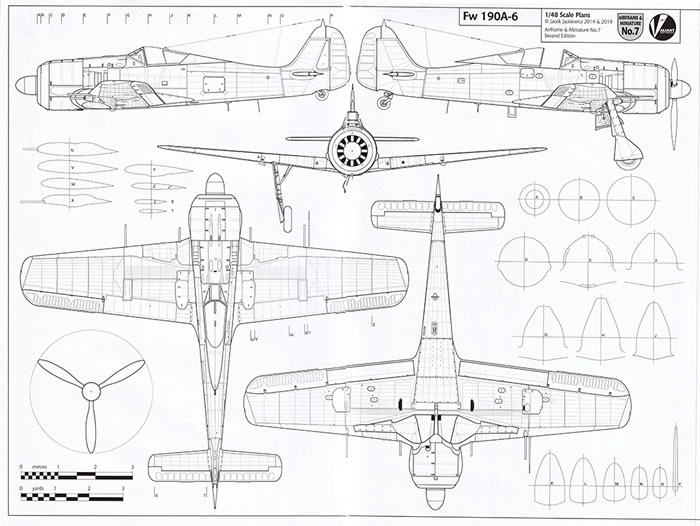
A scan of a drawing from the Airframe and Miniature #7 published by Valiant Wings shows the placement and shape of the inner doors.
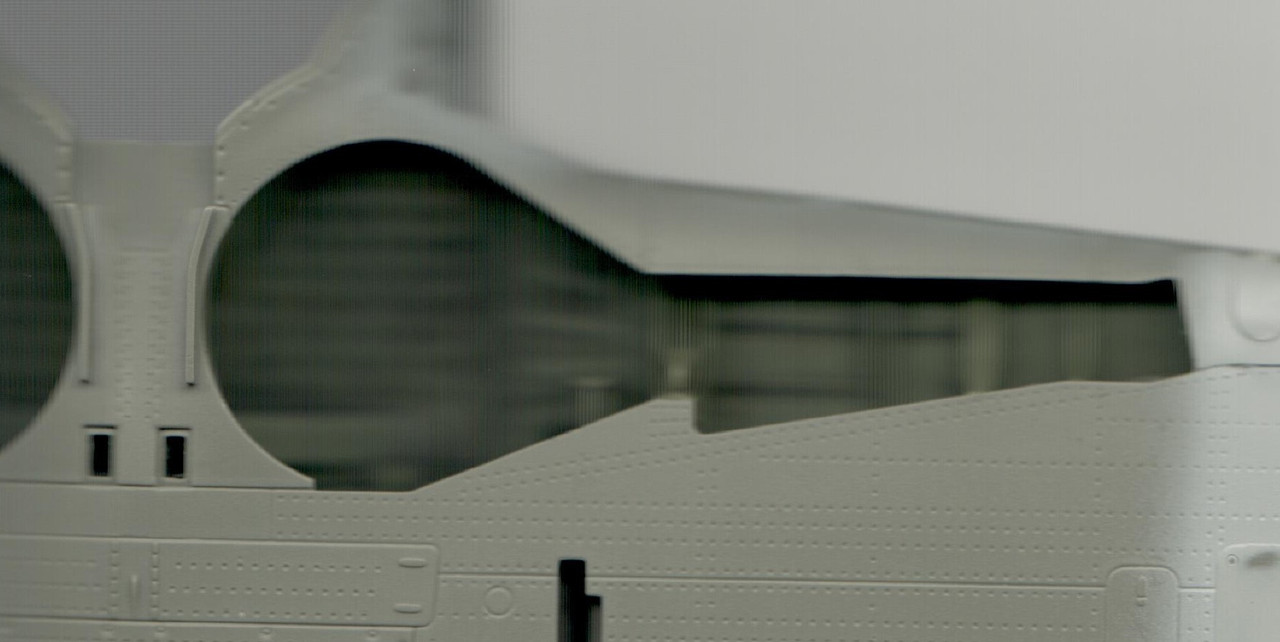
And here's a scan of the Border 190A wheel wells.
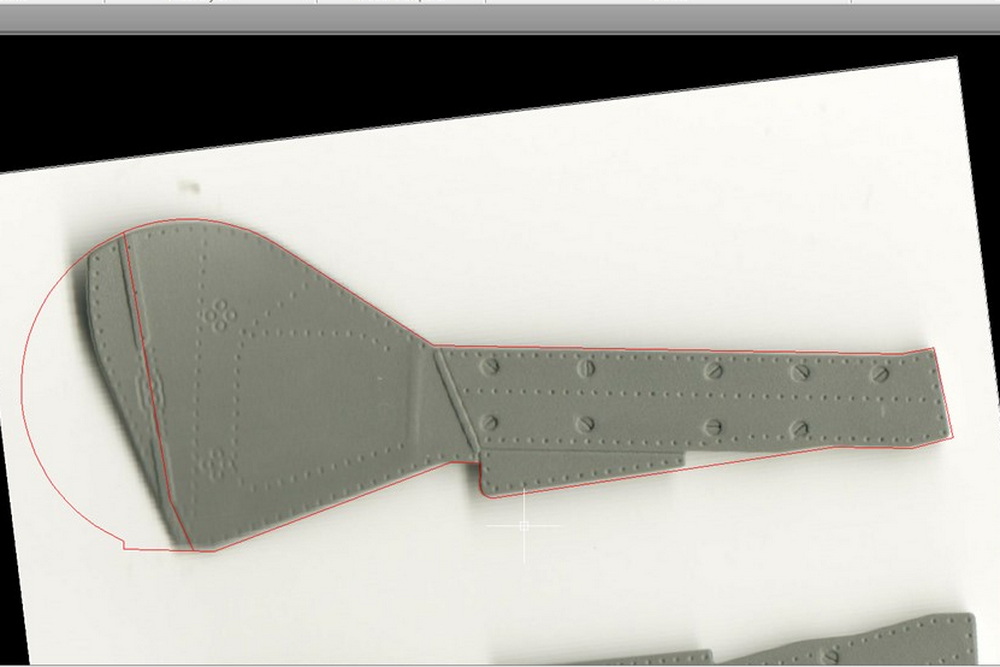
Looking closely at the Border landing gear covers, you can deduce what happened when the inner doors were deleted. The covers were slightly extended. Placing the outline of the wheel well opening onto the landing gear cover and highlighting the line between the old gear cover and extended version, I have rough mock-up of the inner landing gear door IF the wheel well openings were not modified.
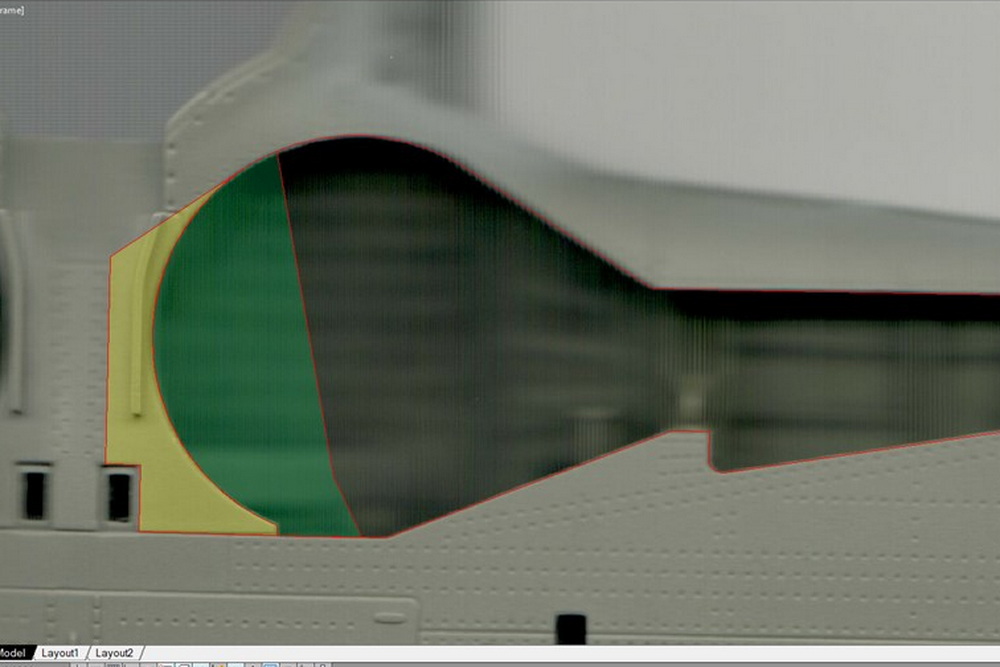
Looking at the restored A-6, we can see that rear edge of the wheel well is straight as it approaches the inner doors, presumably all the way to the ammo chute. Incorporating this information onto my scan of the wheel opening, we can define the approximate limits of removal in yellow. Yellow area + green area gives us the shape of the inner door that approximates the shape I see in the Airframe and Miniature plan view.
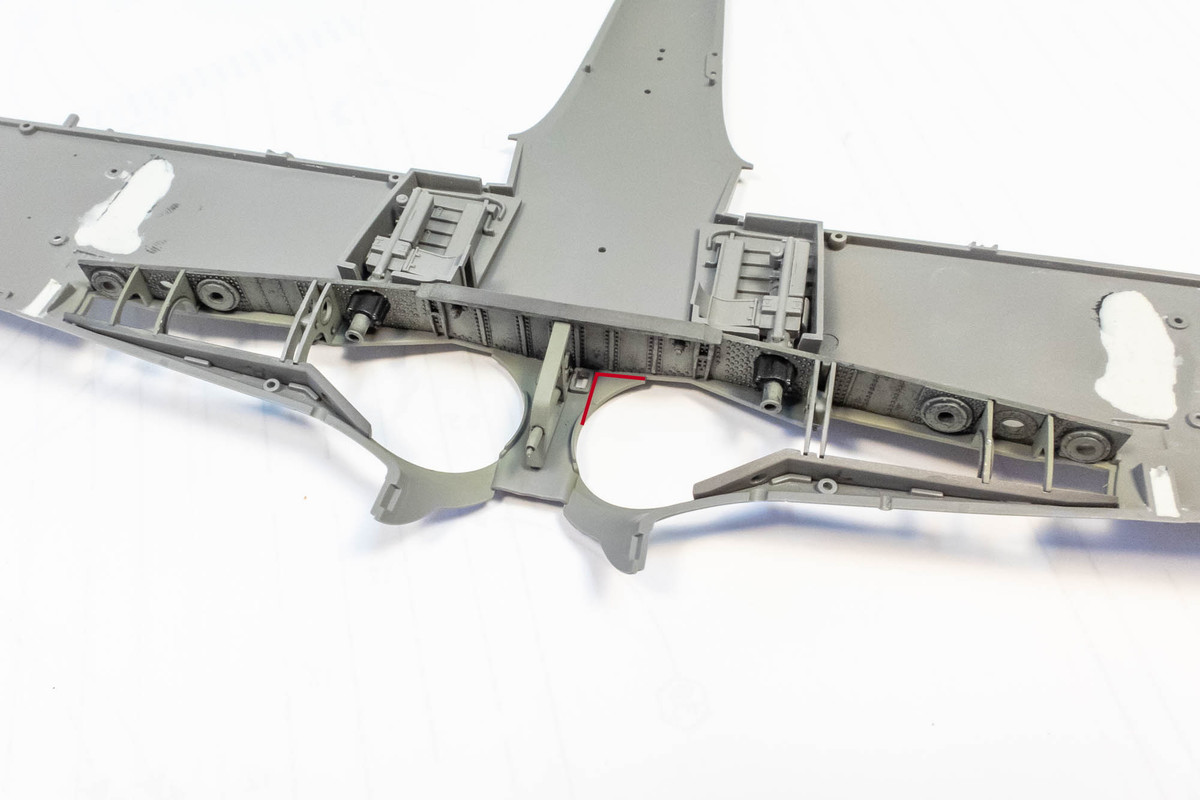
Obviously, this would be simpler if I had caught this before assembly but now I have to consider what's already in place and work around those limitations. The straight cut at the back edge of the wheel well to the ammo chute looks relatively simple, with no major obstacles.
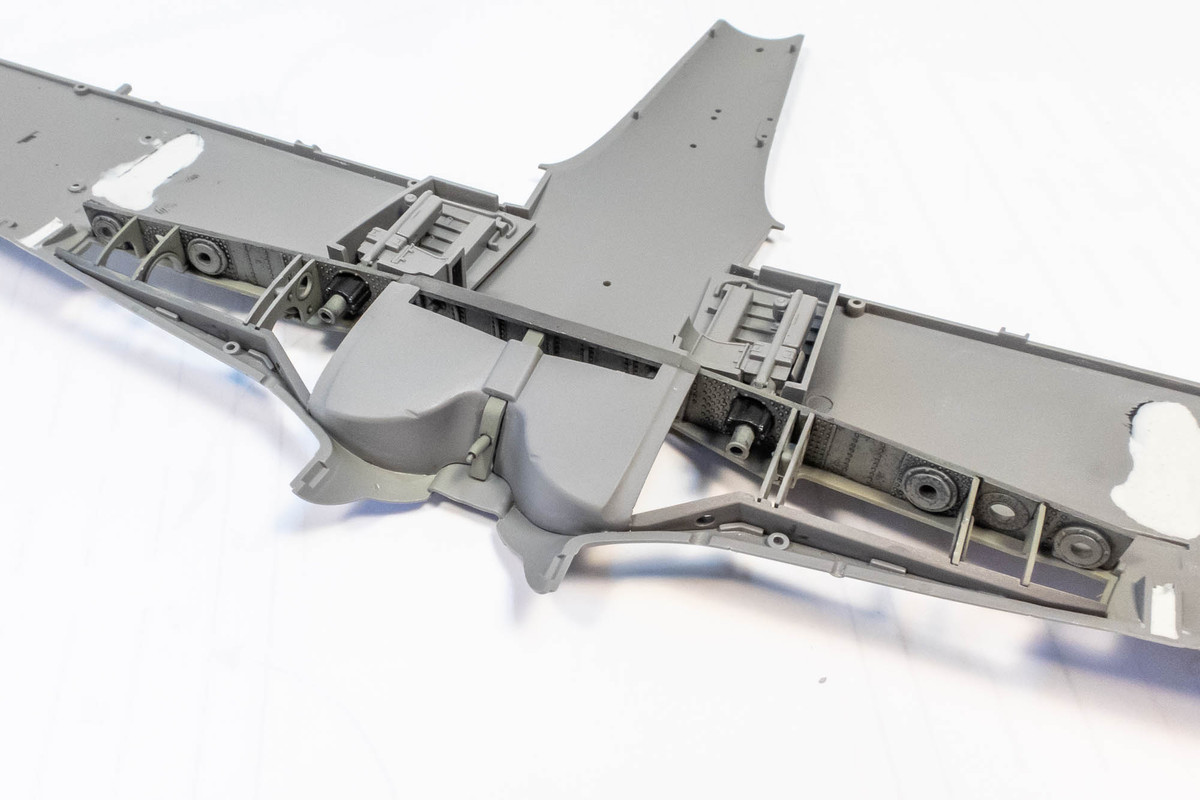
But modifications to the front edge of the wheel well opening will be restricted by the wheel well cover so I probably won't be messing with any major cuts there.
That's the rough game plan. Before I do any cutting of the wheel wells, I'm going to try and make the inner doors first. Stay tuned...
Hmmm... cannot find the doors on the sprues or in the instructions. More digging and I realize that the inner door configuration was being phased out somewhere in the A-6 production run. And it appears that the wheel wells and landing gear covers were modified when the inner doors were deleted. If I want to show the inner doors, I've got some work to do. In addition to scratching up the doors themselves, I'll have to do some cutting up of the wheel well openings and modify the outer landing gear covers as well.
A part of me wants to ignore the photo and just leave it as is but I can't. I'm going to try and represent the inner gear doors as best as I can. It's not going to be 100% accurate so please bear with some of the practical concessions I'm going to make on this little exercise.
Here's a photo of a restored A-6 that has the inner doors in place. The intended target, if you will.
A scan of a drawing from the Airframe and Miniature #7 published by Valiant Wings shows the placement and shape of the inner doors.
And here's a scan of the Border 190A wheel wells.
Looking closely at the Border landing gear covers, you can deduce what happened when the inner doors were deleted. The covers were slightly extended. Placing the outline of the wheel well opening onto the landing gear cover and highlighting the line between the old gear cover and extended version, I have rough mock-up of the inner landing gear door IF the wheel well openings were not modified.
Looking at the restored A-6, we can see that rear edge of the wheel well is straight as it approaches the inner doors, presumably all the way to the ammo chute. Incorporating this information onto my scan of the wheel opening, we can define the approximate limits of removal in yellow. Yellow area + green area gives us the shape of the inner door that approximates the shape I see in the Airframe and Miniature plan view.
Obviously, this would be simpler if I had caught this before assembly but now I have to consider what's already in place and work around those limitations. The straight cut at the back edge of the wheel well to the ammo chute looks relatively simple, with no major obstacles.
But modifications to the front edge of the wheel well opening will be restricted by the wheel well cover so I probably won't be messing with any major cuts there.
That's the rough game plan. Before I do any cutting of the wheel wells, I'm going to try and make the inner doors first. Stay tuned...
John aka JKim
-----------<><

-----------<><
-
BlackSheep214

- Elite Member
- Posts: 13596
- Joined: Sun Apr 06, 2014 8:47 pm
Re: Border 1/35 Focke Wulf Fw190A-5 Nowotny Double Chevron
But aren't you working on the Fw190A-5, not the Fw190A-6?
“Who controls the skies, controls the fate of this Earth”
Author unknown- 352nd Fighter Group, Blue-Nosed Bastards of Bodney
“Send one plane it’s a sortie; send two planes it’s a flight; send four planes it’s a test of airpower. - Richard Kohn
Author unknown- 352nd Fighter Group, Blue-Nosed Bastards of Bodney
“Send one plane it’s a sortie; send two planes it’s a flight; send four planes it’s a test of airpower. - Richard Kohn
Re: Border 1/35 Focke Wulf Fw190A-5 Nowotny Double Chevron
The kit is boxed as an A-6. Nowotny's Double Chevron is most likely an A-5 and so my build is a bit of a conversion. The major difference between the A-5 and A-6 is a wing modification to allow bigger guns in the outboard position. Nowotny's A-5 doesn't have any guns in the outboard gun position nor does it have the associated bulges on the outboard gun covers, which is why I sanded the bulges off. As far as I can tell, some A-5's and some A-6's had the inner wheel well covers. The photos of Nowotny's A-5 clearly show the inner covers so that is why I am adding them.BlackSheep214 wrote: ↑Sat Sep 09, 2023 2:23 pm But aren't you working on the Fw190A-5, not the Fw190A-6?
Prior to discovering the inner cover issue, I had glued on the horizontal stabilizers as well as the wing ailerons.
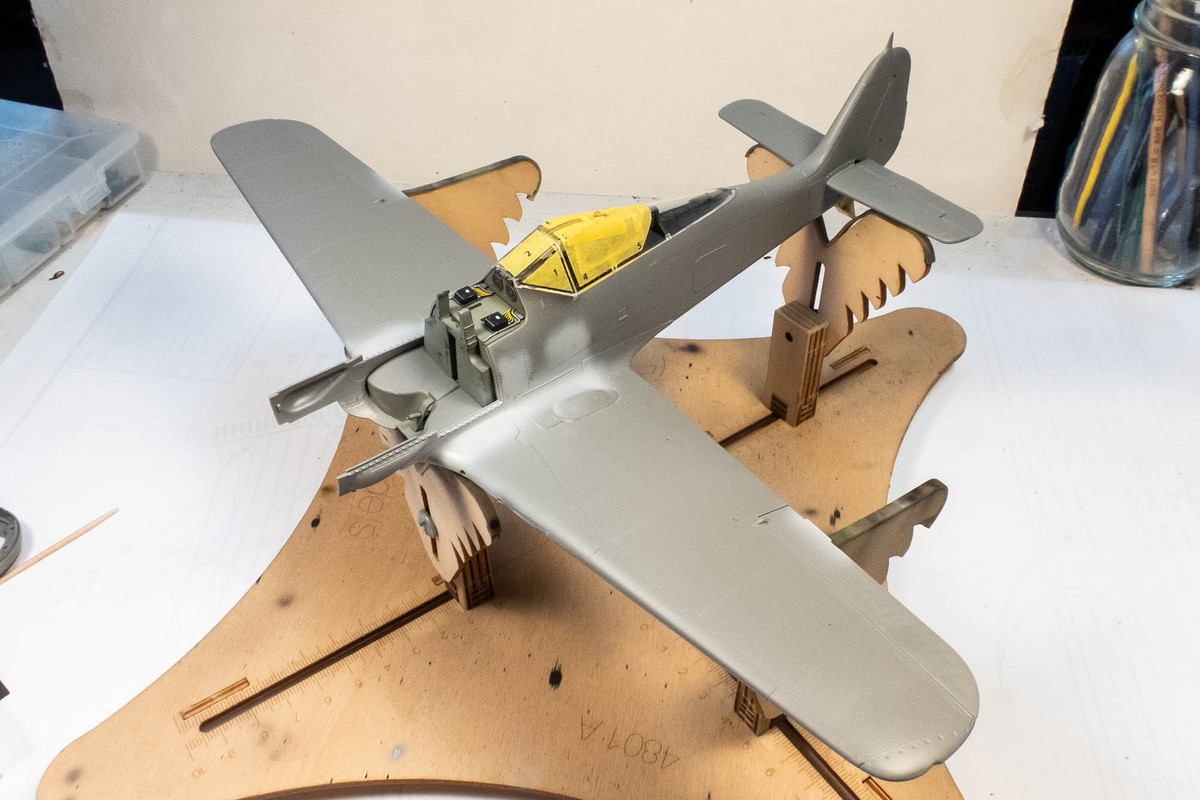
Iterative applications of Mr Primer Surfacer 1000 to fill the multiple seams in this area. There are some subtle "ghost" seams that still need to be addressed but the majority of the fill work is done.
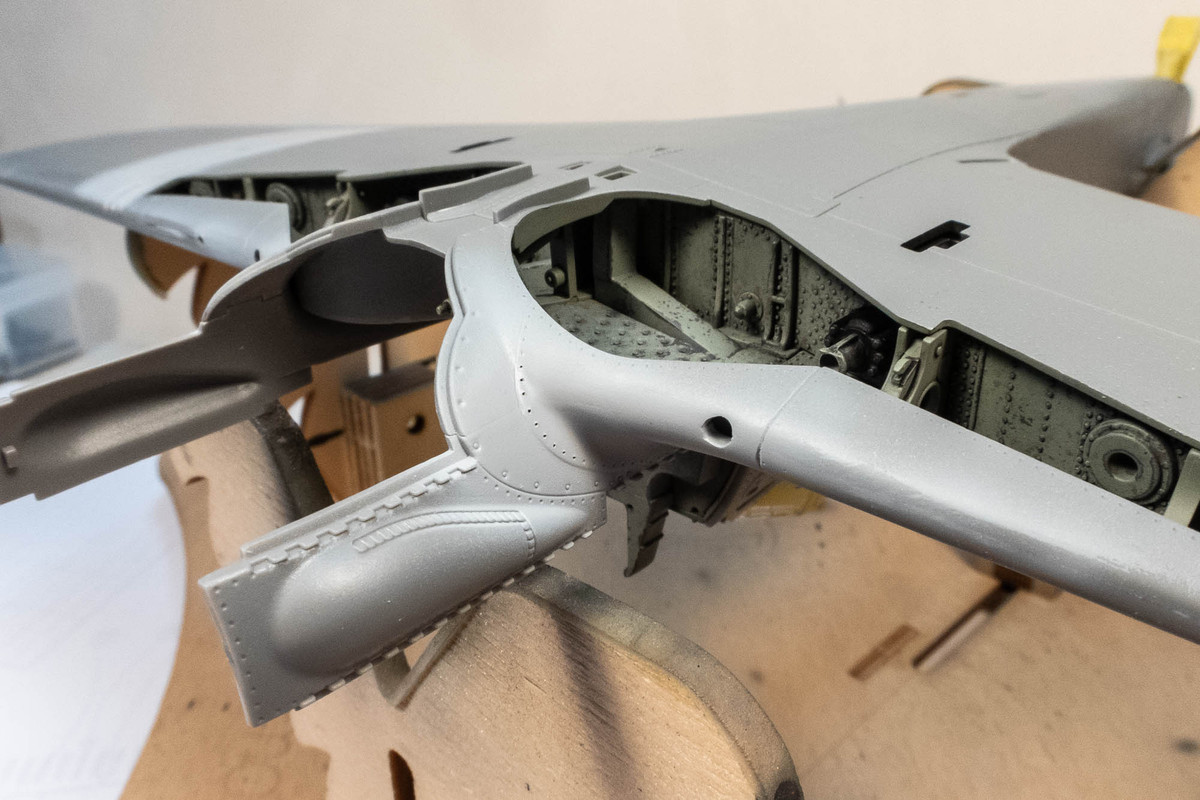
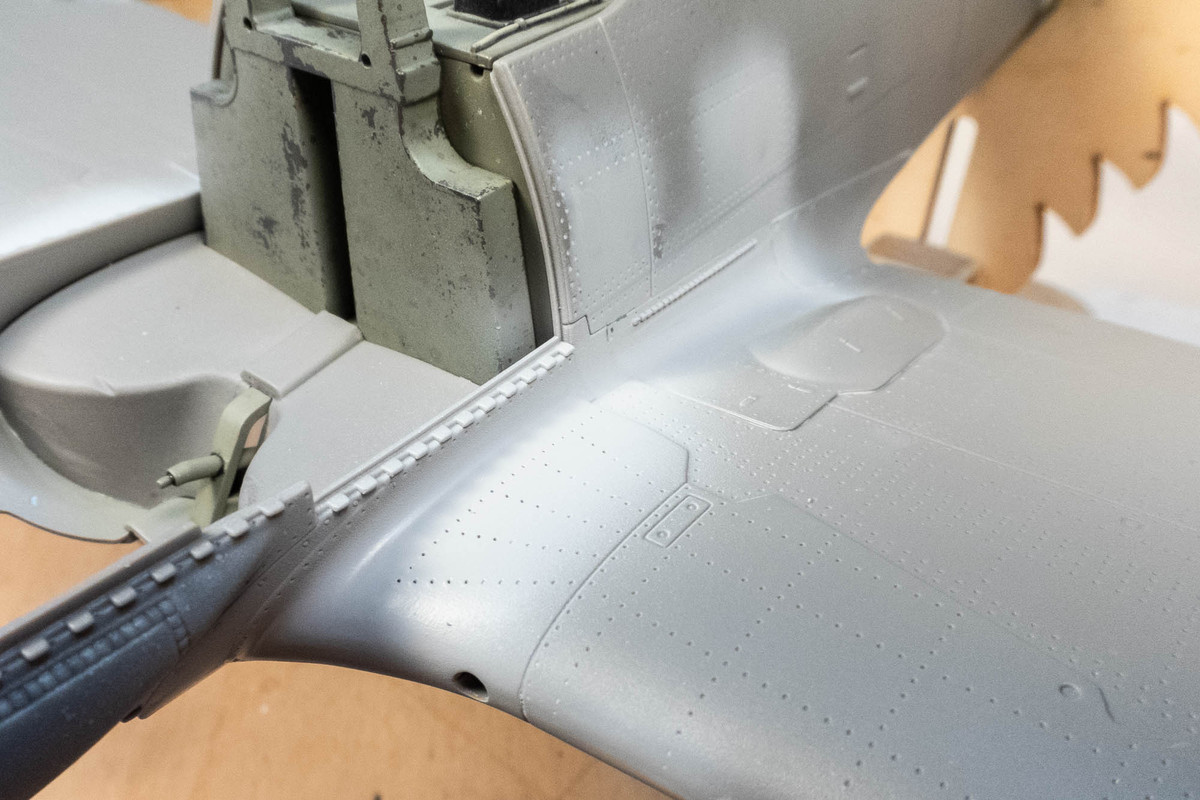
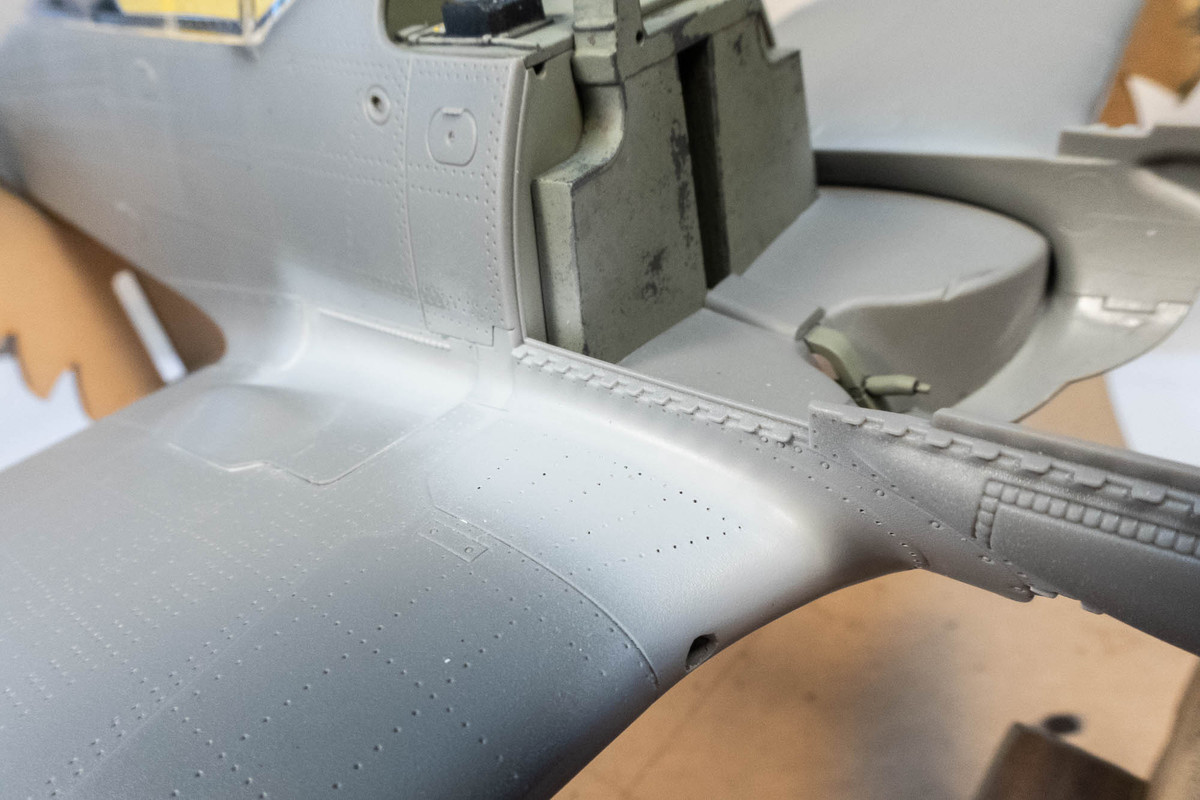
At this time, I decided to try a mock-up of the inner gear door using brass sheet and Oramask 810 masking material. The drawings I showed in my previous post were used to create a mask of the door outline. The mask was placed on a sheet of brass and sprayed with Mr Primer Surfacer 1000. I now have an outline of the door and is easily cut to shape using a pair of scissors.
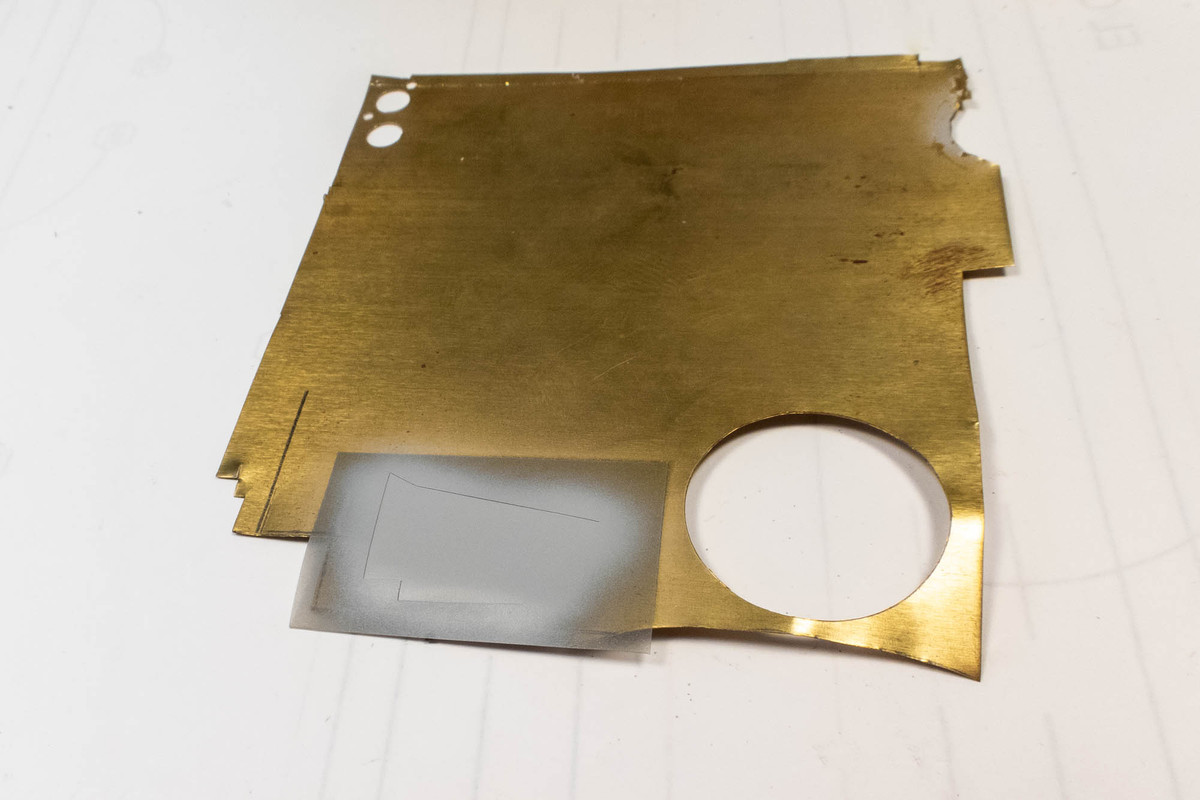
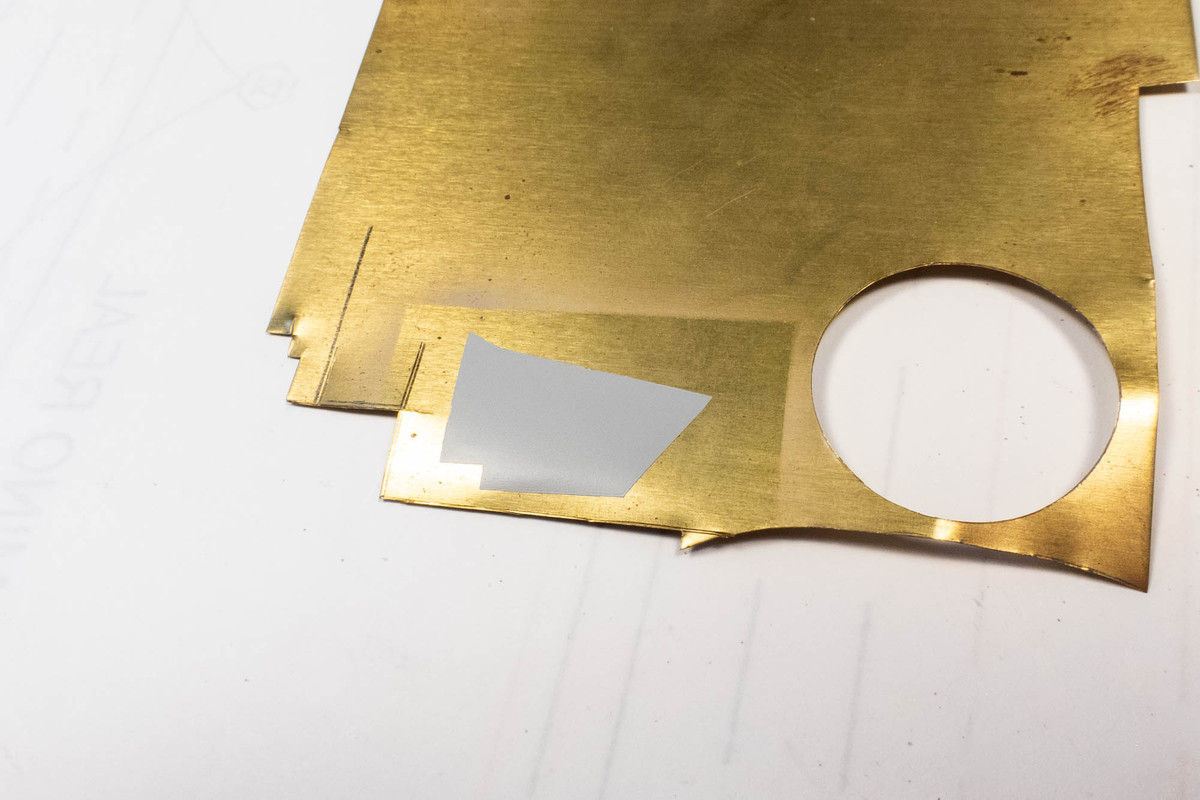
I rolled the base edge of the brass door on a toothpick to get the curvature. The internal detail on the interior of the gear door was replicated in CAD and multiple masks of this pattern were printed out. I used two copies of the mask, exactly on top of one another to create the raised detail.
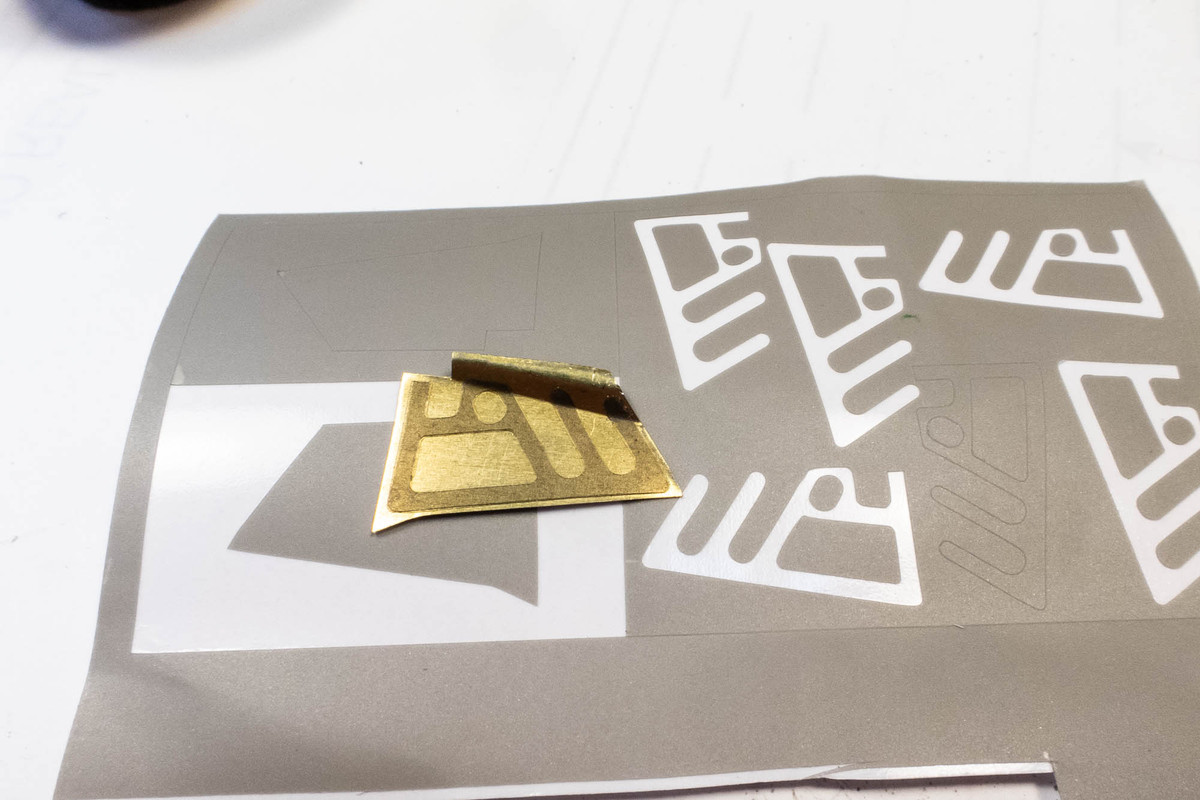
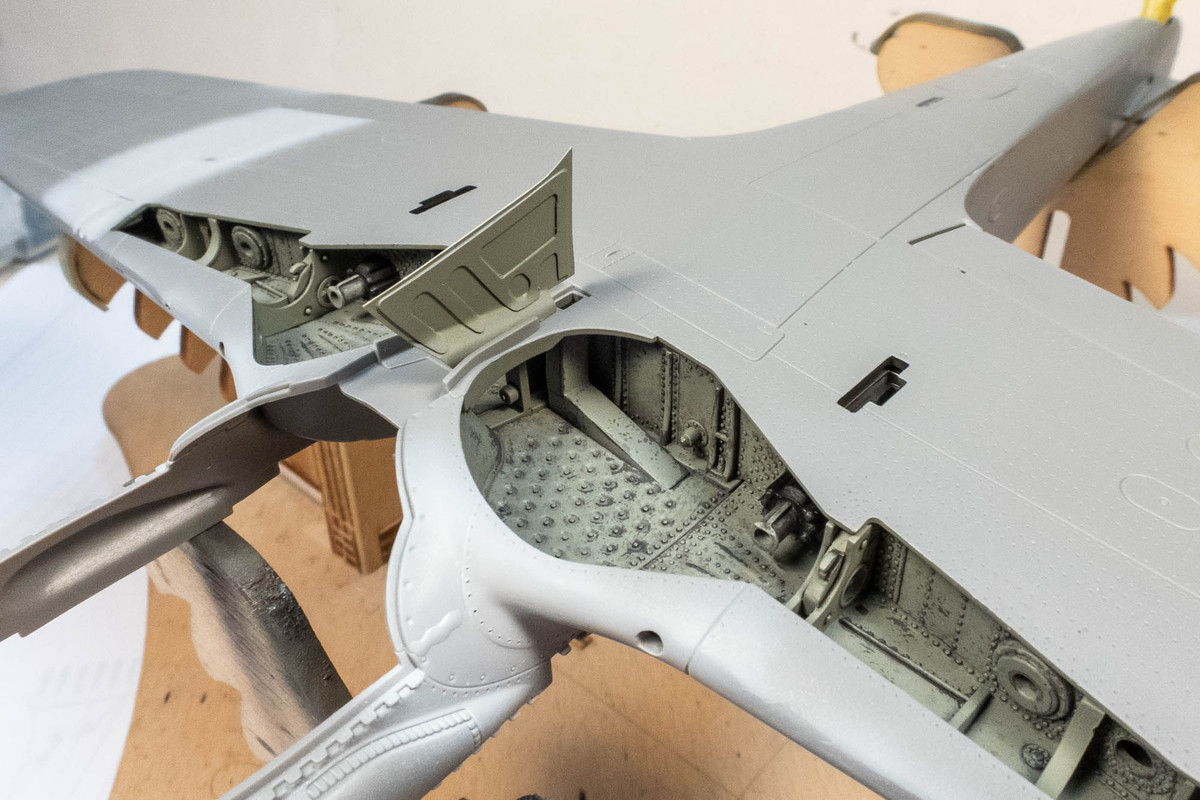
The door was sprayed with Mr Primer Surfacer 1000 and then RLM 02 Green Grey. This proves to me that I can make an acceptable door but I'm going to play around with this a bit. The brass prevents me from adding rivet detail to match the rest of the model so preferrably, I'd like to use sheet styrene.
John aka JKim
-----------<><
-----------<><
-
BlackSheep214
- Elite Member
- Posts: 13596
- Joined: Sun Apr 06, 2014 8:47 pm
Re: Border 1/35 Focke Wulf Fw190A-5 Nowotny Double Chevron
Ok, now I understand. You’re making good work on the doors. They look great. Could you create rivets on them with a rivet tool? The linkage to those inner doors I assume you’ll make use using brass tubing.
Have you thought of having someone create the doors with a 3D printer for you?
Have you thought of having someone create the doors with a 3D printer for you?
“Who controls the skies, controls the fate of this Earth”
Author unknown- 352nd Fighter Group, Blue-Nosed Bastards of Bodney
“Send one plane it’s a sortie; send two planes it’s a flight; send four planes it’s a test of airpower. - Richard Kohn
Author unknown- 352nd Fighter Group, Blue-Nosed Bastards of Bodney
“Send one plane it’s a sortie; send two planes it’s a flight; send four planes it’s a test of airpower. - Richard Kohn
Re: Border 1/35 Focke Wulf Fw190A-5 Nowotny Double Chevron
Great ideas! Don't have any connections for 3D printing and this isn't too complicated so I think it'll be fine without it. Looking at the PE fret that came with the kit, I spy some unused parts that could possibly used for the long actuators for the inner doors.BlackSheep214 wrote: ↑Sat Sep 09, 2023 10:52 pm Ok, now I understand. You’re making good work on the doors. They look great. Could you create rivets on them with a rivet tool? The linkage to those inner doors I assume you’ll make use using brass tubing.
Have you thought of having someone create the doors with a 3D printer for you?
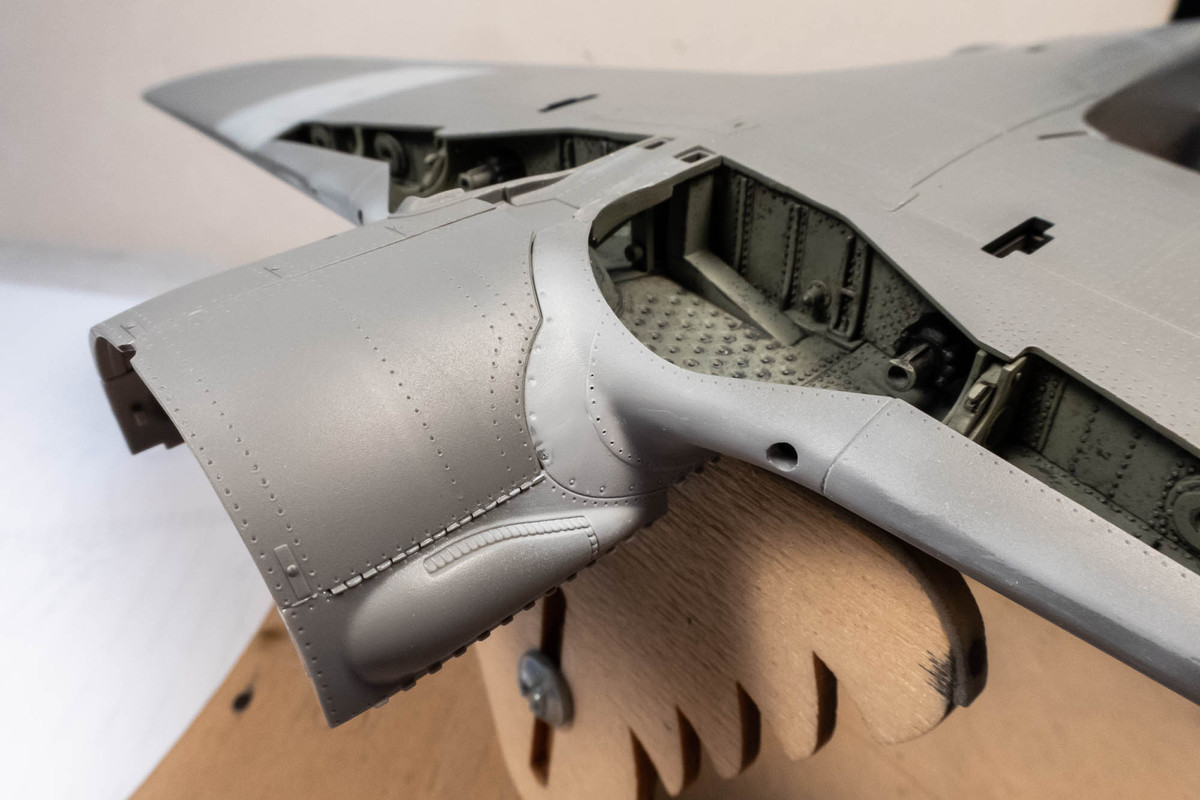
Since I'm pretty confident that the doors are do-able, I've gone ahead with the surgery on the wheel well openings. Due to interference from other internal parts, I had to stop short of my planned cuts. But I think the major visual cues are present and that's about the best I can do.
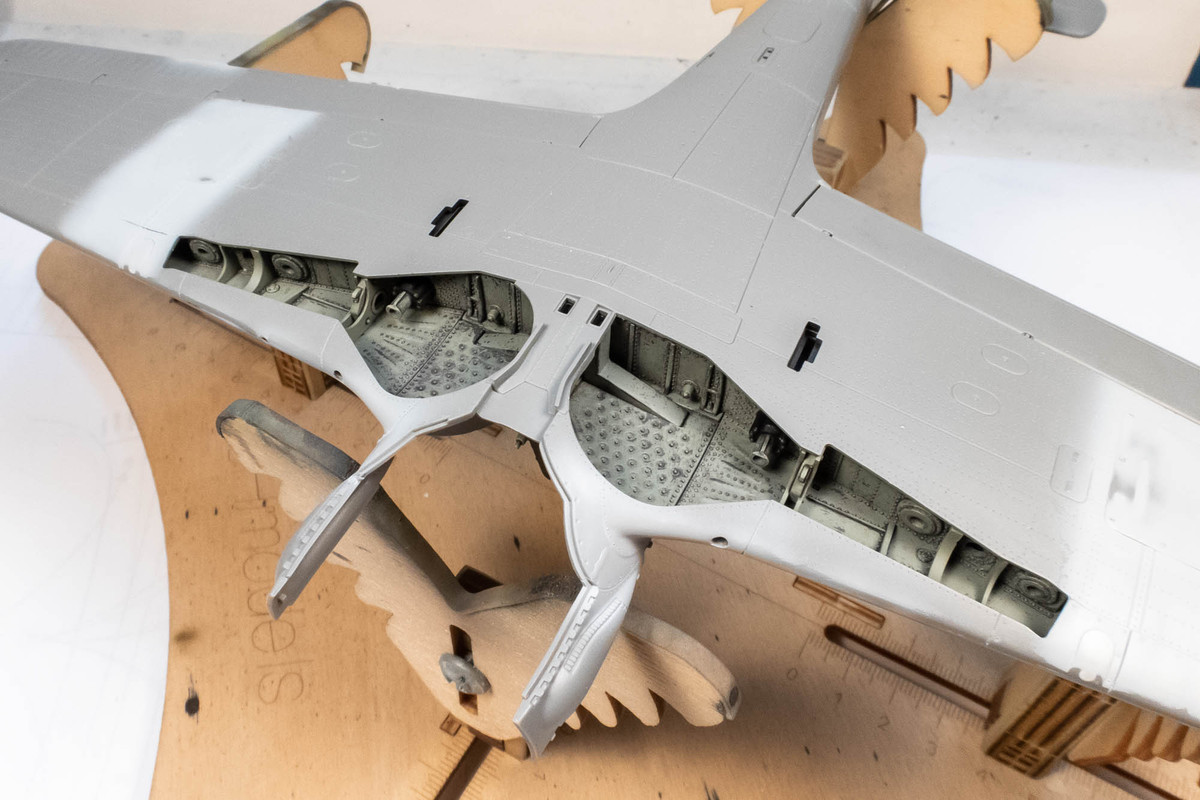
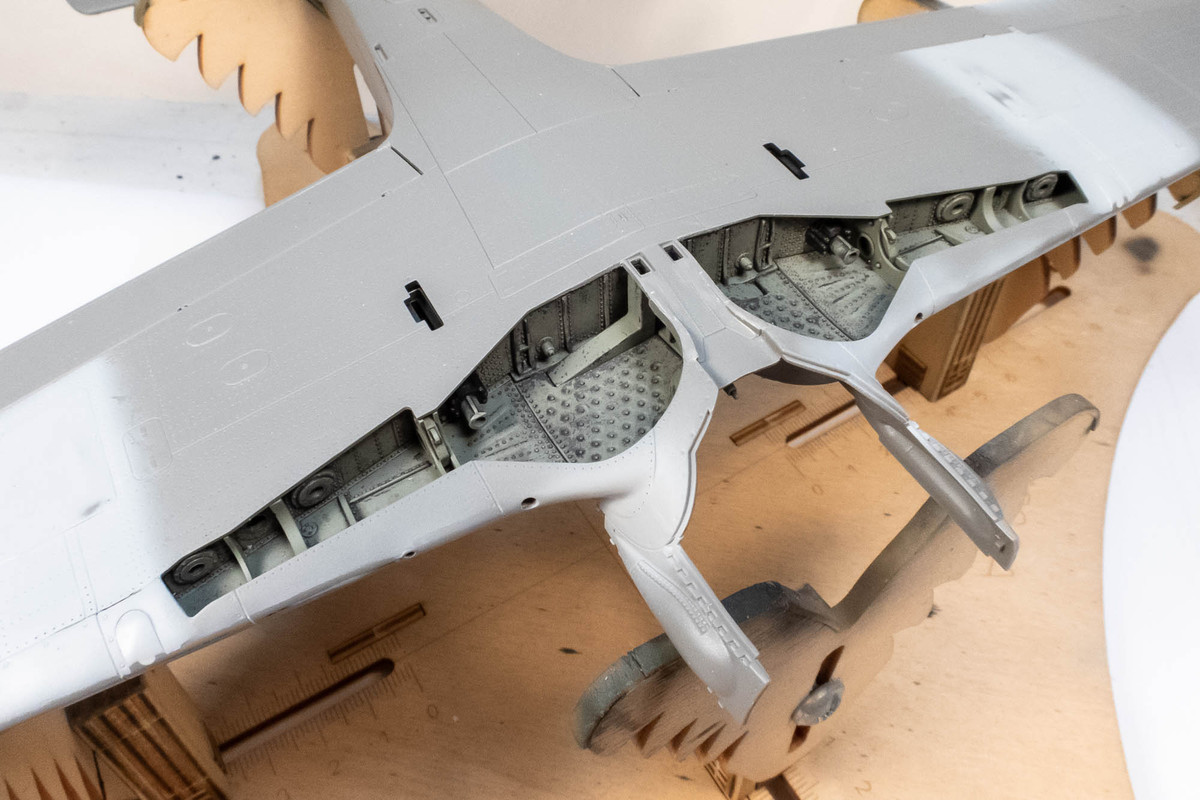
The main landing gear covers have been cut along the extension line.
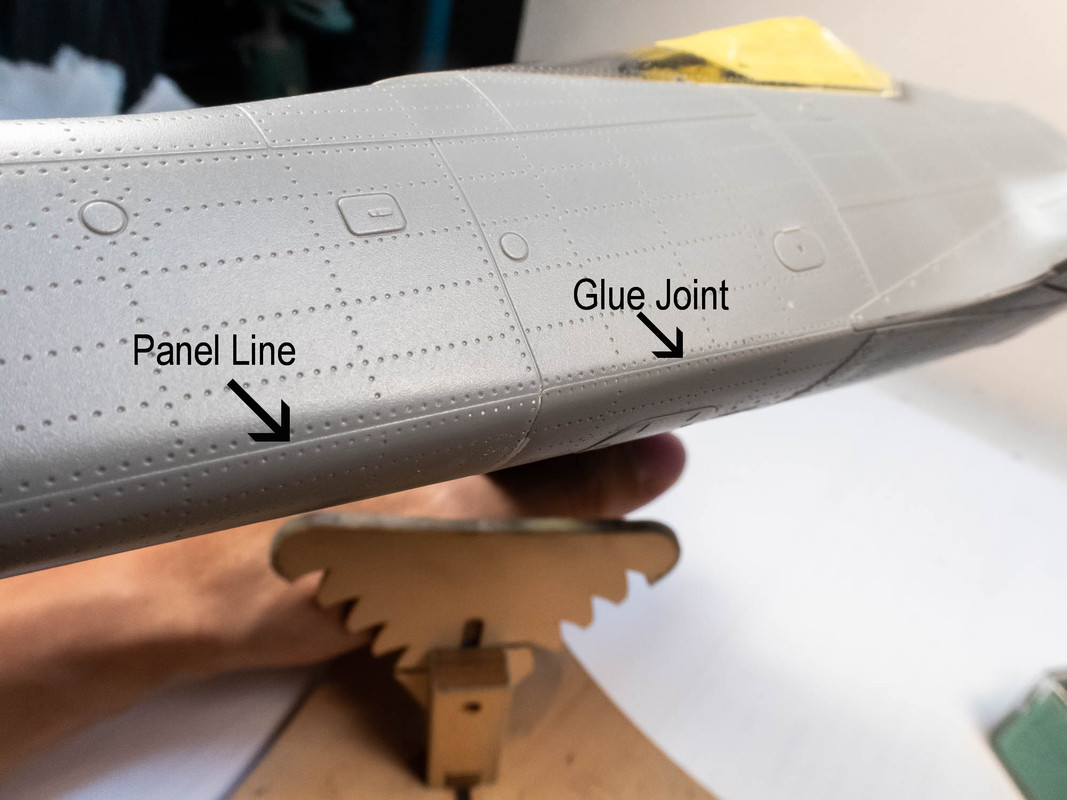
An example of how well the parts fit on this kit. Can you tell the difference between the molded panel line and the untreated glue joint?
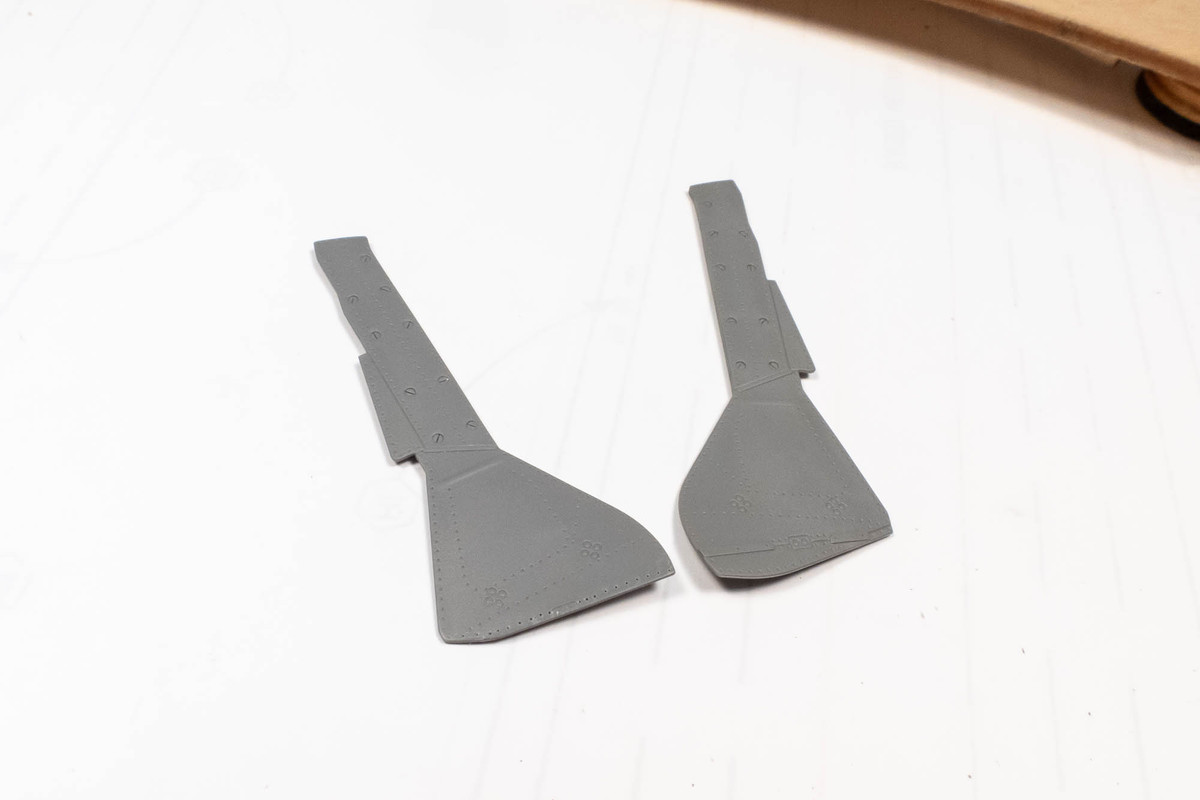
The nose ring has some circular fasteners that are quite prominent. The circles are raised as well as the outlines being recessed with two raised bolts. So I sanded those down to look more aerodynamic. The nose cowl is comprised of three parts to account for the outer and inner structure.
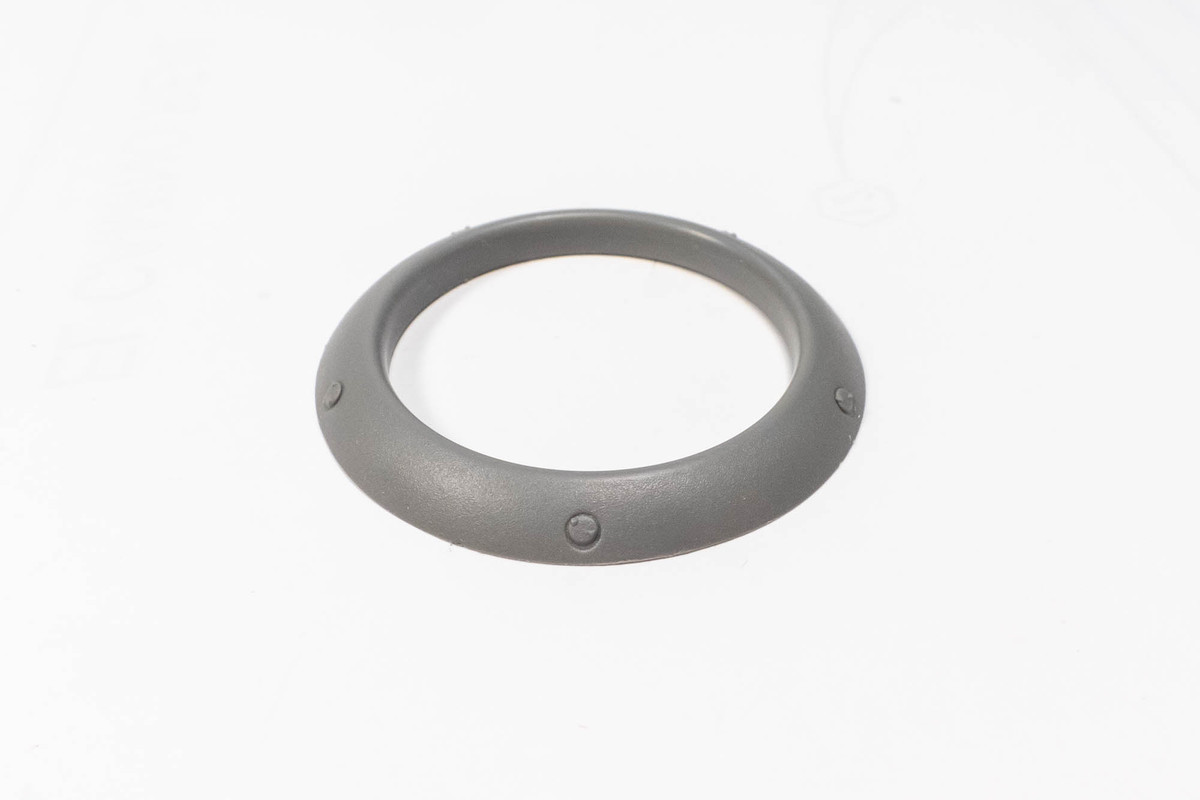
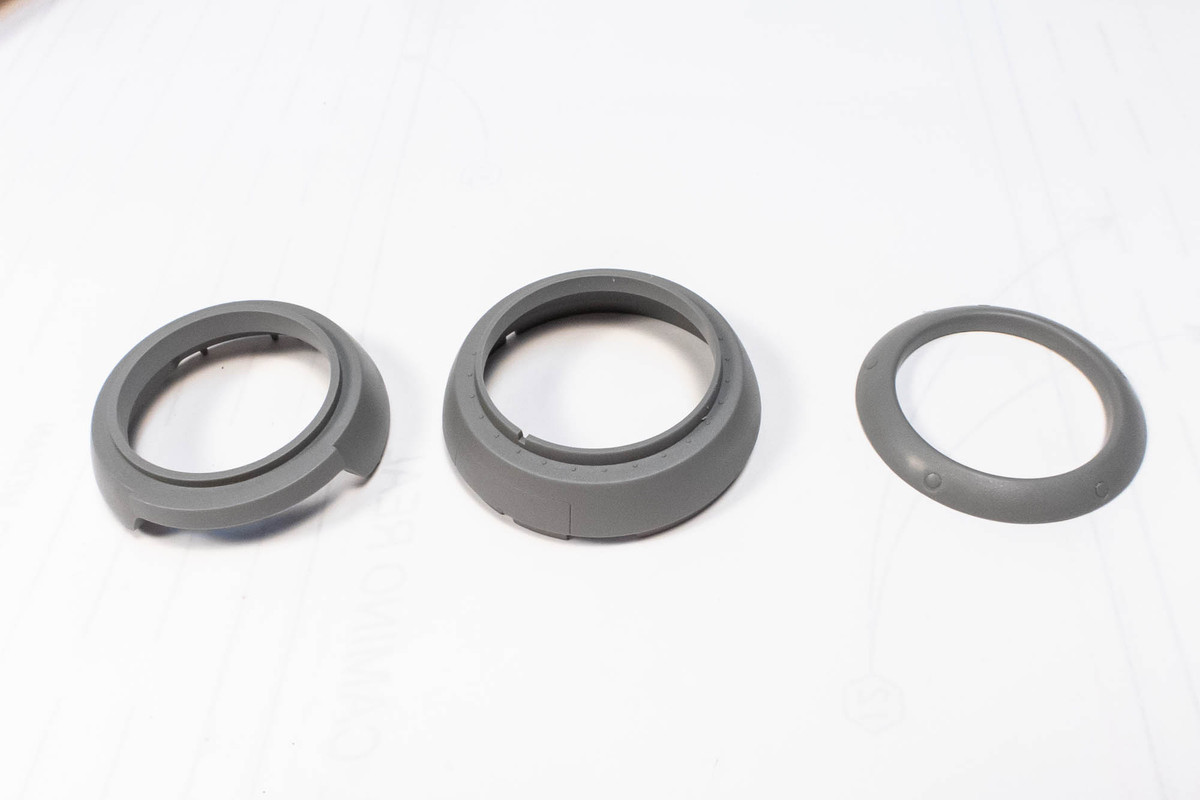
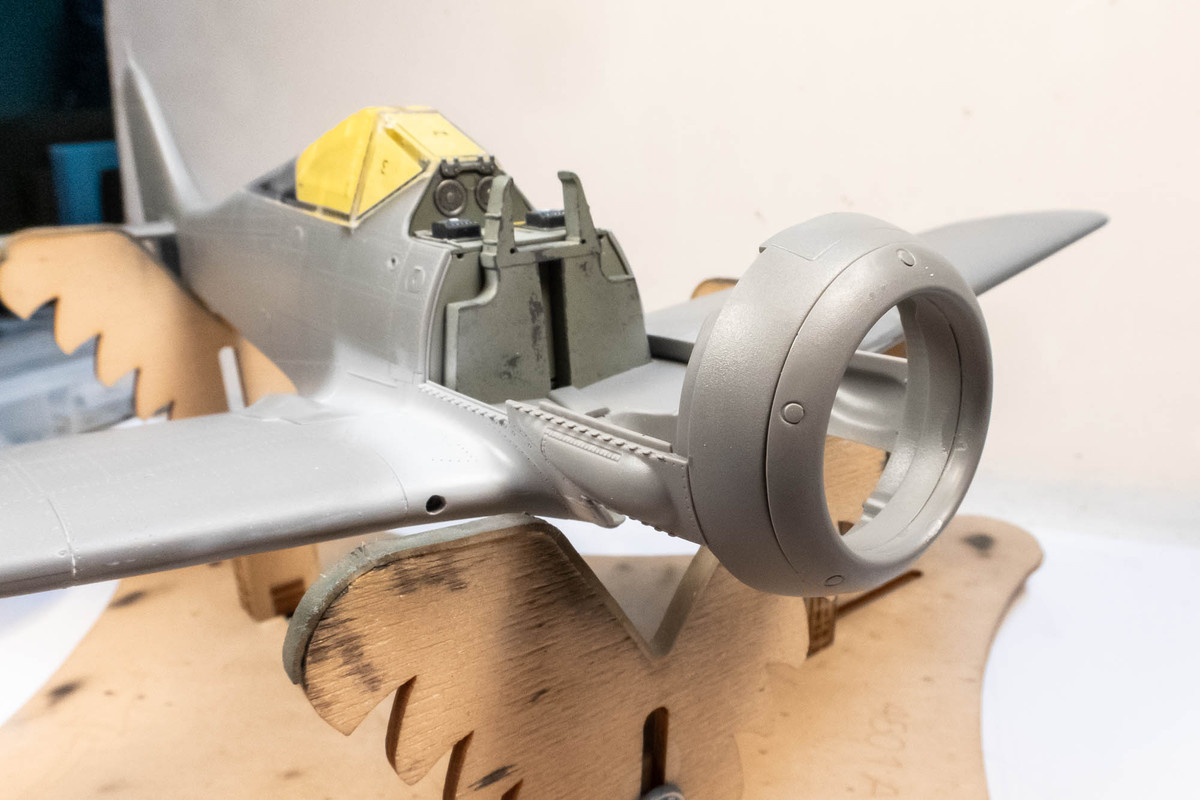
I'm trying to figure out the order of construction as it relates to the engine and the multiple panels that cover the engine. For now, I am gluing the lower engine panels into place as they will not interfere with the fit of the engine. Again, fit along all glue edges is excellent.
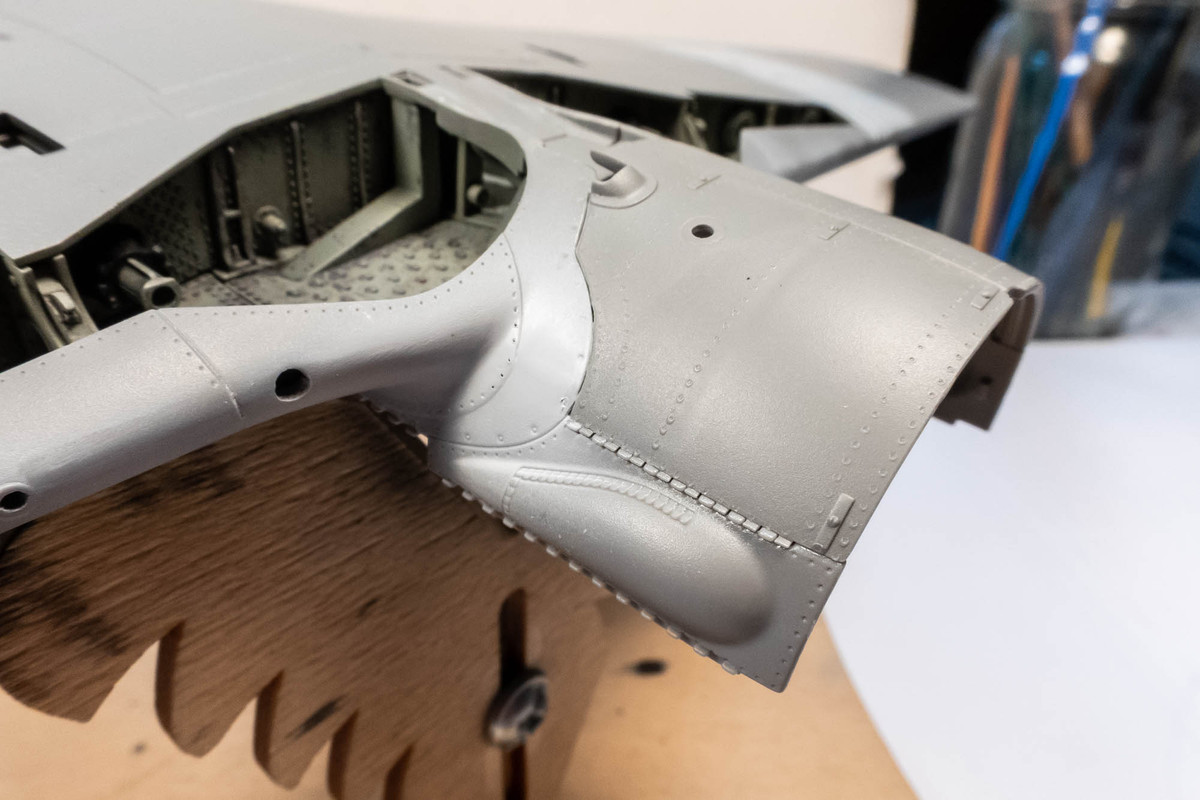
In addition to the Z-shaped frame that serves as the engine mount, there are three circular pipes that glue into the firewall and point forward into the engine compartment. They do not attach to the engine.
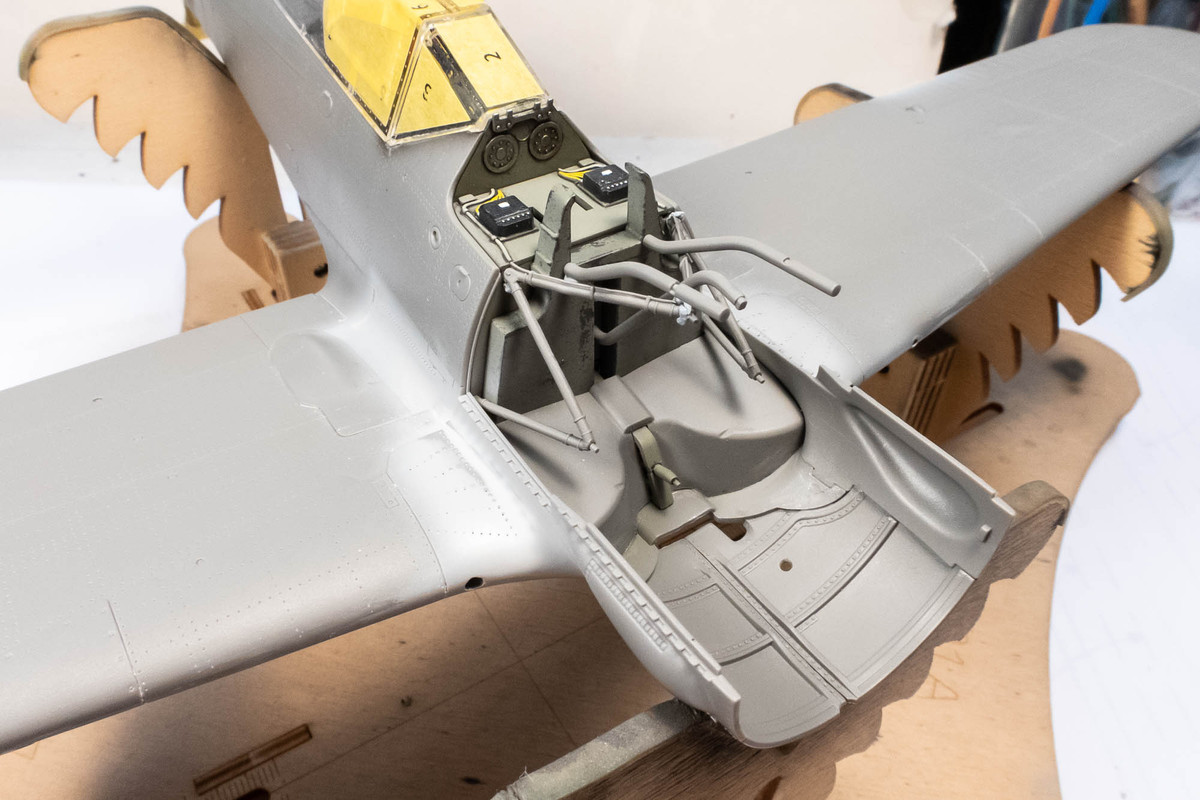
Instead, they form the three attachment points for the gun trough part. Thoughtful engineering on Border's part but a bit tricky to execute since the connection at the firewall is too loose to provide proper positioning without dry-fitting or gluing the gun trough part at the same time.
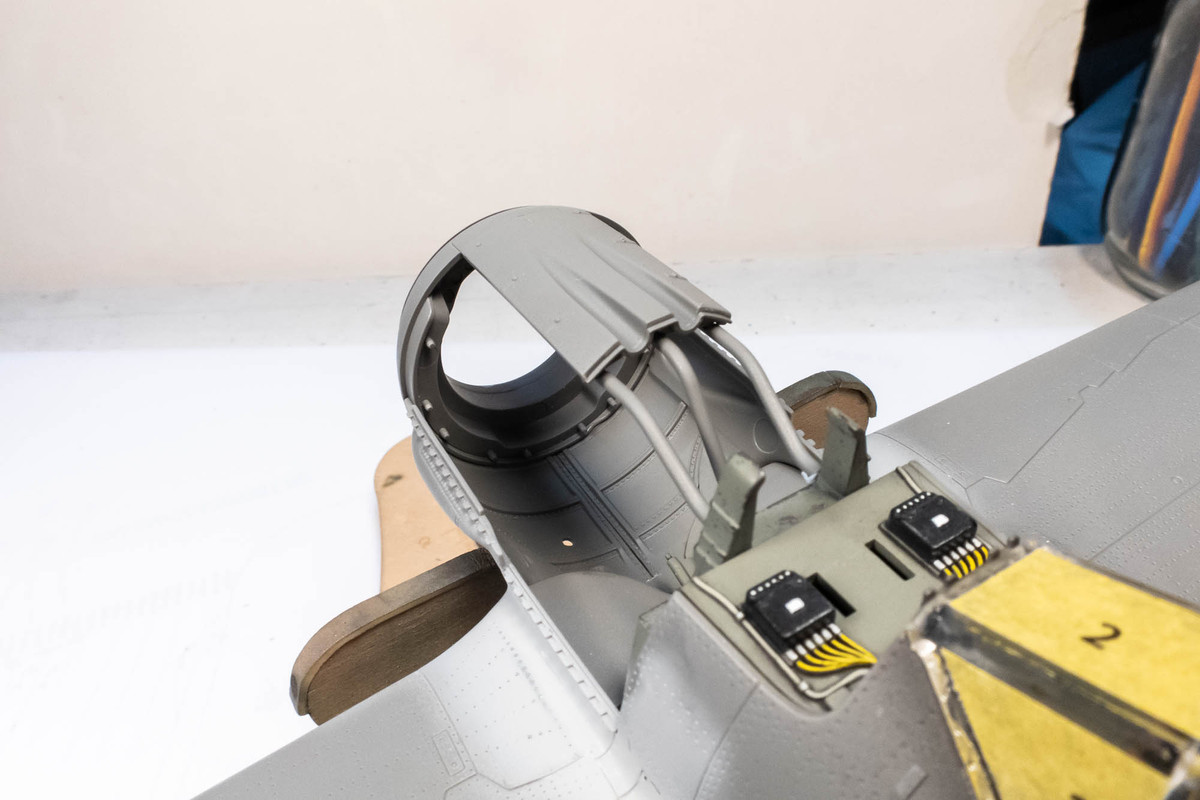
John aka JKim
-----------<><
-----------<><
Re: Border 1/35 Focke Wulf Fw190A-5 Nowotny Double Chevron
Some shots of the engine and guns temporarily mounted in place...
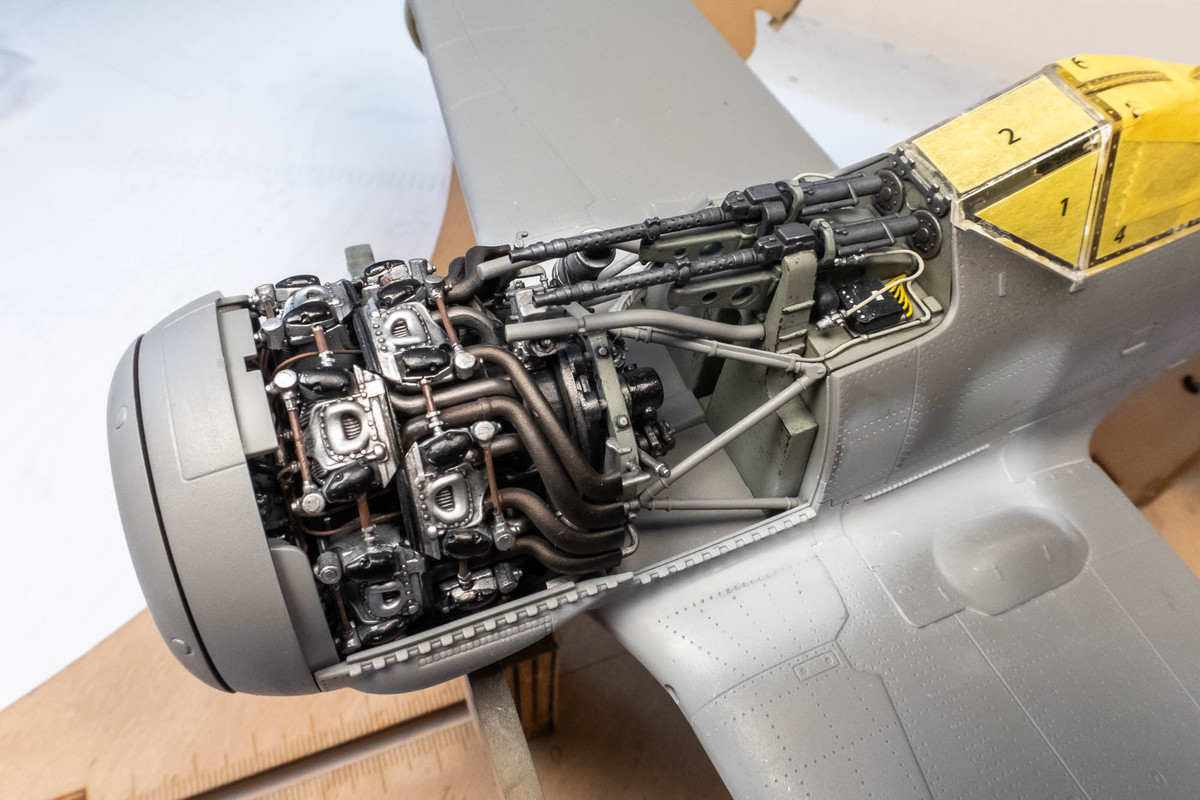
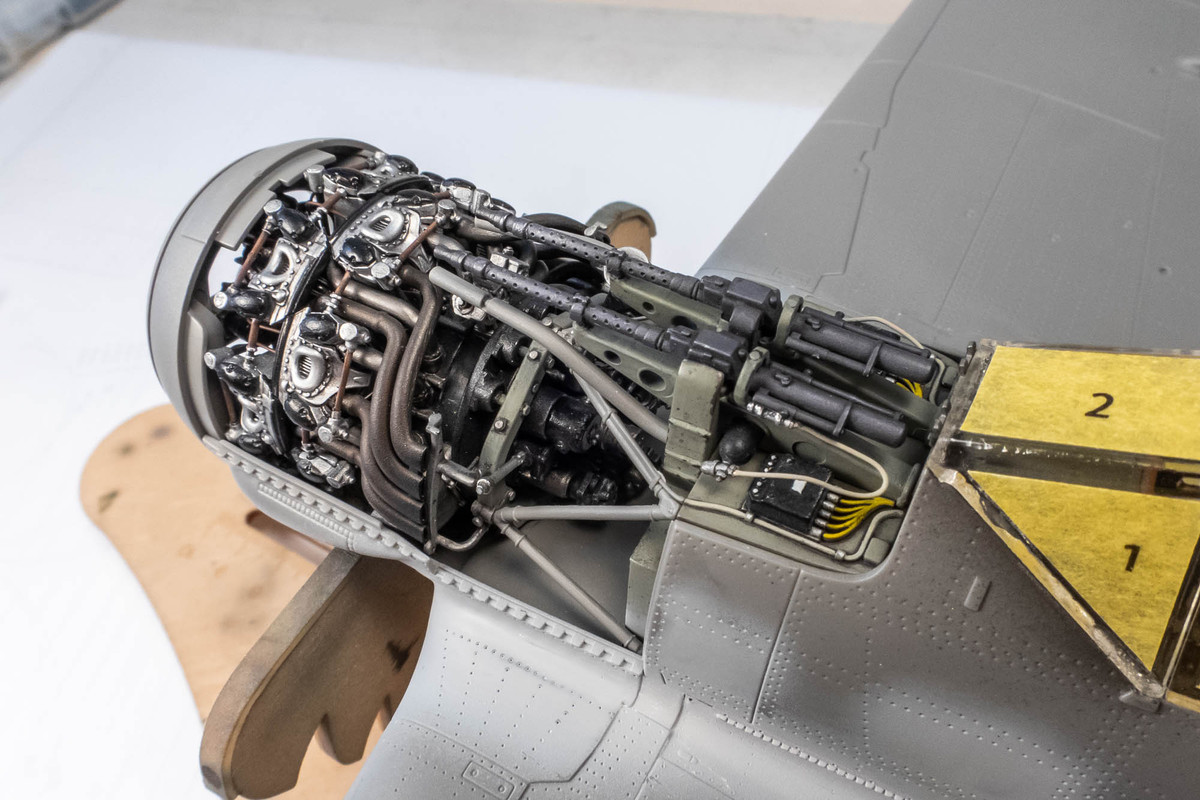
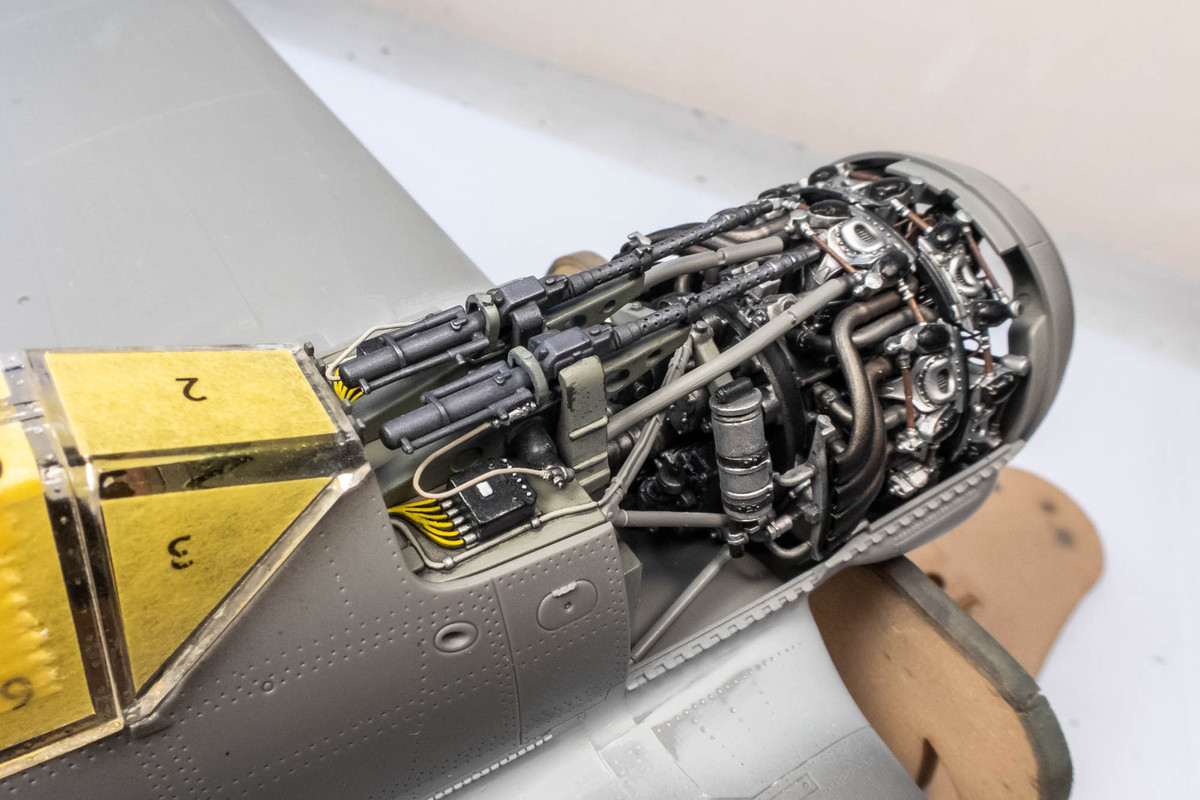
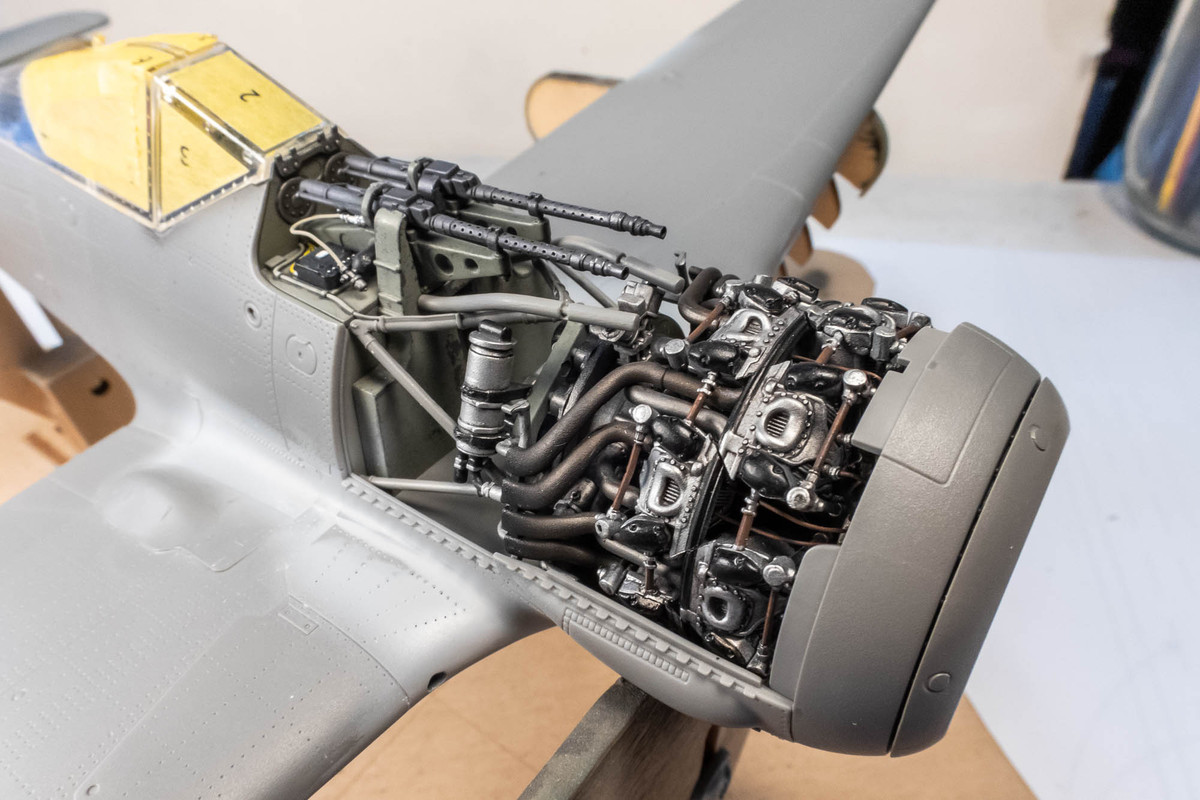
The detail provided by Border is incredible. However, there is a limitation to what Border, or any model manufacturer, can do in this area. The absence of any piping, ducting or wiring between the engine and firewall is conspicuous to me. In order to help hide this area, I am going to paint the interior surfaces of the lower engine compartment black or a very dark color.
Also... the multiple panels that cover the engine fit very well. But they really need glue and I'm seeing signs that they will not sit flush unless they are glued into place.
The detail provided by Border is incredible. However, there is a limitation to what Border, or any model manufacturer, can do in this area. The absence of any piping, ducting or wiring between the engine and firewall is conspicuous to me. In order to help hide this area, I am going to paint the interior surfaces of the lower engine compartment black or a very dark color.
Also... the multiple panels that cover the engine fit very well. But they really need glue and I'm seeing signs that they will not sit flush unless they are glued into place.
John aka JKim
-----------<><
-----------<><
Re: Border 1/35 Focke Wulf Fw190A-5 Nowotny Double Chevron
I chose to follow the instructions and glue the engine into place after the attaching the lower engine cowling parts. First, I glued the attachment truss to the firewall. Although the frame is thin and a bit rickety, once the four glue points are attached to the engine, the truss should gain rigidity.
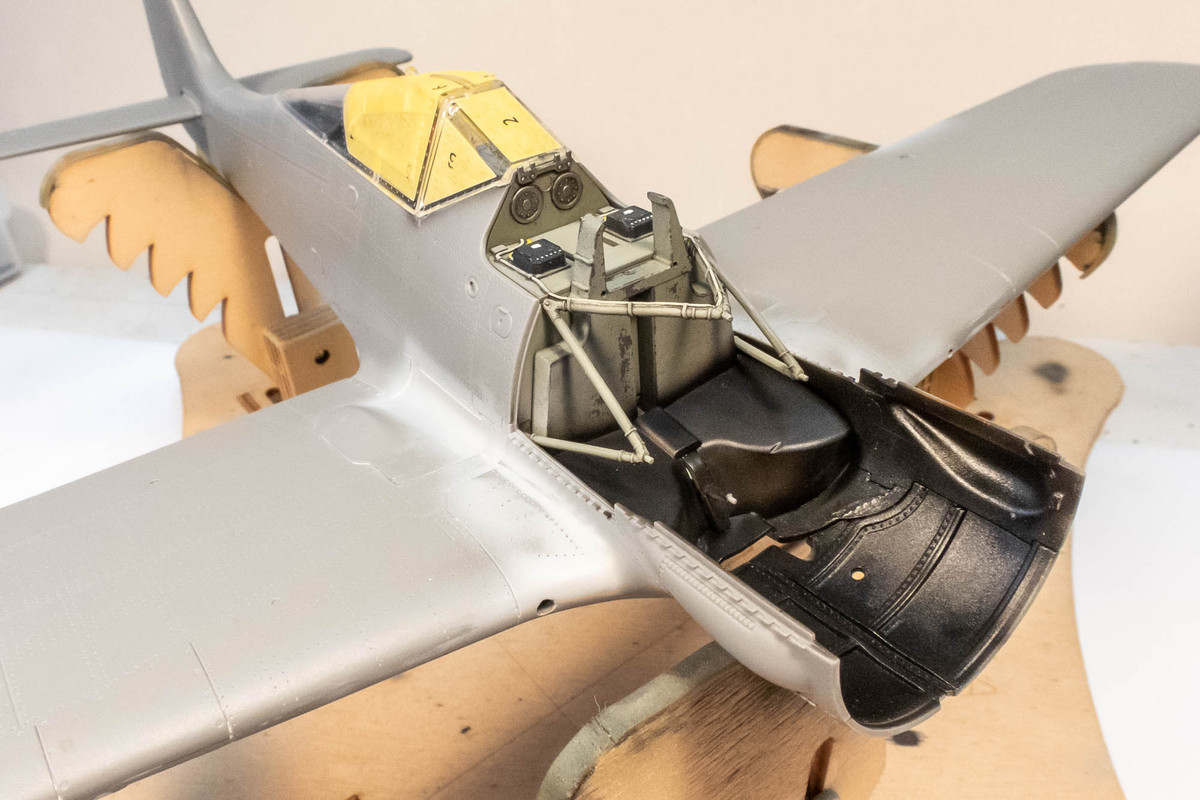
The bottom attachment is secured first since it is unreachable from the outside. Both glue surfaces (pin and hole) for the bottom attachment were softened with Tamiya Extra Thin before the engine was slid into place. The other three attachment pins were then nudged into their respective holes and Tamiya Extra Thin was seeped into the connections.
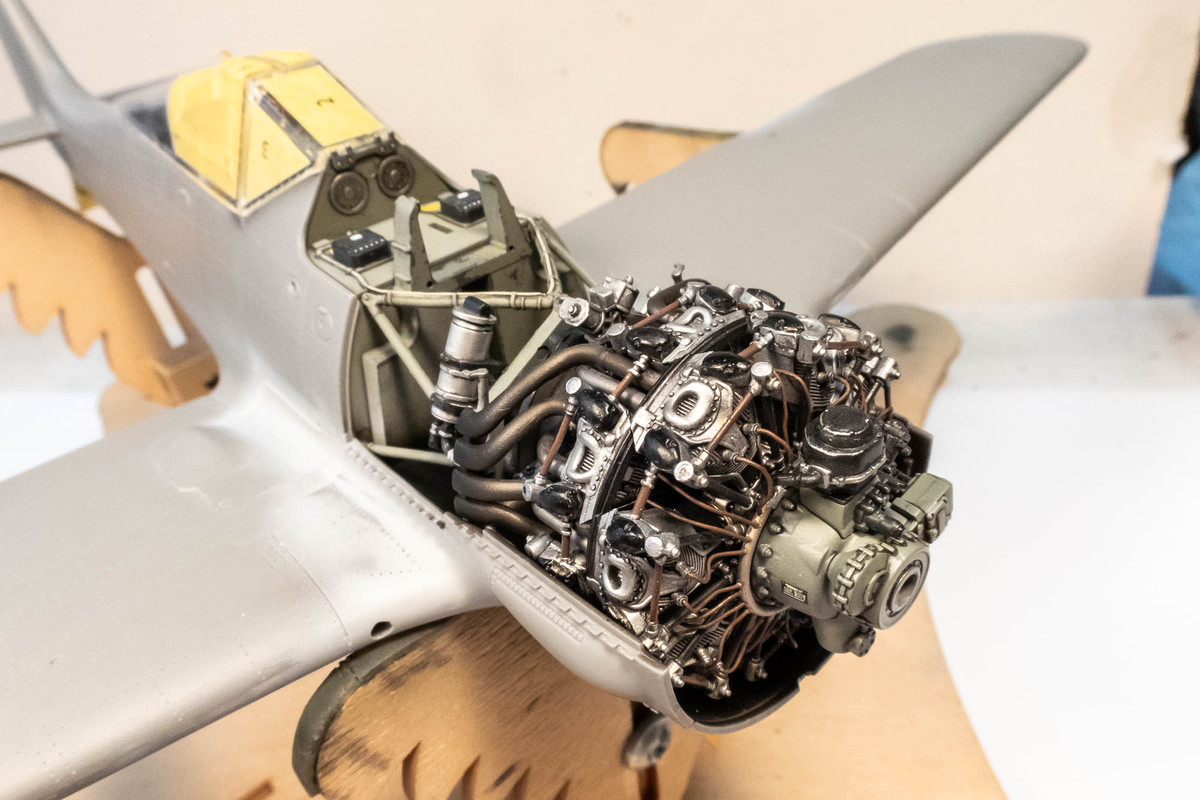
The nose ring cowling was then pushed into position and the three circular pipes are attached to the firewall with Tamiya Extra Thin.
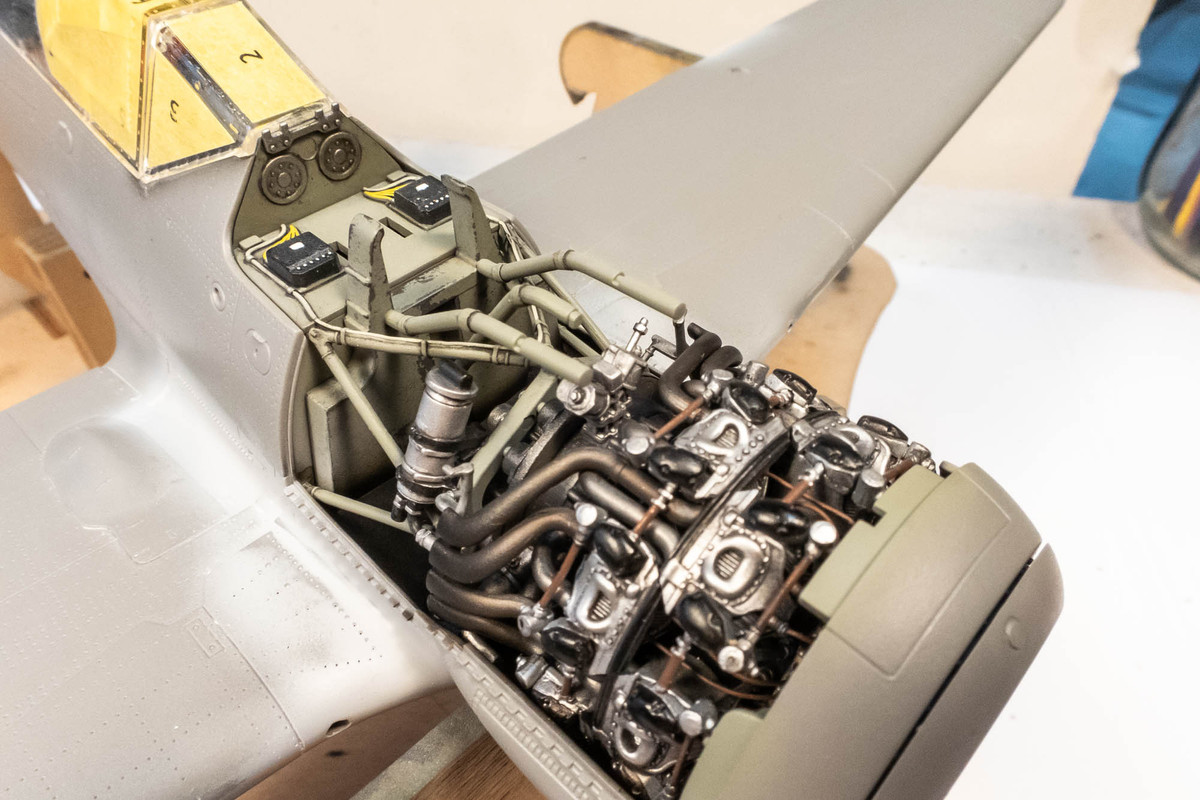
While the glue on the pipes was still soft, the gun trough plate was placed into position. The front edge is held by the lip on the nose ring cowling and the rear edge by the the three pipes. No glue is being used for the gun trough plate and nose ring yet as I'm still trying to accommodate some removable panels but the parts are kept in this position so that the three pipes will set in the correct orientation.
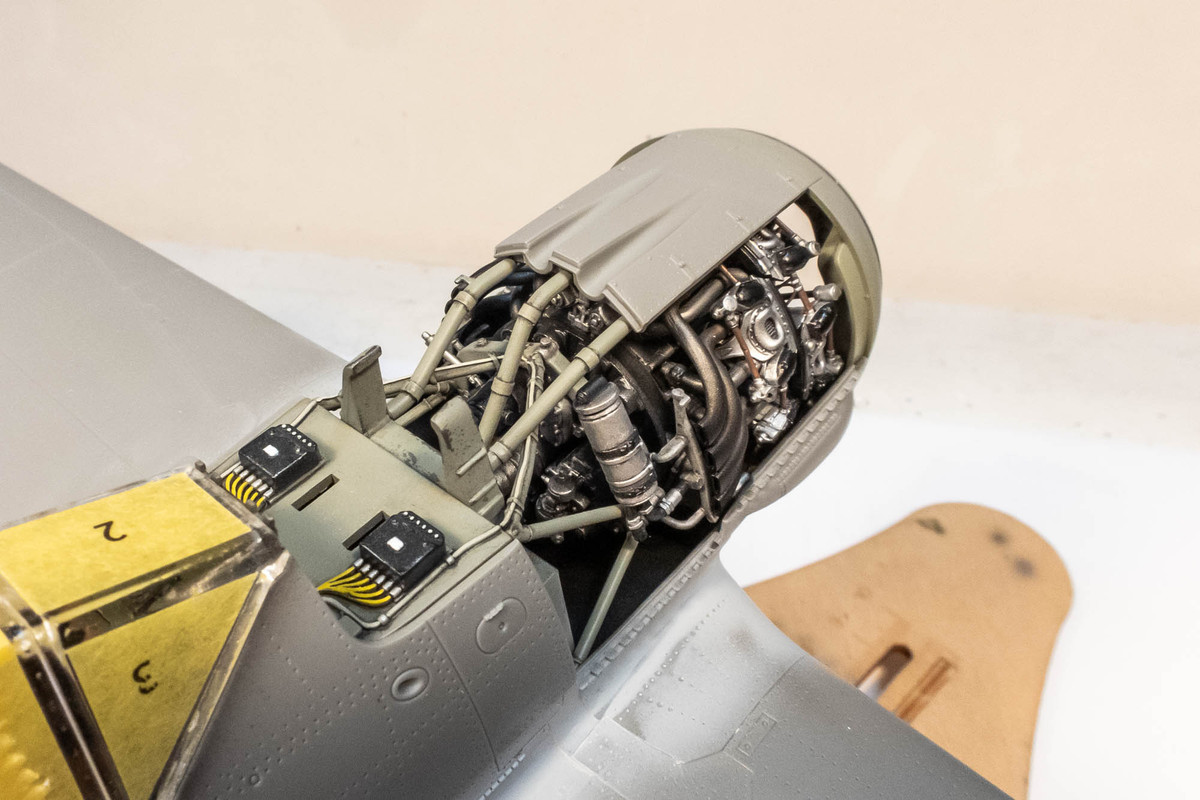
I've gone ahead and glued the exhaust baffle plates on both sides as I am not planning to have those removable.
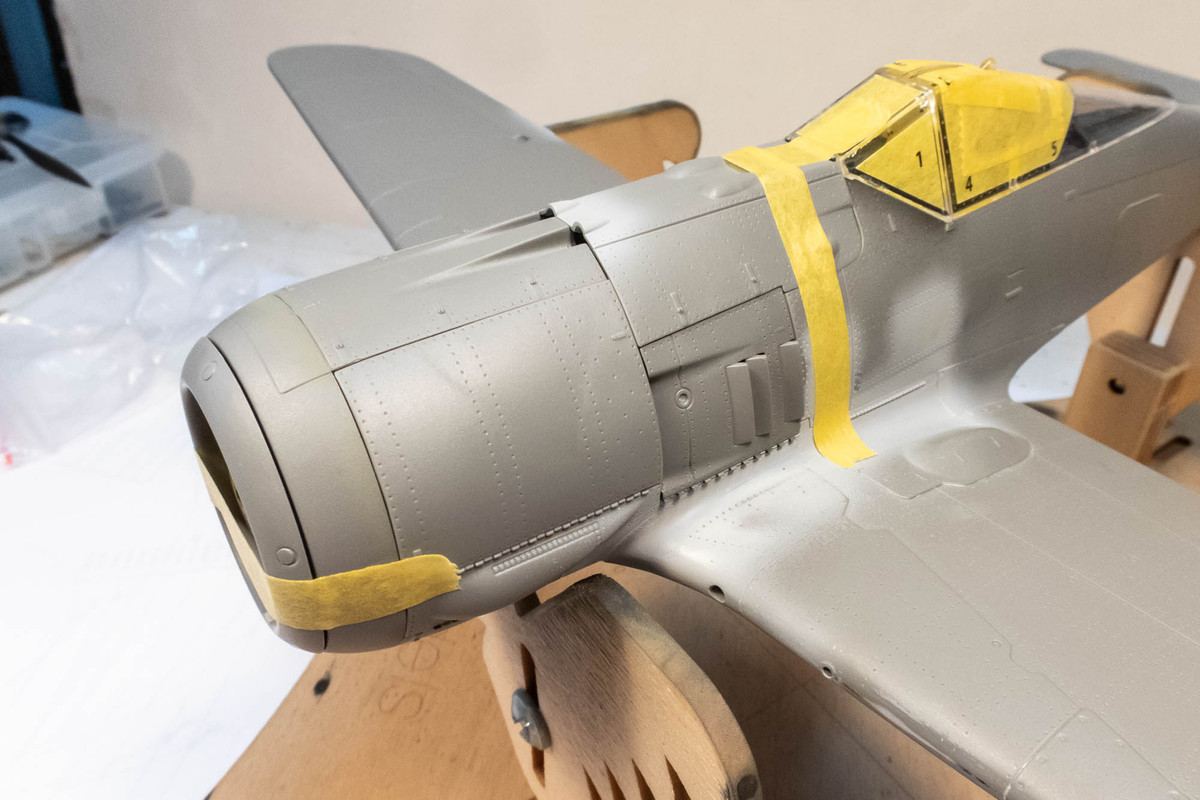
Both engine side cowlings fit very well and may be candidates to be left unglued and thus, removable.
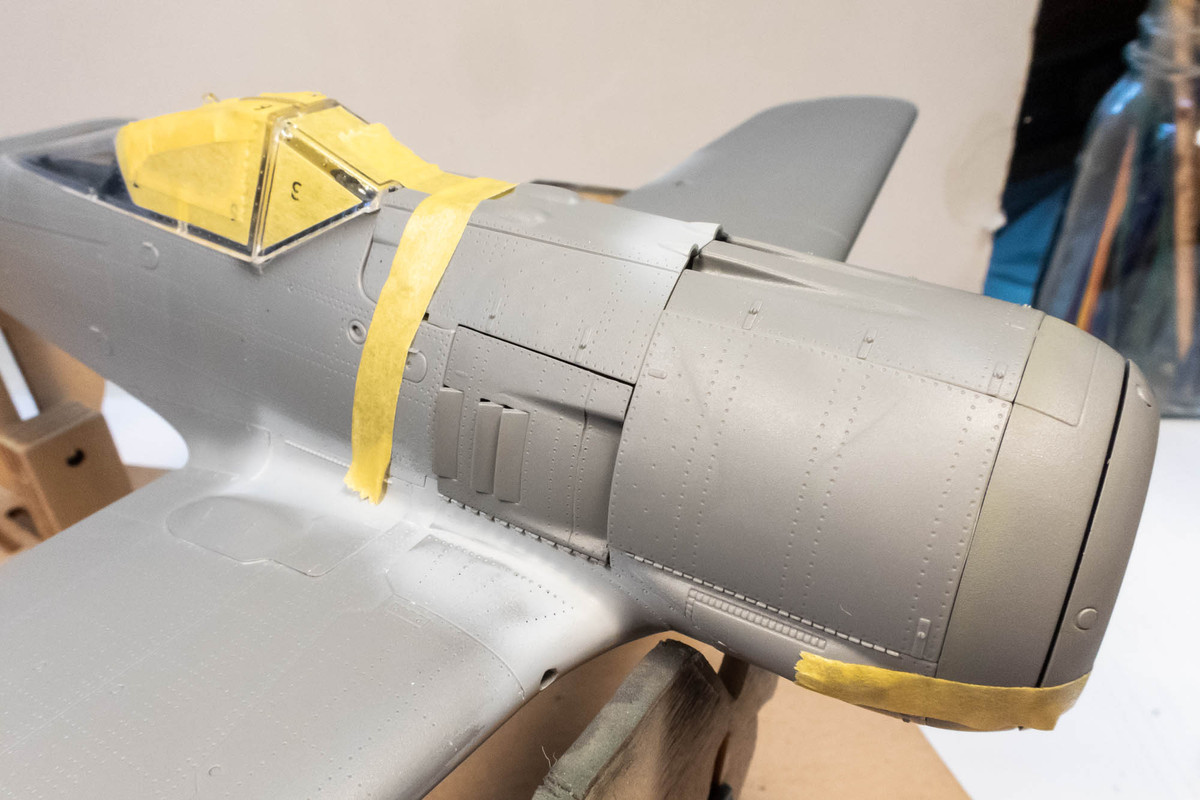
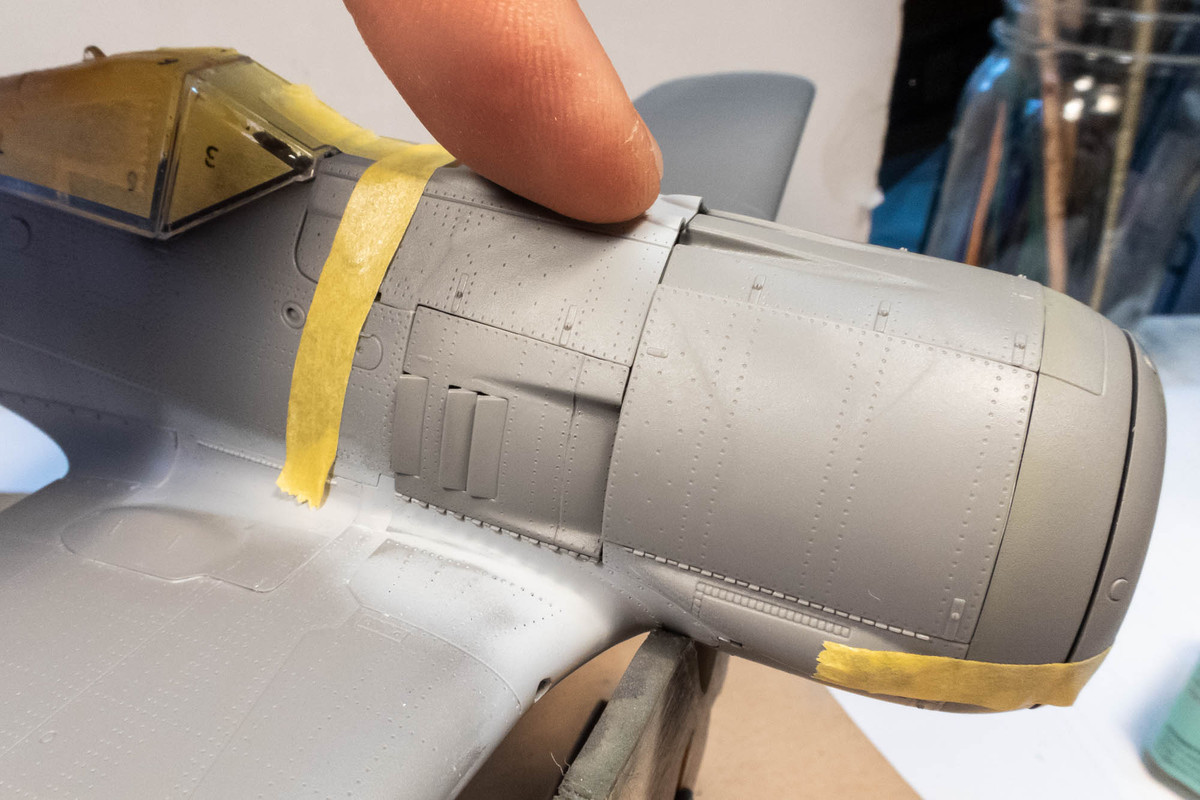
But you can see here that some joints need a little bit of pressure to close properly.
The bottom attachment is secured first since it is unreachable from the outside. Both glue surfaces (pin and hole) for the bottom attachment were softened with Tamiya Extra Thin before the engine was slid into place. The other three attachment pins were then nudged into their respective holes and Tamiya Extra Thin was seeped into the connections.
The nose ring cowling was then pushed into position and the three circular pipes are attached to the firewall with Tamiya Extra Thin.
While the glue on the pipes was still soft, the gun trough plate was placed into position. The front edge is held by the lip on the nose ring cowling and the rear edge by the the three pipes. No glue is being used for the gun trough plate and nose ring yet as I'm still trying to accommodate some removable panels but the parts are kept in this position so that the three pipes will set in the correct orientation.
I've gone ahead and glued the exhaust baffle plates on both sides as I am not planning to have those removable.
Both engine side cowlings fit very well and may be candidates to be left unglued and thus, removable.
But you can see here that some joints need a little bit of pressure to close properly.
John aka JKim
-----------<><
-----------<><
-
BlackSheep214
- Elite Member
- Posts: 13596
- Joined: Sun Apr 06, 2014 8:47 pm
Re: Border 1/35 Focke Wulf Fw190A-5 Nowotny Double Chevron
Wow…. just wow… incredible realism, incredible work! 
I quit! Your work makes mine look amateurish.
  I know I do the best of my ability and I’m happy with the finished product. But sometimes I question myself should I have maybe given myself a little bit more effort in doing a better build? I don’t know. I don’t beat myself over it.
Watching you is like watching the master builder work his magic. At 58 yrs old, I’m far from achieving your level of work. I get lost in translation and/or feel overwhelmed on how to achieve such realism on my normal scale -1/48 scale aircrafts and some 1/72 scale larger aircrafts (bombers, transport planes, etc…)
I’m always at awe watching you put it all together and that’s a good thing.
I quit!
Your work makes mine look amateurish. I know I do the best of my ability and I’m happy with the finished product. But sometimes I question myself should I have maybe given myself a little bit more effort in doing a better build? I don’t know. I don’t beat myself over it.Watching you is like watching the master builder work his magic. At 58 yrs old, I’m far from achieving your level of work. I get lost in translation and/or feel overwhelmed on how to achieve such realism on my normal scale -1/48 scale aircrafts and some 1/72 scale larger aircrafts (bombers, transport planes, etc…)
I’m always at awe watching you put it all together and that’s a good thing.
“Who controls the skies, controls the fate of this Earth”
Author unknown- 352nd Fighter Group, Blue-Nosed Bastards of Bodney
“Send one plane it’s a sortie; send two planes it’s a flight; send four planes it’s a test of airpower. - Richard Kohn
Author unknown- 352nd Fighter Group, Blue-Nosed Bastards of Bodney
“Send one plane it’s a sortie; send two planes it’s a flight; send four planes it’s a test of airpower. - Richard Kohn
-
Gary Brantley

- Elite Member
- Posts: 2771
- Joined: Tue Apr 08, 2014 9:40 pm
- Location: Cameron, Texas
Re: Border 1/35 Focke Wulf Fw190A-5 Nowotny Double Chevron
Tom, I know exactly how you feel. John is a master modeler, and his work demonstrates his abilities on each of his projects. I will never approach his level of care, precision and craftsmanship no matter how long I tried or how careful I am. It's a joy watching someone at his level and analogous to watching any artist who is a master in his field. Hey, I loved playing baseball when I was kid and I was pretty good at sandlot ball for a fat kid, but I could never play competitively at any higher level. You know, every baseball player can't be Mickey Mantle (or Aaron Judge-I know I'm showing my age now  ). And every scale modeler can't produce work like John does. I'm just happy to be watching and learning a few tricks as he goes along and feel lucky to have him around this place!
Any room for a micro magnet on that engine cover, John?
). And every scale modeler can't produce work like John does. I'm just happy to be watching and learning a few tricks as he goes along and feel lucky to have him around this place! Any room for a micro magnet on that engine cover, John?