Tamiya 1/32 Spitfire XIVe Conversion

Post your work in progress of your aircraft builds in here.
User avatar
jkim
Elite Member
Posts: 4073
Joined: Mon Apr 10, 2017 4:03 pm

Re: Tamiya 1/32 Spitfire XIVe Conversion

Post by jkim »

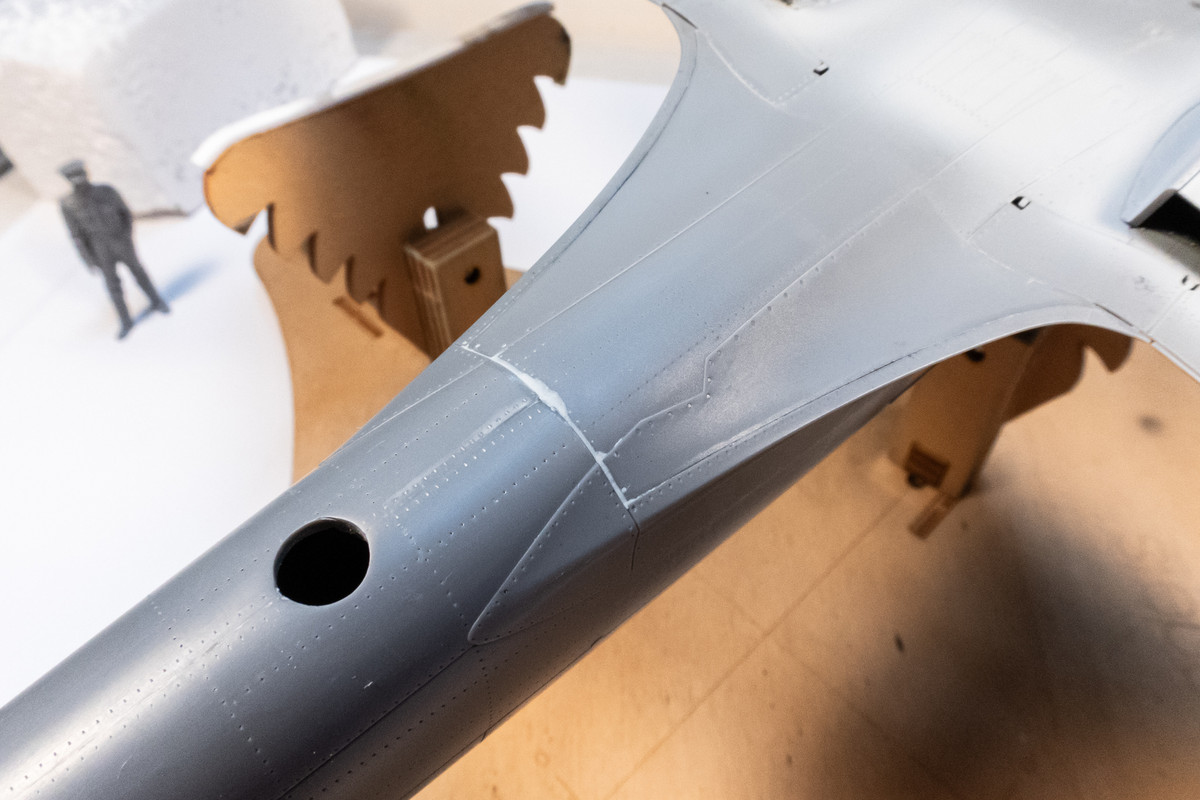
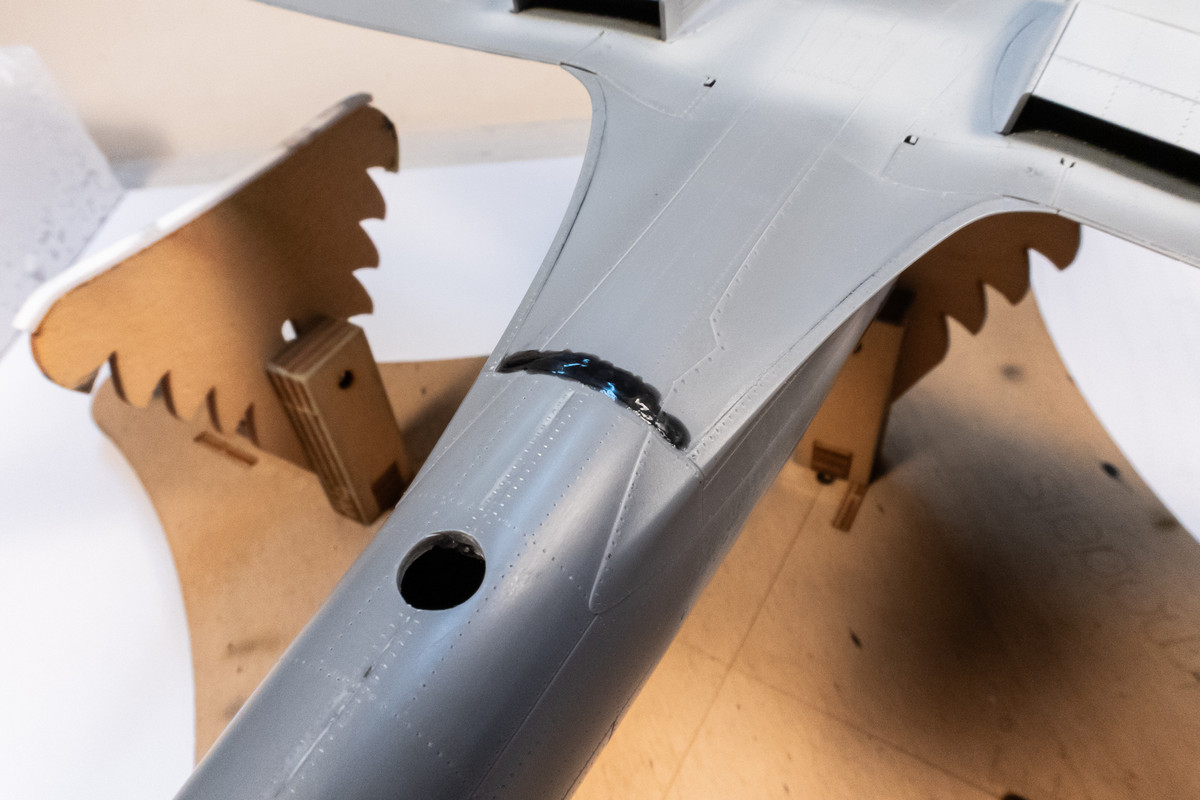
The initial fill attempt on the bottom joint was using Apoxie Sculpt. Due to the absence of any deep gap and the shallowness of the fill, it was difficult to get the putty to stay put. After it dried, small chunks of it came out during sanding indicating a lack of adhesion. So I gouged it all out and started over.
Image

I probably should have used CA glue from the beginning. The application is wide because I am trying to bridge a valley along with the joint itself.
Image

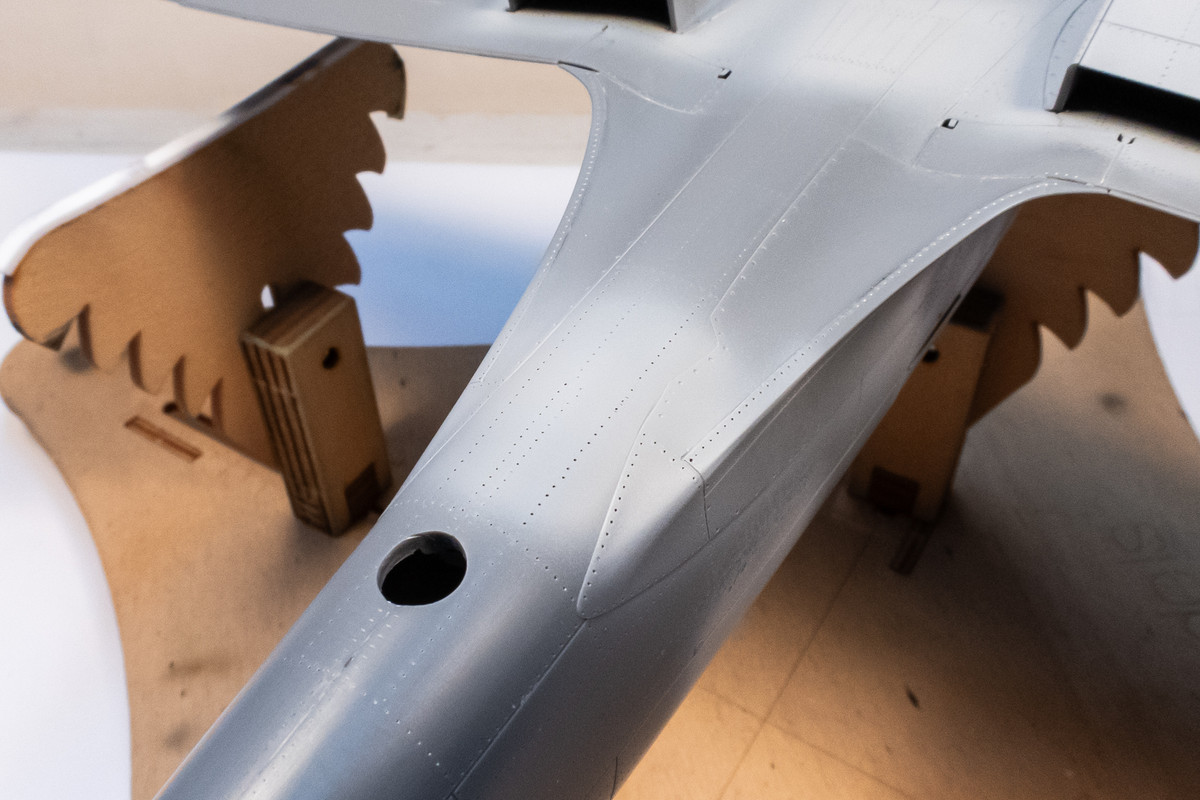
The area after repair and a coat of primer.
Image

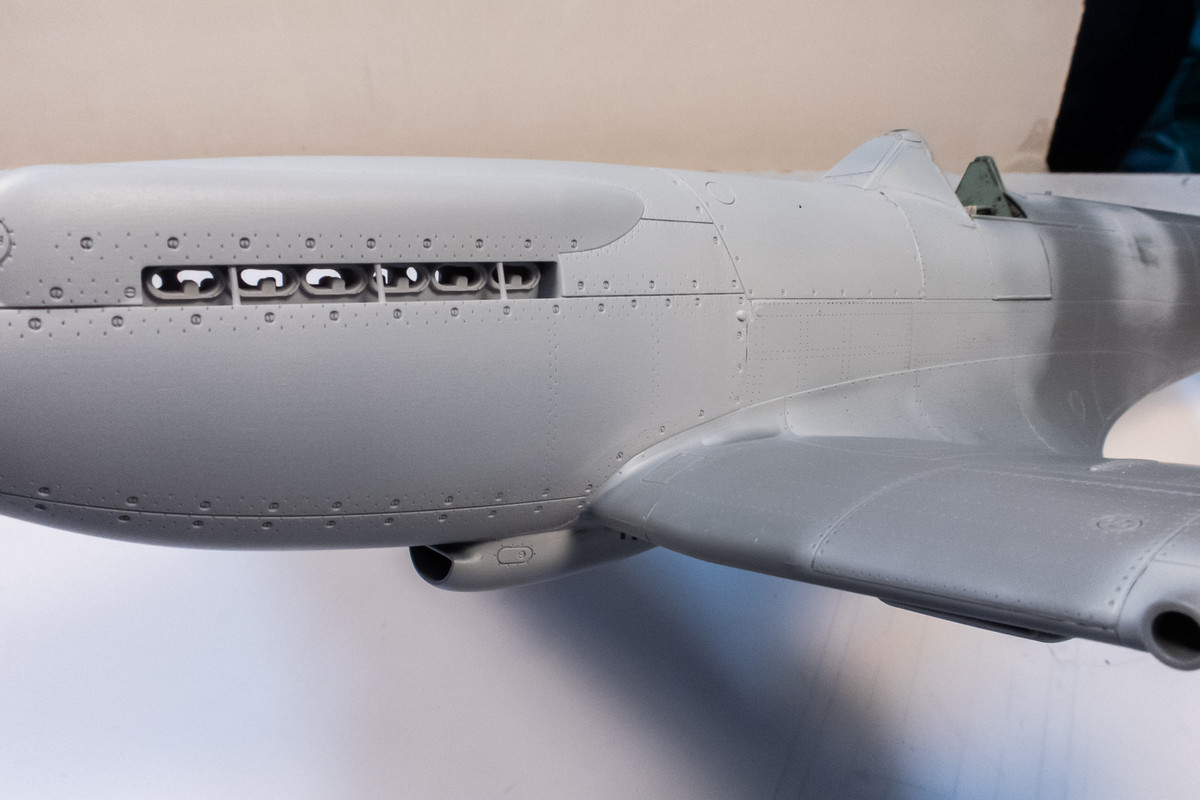
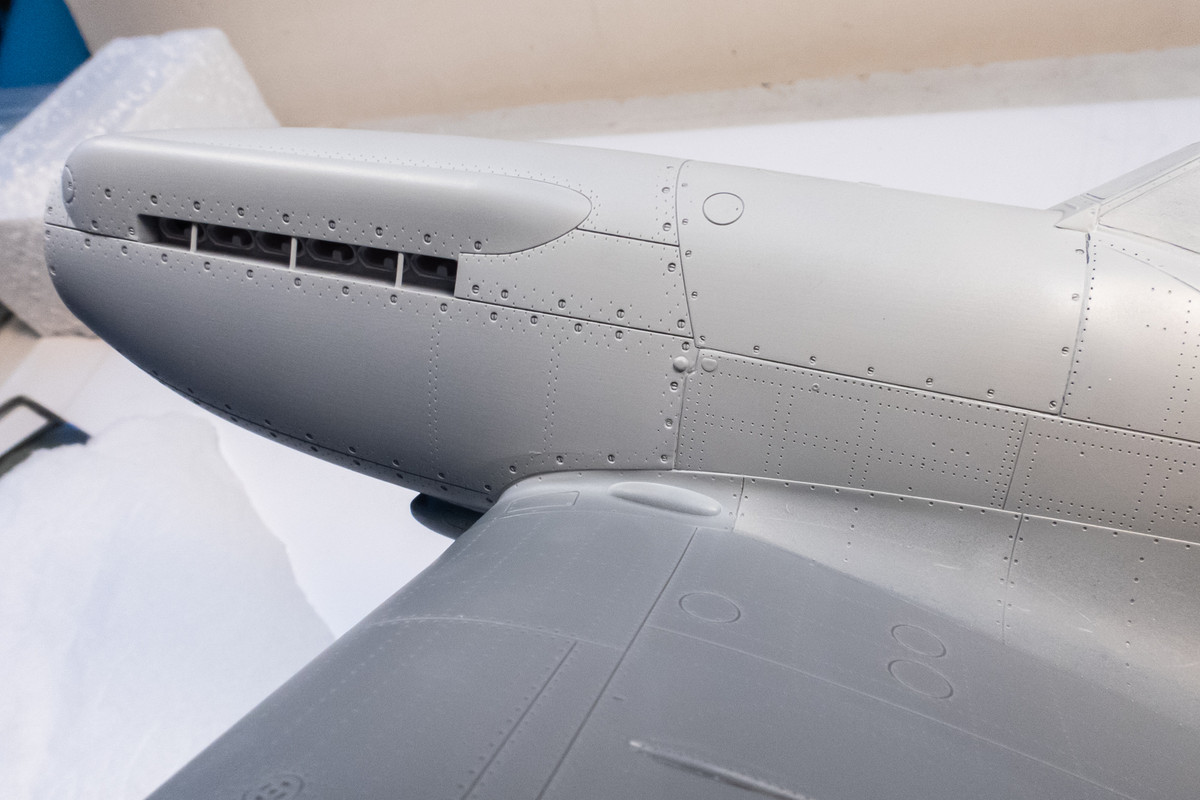
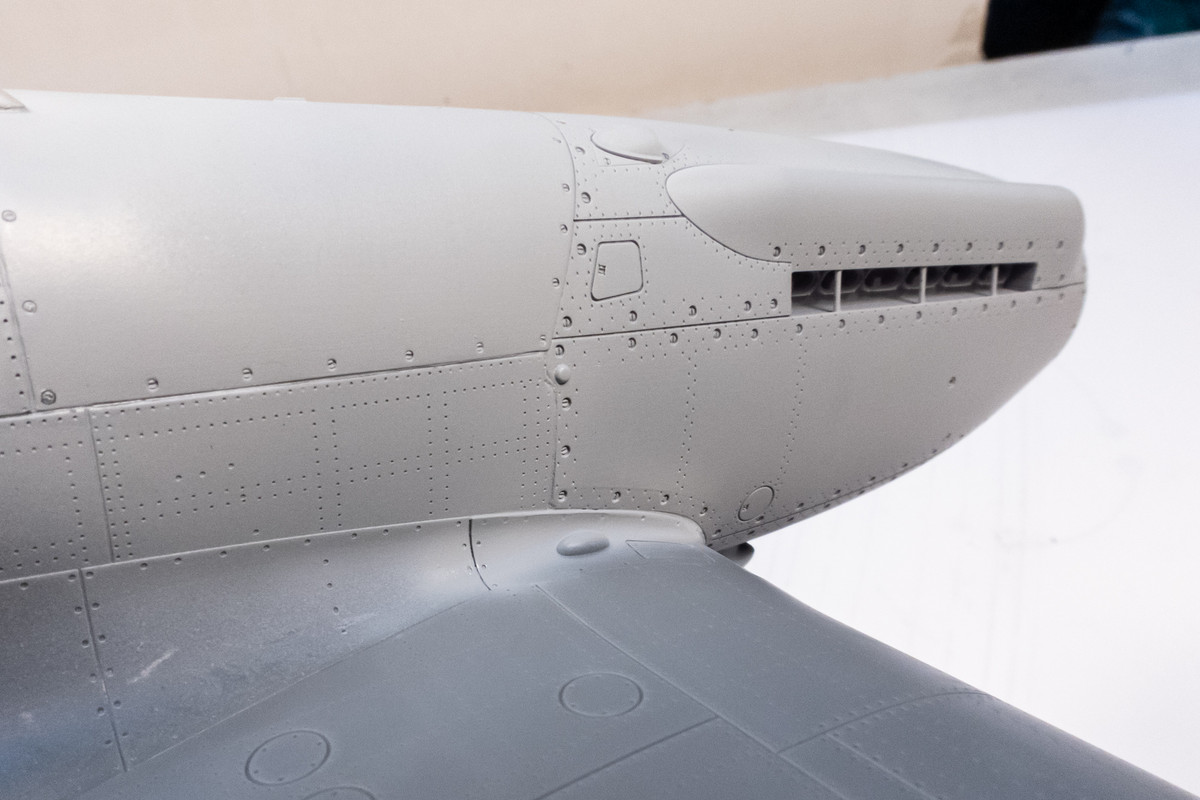
The Apoxie Sculpt applications along the nose joints have dried so I shot the areas with primer to see what they look like. The upper joints on the port side look very good.
Image
Image

Upper joints on the starboard side look good as well.
Image

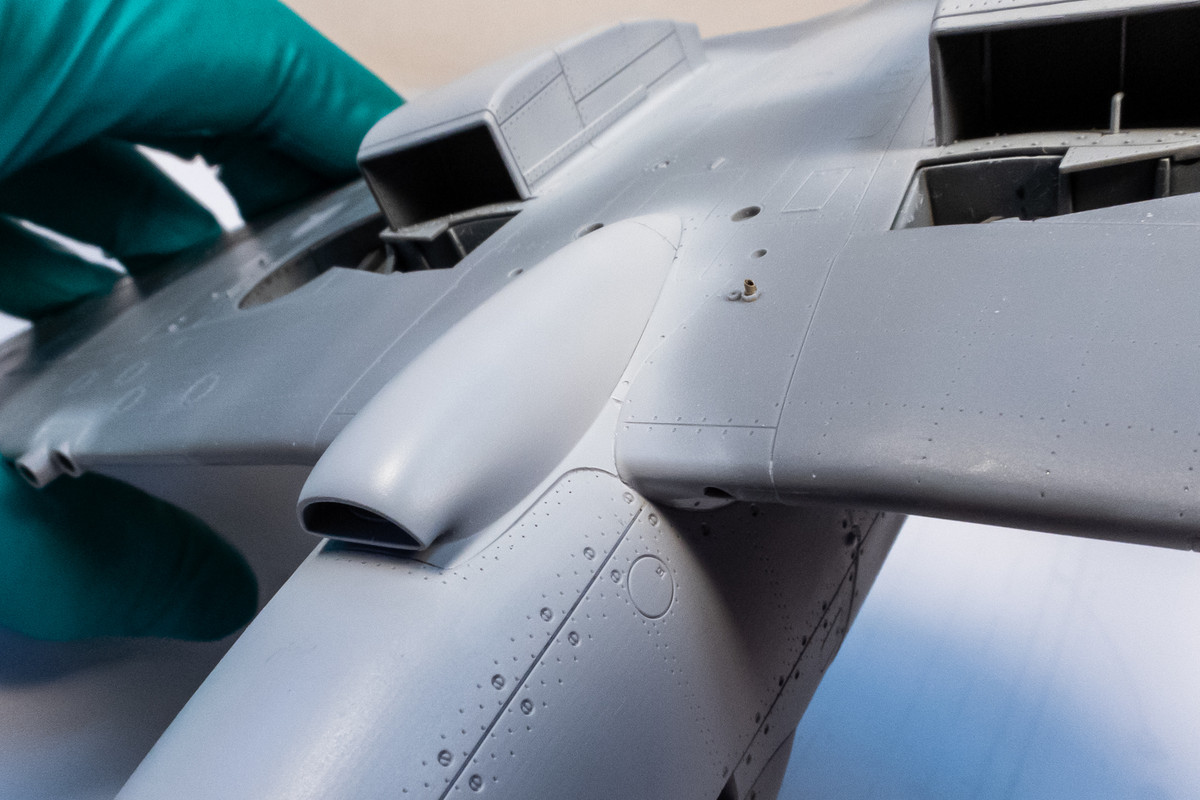
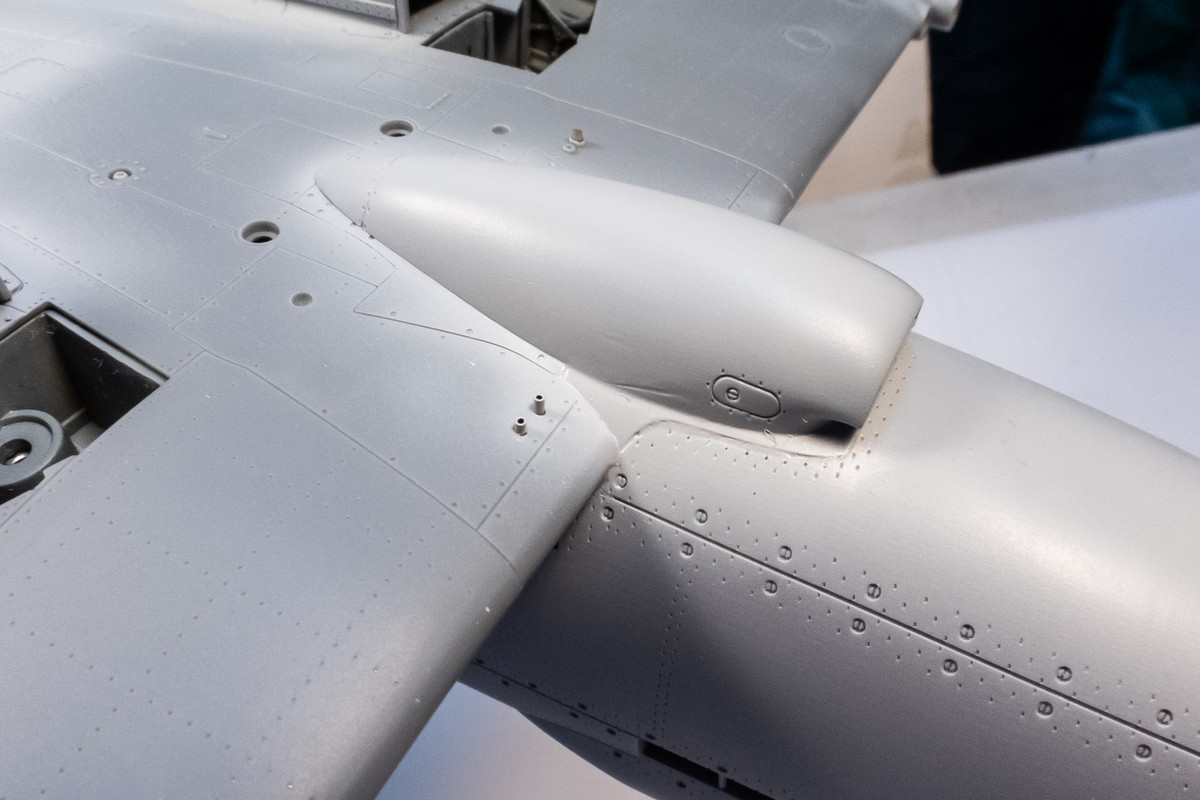
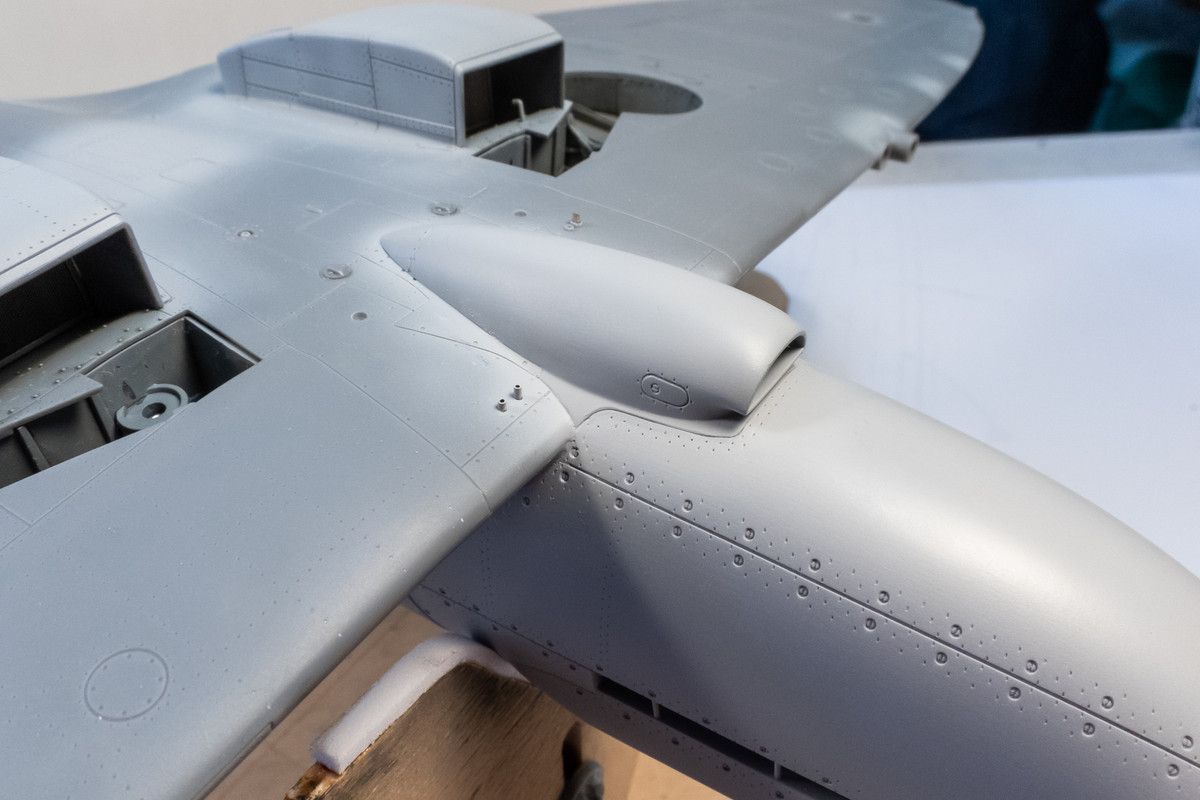
The joints around the chin intake will need a bit of clean-up work. And there is a gash on the chin intake that I repaired previously but has re-appeared. I used debonder to remove excess CA glue around this joint and it must've wiped off the Mr Surfacer application.
Image
Image

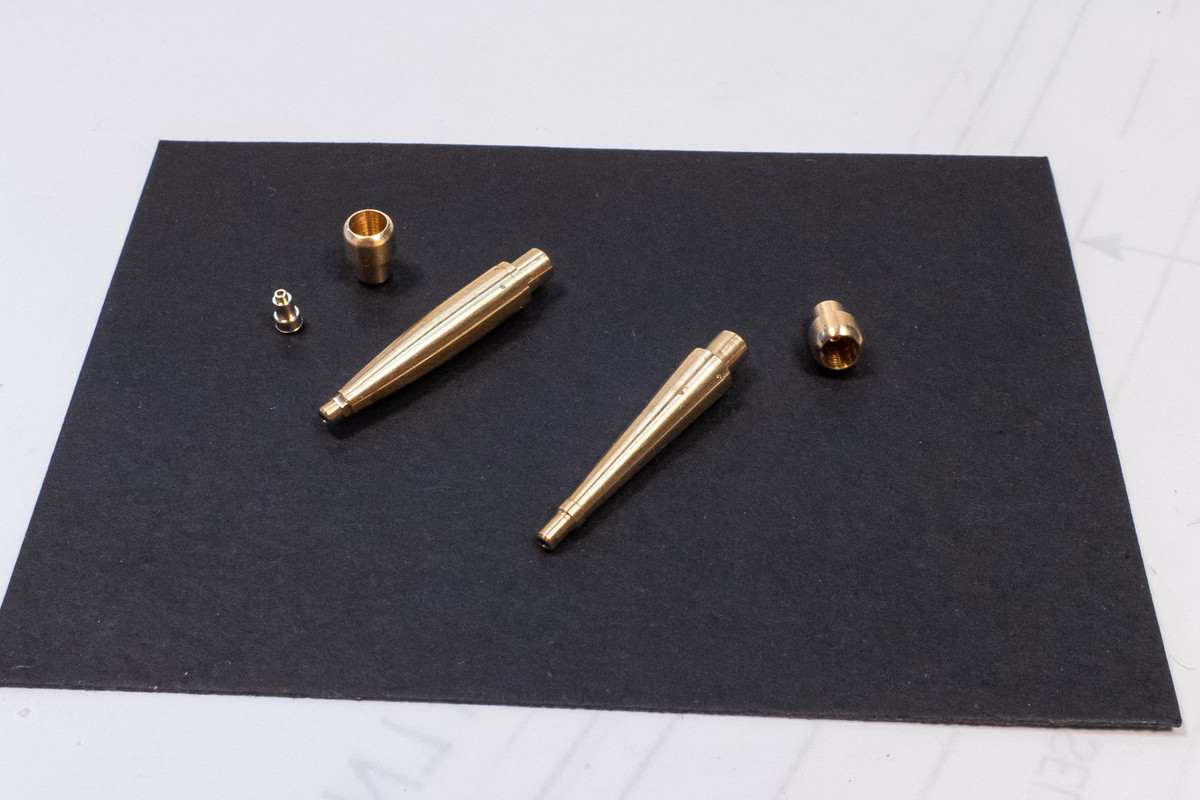
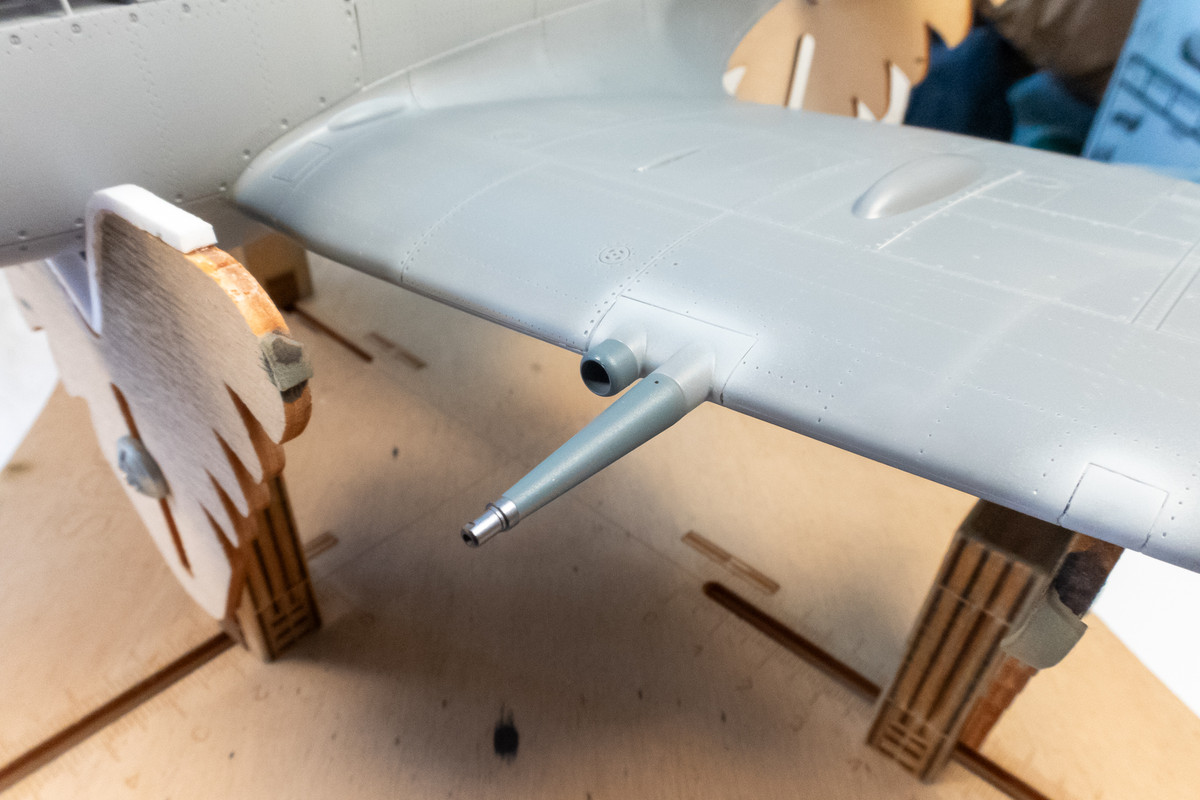
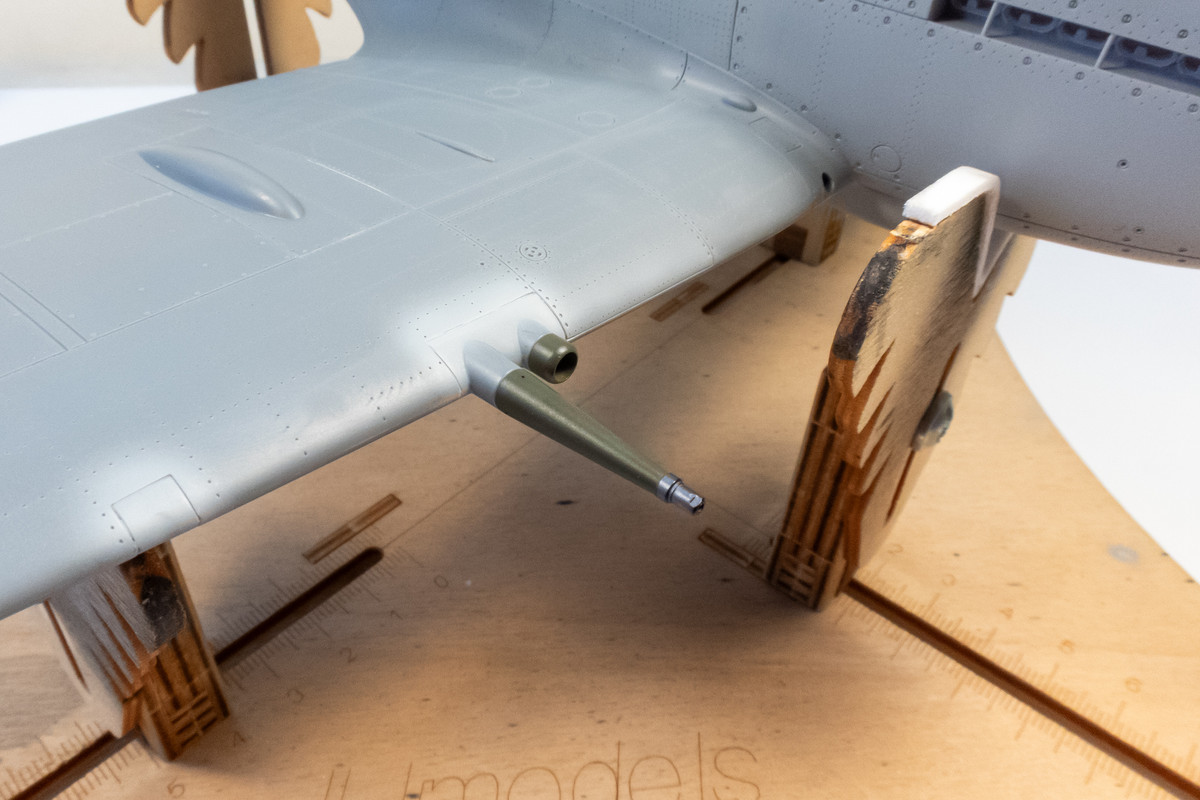
Two types of brass barrels for the Hispano 20mm cannon from Master. I will be using the straight tapered "Early" type on the right. These will be given a coat of Mr Primer Surfacer 1000. The Browning 50 cal machine gun barrels will be painted separately before they are inserted into their shrouds. If fit is good, I can pre-paint the barrels and insert at the end.
Image
John aka JKim
-----------<><
Image
User avatar
Stuart
Elite Member
Posts: 11899
Joined: Sun Apr 06, 2014 1:06 pm
Location: North Wales

Re: Tamiya 1/32 Spitfire XIVe Conversion

Post by Stuart »

Beautiful work as ever John.
Stuart Templeton 'I may not be good but I'm slow...'
User avatar
jkim
Elite Member
Posts: 4073
Joined: Mon Apr 10, 2017 4:03 pm

Re: Tamiya 1/32 Spitfire XIVe Conversion

Post by jkim »

Thank you Stuart!

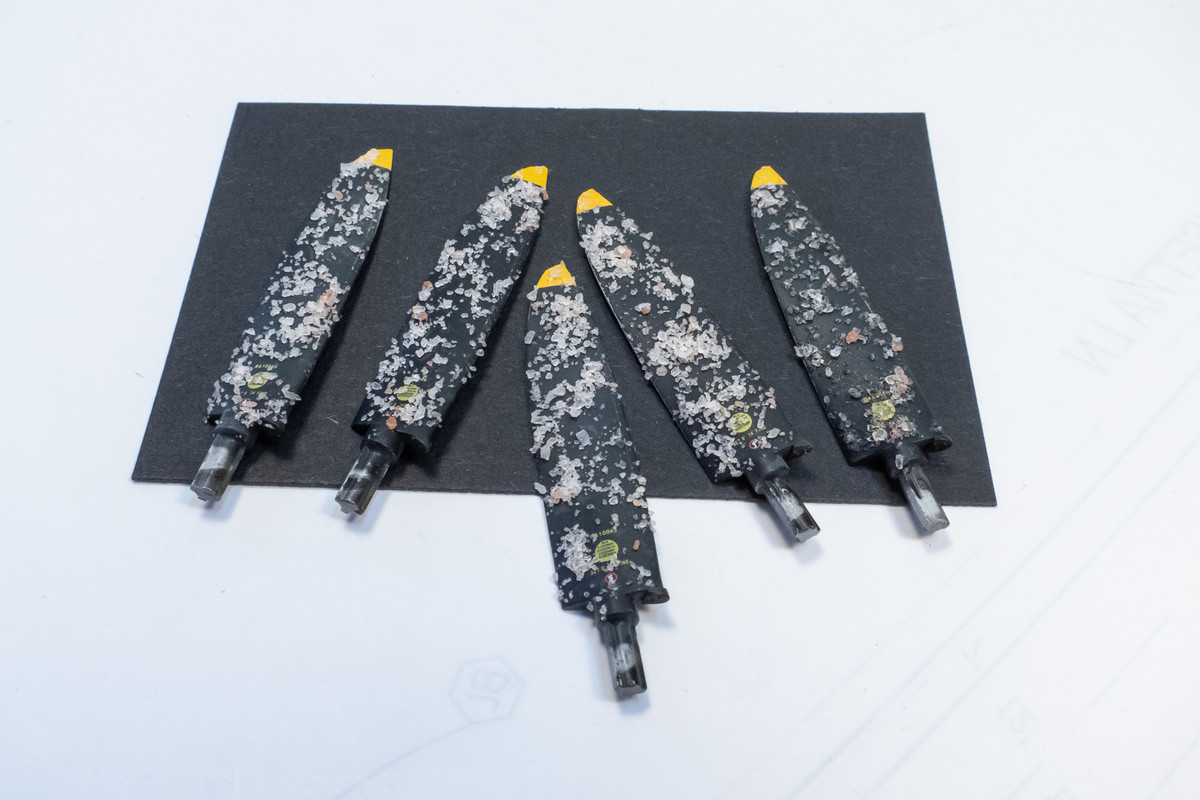
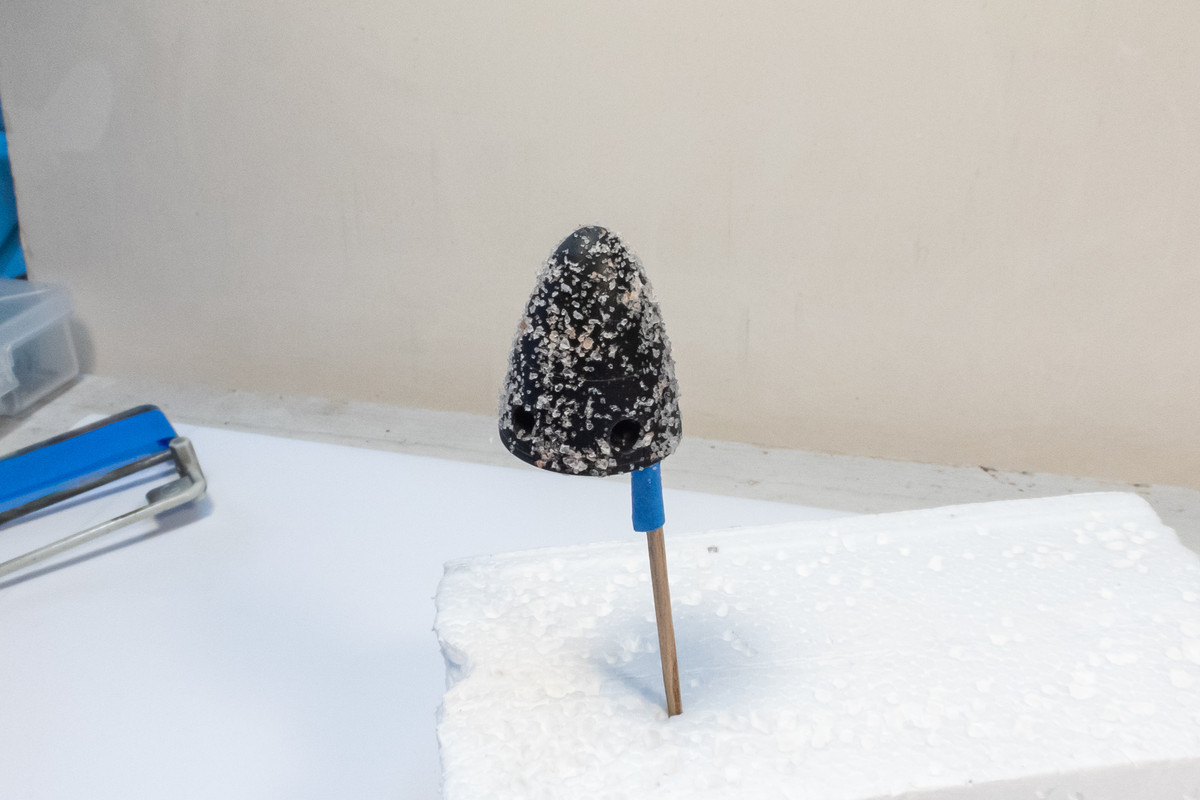
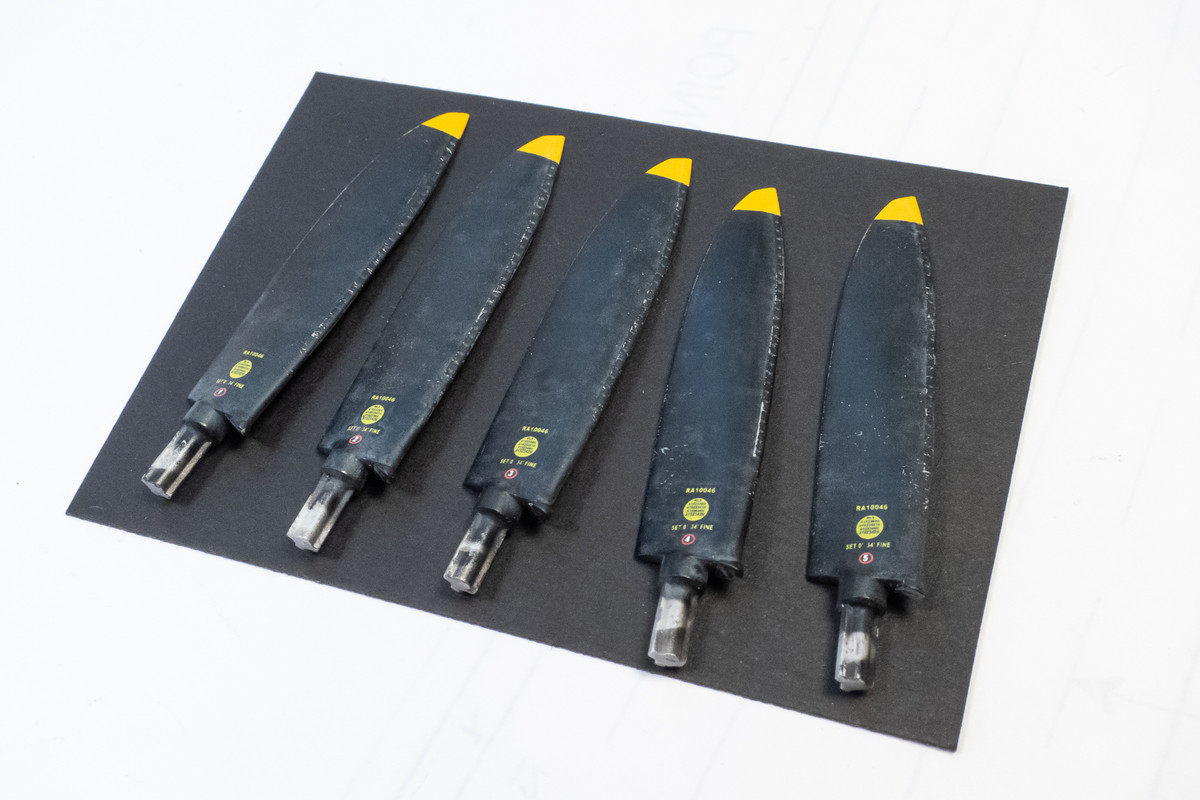
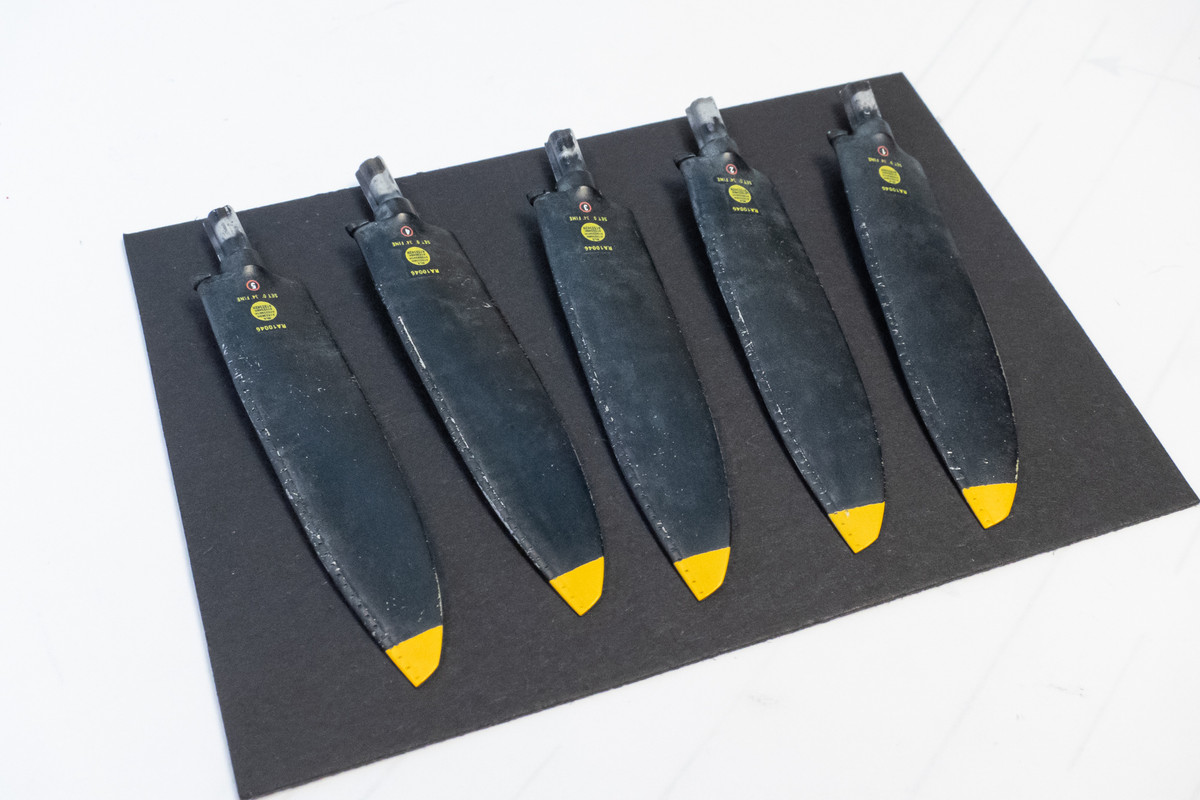
One more weathering step on the prop assembly. I like to use salt crystals as a random mask to put some discrete staining on external surfaces. It creates a little bit of visual complexity that helps to make even small things look a little bigger. Water is spread over the surface and salt crystals are randomly sprinkled on the wet surface. As the water dries, the salt crystals temporarily fuse onto the surface.
Image
Image

A very dilute spray of lighter color (I like tans and grays) is sprayed. The resultant pattern should look similar to rain stains. It can be difficult to gauge the effect as you spray but a subtle effect is desired.
Image

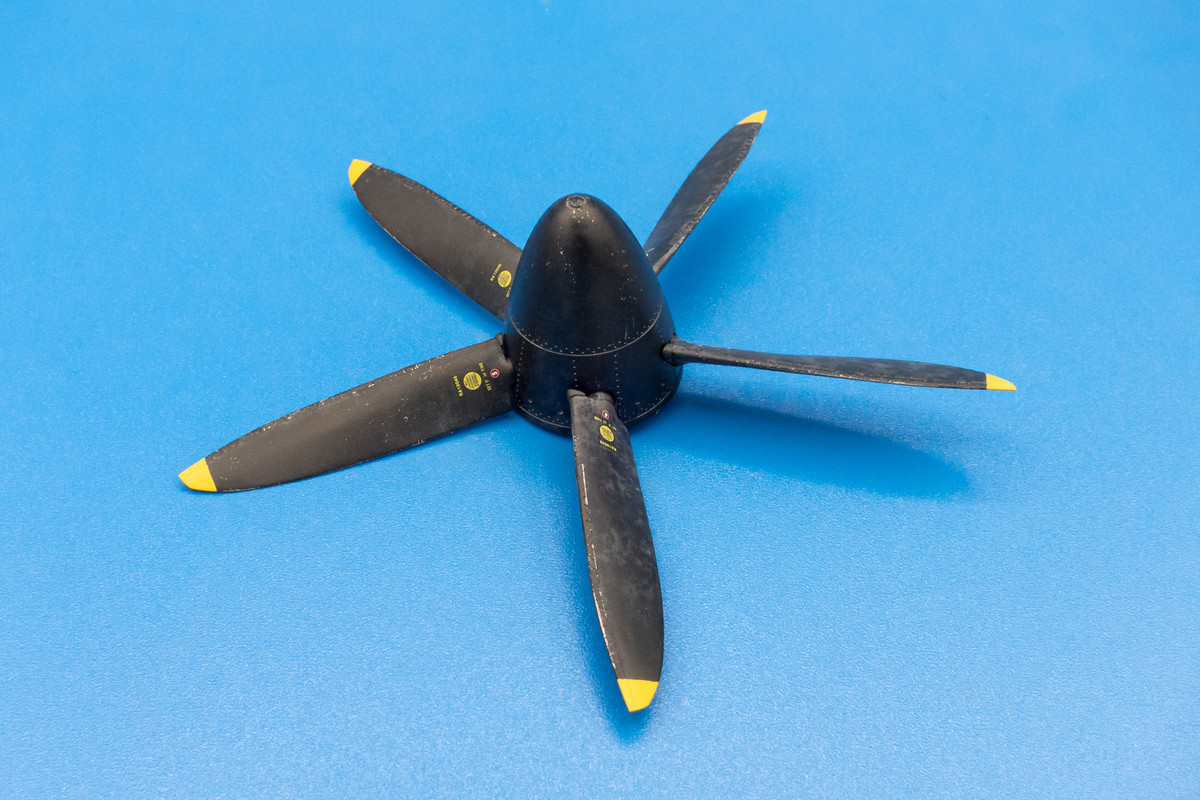
If necessary, the staining can be dialed back by carefully micromeshing specific areas. After a couple of iterations, here's what the prop blades look like after salt weathering. The effect varies with the viewing angle and these photos represent the max effect.
Image
Image

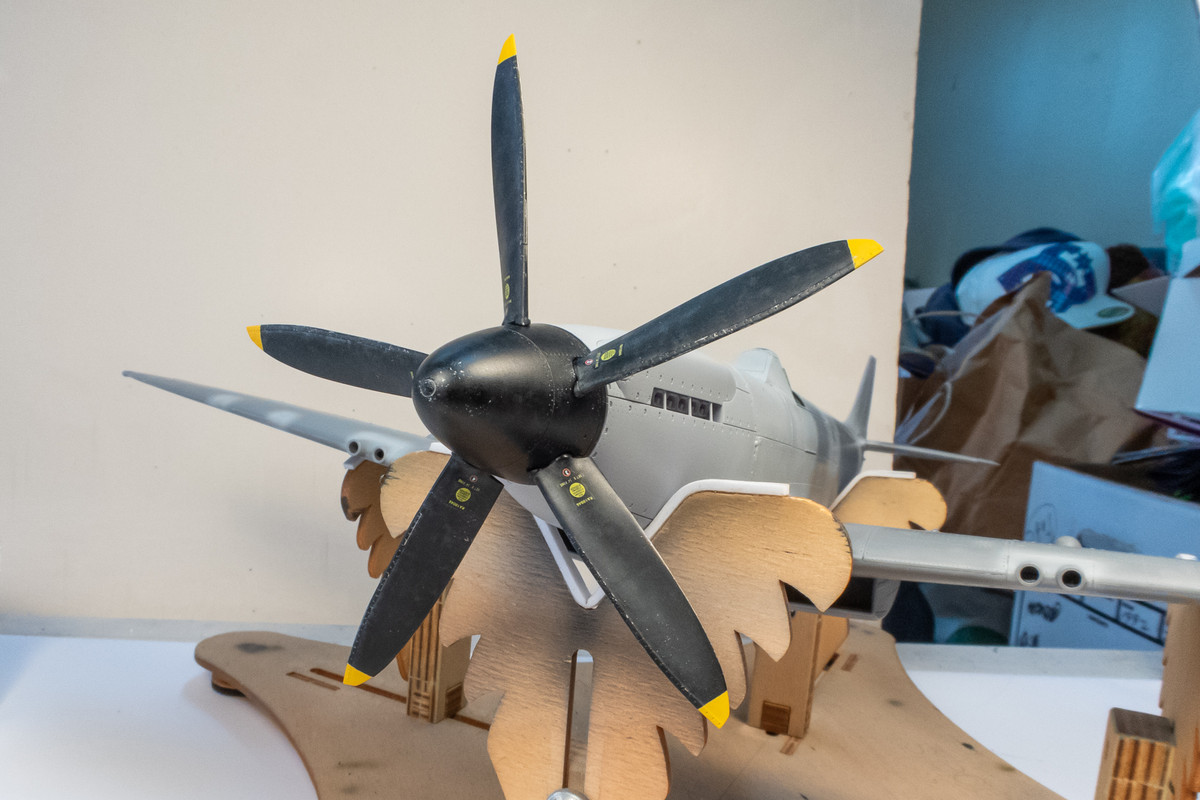
Once on the model, the prop and spinner staining isn't (hopefully) too noticeable but enough to give that impression of wear.
Image

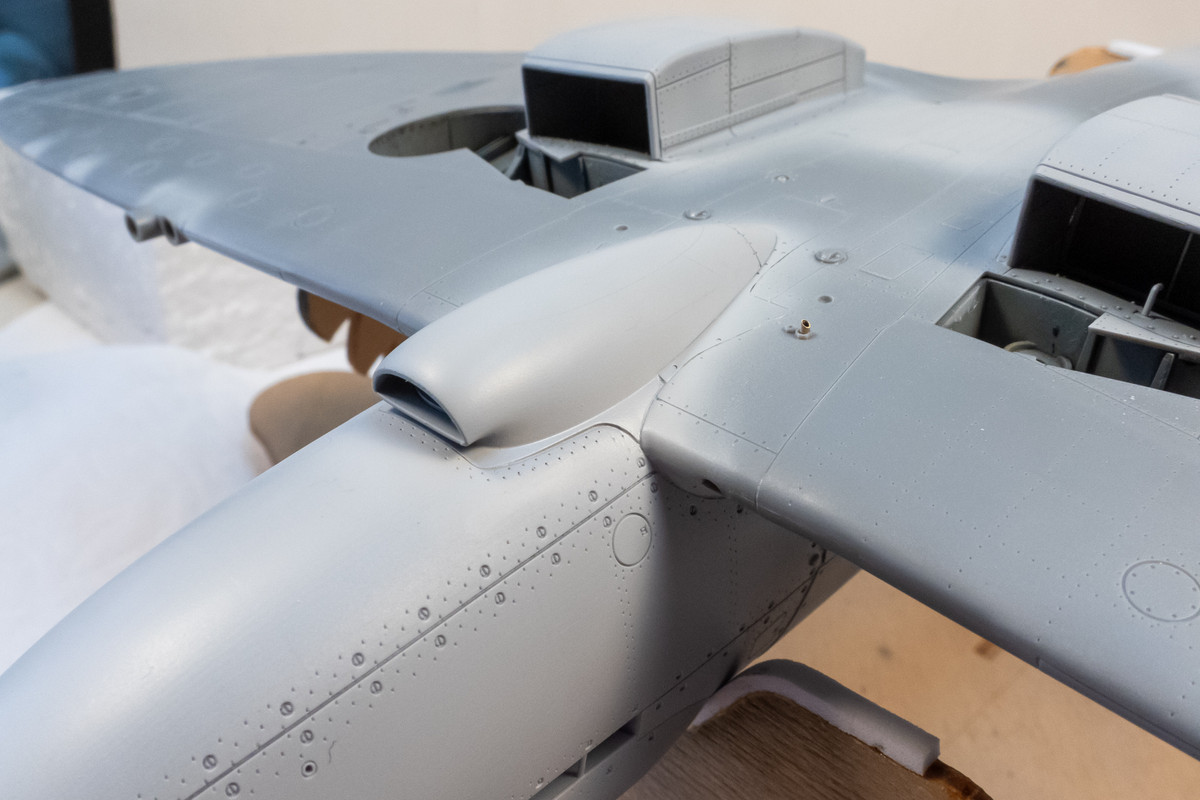
The joints between the chin intake and wing/fuselage have been cleaned up.
Image
Image

The Master brass gun barrels and shrouds have been painted.
Image
Image
John aka JKim
-----------<><
Image
User avatar
keavdog
Elite Member
Posts: 4779
Joined: Thu Jan 10, 2019 1:14 am
Location: Earth

Re: Tamiya 1/32 Spitfire XIVe Conversion

Post by keavdog »

Great stuff John. I've yet to try the salt technique. I think it turned out really nice. Introduces a bit of random color modulation. :shoutout:
Thanks,
John
User avatar
jkim
Elite Member
Posts: 4073
Joined: Mon Apr 10, 2017 4:03 pm

Re: Tamiya 1/32 Spitfire XIVe Conversion

Post by jkim »

keavdog wrote: Fri Jun 21, 2024 7:33 pm Great stuff John. I've yet to try the salt technique. I think it turned out really nice. Introduces a bit of random color modulation. :shoutout:
Thanks John! My theory is that little details help fool the eyes into thinking they are looking at something larger or more complex.

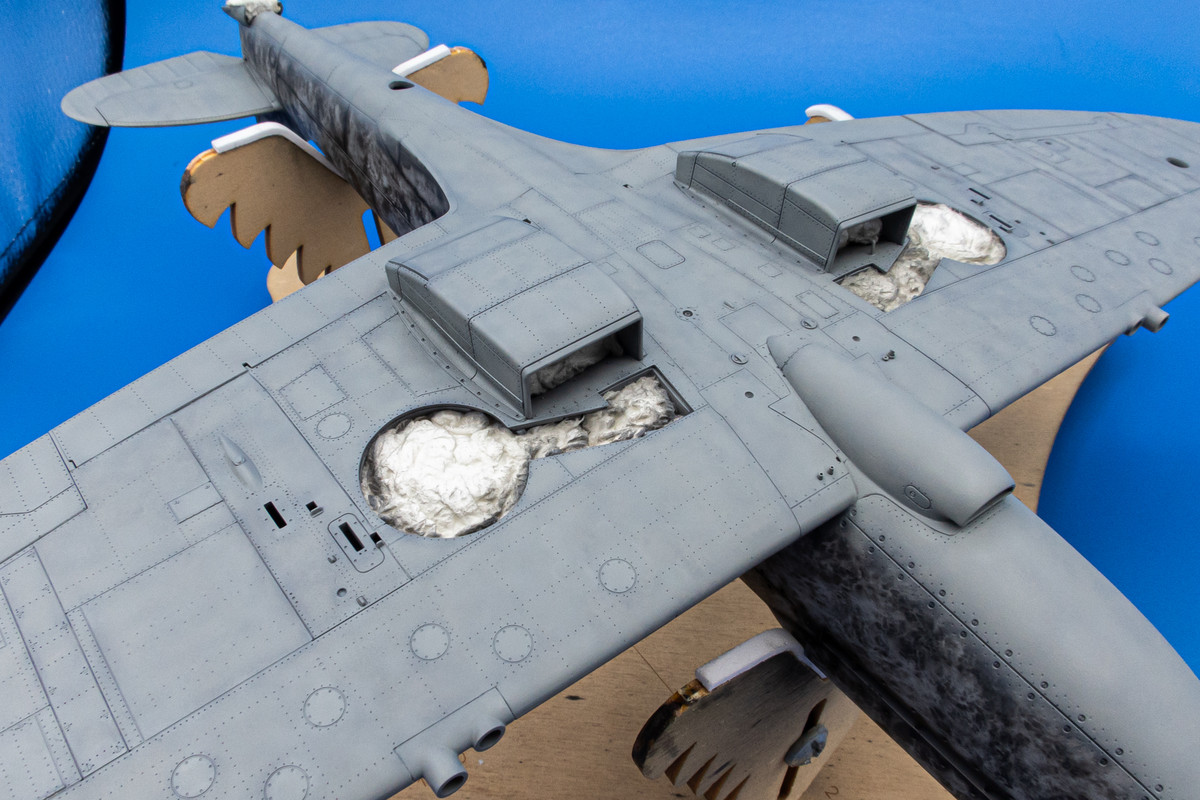
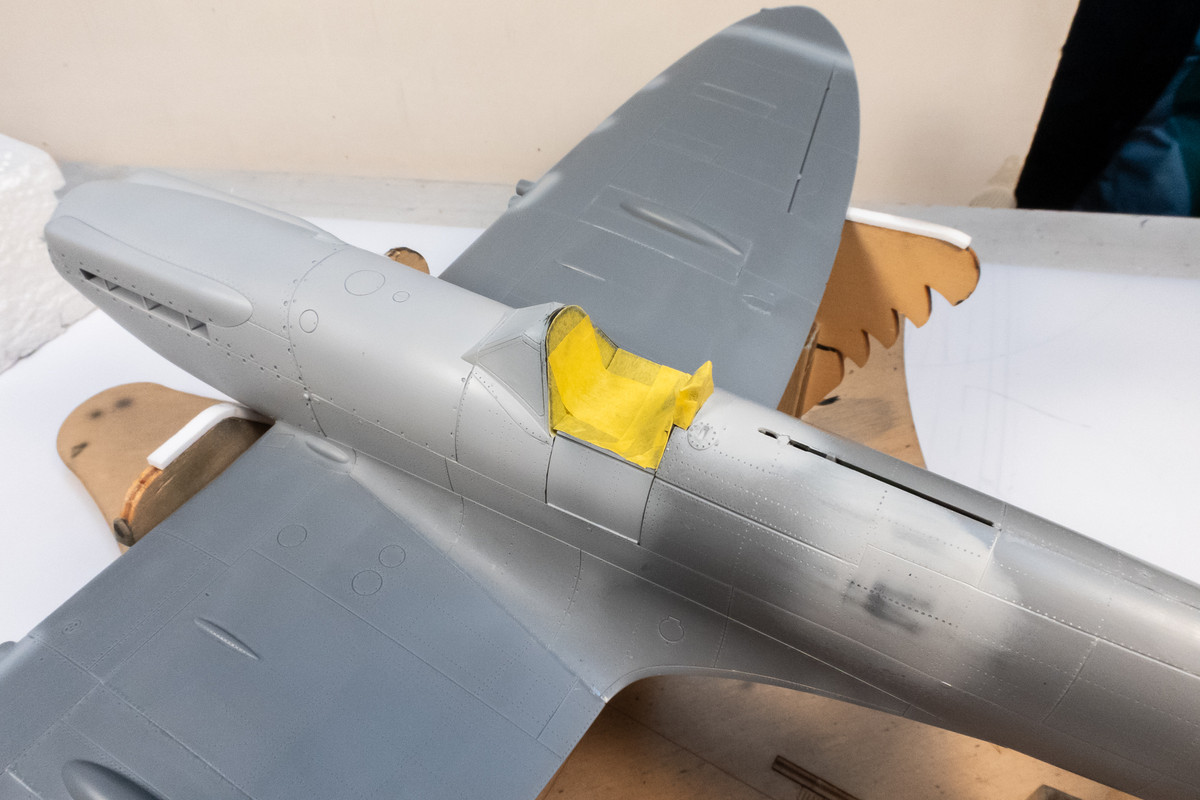
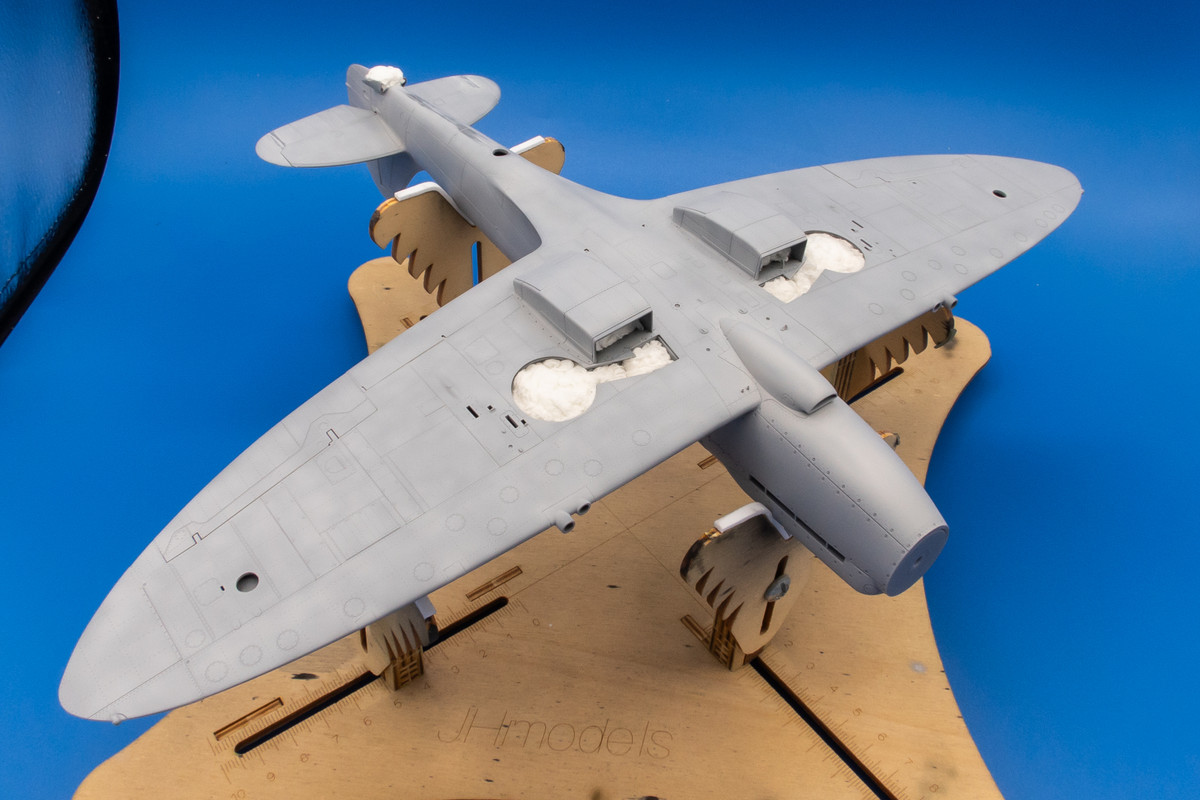
In preparation of the painting to come, the miscellaneous openings are covered. I used tape for the cockpit.
Image

Wet tissue paper was plugged into the wheel wells. Actually toilet paper but tissue sounds less disgusting.
Image

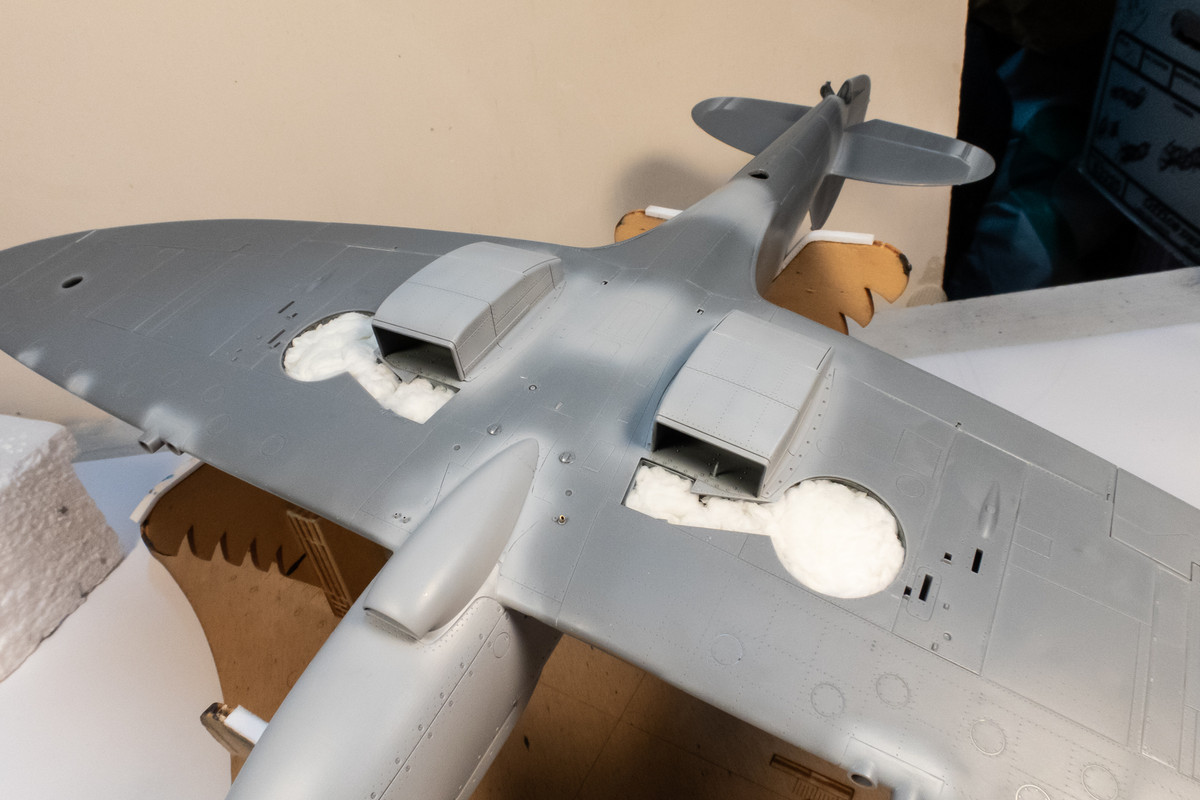
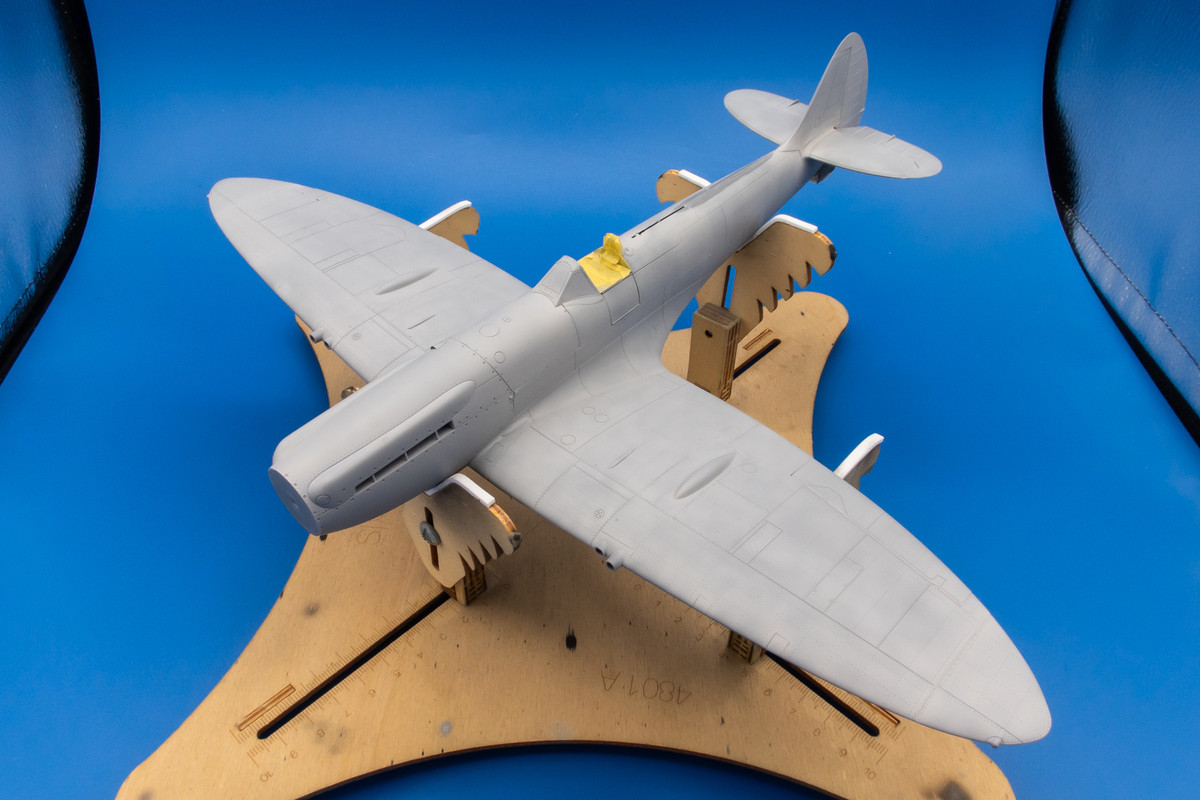
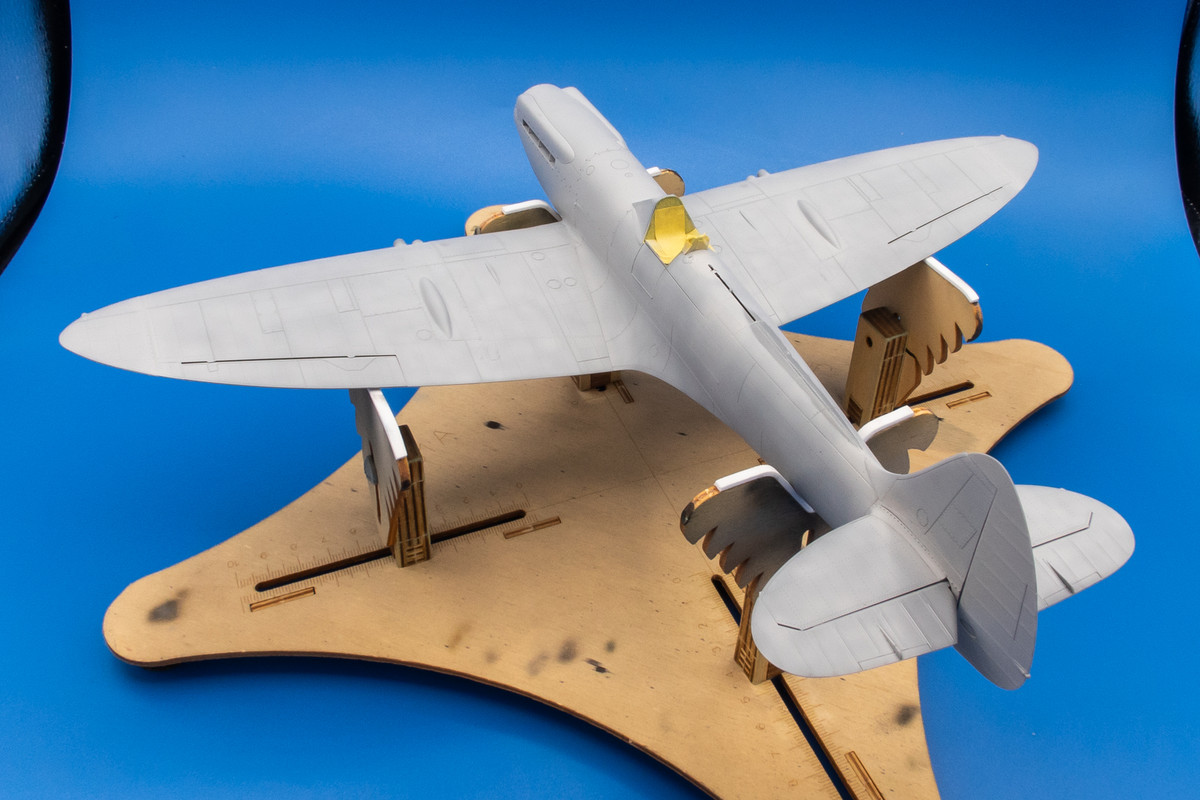
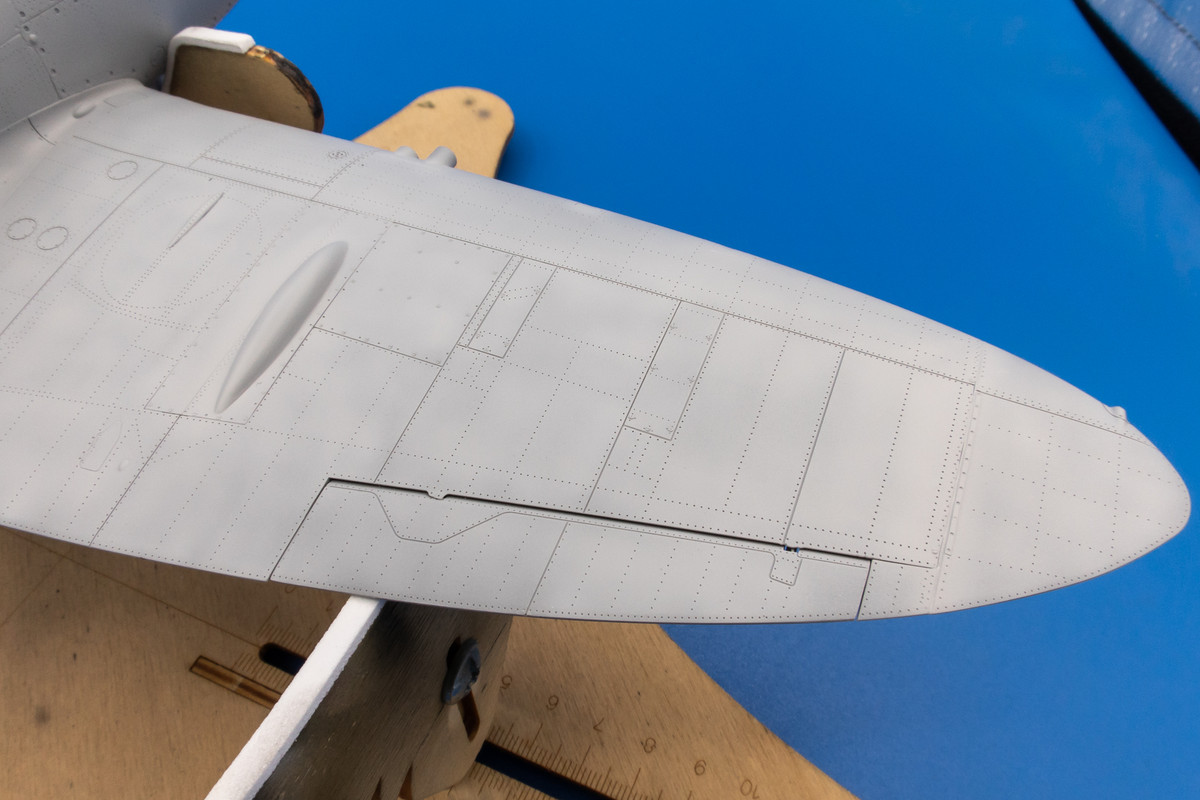
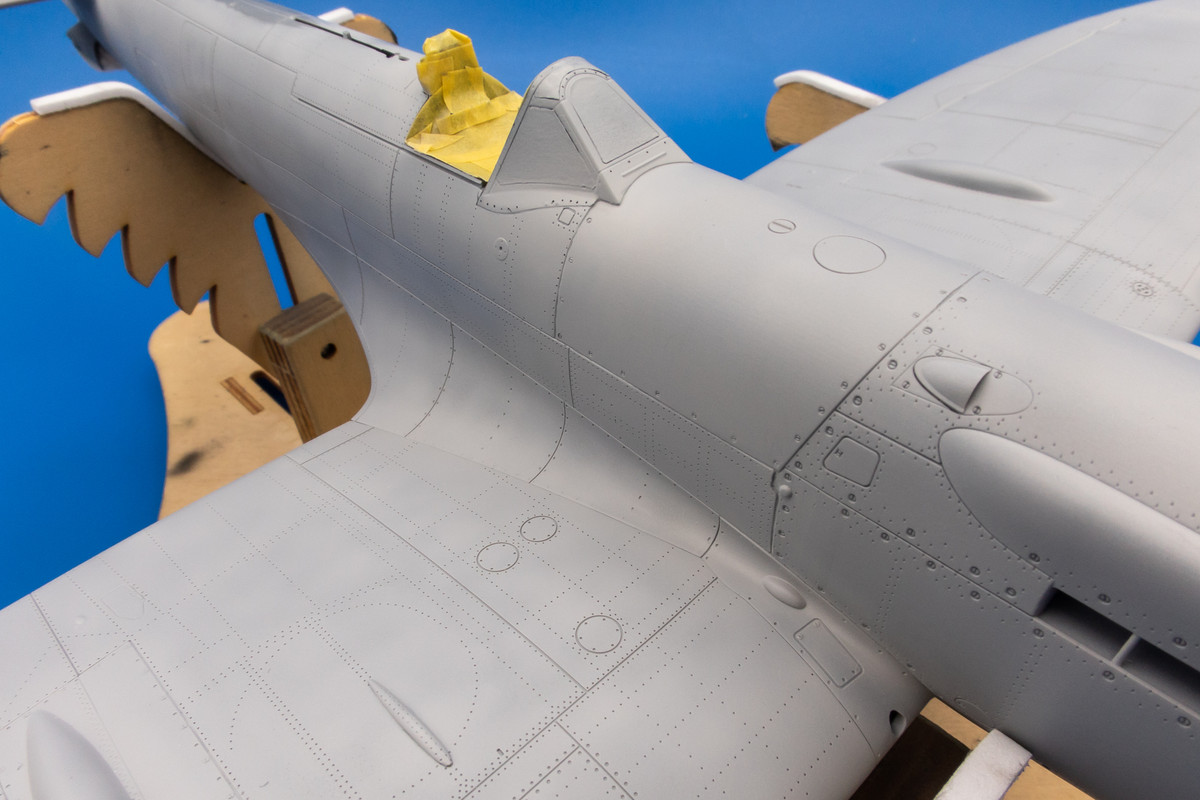
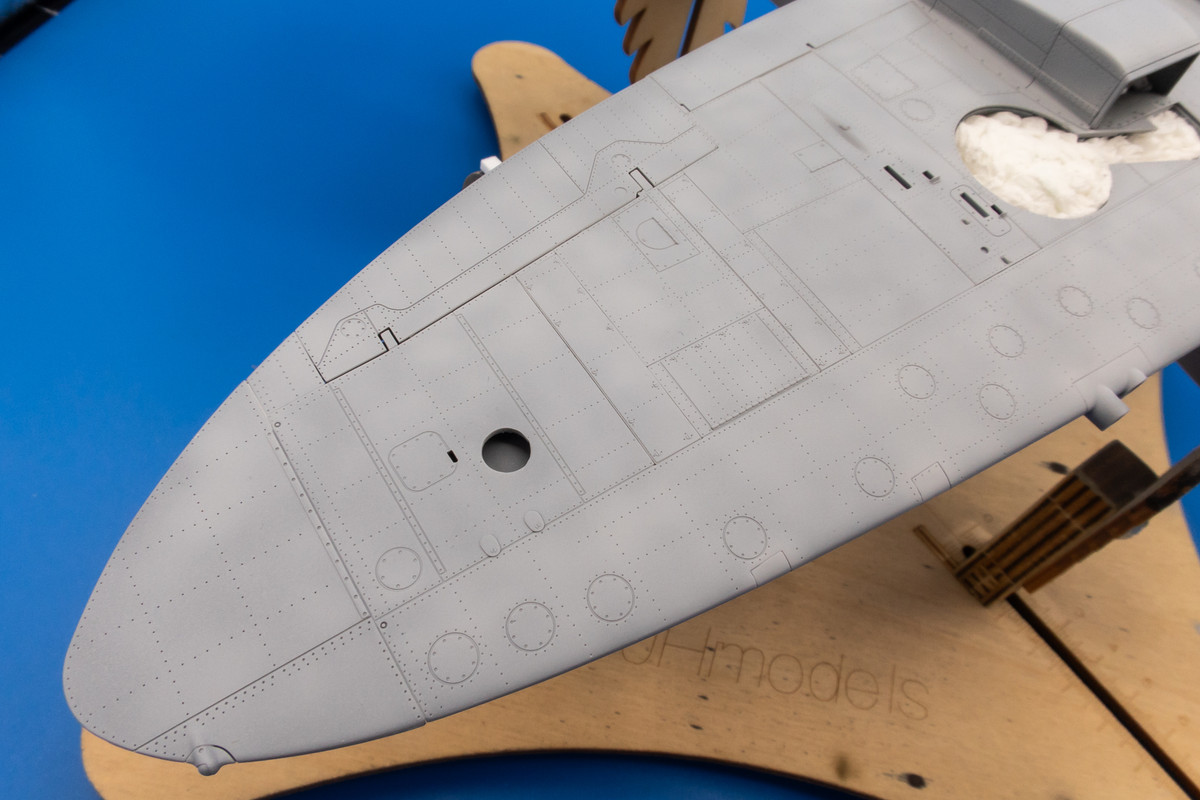
A very light (and uneven) coat of primer (Mr Primer Surfacer 1000) was sprayed over the entire model. Typically, I skip this skip to preserve the surface details as much as possible but with all of the panels that I glued into the wing, I thought a primer coat would help me check all those joints one final time, as well reduce the risk of paint lift when I spray the markings using adhesive masks.
Image
Image
Image
Image
Image
Image

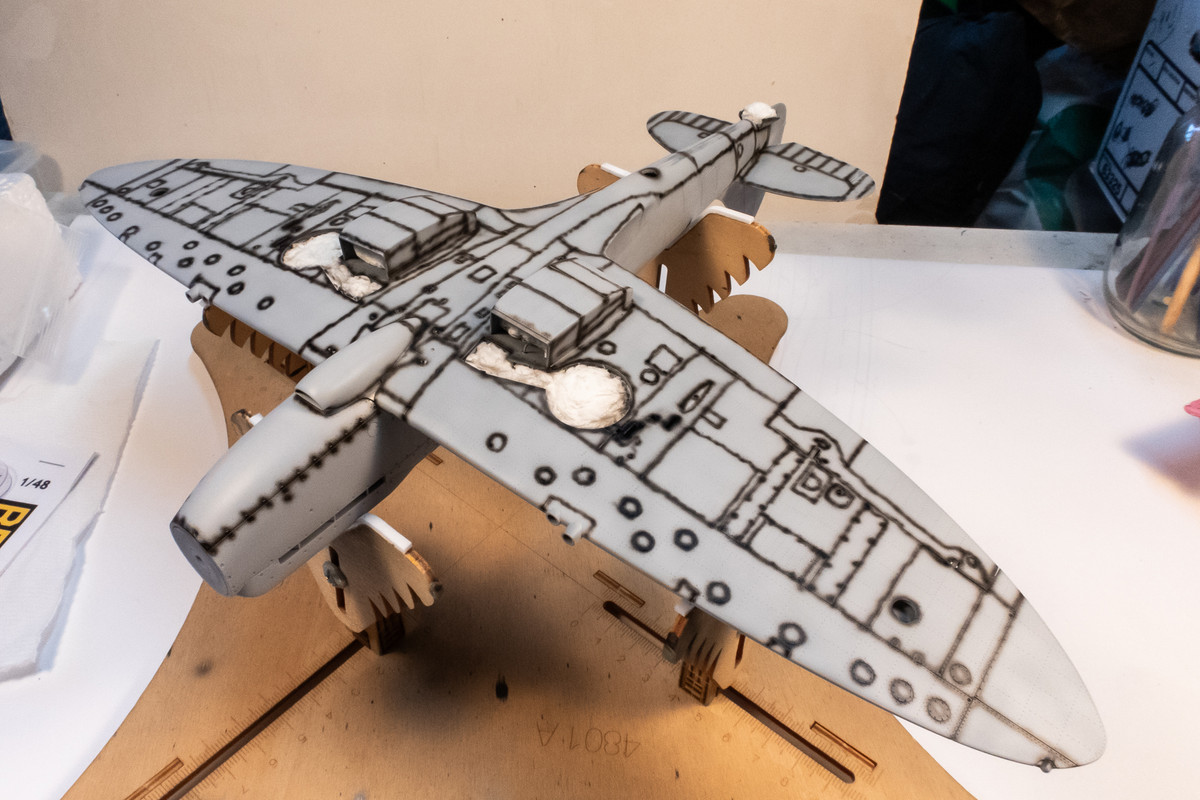
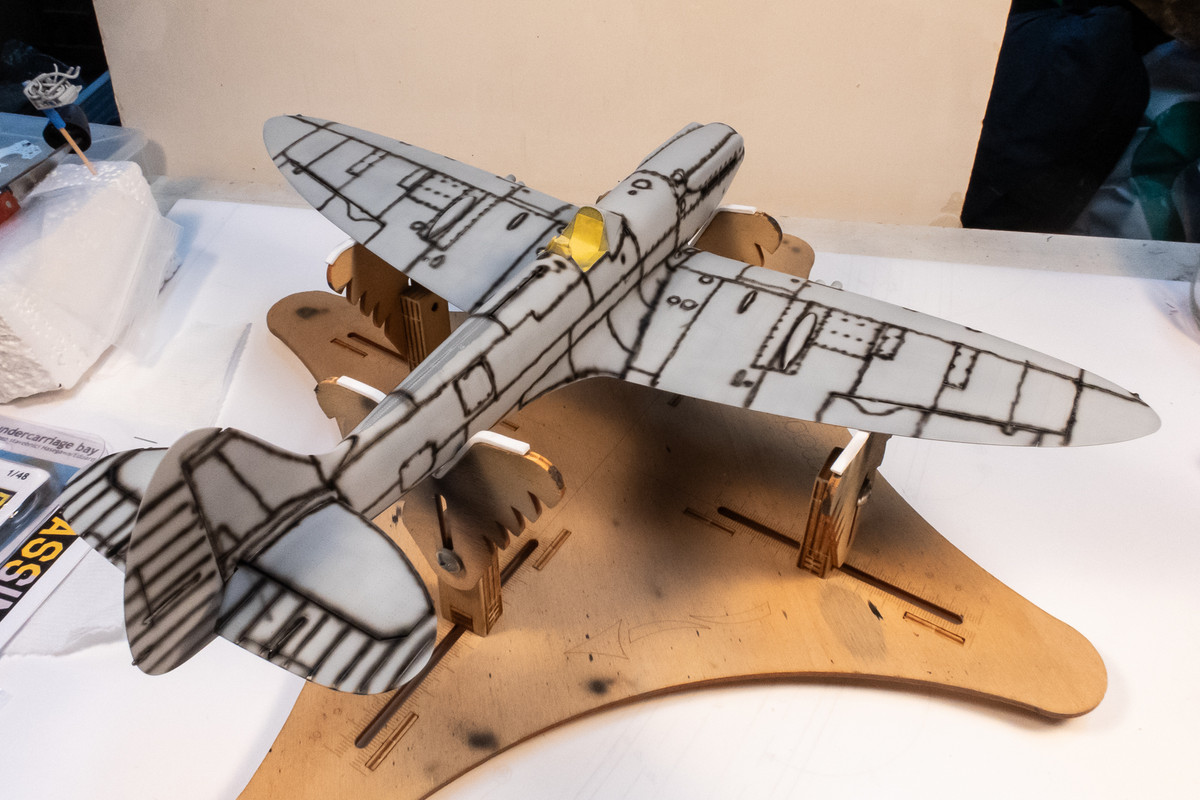
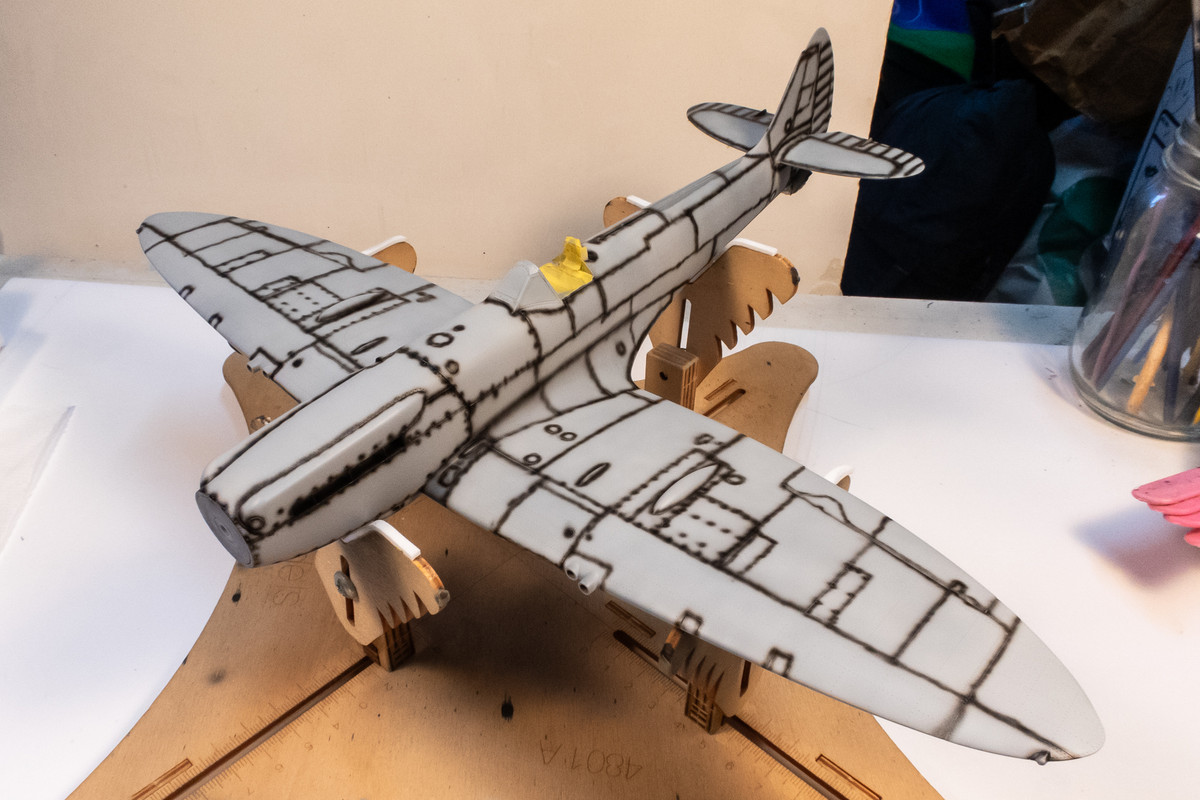
After the primer coat dried, I buffed it with a clean t-shirt to get rid of any "dusty" areas where the primer sprayed rough. My normal pre-shading layer was then applied. Thinned black over all of the panel lines and fasteners but not the rivets. Sloppy is good here since I don't my pre-shading effects to be too uniform.
Image
Image
Image
John aka JKim
-----------<><
Image
User avatar
jkim
Elite Member
Posts: 4073
Joined: Mon Apr 10, 2017 4:03 pm

Re: Tamiya 1/32 Spitfire XIVe Conversion

Post by jkim »

Lots of paint slinging today and also a bit of a scare.

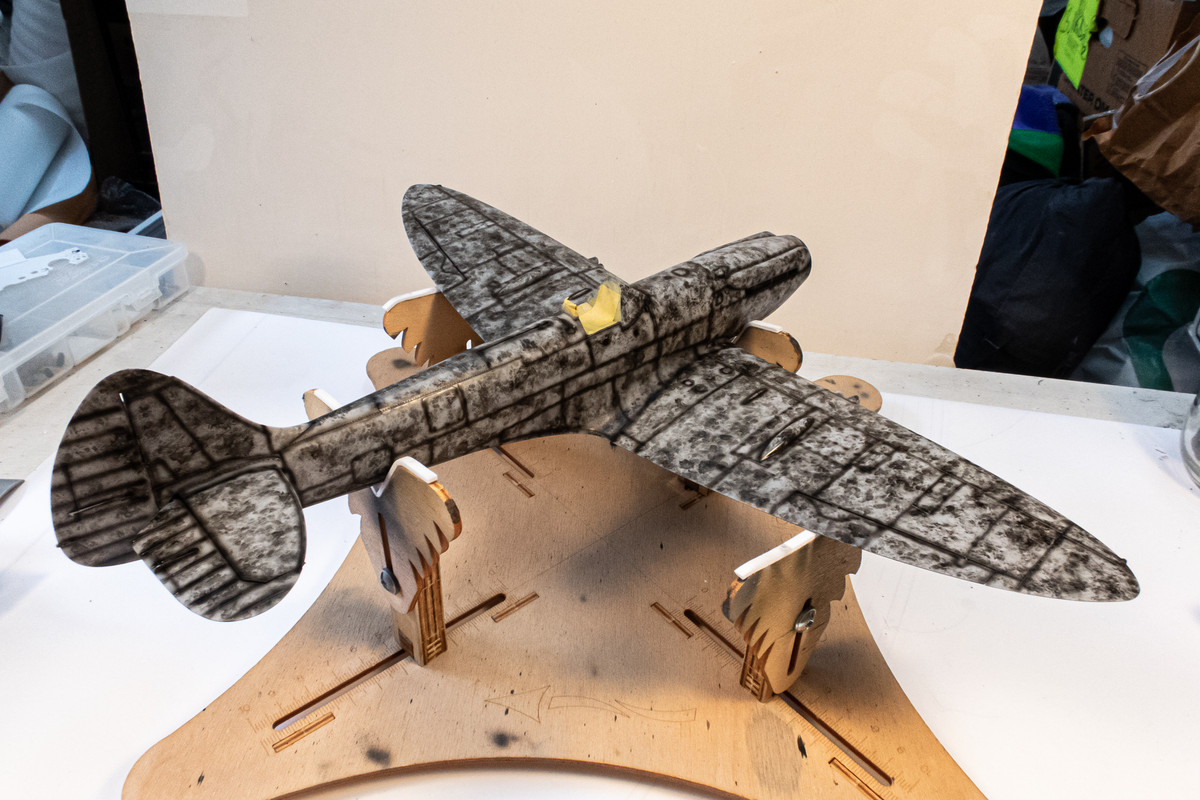
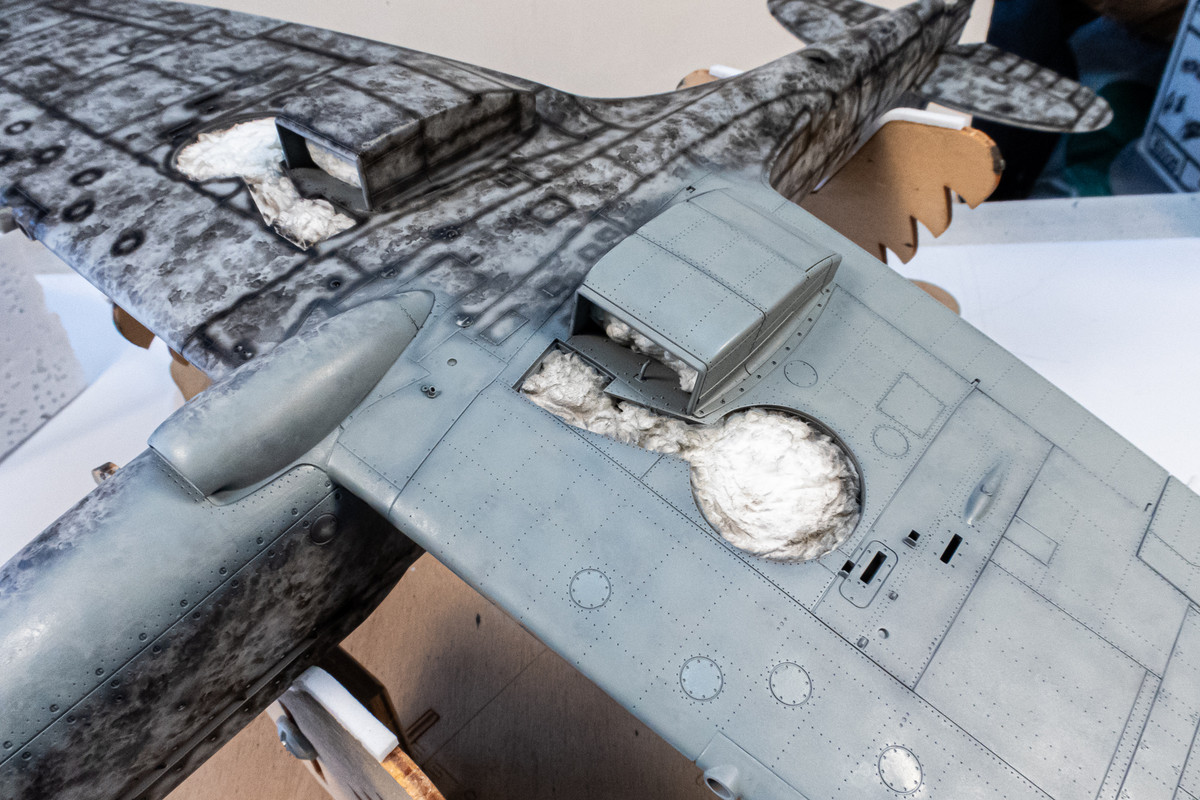
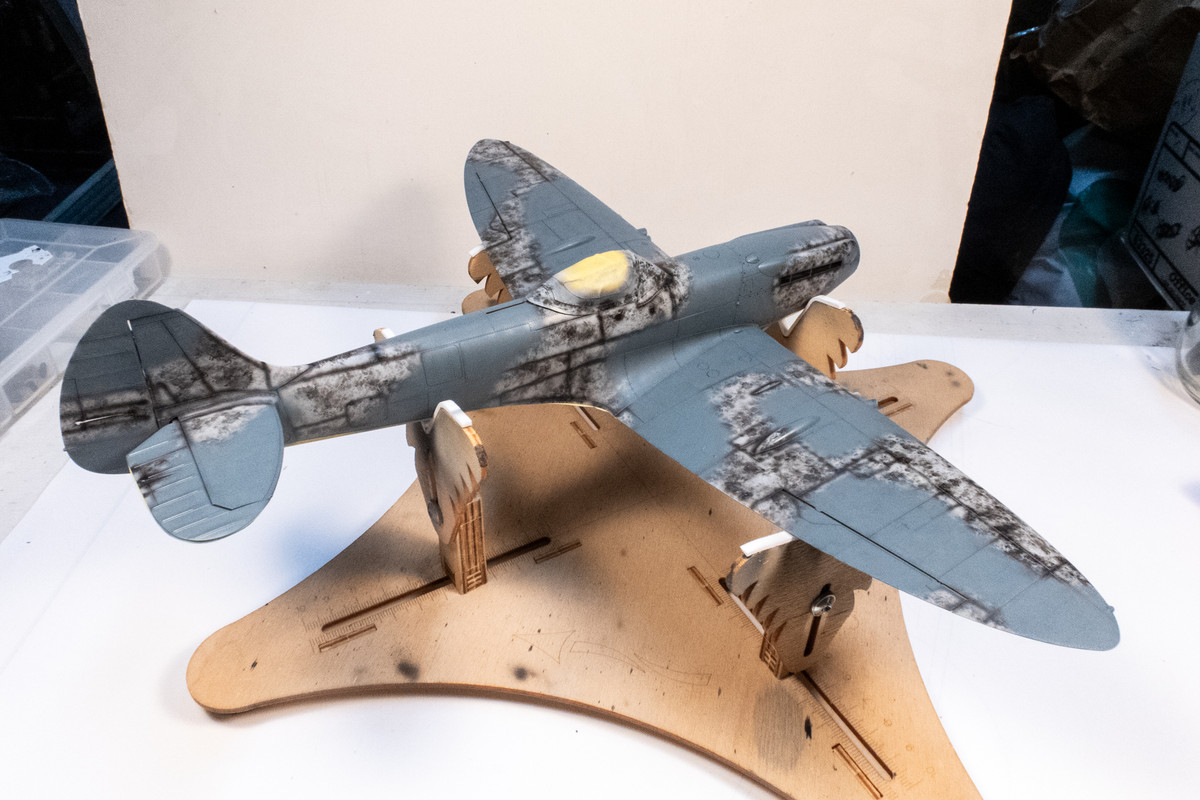
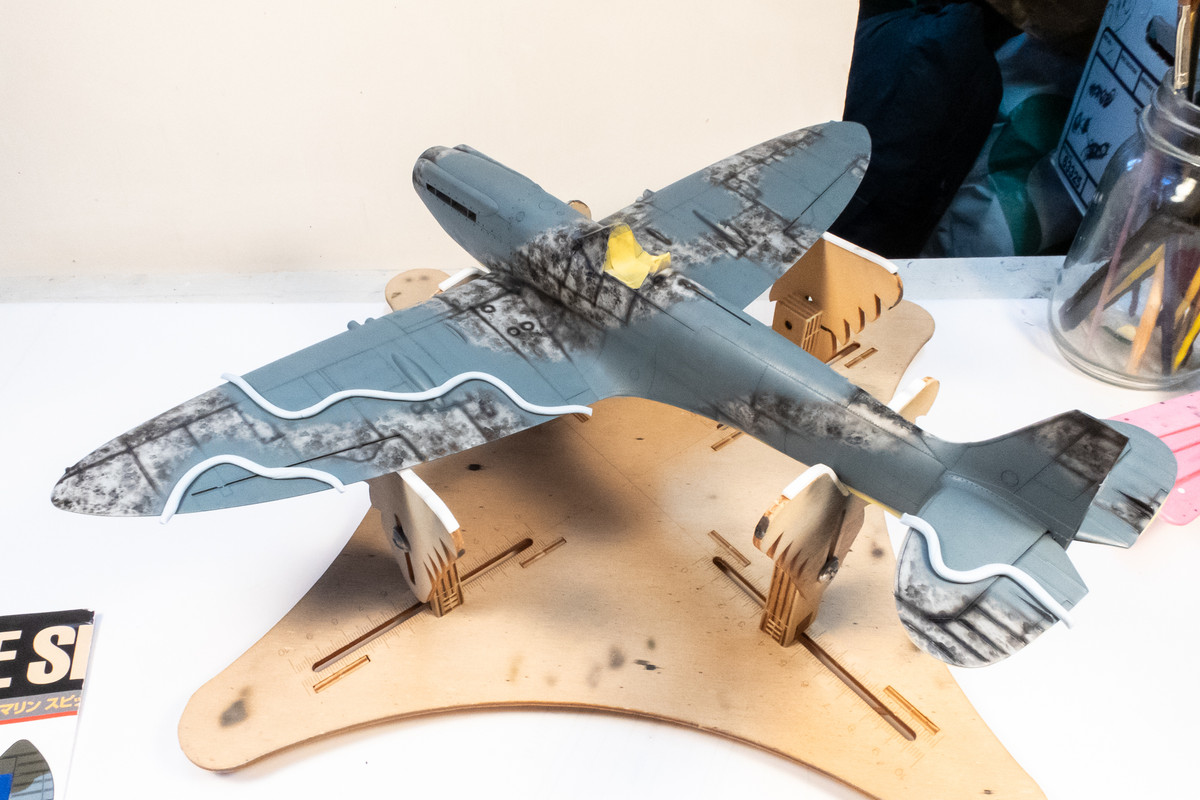
After the panel line pre-shading, I applied a random mottle pattern using a thinned piece from a scrub pad.
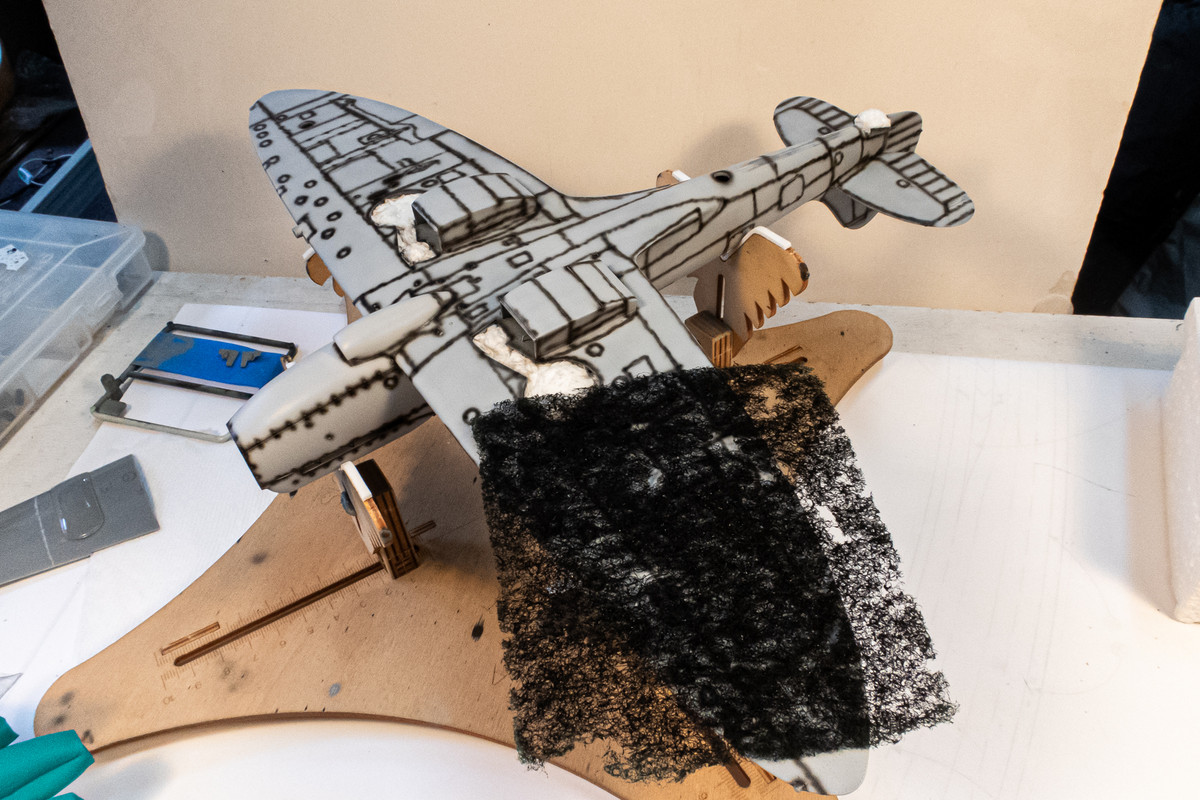
Image
Image
Image

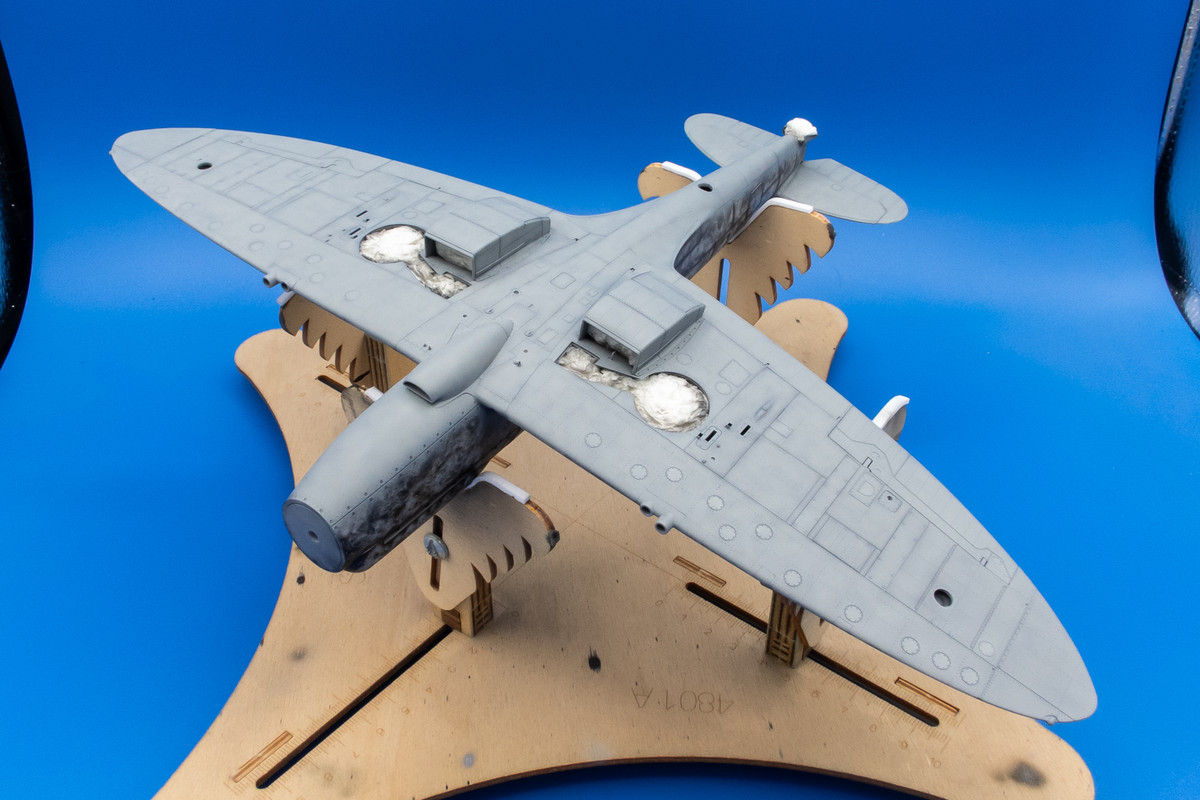
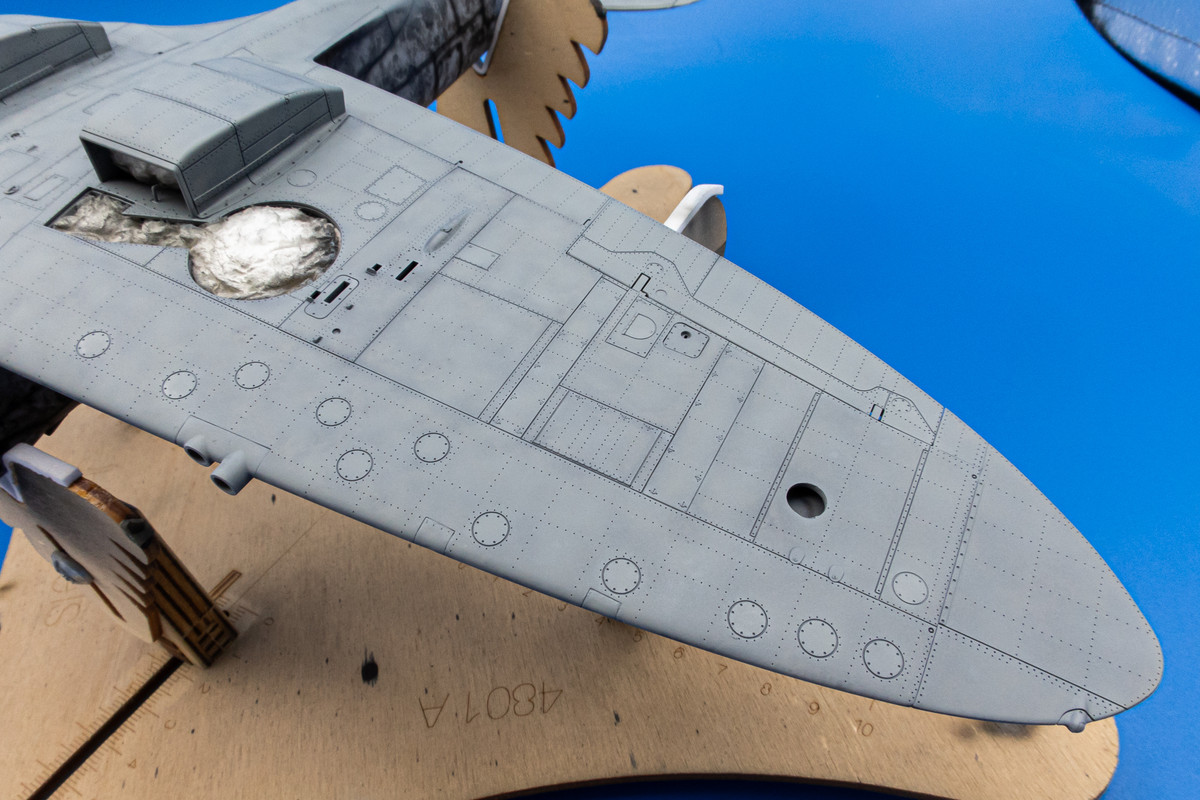
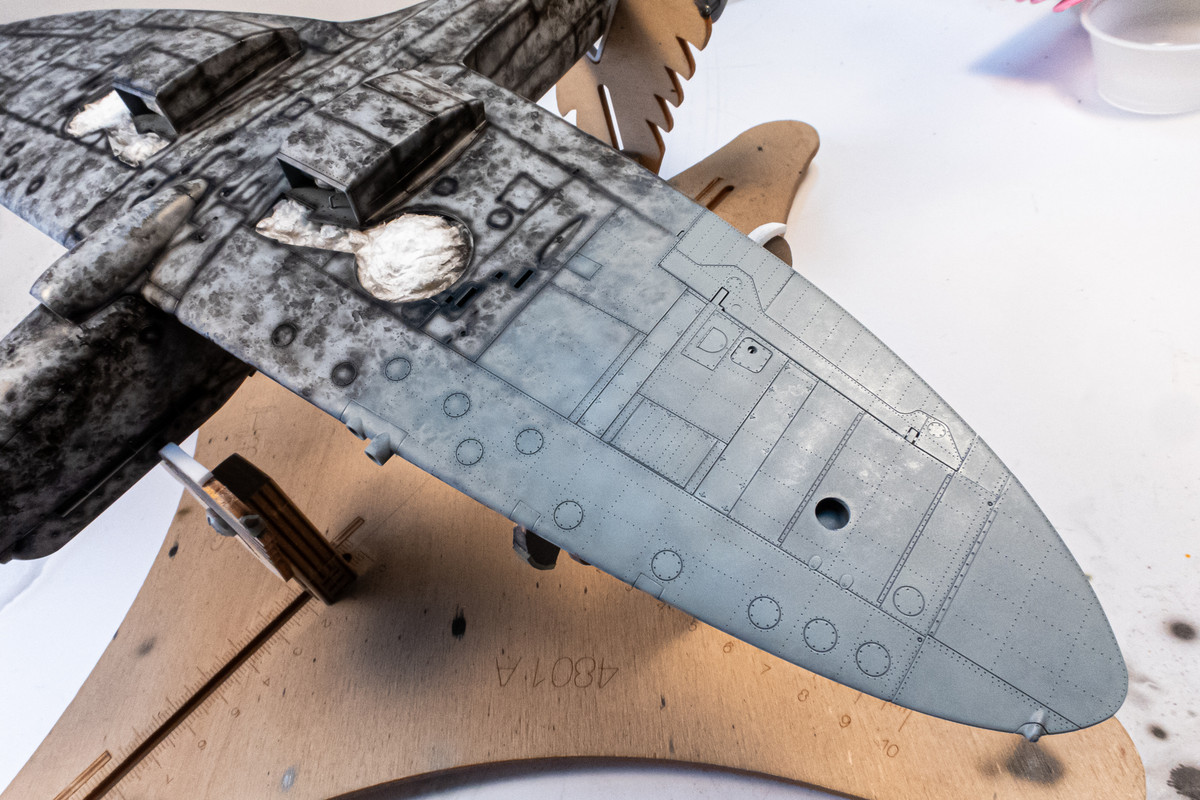
It's a lot of work for very little visible result but I consider it a key layer in my weathering sequence. The nice thing about this (and also the inverse which is often referred to as black-basing) is that you can dial the effect from extreme to not visible, depending on what you want to show. The bottom color, Tamiya Medium Sea Gray 2 (XF-83) is thinned to about 1.5:1 thinner-to-paint ratio and sprayed gradually over the mottle. My preference is for the pre-shade effects to be just barely visible. The Spitfire has a lot of panels and this makes it easy to work on small sections at a time.
Image
Image
Image

Here is the completed bottom color in the lightbox.
Image
Image
Image
Image

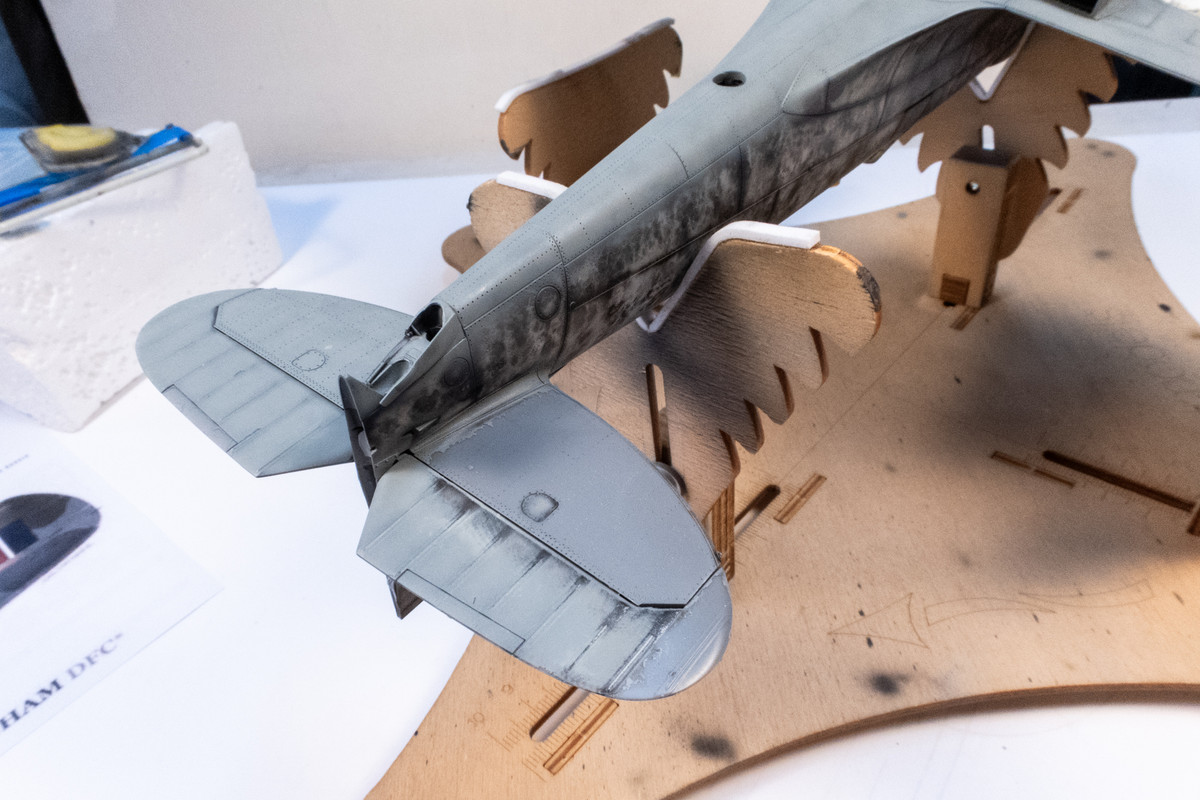
After letting that cure for half a day, I started masking off the bottom of the horizontal stabilizers. To my shock and disappointment, big chunks of paint lifted off when I was adjusting the masking. Past the primer and all the way to the plastic. I was able to remove by tape almost all of the paint on the non-fabric portion of the port stab. The fabric portion, for whatever reason held its paint better. I cleaned off the rest of the paint with iso alcohol and repainted the stab.
Image

Now I'm nervous about the rest of the paint that I just applied. Was there something about the bottom of that stabilizer that caused the primer and paint layers to be unstable? I cleaned the entire model with clean cloth lightly dusted with an ammonia-based cleaner (Windex) before the primer was applied. Did that have something to do with it?

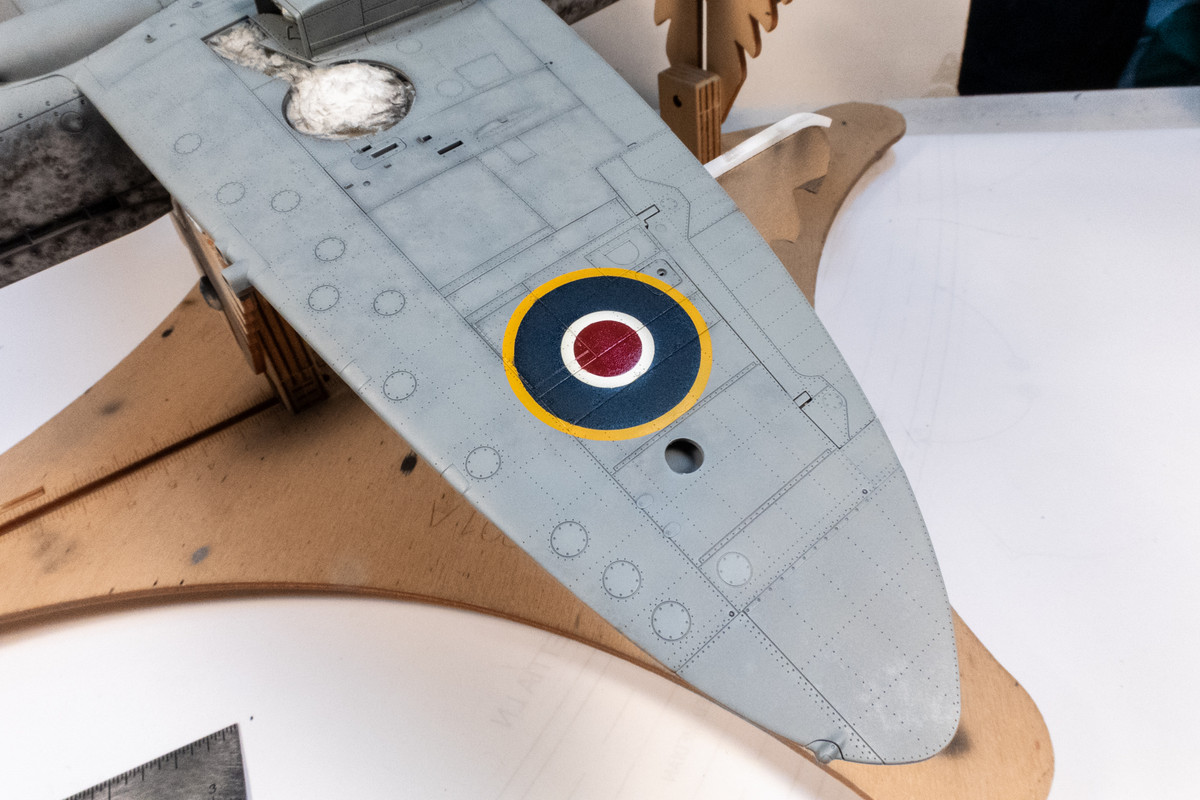
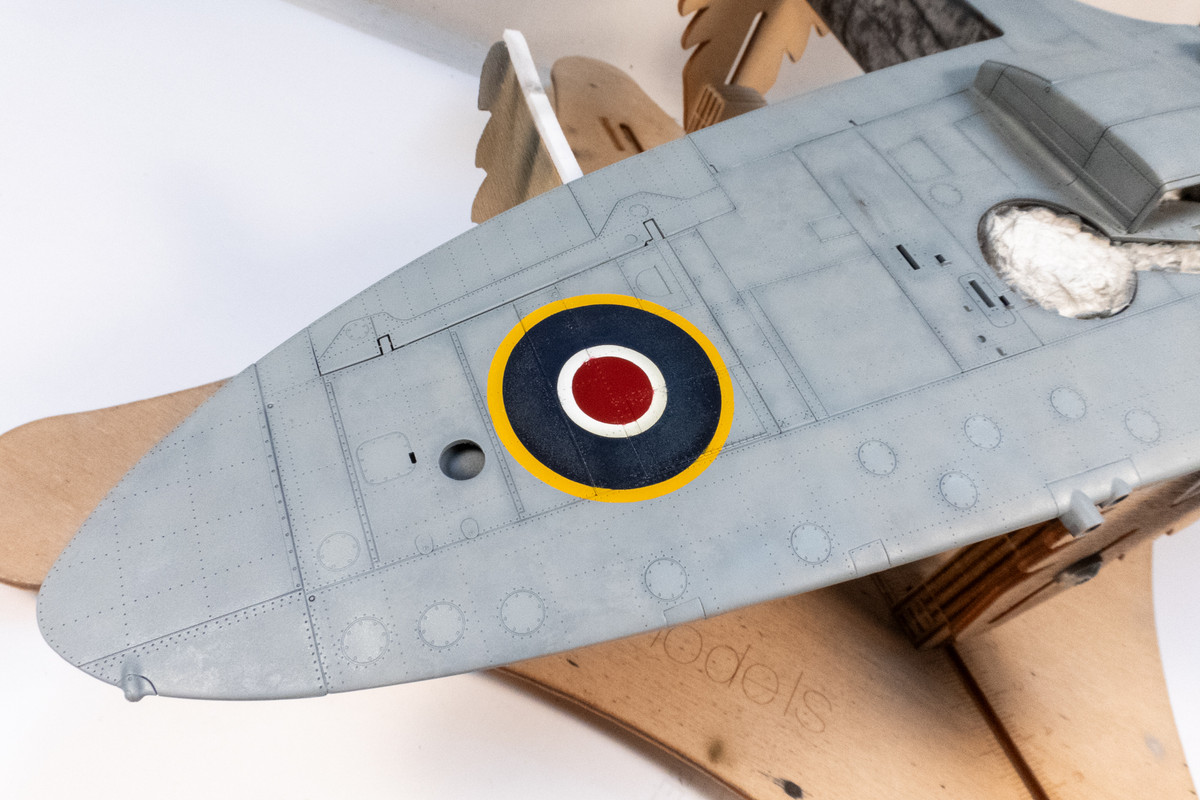
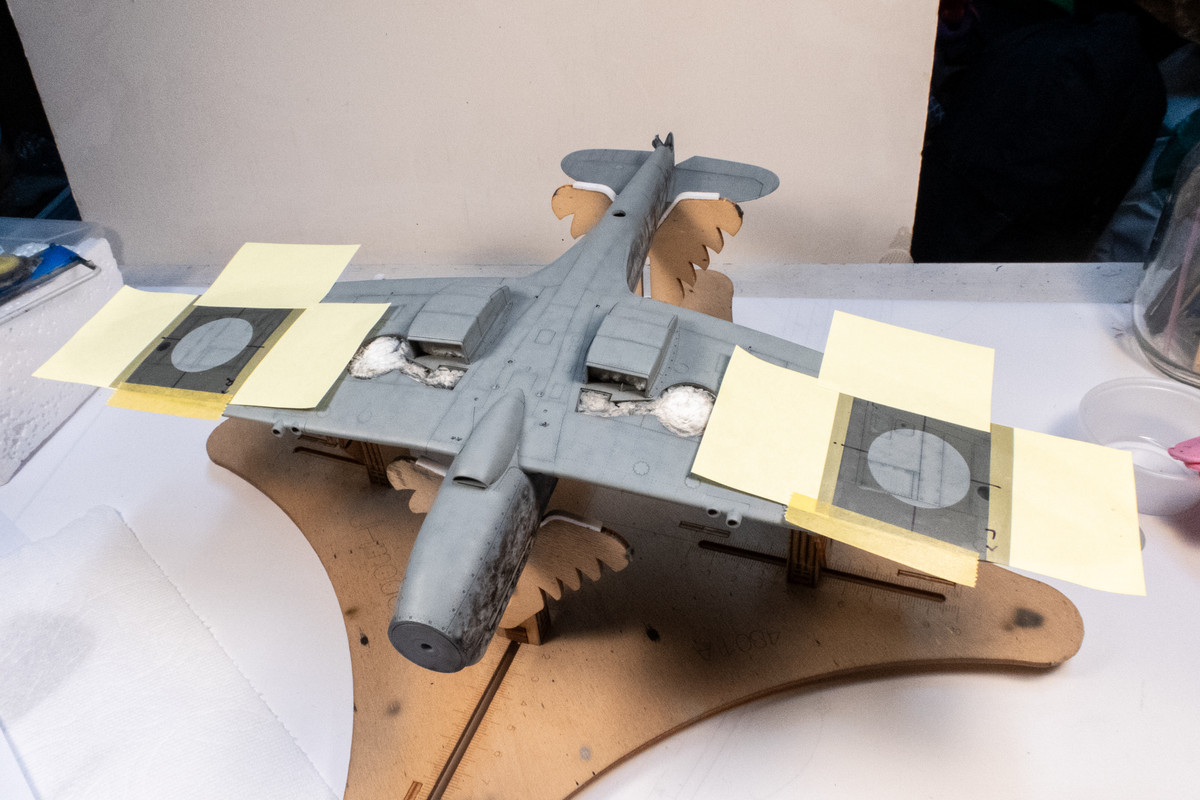
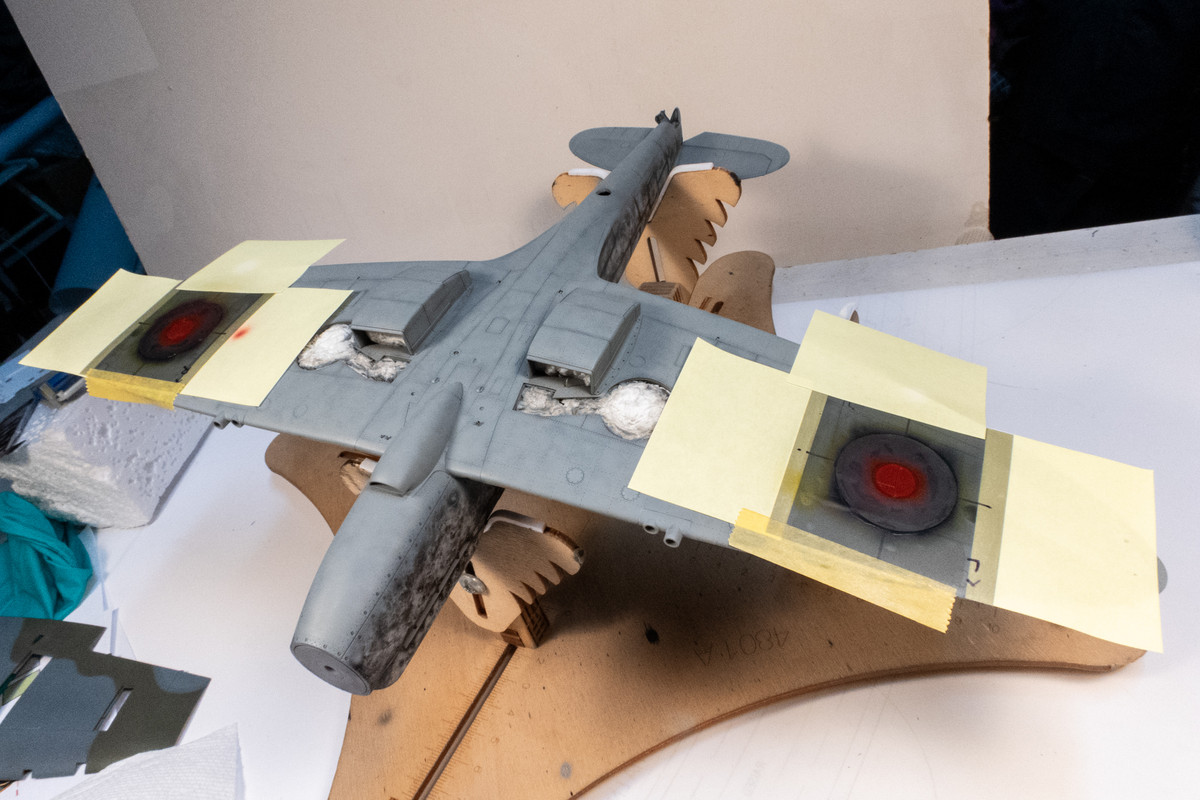
I shook up the painting order and decided to mask and paint the bottom roundels to test the paint under the wings. If I got the kind of paint lift that I experienced on the stabilizer, I would be in big trouble but I wanted to know before I started any more camo painting.

The mask outline was placed into position first.
Image

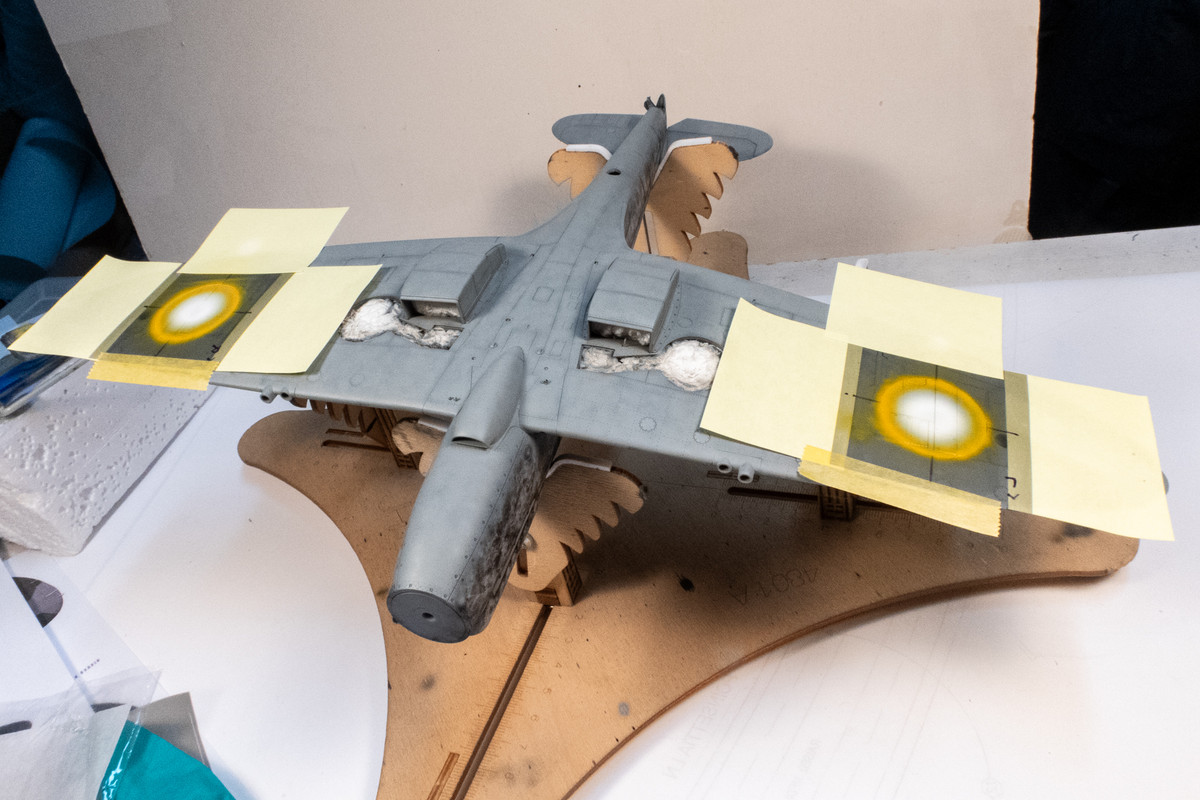
Normally, on multi-colored roundels, I work from the outside in. But considering the separation between the yellow and white, I got the bright idea of trying to reduce the number of steps and paint both of those colors before the other mask elements were applied. Brilliant right? I mixed colors to match the Tamiya decals. Yellow was a 4:1 mix of Tamiya Lemon Yellow (X-8) and Tamiya Orange (X-6)
Image

After the yellow and white were painted, the rest of the mask elements were inserted into the outline. The mask over the blue area was removed first. I found that Mr Hobby Aqueous Blue FS15044 (H-326) was a good match for the blue. Spraying the blue creates two borders at once (yellow on the outside and white on the inside)... brilliant!

The final color is the red, which was 3:1 mixture of Tamiya Red (X-7) and Tamiya Red Brown (XF-64).
Image

The results... wait for it...
Image
Image

A tiny bit of paint bleed around the raised features but almost neglible. But more importantly, no paint lift! Big sigh of relief. AND my brilliant idea about the yellow and white worked out! Double hurrah.

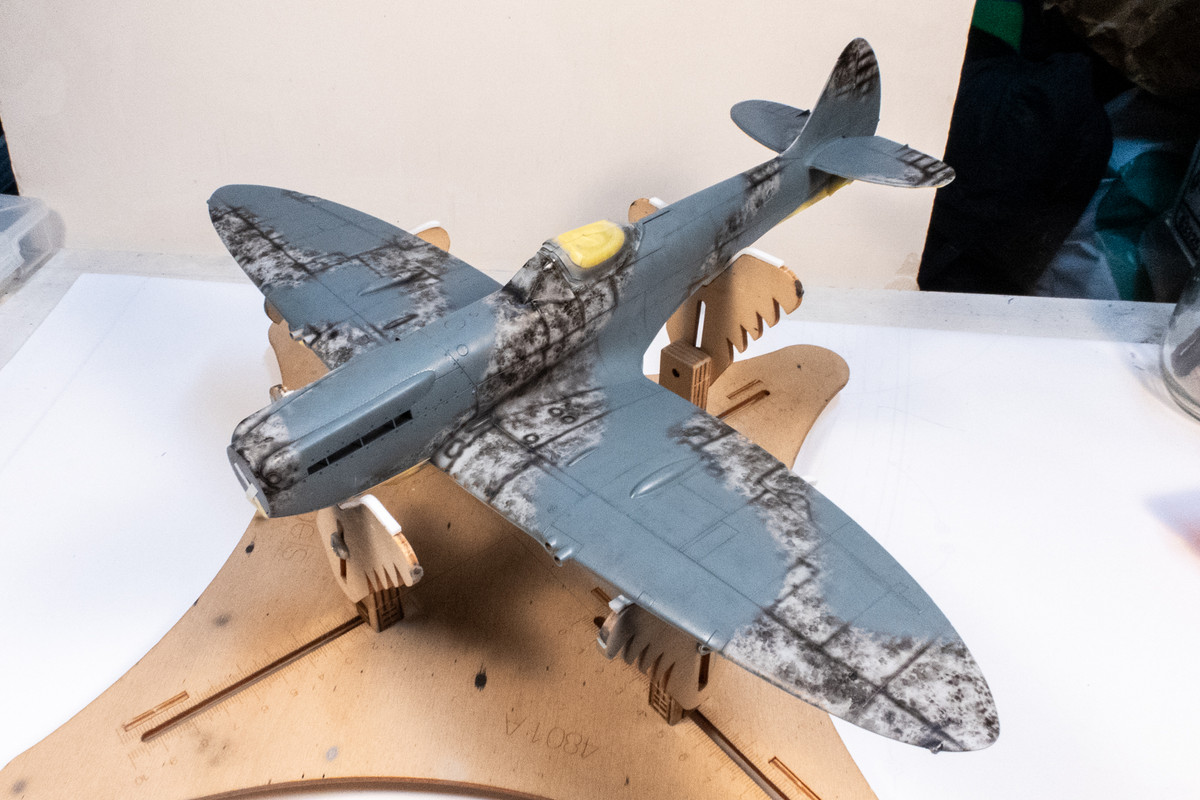
Emboldened by success, I pushed on and confidently masked off the bottom. I painted the Ocean Gray 2 (Tamiya XF-82) free hand.
Image
Image

Next I'll be using Blu Tack to delineate the camo demarcation before spraying the Dark Green.
John aka JKim
-----------<><
Image
User avatar
tempestjohnny
Elite Member
Posts: 3804
Joined: Sat Oct 15, 2016 4:51 am
Location: Naples. FL

Re: Tamiya 1/32 Spitfire XIVe Conversion

Post by tempestjohnny »

Glad everything worked out on the scare. The distressed look of the paint looks fantastic. Roundels look good too
User avatar
jkim
Elite Member
Posts: 4073
Joined: Mon Apr 10, 2017 4:03 pm

Re: Tamiya 1/32 Spitfire XIVe Conversion

Post by jkim »

Thanks Johnny!

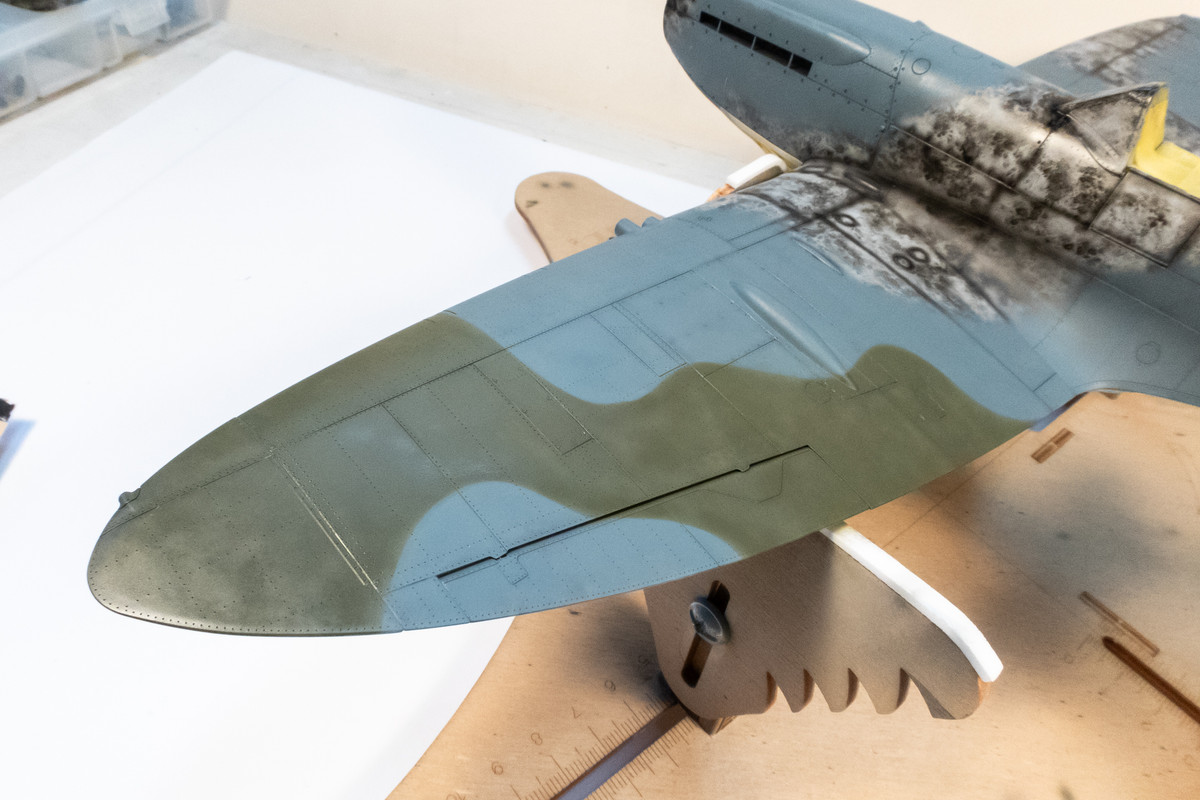
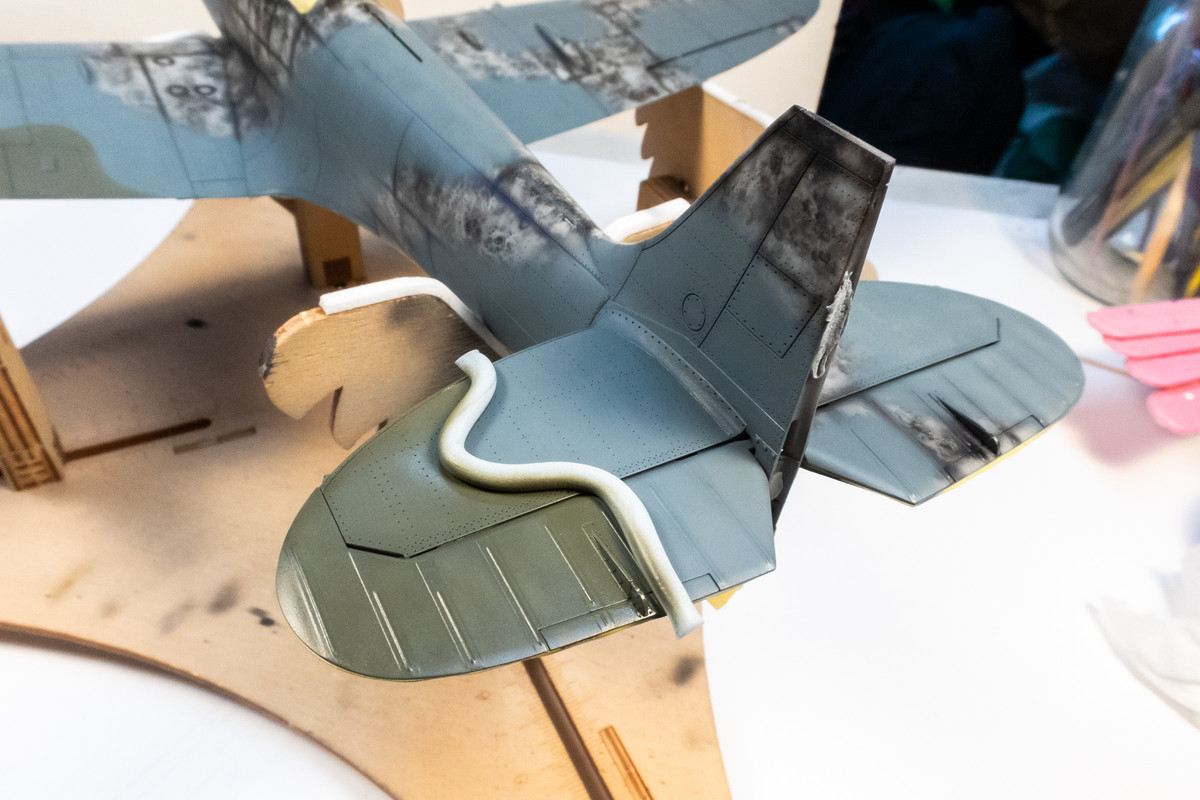
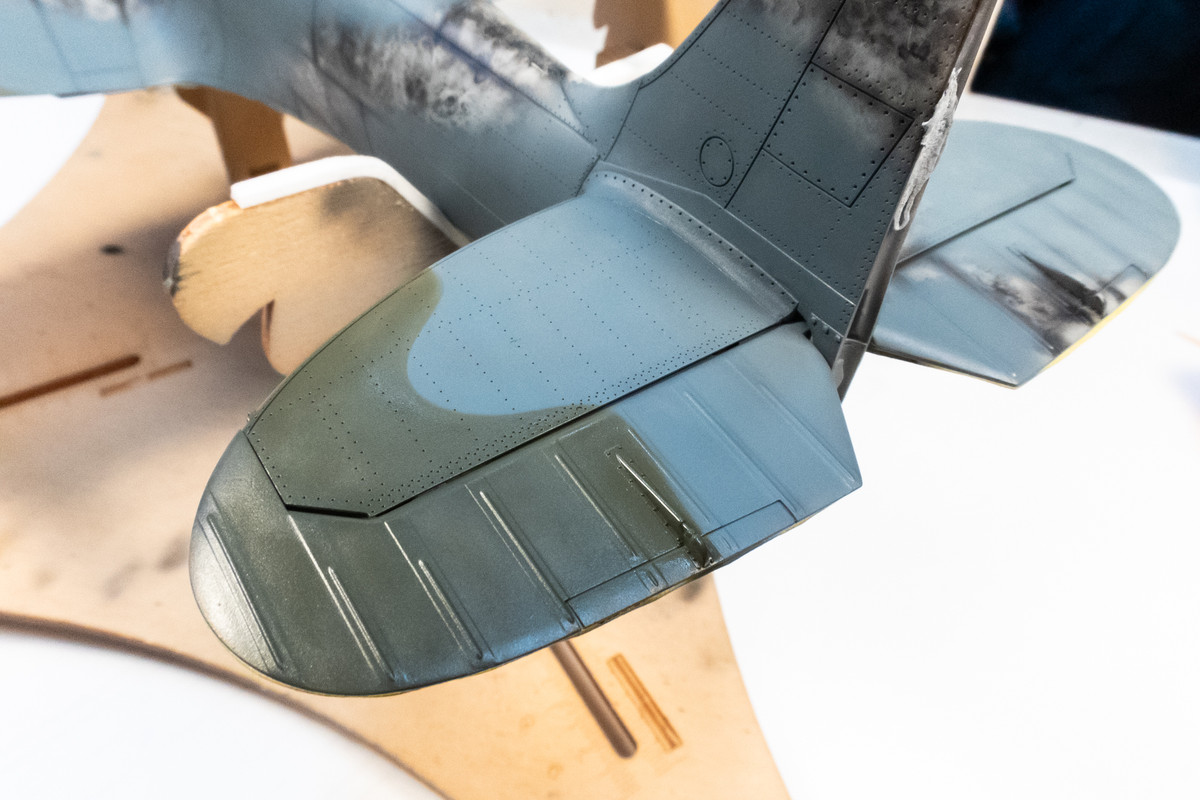
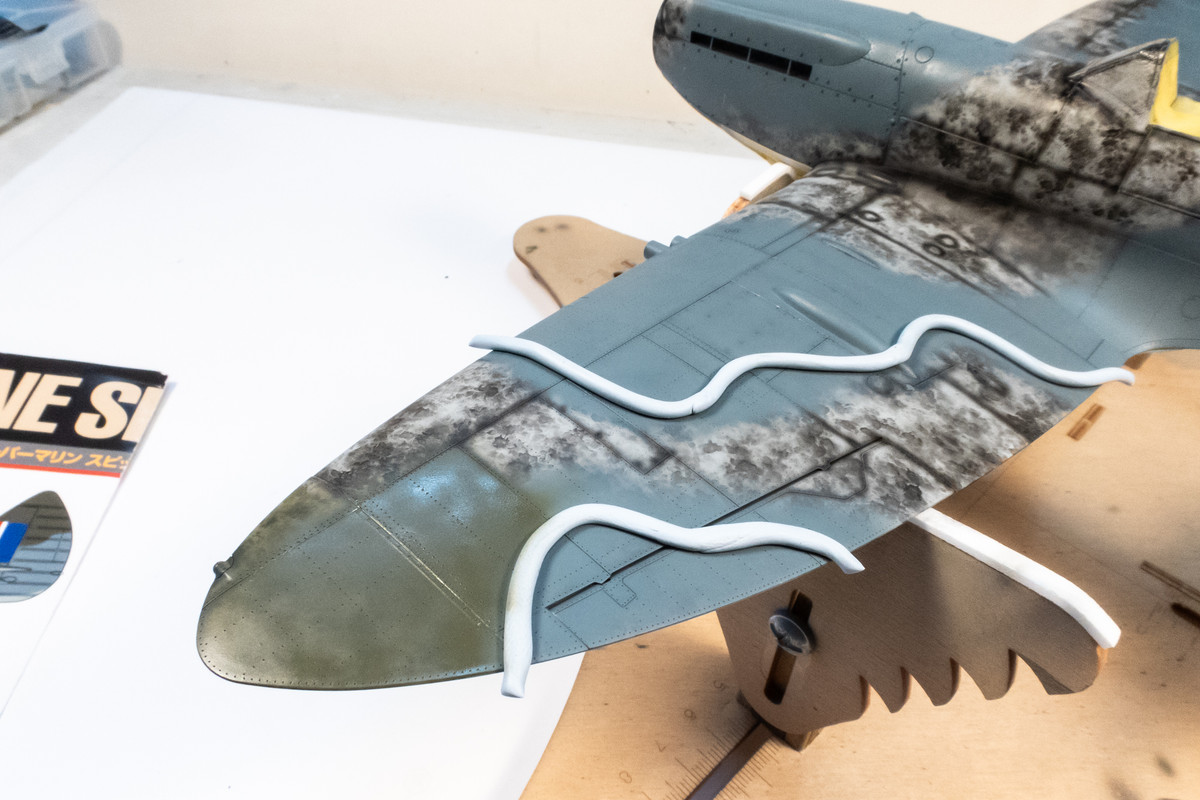
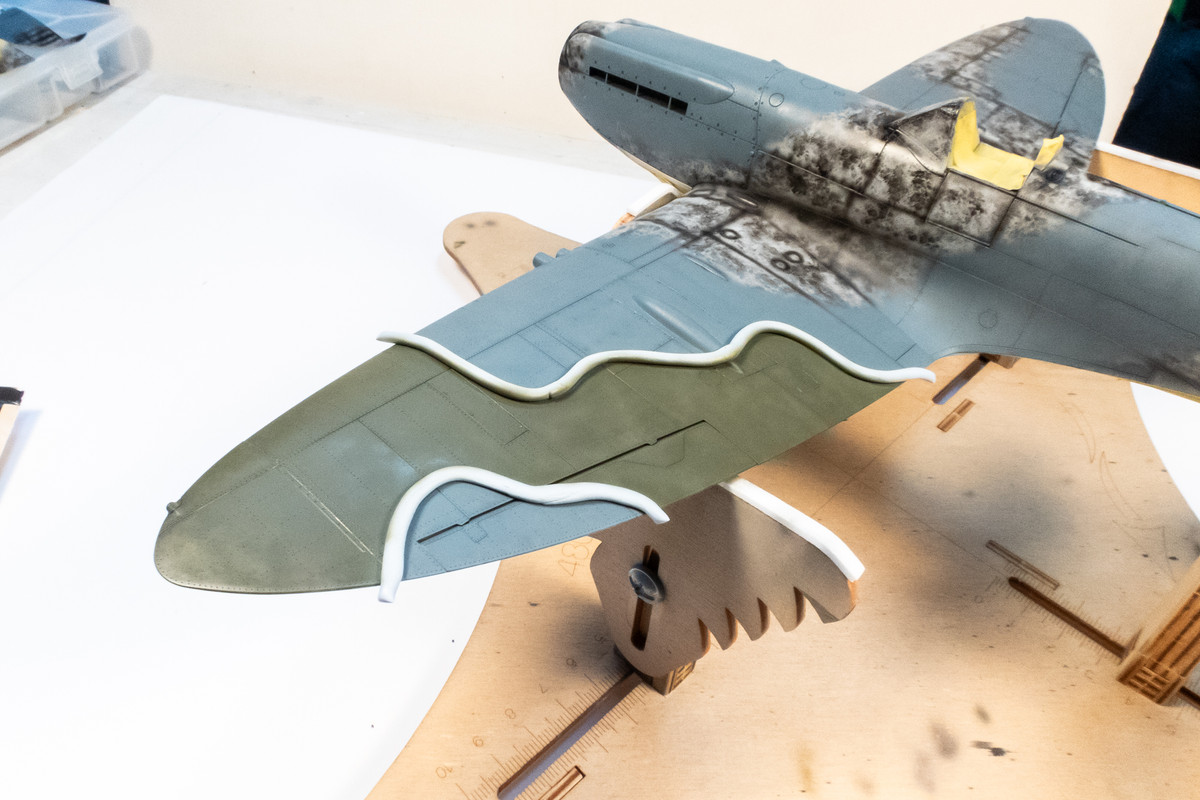
Woke up early to test the putty snake method to lay down the Dark Green portion of the camo. The putty is rolled into long thin strips and then stuck onto the model in the desired camo pattern. A nice feature of this technique versus pre-cut masks is that you can freely adjust the demarcation line as you apply it on the model. Much easier to get the pattern you want with this method.
Image

Instead of a wide spray approach, I used a narrow spray and covered small areas at a time, essentially airbrushing freehand using the putty as a guide. This careful approach reduces the amount of masking that you have to do if you trust your spray pattern.
Image

Another convenient feature of this approach is that you don't have to do all of the camo at one time. You can do sections at a time. Much more manageable and I don't have to cramp my fingers rolling miles of putty snakes.
Image

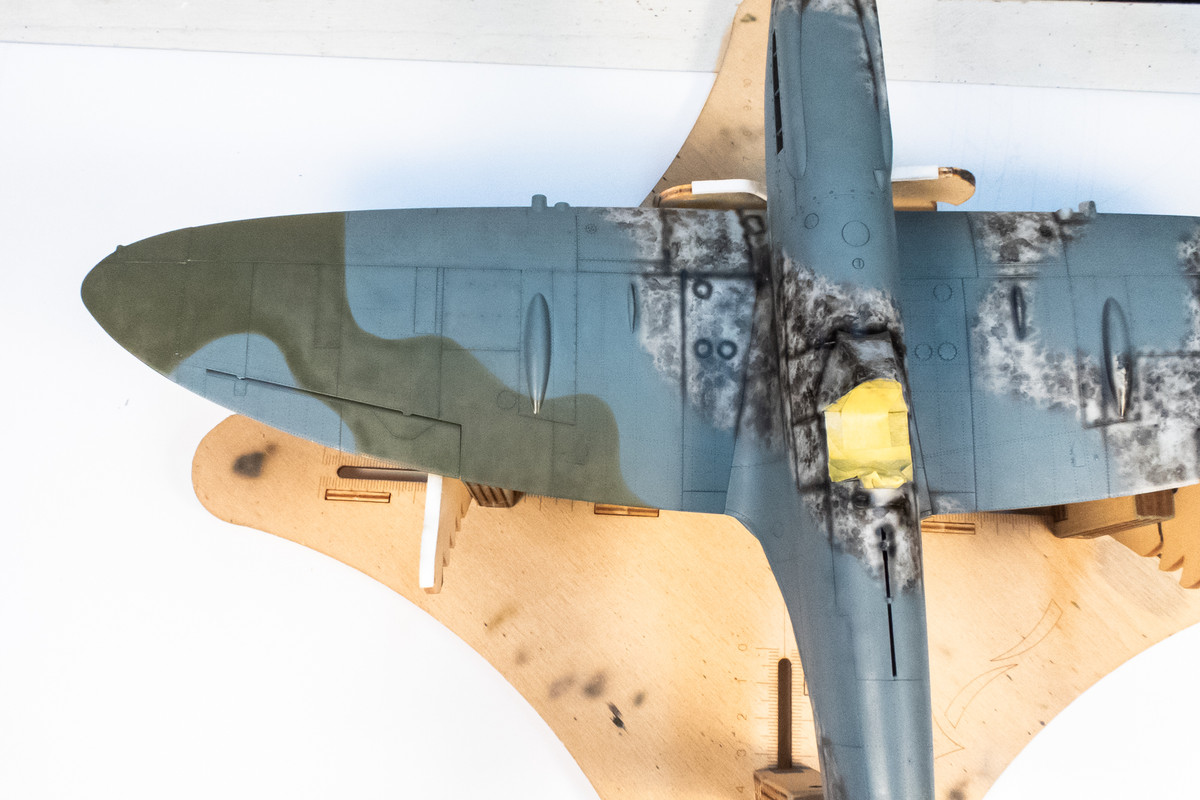
Once the pattern is filled in with the Dark Green, which is Mr Hobby Aqueous RAF Dark Green (H-73), the putty can be removed to reveal the completed camo pattern.
Image

A small section of the tail is also painted.
Image
Image

I like this method better than paper masks. Lots of advantages and result looks pretty good in my eyes. I'll leave this for awhile as I'm off on my normal Sunday routine. I'll inspect it closer and make adjustments as necessary but I may not soften all of the edges as I had previously planned. We'll see.
Image
John aka JKim
-----------<><
Image
User avatar
BlackSheep214
Elite Member
Posts: 13412
Joined: Sun Apr 06, 2014 8:47 pm

Re: Tamiya 1/32 Spitfire XIVe Conversion

Post by BlackSheep214 »

Scrubbing pad method I definitely need to try. Painting your own roundels is another I like to attempt. Makes sense to work from outside in. Then again masking each circle color can be a challenge to keep uniform.

I like the idea of mixing your red and yellow for the roundel circles. Nice save on the tape mishap.
“Who controls the skies, controls the fate of this Earth”

Author unknown- 352nd Fighter Group, Blue-Nosed Bastards of Bodney

“Send one plane it’s a sortie; send two planes it’s a flight; send four planes it’s a test of airpower. - Richard Kohn
User avatar
keavdog
Elite Member
Posts: 4779
Joined: Thu Jan 10, 2019 1:14 am
Location: Earth

Re: Tamiya 1/32 Spitfire XIVe Conversion

Post by keavdog »

Camo looks good John. Which putty do you use?
Thanks,
John
Post Reply

Return to “Aircraft Work in Progress”